My Adventures in Rust Removal (potatoes and other chemicals)

Forum for Maintenance and Repair topics. Feel free to ask questions or contribute.

Moderators: HopefulSSer, admin

User avatar
heathicus
Platinum Member
Posts: 2648
Joined: Wed Oct 22, 2008 1:02 am
Location: WhoDat Nation

My Adventures in Rust Removal (potatoes and other chemicals)

Post by heathicus »

As I've mentioned in other threads, I tried to replicate Nick Engler's potato rust removal on a set of old 10ER tubes.

Image
Link to hi-res image.

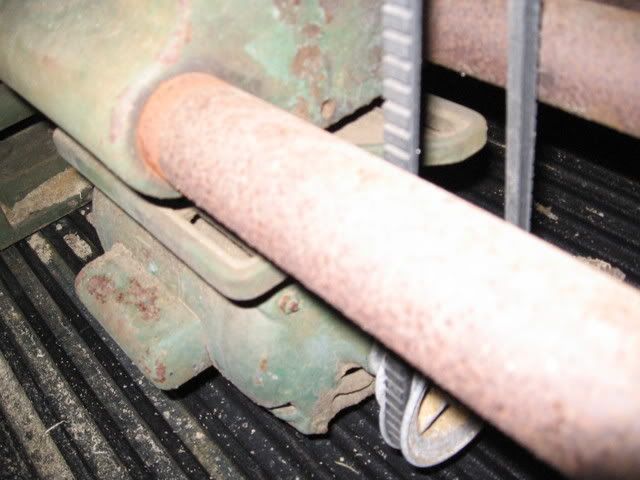
In order to disassemble the 10ER, I had to give the tubes a quick sanding with an emory cloth, then coat them in 3-in-1 Oil so I could get the headstock off. The tailstock, base arm plate, and carriage required some Kroil to break them free. This process took several days of working in the evenings after work. I also sprayed them down with break cleaner to remove the oil/Kroil in case that kept the potatoes from doing their thing.

Image
Link to hi-res image.

Then, I repeated Nick's setup.

I bought a 3" x 10' section of PVC pipe and cut it in half to have two 5' sections. I put a cap on one end of each tube and a clean-out plug on the other end. I shoved a rack into the pipes, put the way tubes in, added 3 medium/large potatos per tube cut up in various size chunks, filled the tubes with water, screwed on the clean-out plug and let it sit in a corner of the garage for 15 days.

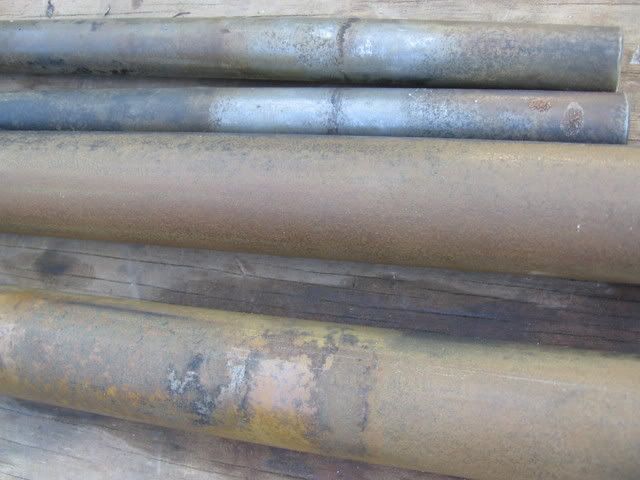
I knew the smell was going to be bad, and it was bad. Realy bad. I dumped the water out on the edge of a swampy wooded area far away from the house, but the smell lingered around the tubes as I worked on them. A day later, the tubes still stink.

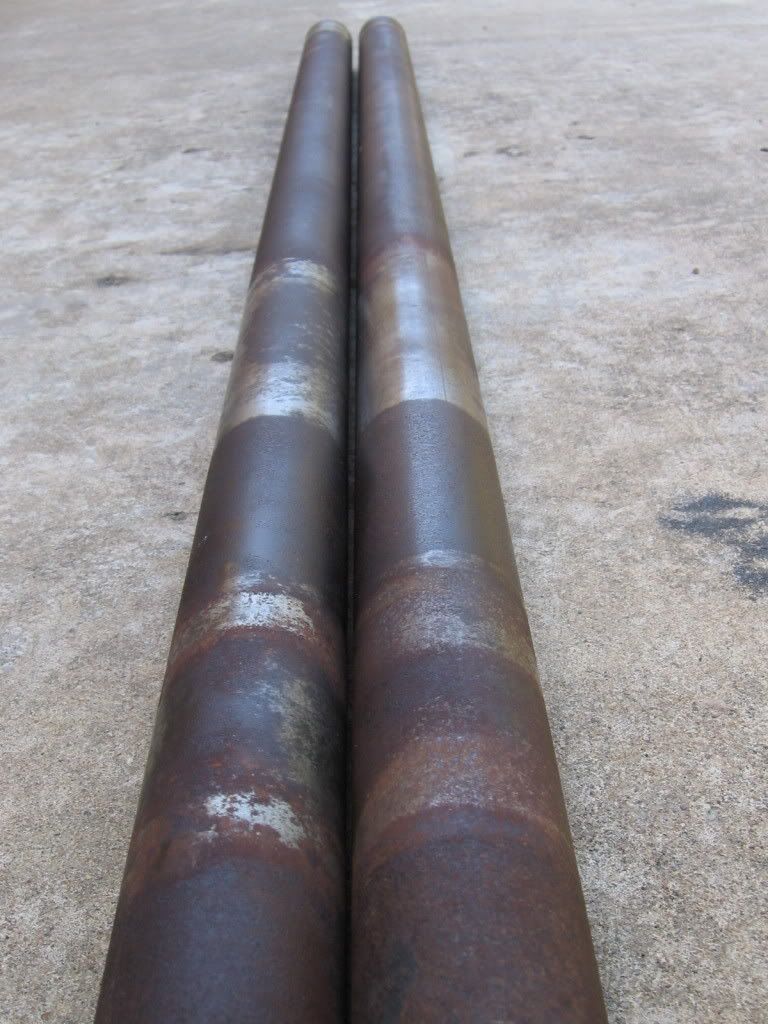
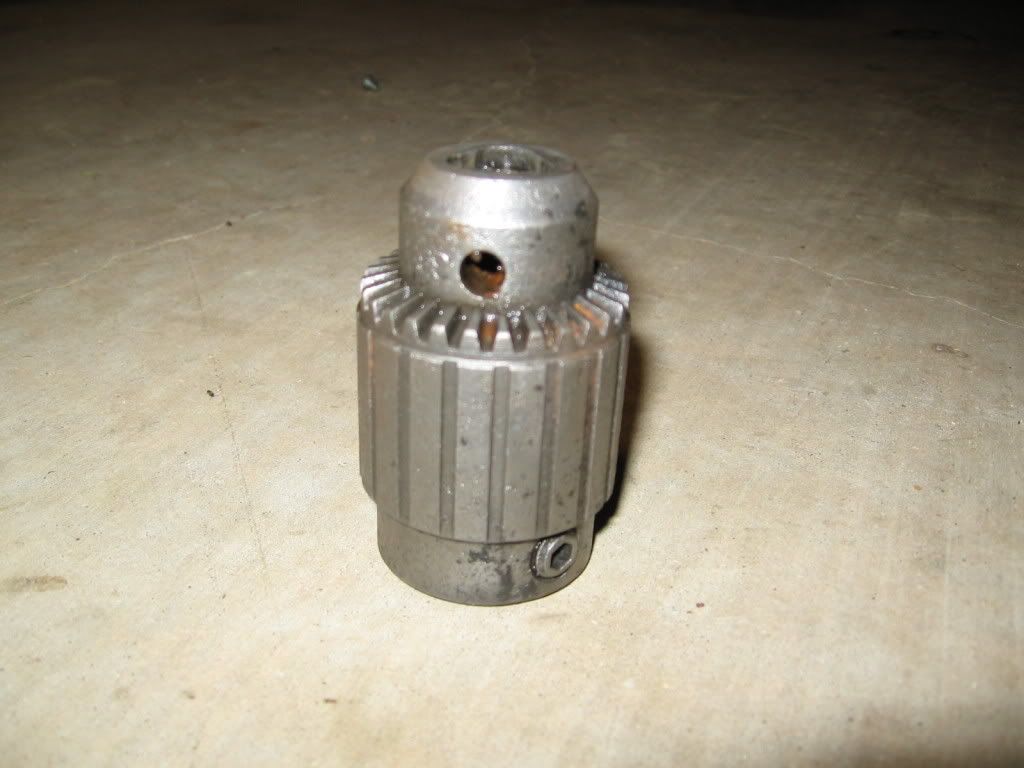
Immediately after taking the tubes out, a fine surface rust started forming over the them. I rubbed them down with a rag and took them to a bench. This is what they looked like at this point before I did anything else to them. (I added the table rods in the potato water with the way tubes and they are pictured here as well.)

Image
Link to hi-res image.

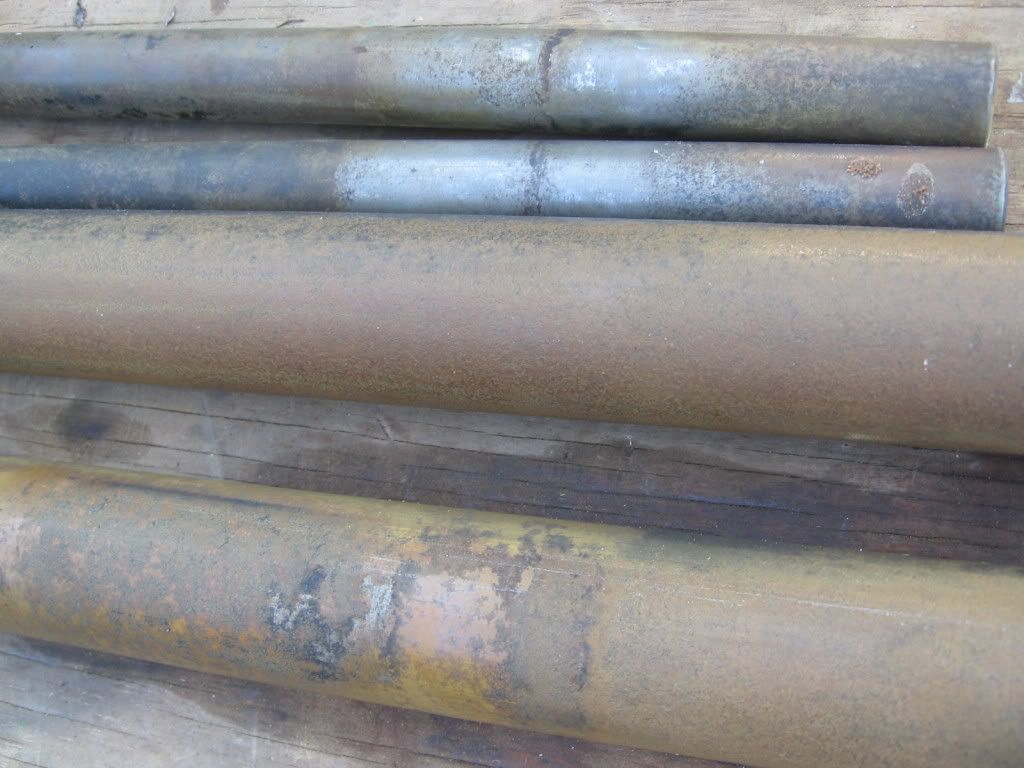
I followed Nick's guide and started with a wire brush. But this didn't seem to do anything. I took a picture, but although you could see a slight difference in person, the photo doesn't show the difference between the tube that was brushed and the tube that wasn't.

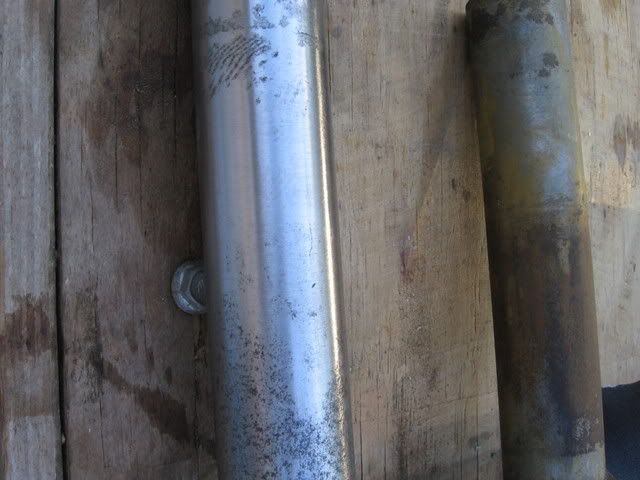
I switched to emory cloth and, at first, the tube I was working on started to look slick and shiny with just a minimal amount of rubbing. "This is going to be awesome!" I told myself.

Image
Link to hi-res image.

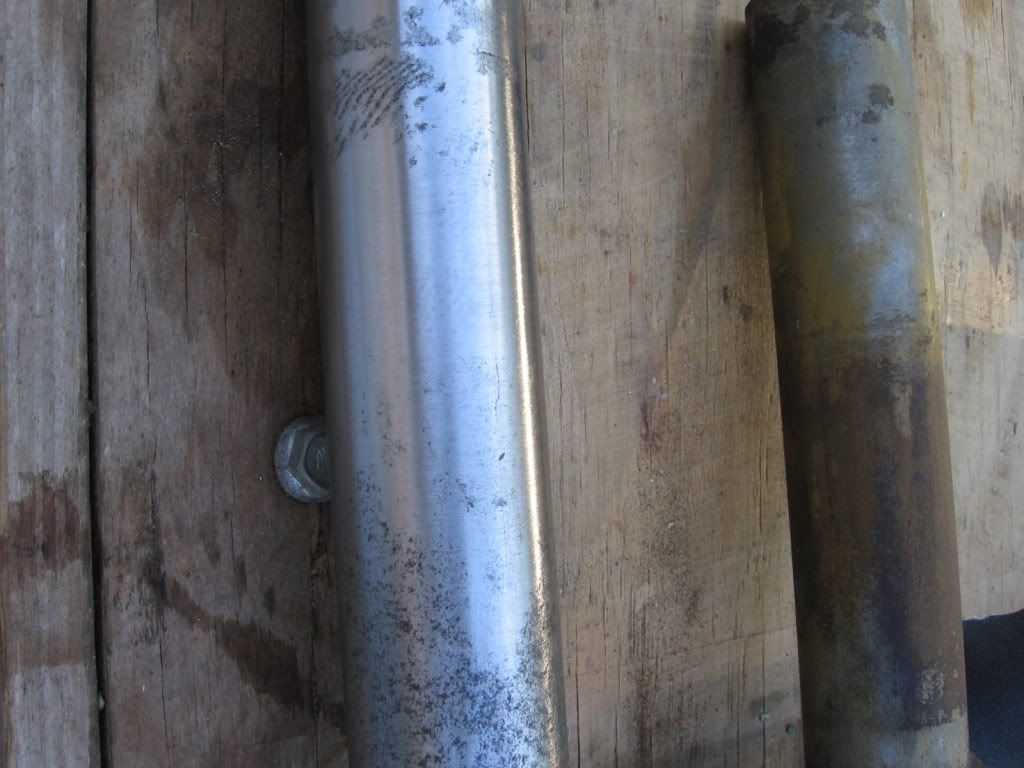
But, I just happened to be working on the part of the tube that was under the base plate arm and tailstock and once I got to the exposed section of pipe, the work became harder and harder. The surface rust was easy to get off, but that was it. Deeper rust still took a lot of elbow grease. I even had to use some 60 grit sandpaper on the really bad sections. I followed that up with the emory cloth and that tube is starting to get smooth, but it is far from shiny. It's still pretty black. I thought I had a picture of the really bad section after all the sandpaper and emory cloth, but I can't find one. I'll try to take one tomorrow and post it.

Unfortunately, I didn't have the success that Nick had. Maybe I didn't get one or more of the variables right. I wasn't sure how many potatoes to use, what kind, whether they should be peeled, or whether any of that mattered. Maybe my garage wasn't warm enough or the 3-in-1 Oil, Kroil, or brake cleaner caused a problem. Or maybe there was just something in the water.

I would consider my experiment with potato water a failure.
User avatar
heathicus
Platinum Member
Posts: 2648
Joined: Wed Oct 22, 2008 1:02 am
Location: WhoDat Nation

Post by heathicus »

I tried another product on some of the smaller parts called Evapo-Rust. I had never heard of it before buying it, but it was all the store had that day, so I picked up a small bottle of it. Now this stuff is a miracle worker! The drawback is it's expensive ($20 for a gallon, or $7 for a smaller bottle - maybe a quart?) and you have to totally submerge the part. Below is a picture of the Jacobs Chuck that came with the 10ER I'm working on.

Image
Link to hi-res image.

The chuck was frozen and it was several days before I could find some Kroil or rust removal locally, so I filled the chuck with some Liquid Wrench and let it sit for a couple of days (which did absolutely nothing). I did no other prep to it before soaking it in the Evapo-Rust.

I took a bottled water bottle, cut off the top of the bottle where it starts to curve inward, put the chuck in and covered it with Evapo-Rust. The label says it removes surface rust in 30 minutes, but heavy rust should soak overnight. I knew this was going to take at least an overnight soaking. I checked it the next morning before work (splashing the stuff on my shirt in the process!) and decided to let it soak until I got home. So it soaked about 18 hours total. After removing it from the Evapo-Rust, I rinsed it off with water as per the directions, then brushed it with a wire brush. Here is the result.

Image
Link to hi-res image.

Amazing, huh? The chuck is pitted pretty badly, but what would you expect from all that rust?

I've since used it to remove rust on just about everything I can get to soak in it. I've put nuts and bolts and knobs in the cut off water bottle. I built a little tray out of tin foil to soak the miter gauge bar. A set of lathe chisels that I thought were totally destroyed by rust just need sharpening now and they've still got a lot of use in them. The Evapo-Rust can be re-used, so if you're careful with it, you can stretch it pretty far. And it's non-toxic, environmentally safe, can be poured out on the ground or down the drain. It's incredible, incredible stuff. I wish I could afford enough to soak the way tubes in it! Evapo-Rust and Kroil are my two favorite things right now!

Something else I tried on a whim was Alka-Seltzer. I saw a video on YouTube showing Alka-Seltzer being used to remove rust from a bolt and to clean a tarnished necklace. So I tried it on a rusted lathe spur. It did absolutely nothing. I think that YouTube video was a hoax!
doug45601
Gold Member
Posts: 231
Joined: Sun Nov 02, 2008 1:28 am

Post by doug45601 »

Thanks for posting.. Great pictures and details on your trial and effort! The pitting on the tubes is something you will have to live with unless you do some really hard gringing and then you will loose metal. Might be best just to replace them if they are really overwhelming with pits. Good luck and thank for the detailed pictures.
User avatar
mickyd
Platinum Member
Posts: 2999
Joined: Mon Feb 09, 2009 1:18 pm
Location: San Diego, CA
Contact:

Post by mickyd »

You would be surprised how many of those pits can be removed if you patiently follow this procedure(or use a lathe if you have one).
Mike
Sunny San Diego
User avatar
heathicus
Platinum Member
Posts: 2648
Joined: Wed Oct 22, 2008 1:02 am
Location: WhoDat Nation

Post by heathicus »

mickyd wrote:You would be surprised how many of those pits can be removed if you patiently follow this procedure(or use a lathe if you have one).
I was going to post about that tonight! :D

I gave the "MickyD Lathe" a try this afternoon. The inside diameter of the ER tubes is 1-3/8" and the only expansion plug I could find was 1-1/2". So I had to do a little modifying to get it to fit, but it did and it worked great. I had two casters left over from a previous project so I placed them side by side and let the tube rest between them and roll on them so no heat/friction problems.

I worked about 30 minutes on each tube. I started with 60 grit, then went to 100, 150, then emery cloth, then real light with 600 grit. My sandpaper stock is getting low and that's all I had (other than some 2000 grit). The tubes are in much better shape now. They're not bright and shiny and brand new looking - they're still pretty blackened from the rust stains. But they're nice and smooth now. I should have skipped the potatoes and went straight to this! I coated them with some oil while I work on the rest of the machine.

I'll post pictures tomorrow. I took some, but the camera is downstairs and I'm feeling lazy and don't want to go get it. I videoed the "MickyD Lathe(TM)" (Patent Pending) in action too and maybe will post that as well.
User avatar
JPG
Platinum Member
Posts: 34643
Joined: Wed Dec 10, 2008 7:42 pm
Location: Lexington, Ky (TAMECAT territory)

Post by JPG »

Any body besides me notice the size of these pix? 1024 x 768!
╔═══╗
╟JPG ╢
╚═══╝

Goldie(Bought New SN 377425)/4" jointer/6" beltsander/12" planer/stripsander/bandsaw/powerstation /Scroll saw/Jig saw /Craftsman 10" ras/Craftsman 6" thicknessplaner/ Dayton10"tablesaw(restoredfromneighborstrashpile)/ Mark VII restoration in 'progress'/ 10
E[/size](SN E3779) restoration in progress, a 510 on the back burner and a growing pile of items to be eventually returned to useful life. - aka Red Grange
User avatar
mickyd
Platinum Member
Posts: 2999
Joined: Mon Feb 09, 2009 1:18 pm
Location: San Diego, CA
Contact:

Post by mickyd »

JPG40504 wrote:Any body besides me notice the size of these pix? 1024 x 768!

Your right!!! :eek: :eek: :eek:

p.s. You learn well!!:D
Mike
Sunny San Diego
User avatar
JPG
Platinum Member
Posts: 34643
Joined: Wed Dec 10, 2008 7:42 pm
Location: Lexington, Ky (TAMECAT territory)

Post by JPG »

mickyd wrote:Your right!!! :eek:

p.s. You learn well!!:D
Didja notice HOW he did it?:)

I usually retain the useful stuff I 'Learn".:D
╔═══╗
╟JPG ╢
╚═══╝

Goldie(Bought New SN 377425)/4" jointer/6" beltsander/12" planer/stripsander/bandsaw/powerstation /Scroll saw/Jig saw /Craftsman 10" ras/Craftsman 6" thicknessplaner/ Dayton10"tablesaw(restoredfromneighborstrashpile)/ Mark VII restoration in 'progress'/ 10
E[/size](SN E3779) restoration in progress, a 510 on the back burner and a growing pile of items to be eventually returned to useful life. - aka Red Grange
User avatar
mickyd
Platinum Member
Posts: 2999
Joined: Mon Feb 09, 2009 1:18 pm
Location: San Diego, CA
Contact:

test

Post by mickyd »

Image
Mike
Sunny San Diego
User avatar
reible
Platinum Member
Posts: 11283
Joined: Thu Jul 20, 2006 12:08 pm
Location: Aurora, IL

Post by reible »

Hi,

The pictures are not stored on this system but are linked in so they don't have to be restricted as to size here.

Ed
{Knight of the Shopsmith} [Hero's don't wear capes, they wear dog tags]
Post Reply