Page 1 of 2
Electrolysis Failure
Posted: Sun Apr 25, 2010 8:05 am
by PG-Zac
I eventually got around to trying the electrolysis technique, with dismal results.
Basic setup:-
Take 2 scrap pieces of painted angle iron from old shelving.
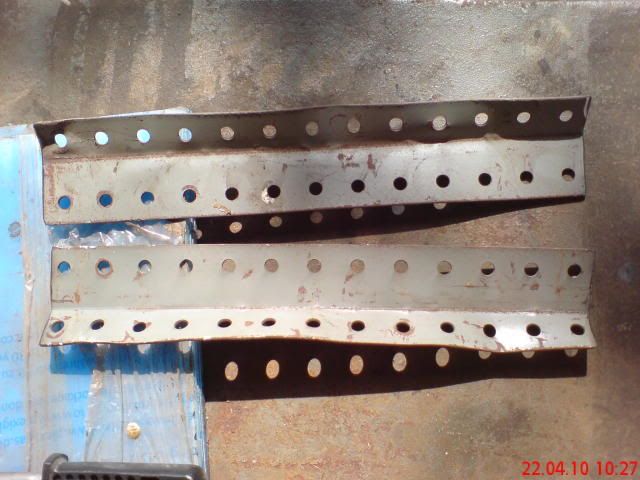
.
Clean the inner faces and attach cables.
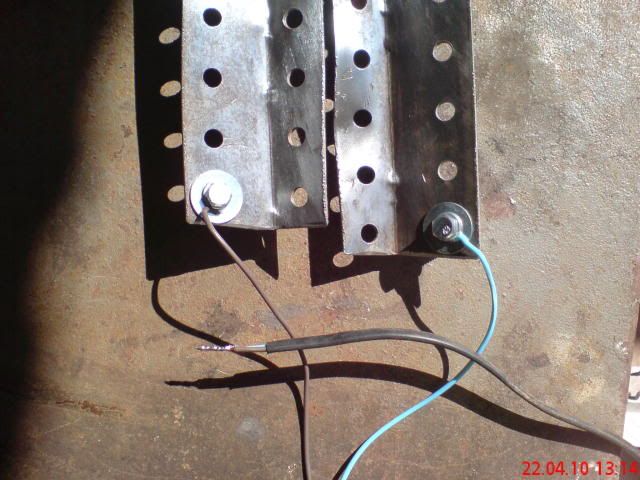
.
Take one quill housing and wedge cable inside.
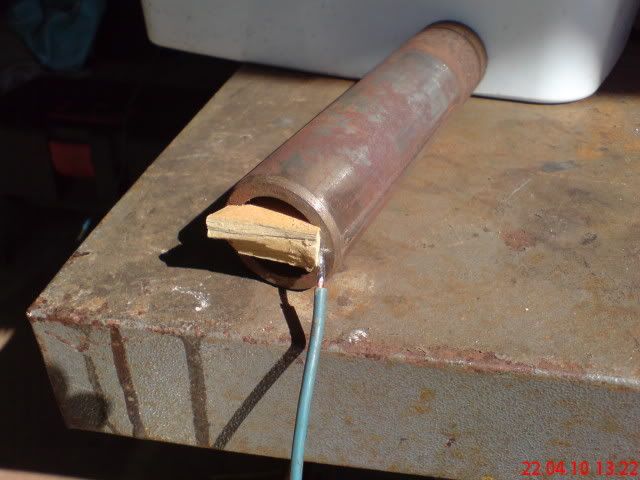
.
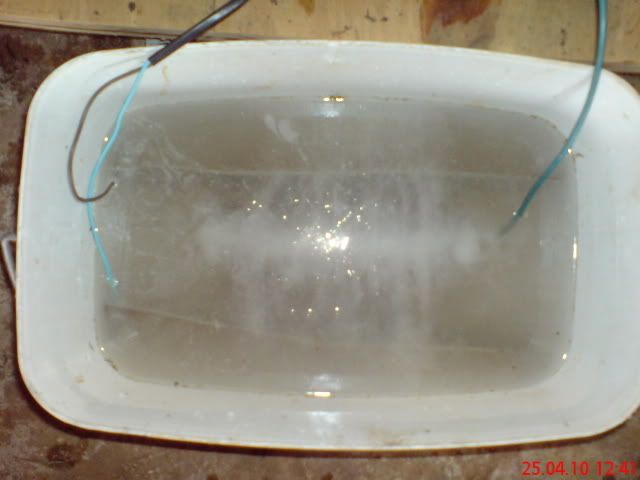
Place in bucket and electrolyte like this.
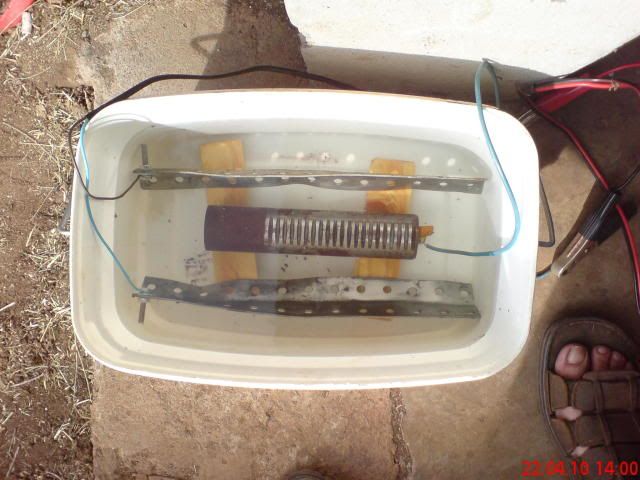
.
See next post
Posted: Sun Apr 25, 2010 8:53 am
by dusty
Where are the brown and blue wires that connect to the two pieces of angle iron connected at the other end; they should be connected together at the positive lead of the power source. The blue lead that is connected to the quill should be connected to the negative lead of the power source.
If you are connected as depicted here, then I see no reason that your set up should not work. Provided that you are using the RIGHT SODA.
Are you able to see any bubbling in the area of the quill. I would expect to see a constant stream of small bubbles rising in the electrolyte along the entire length of the quill.
If you have a multimeter, measure the voltage from the quill to the iron anode. It should be close to the voltage of the power source.
[ATTACH]8716[/ATTACH]
I just did another set up and while doing it I was thinking about yours. A difference between yours and mine that "MIGHT" be significant is the size of wire. I am using 8 ga automotive wire and yours appears to be 12 or 14 ga at most.
When I first measured the current, I had only 1.5 amps. I added soda and brought it up to 3.5 amps. I don't think the amperage makes a big difference except in time required to get anything done. Low current = long time process.
Posted: Sun Apr 25, 2010 1:21 pm
by mickyd
I'd suspect the wooden wedge your using. If you have a metal C-clamp, replace the wedge with that instead. Aside from that, this process is too robust for it not to work unless your charger is not performing adequately.
Posted: Sun Apr 25, 2010 1:28 pm
by mickyd
dusty wrote:Where are the brown and blue wires ....
If you are connected as depicted here, then I see no reason that your set up should not work. Provided that you are using the RIGHT SODA.
.......
Did you finally score some "washing soda"? I am assuming the photo you posted is your.
RIGHT soda......
any sodium whatever works, whether is be sodium carbonate (washing soda), sodium bicarbonate (baking soda), sodium chloride (table salt...but is corrosive), sodium hydroxide (lye...watch your skin and eyes).
Posted: Sun Apr 25, 2010 3:34 pm
by dusty
mickyd wrote:Did you finally score some "washing soda"? I am assuming the photo you posted is your.
RIGHT soda......any sodium whatever works, whether is be sodium carbonate (washing soda), sodium bicarbonate (baking soda), sodium chloride (table salt...but is corrosive), sodium hydroxide (lye...watch your skin and eyes).
Yes, Ace Hardware comes through again.
You are right, however, the RIGHT SODA doesn't bring about any better results than I had with the laundry booster that smelled so good (by Arm and Hammer also).
Posted: Mon Apr 26, 2010 9:50 am
by pennview
A possible reason for failure is using one of the newer electronic battery charger that checks for a battery being present and not finding one, shuts down. If you add an old battery in the circuit it should work.
I don't know if this was mentioned before, but the electrolysis process produces hydrogen and oxygen so it really should be done outside, as sparks and hydrogen can have unintended consequences.
Posted: Mon Apr 26, 2010 10:23 am
by JPG
I have to disagree with mickyd re wooden wedge. As long as the wire is making good contact with the inside of the quill, it should work.
Larger wire would 'help' if higher currents were expected, but smaller wire should not lead to 'failure'.
The battery charger is unknown(to us) and is the likely culprit. As Pennview has said some of the newer 'smarter' chargers check for not only battery presence, but also the terminal voltage so as to control the charge rate.
Connect those wires to an actual 12V battery and then observe the 'action'.
Keep us 'posted'(BTW what happened to the 'next post'?)!
And as an afterthought, Observe proper polarity[(-) to workpiece, (+) to sacrificial iron]. Is the shelve iron plated?????
Failure becomes Success
Posted: Mon Apr 26, 2010 12:23 pm
by PG-Zac
Sorry about the lack of the "next post" - we completely lost our internet until a couple of hours ago. I went from submitting the first post to ultra frustration that I couldn't even see it posted in the space of 10 seconds.

So here (at last) is the long awaited finale of my woeful tale.
Next I connected the battery charger Black to quill & Red to angle iron
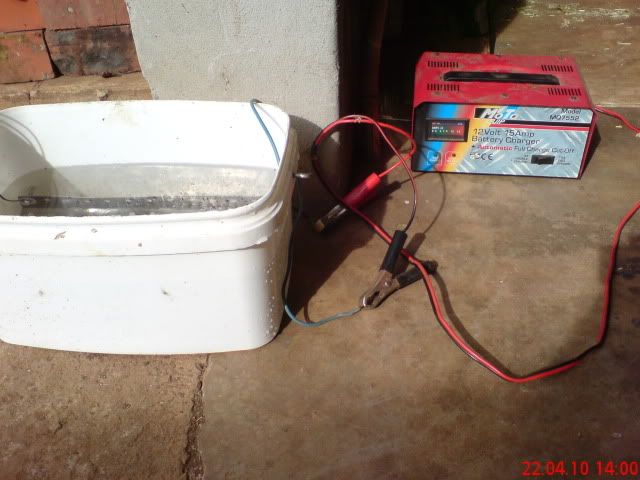
I applied power, and nothing happened. At least nothing happened in the bucket. The charger hummed, and that was all. I moved the quill closer to the scrap - nothing. I moved the quill to touching the scrap - nothing. I switched the charger from 3A to 15A - nothing.
So I dismantled the setup and pondered overnight.
Was it the Electrolyte solution? Maybe the issue was the 1 tablespoon per gallon I've seen on some instructions.
Was it the charger? It is a bit old, and has been incorrectly connected a few times.
A few possible answers surfaced in my brain over the next few hours, until I had a route mapped forward.
Step 1: Test the charger on a battery I know will need boosting - CHECK
Step 2: Enrich the electrolyte to 1/2 cup per gallon as seen on other instructions - CHECK
I made these adjustments and connected the system again.
I applied power and (drumroll please) ... ... ... NOTHING.
Then a small little background idea pushed forward in my head - This charger has an automatic cut-off when the battery is full. Maybe it also has a protection circuit of sorts that only allow its to work if there is a battery connected.
The next step was to use a battery instead of a charger on the cleaning circuit to see if the charger was the problem.
Hey presto - BUBBLES

.
See next post in about 2 hours
.
Posted: Mon Apr 26, 2010 12:33 pm
by JPG
I use 1/2 cup to 16 gal!(= 1 tbl/gal)!
Try with both the charger and the battery connected(the charger MAY keep the battery charged).
Posted: Mon Apr 26, 2010 12:58 pm
by PG-Zac
I took this picture as quickly as I could after I saw the bubbles starting.
I then connected the charger to the battery to keep it charged it while the battery was working on my quill. The battery and the work are connected in parallel.
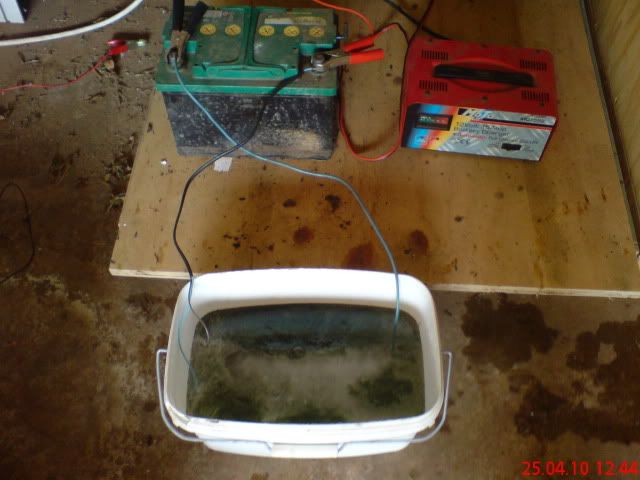
Six minutes after starting, this is the surface of the electrolyte

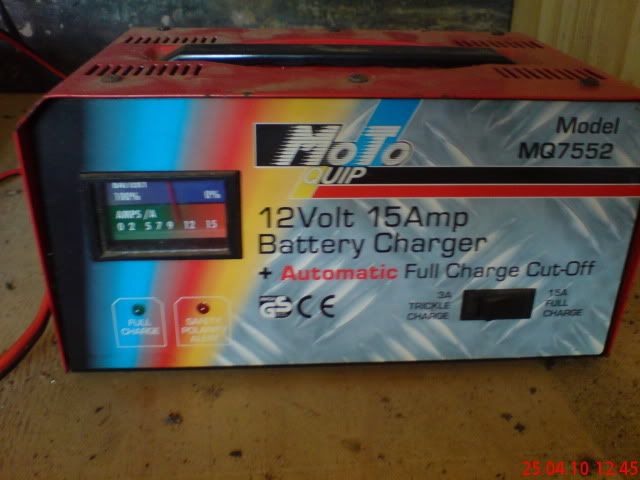
This is the charger - As you can see here, the system is drawing between 9A and 12A
See next post for more
.