Heath's Woodworking Projects
Posted: Sun May 02, 2010 2:12 am
Yeah, I'm copying MickyD again. Sue me!
[ATTACH]8739[/ATTACH]
I had wanted to make the same lanterns that MickyD is making for my mom for Christmas. I just didn't have time, so I moved it to Mother's Day. And here I am, a week before Mother's Day and I'm just getting started. Made good progress today, though, and experienced a few woodworking "firsts" for me.
This was my first time to work with a good quality hardwood. Previously, I've always used pine lumber from Lowes, MDF, or fought with recycled pallet wood. But for this project, I used some African Mahogany that mbcabinetmaker was kind enough to send quite a few months ago.
This was also the first time to use a good, quality saw blade. I used a Freud Avanti thin kerf blade. What a nice change over the cheap blades from Lowes I've always used! Very smooth cuts and like cutting through butter with a warm knife.
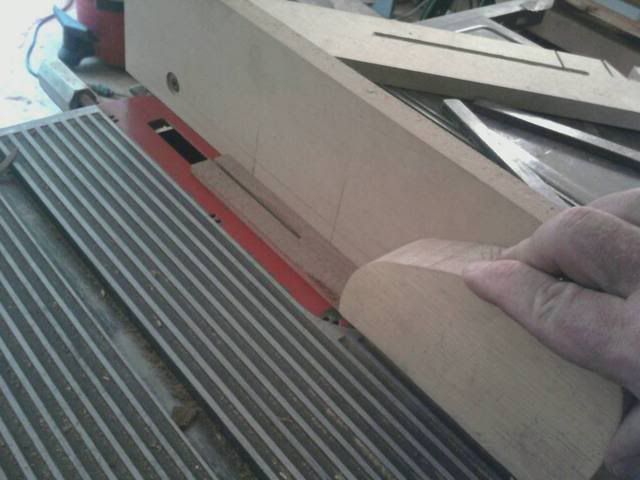
This was also the first time to use a push shoe. I had made one a few months back, but I've been spending my limited shop time with the bandsaw so hadn't had cause to use it. But it was required for these small pieces and gave me much more control than a push stick.
I also learned that I need to learn more about planning my cuts and making the most of my available wood. I ended up wasting a lot more wood than I would have liked to. I hope this is something that comes with experience. I'll discuss that as I go through my progress today.
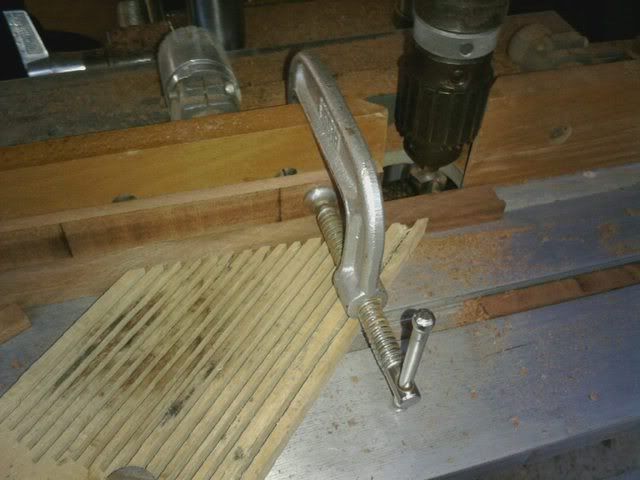
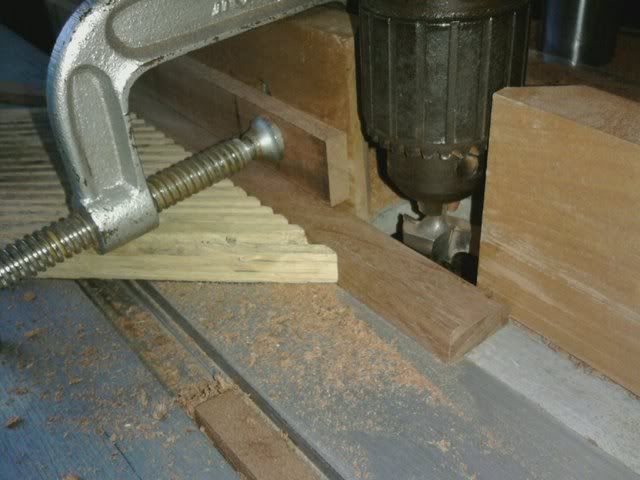
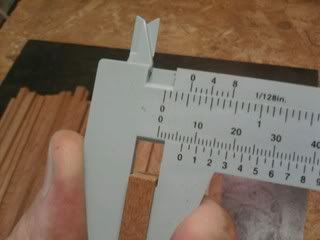
I started by cutting the rails and styles first. I don't have the glass yet, so I haven't cut them (or anything else) to length - just width and thickness. The pieces of wood I had were nearly 1" thick, around 12" long, and varying widths. I ripped off a few strips about 1-1/4" wide as I was comfortable resawing that on the bandsaw with my 1/4" blade. Then I resawed each strip in half, then used my planer to bring them all to 1/4" thick. I realized at that stage that, had I been a little more confident in my bandsawing, I could have gotten three 1/4" strips instead of just two.
After planing, I ripped each strip further down into 1/2" strips. This was where the push shoe came in really handy!
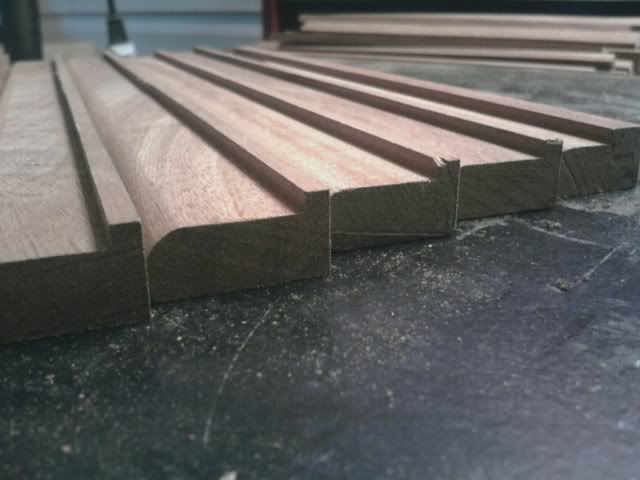
But, I ended up making way too many of them. The plans stated about 21' of 1/2"x1/4" material was needed. My stock was all 12" long, so I planned on cutting 25 or so strips 1/2"x1/4". When I was done, somehow I had almost doubled that and ended up with 46 of them! Wow, what a waste. I guess I was just having so much fun I got carried away. But, they all came out perfectly.

[ATTACH]8739[/ATTACH]
I had wanted to make the same lanterns that MickyD is making for my mom for Christmas. I just didn't have time, so I moved it to Mother's Day. And here I am, a week before Mother's Day and I'm just getting started. Made good progress today, though, and experienced a few woodworking "firsts" for me.
This was my first time to work with a good quality hardwood. Previously, I've always used pine lumber from Lowes, MDF, or fought with recycled pallet wood. But for this project, I used some African Mahogany that mbcabinetmaker was kind enough to send quite a few months ago.
This was also the first time to use a good, quality saw blade. I used a Freud Avanti thin kerf blade. What a nice change over the cheap blades from Lowes I've always used! Very smooth cuts and like cutting through butter with a warm knife.
This was also the first time to use a push shoe. I had made one a few months back, but I've been spending my limited shop time with the bandsaw so hadn't had cause to use it. But it was required for these small pieces and gave me much more control than a push stick.
I also learned that I need to learn more about planning my cuts and making the most of my available wood. I ended up wasting a lot more wood than I would have liked to. I hope this is something that comes with experience. I'll discuss that as I go through my progress today.
I started by cutting the rails and styles first. I don't have the glass yet, so I haven't cut them (or anything else) to length - just width and thickness. The pieces of wood I had were nearly 1" thick, around 12" long, and varying widths. I ripped off a few strips about 1-1/4" wide as I was comfortable resawing that on the bandsaw with my 1/4" blade. Then I resawed each strip in half, then used my planer to bring them all to 1/4" thick. I realized at that stage that, had I been a little more confident in my bandsawing, I could have gotten three 1/4" strips instead of just two.
After planing, I ripped each strip further down into 1/2" strips. This was where the push shoe came in really handy!
But, I ended up making way too many of them. The plans stated about 21' of 1/2"x1/4" material was needed. My stock was all 12" long, so I planned on cutting 25 or so strips 1/2"x1/4". When I was done, somehow I had almost doubled that and ended up with 46 of them! Wow, what a waste. I guess I was just having so much fun I got carried away. But, they all came out perfectly.