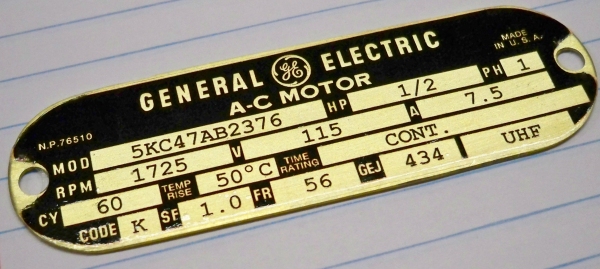
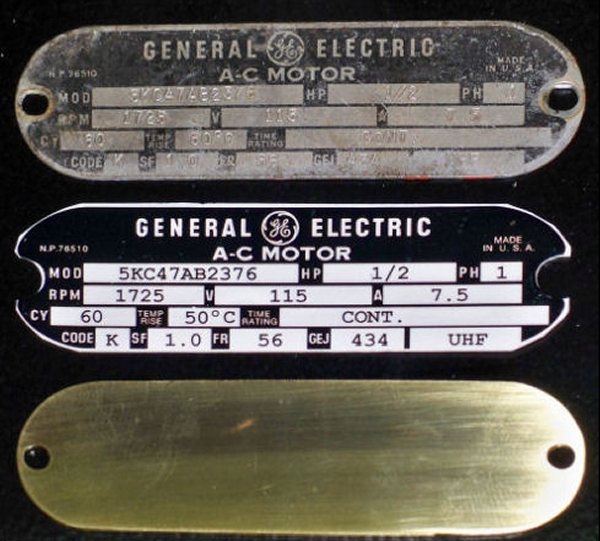
[font=Verdana]Here's my recreated CUSTOM brass motor nameplate for the ER10. I decided to try a water slide decal process instead of the acid etch process used for recreating the main ShopSmith nameplate, reason being, I didn't think the tiny lettering above the information blocks stood a chance at making it though the acid bath without getting etched away. Water slide decals are the same we used as kids when making models.[/font]
[font=Verdana]Original nameplate[/font]
[font=Verdana]Water Slide Decal[/font]
[font=Verdana].032" Brass stock trimmed to size[/font]
[font=Verdana]Finished part[/font]
[font=Verdana][/font]
[font=Verdana].[/font]
[font=Verdana].[/font]
[font=Verdana]I bought a 5-pack of the clear inkjet water slide decal stock from Papilio.com. (~$15.00 with shipping) I was going to buy from Testor’s but it took them 2 days to answer an email I sent asking them a question. After 1 day, I located the other source. Couldn't wait! Too bad.....I spent a lot of hard earned paper route money with Testor as a kid.[/font]
[font=Verdana]Process was pretty straight forward.[/font]
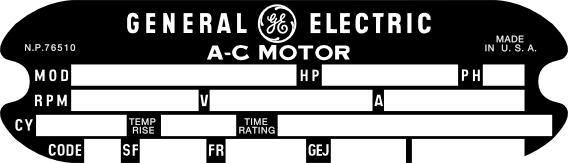
[font=Verdana]1.[/font][font=Verdana]Prepare your artwork. Blank GE motor artwork below.[/font]
[font=Verdana]2.[/font][font=Verdana]Prepare your metal sheet stock. I used .032” thick brass.[/font]
[font=Verdana]---a.[/font][font=Verdana]Sand the front surface with 1500 grit sandpaper on a mirror or flat surface to make it shine. Double sided tape works well here.[/font]
[font=Verdana]---b.[/font][font=Verdana]Coat the back surface with 3 or 4 light coats of clear lacquer for protection and allow to dry for 8 hours.[/font]
[font=Verdana]3.[/font][font=Verdana]Print your artwork to the correct scale onto the waterslide decal paper and let dry for a couple hours.[/font]
[font=Verdana]4.[/font][font=Verdana]Coat the inkjet image with "fixative" (similar to a clear lacquer) to protect the image when you submerge it in water then let dry for 8-hours.[/font]
[font=Verdana]5.[/font][font=Verdana]So that the decal slides easily on the nameplate once initially applied, spread a very light coating of “decal mounting fluid” on the nameplate surface. This allows you to make fine adjustments sliding the decal into position without it stretching or tearing.[/font]
[font=Verdana]6.[/font][font=Verdana]Put decal paper in warm water to loosen the decal.[/font]
[font=Verdana]7.[/font][font=Verdana]Apply decal to the nameplate.[/font]
[font=Verdana]8.[/font][font=Verdana]Squeegee out all air bubbles, water, and the decal mounting fluid with your finger OR preferable, a small curved plastic squeegee, similar to the one shown toward the bottom of this page.[/font]
[font=Verdana]9.[/font][font=Verdana]Sit back and watch your masterpiece dry for about 2 hours while enjoying a tall glass or two of your favorite beverage.[/font]
.
.
.
.
GE Motor Artwork below
(right click, save picture as)
.
.