Accessory shelf repair

Forum for Maintenance and Repair topics. Feel free to ask questions or contribute.

Moderator: admin

User avatar
heathicus
Platinum Member
Posts: 2648
Joined: Wed Oct 22, 2008 1:02 am
Location: WhoDat Nation

Accessory shelf repair

Post by heathicus »

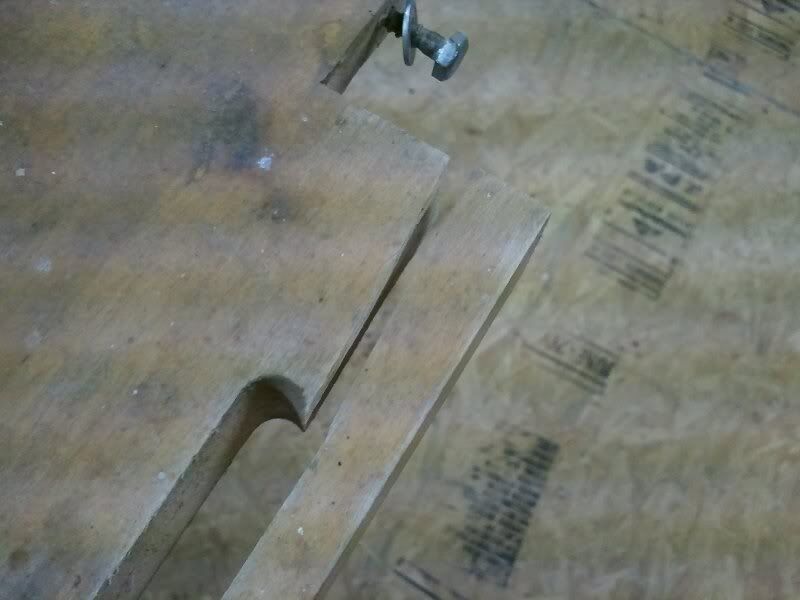
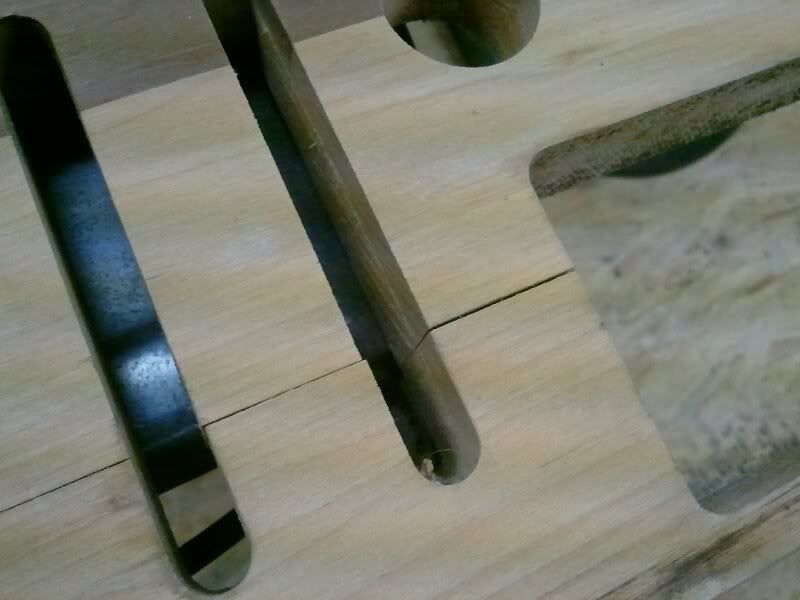
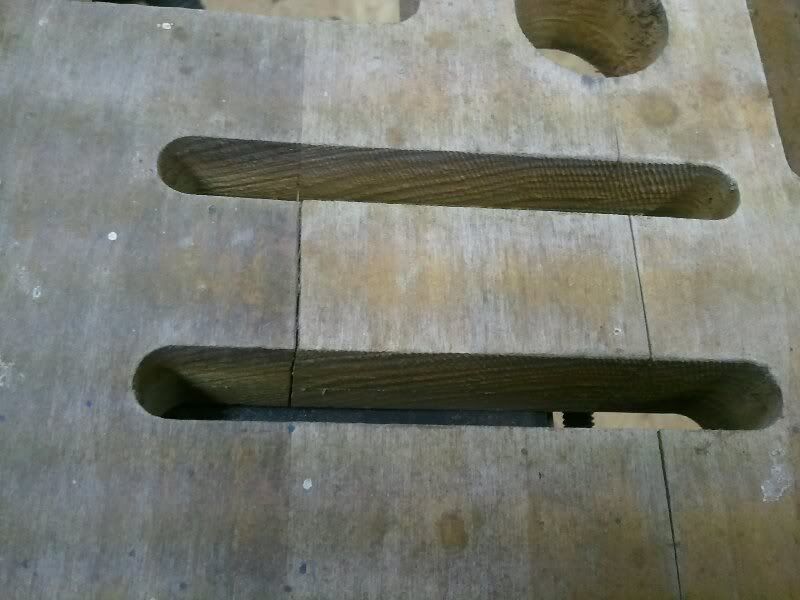
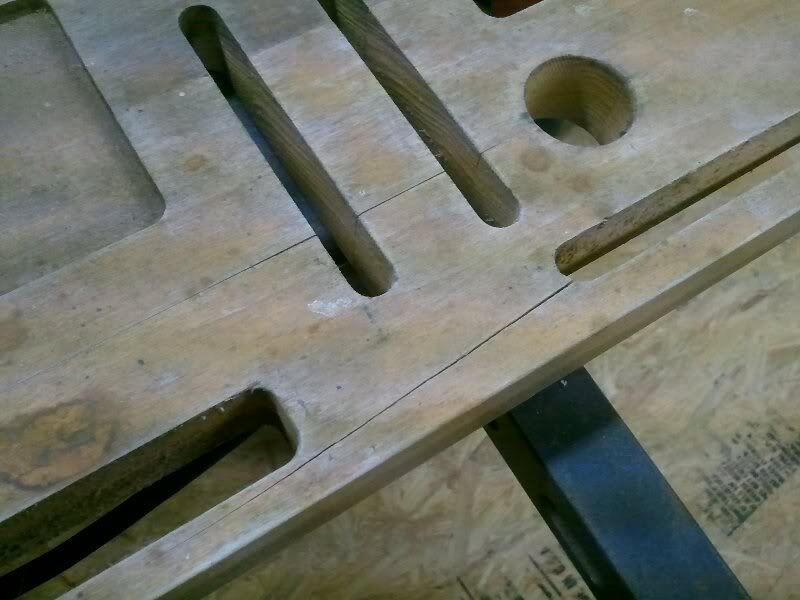
I have this Shopsmith made accessory shelf that I got with that 510 I parted out on eBay. The top surface is in rough shape from weather exposure but I'm sure that can be sanded down. But it also has some splits in several places. I applied clamping pressure across the shelf at those places and some of the cracks still won't come back together or line up correctly. What is the best way to go about repairing this? Is it worth it?

Image

Image

Image

Image
Heath
Central Louisiana
-10ER - SN 13927, Born 1949, Acquired October 2008, Restored November, 2008
-10ER - SN 35630, Born 1950, Acquired April 2009, Restored May 2009, A34 Jigsaw
-Mark V - SN 212052, Born 1986, Acquired Sept 2009, Restored March 2010, Bandsaw
-10ER - SN 39722, Born 1950, Acquired March 2011, awaiting restoration
User avatar
robinson46176
Platinum Member
Posts: 4182
Joined: Mon Mar 09, 2009 9:00 pm
Location: Central Indiana (Shelbyville)

Post by robinson46176 »

Epoxy...


.
--
farmer
Francis Robinson
I did not equip with Shopsmiths in spite of the setups but because of them.
1 1988 - Mark V 510 (bought new), 4 Poly vee 1 1/8th HP Mark V's, Mark VII, 1 Mark V Mini, 1 Frankensmith, 1 10-ER, 1 Mark V Push-me-Pull-me Drillpress, SS bandsaw, belt sander, jointer, jigsaw, shaper attach, mortising attach, TS-3650 Rigid tablesaw, RAS, 6" long bed jointer, Foley/Belsaw Planer/molder/ripsaw, 1" sander, oscillating spindle/belt sander, Scroll saw, Woodmizer sawmill
User avatar
dusty
Platinum Member
Posts: 21481
Joined: Wed Nov 22, 2006 6:52 am
Location: Tucson (Wildcat Country), Arizona

Accessory Shelf Repair

Post by dusty »

I think that I would use it as a template and make a new one.

I have thought about doing that with mine. It is not broken but is less useful than it once was because of the accessories that I now use. I now have a 520 configuration. This started its life with a 510.
"Making Sawdust Safely"
Dusty
Sent from my Dell XPS using Firefox.
User avatar
fjimp
Platinum Member
Posts: 2345
Joined: Wed Jul 19, 2006 8:45 pm
Location: Lakewood, Colorado

Post by fjimp »

dusty wrote:I think that I would use it as a template and make a new one.

.

I have considered making a second one for my second 520. When I first purchased it I added a wire shelf from a box store. The shelf is okay but rather springy and not strong enough to support the items I like to store on it. I recently acquired the appropriate lumber to build one and will one day create one. The sticking point for me is to think thru prior to starting, what is the perfect configuration for storage. Where to cut holes, where to create indentations for those items to store flat and how many hoes and of which sizes. I have given that some consideration. Unfortunately not enough to begin the process. Jim
F. Jim Parks
Lakewood, Colorado:)

When the love of power is replaced by the power of love the world will have a chance for survival.
User avatar
JPG
Platinum Member
Posts: 35457
Joined: Wed Dec 10, 2008 7:42 pm
Location: Lexington, Ky (TAMECAT territory)

Post by JPG »

fjimp wrote:I have considered making a second one for my second 520. When I first purchased it I added a wire shelf from a box store. The shelf is okay but rather springy and not strong enough to support the items I like to store on it. I recently acquired the appropriate lumber to build one and will one day create one. The sticking point for me is to think thru prior to starting, what is the perfect configuration for storage. Where to cut holes, where to create indentations for those items to store flat and how many hoes and of which sizes. I have given that some consideration. Unfortunately not enough to begin the process. Jim

Ahhh! The vagaries and multiple options and conflicting goals of a design process. I would be inclined to create a 'cheap' mockup and try it out before committing a good portion of a decent tree to it. Think of it as an 'Alpha' test.;)


P.S. Heath: I am with Farmer re epoxy. Ya got little to lose there! Remember MickyD's M10 bench planks!
╔═══╗
╟JPG ╢
╚═══╝

Goldie(Bought New SN 377425)/4" jointer/6" beltsander/12" planer/stripsander/bandsaw/powerstation /Scroll saw/Jig saw /Craftsman 10" ras/Craftsman 6" thicknessplaner/ Dayton10"tablesaw(restoredfromneighborstrashpile)/ Mark VII restoration in 'progress'/ 10
E[/size](SN E3779) restoration in progress, a 510 on the back burner and a growing pile of items to be eventually returned to useful life. - aka Red Grange
User avatar
dusty
Platinum Member
Posts: 21481
Joined: Wed Nov 22, 2006 6:52 am
Location: Tucson (Wildcat Country), Arizona

Post by dusty »

If one was going to make replacement shelf, is there a reason that it would have to be that thick?

I was thinking 3/4" or 1" MDF. I would use long bolts rather than lag screws to attach ti the legs.
"Making Sawdust Safely"
Dusty
Sent from my Dell XPS using Firefox.
User avatar
JPG
Platinum Member
Posts: 35457
Joined: Wed Dec 10, 2008 7:42 pm
Location: Lexington, Ky (TAMECAT territory)

Post by JPG »

dusty wrote:If one was going to make replacement shelf, is there a reason that it would have to be that thick?

I was thinking 3/4" or 1" MDF. I would use long bolts rather than lag screws to attach ti the legs.
How much sag or springy are we willing to tolerate?;)
╔═══╗
╟JPG ╢
╚═══╝

Goldie(Bought New SN 377425)/4" jointer/6" beltsander/12" planer/stripsander/bandsaw/powerstation /Scroll saw/Jig saw /Craftsman 10" ras/Craftsman 6" thicknessplaner/ Dayton10"tablesaw(restoredfromneighborstrashpile)/ Mark VII restoration in 'progress'/ 10
E[/size](SN E3779) restoration in progress, a 510 on the back burner and a growing pile of items to be eventually returned to useful life. - aka Red Grange
User avatar
robinson46176
Platinum Member
Posts: 4182
Joined: Mon Mar 09, 2009 9:00 pm
Location: Central Indiana (Shelbyville)

Post by robinson46176 »

I may make a couple of accessory shelves but not quite like that. I want to build a SS "communal" tool tower for most of the accessories that can be just used in common like sanding disk and a lot of others. I do want on-board storage for alignment specific items. Each SS needs to have its own aligned to that machine main table, fence miter-gauge, extension tables as well as anything else that must be aligned. I have those items painted to match their individual SS. I could care less about which sanding disk I use on which SS. The same applies to a lot of other stuff like a chuck etc. Of course I can always "borrow" most of the other items as long as I am not counting on them being properly aligned to any other SS like when using an extension table just to support something but not when using a fence locked on it trying to be accurate.

Accurate... Hell, who am I trying to kid? I sometimes use a hatchet as a jointer. :eek: :rolleyes: :D

I only have one 10-ER, Mark VII and 510 and items specific to each of them may as well stay right with them.


.
--
farmer
Francis Robinson
I did not equip with Shopsmiths in spite of the setups but because of them.
1 1988 - Mark V 510 (bought new), 4 Poly vee 1 1/8th HP Mark V's, Mark VII, 1 Mark V Mini, 1 Frankensmith, 1 10-ER, 1 Mark V Push-me-Pull-me Drillpress, SS bandsaw, belt sander, jointer, jigsaw, shaper attach, mortising attach, TS-3650 Rigid tablesaw, RAS, 6" long bed jointer, Foley/Belsaw Planer/molder/ripsaw, 1" sander, oscillating spindle/belt sander, Scroll saw, Woodmizer sawmill
elderbob
Bronze Member
Posts: 2
Joined: Wed Dec 24, 2008 9:09 pm

Post by elderbob »

Forgive me if I screw this up, my first post. I just made and installed an accessory shelf on my 1980's vintage Mark 510. Somewhere in this forum I found directions and measurements for where to cut the holes which made it relatively simple to complete. If I had a scanner I would post them but unfortunately I do not but perhaps one of the more experienced members could direct you to the pages.
User avatar
dusty
Platinum Member
Posts: 21481
Joined: Wed Nov 22, 2006 6:52 am
Location: Tucson (Wildcat Country), Arizona

Post by dusty »

elderbob wrote:Forgive me if I screw this up, my first post. I just made and installed an accessory shelf on my 1980's vintage Mark 510. Somewhere in this forum I found directions and measurements for where to cut the holes which made it relatively simple to complete. If I had a scanner I would post them but unfortunately I do not but perhaps one of the more experienced members could direct you to the pages.
Welcome to the forum. I am sure someone will locate those instructions. I will look but I don't have much luck finding others posts. I frequently can not find my own.
"Making Sawdust Safely"
Dusty
Sent from my Dell XPS using Firefox.
Post Reply