The plans are from ScrollSaw Woodworking & Crafts Issue 42.
[ATTACH]22644[/ATTACH]
After making copies of the plan I cut up the plan according to stock thickness and type. There is 1/8, 1/4, 3/8, and 1/2 plywood and well as 1/8 and 1/2 hardwood. In the past I’ve had issues applying patterns to wood. Either they come loose while cutting or fray so lines can’t be distinguished and/or are difficult to remove. So after checking with a couple of folks on another forum I decided to try covering the face of each piece of stock with ‘blue painters tape’, adding the pattern with 3M adhesive and then covering the whole thing – front and back with packing tape. This seems to work pretty well but I’m not thrilled.
This project has a lot of drilling and I sure wouldn’t attempt it without a drill press. Drill bits needed are 1/16, 7/64, 1/8, 5/32, 11/64, 3/16, 7/32, 1/4, 17/64 – yep, lots of drilling. The author recommends using brad point bits. I’m not even sure they’re made in all these sizes and even if they are, I’m on a fixed income so I used plain old twist bits for all but two of the sizes.
I applied the patterns as described and then using the center hole of each gear and a circle cutting jig on a bandsaw to cut out each gear. Then I used the same jig and disk sander to get the edge just 'kissing' the top of each tooth. However if the center hole isn’t drilled exactly in the center of the pattern, when using the circle cutting/sanding jig, you’re off some. I think you can see this in the pics.
[ATTACH]22646[/ATTACH]
[ATTACH]22642[/ATTACH]
[ATTACH]22643[/ATTACH]
In order to position each wheel for the drilling I used the scrap from the circle cutter and clamped it to the table so I could just spin the wheel to each new location. I could get pretty close using that method. Then bring the bit so it’s nearly touching the work and move the gear exactly under the bits center and clamp the wheel into position for drilling.
Because the “valleys” between the teeth seemed round I decided rather than scroll them I’d drill them out. That’s what I did. Then I scrolled from the top of each tooth to the center “valley”. It seemed to go pretty well. The author recommends cutting just outside the line and then using a strip sanded to creep in and just remove the line. Unfortunatly a tool I don’t have so I’m hand sanding quite a bit.
[ATTACH]22645[/ATTACH]
This clock is not your traditional clock. In this clock the numerals for the time are not on a ‘stationary face’ but on the gears (and hour wheel and a minute wheel) themselves. The clocks hands don’t move.
The plans have a set of numbers on them that are to be mounted on 1/8” stock and then cut into a ‘shield’ shape and glued to the wheels.
Actually, this is one of my questions. This ‘glue the number process’ seems, I don’t know, not very good, so I’m looking for alternatives. I could print out a new set of numbers and then try to transfer inkjet images to the wood wheels. I’ve never done that before and it sounds tricky. Or I could try wood burning, I’ve never done that before. Or I could go to CL and find a calligrapher who’d work with me. Suggestions or recommendations please.
One of the worst things is that unknown on a project like this. I've taken quite a bit of care here but I have no idea if this will really work. Are the teeth well enough formed?
Wooden Gear Clock
Moderator: admin
Wooden Gear Clock
New Leaf Custom Woodworking
Berry Conway - Chief Dust Maker
Berry Conway - Chief Dust Maker
Wooden Gear Clock cont'd
A pic of the scroll saw action. I've replaced the insert with a shop made ZCI.
[ATTACH]22647[/ATTACH]
And here are the clock numeral 'shields' at the bottom of the image.
[ATTACH]22648[/ATTACH]
And here's a view of the scroll saw and the first class dust collection system.
[ATTACH]22649[/ATTACH]
[ATTACH]22647[/ATTACH]
And here are the clock numeral 'shields' at the bottom of the image.
[ATTACH]22648[/ATTACH]
And here's a view of the scroll saw and the first class dust collection system.
[ATTACH]22649[/ATTACH]
- Attachments
-
- WGC_1825.jpg (55.58 KiB) Viewed 5070 times
-
- WGC_1810_1.jpg (45.16 KiB) Viewed 5073 times
-
- ScrollSawDC_1807_1.jpg (68.57 KiB) Viewed 5071 times
New Leaf Custom Woodworking
Berry Conway - Chief Dust Maker
Berry Conway - Chief Dust Maker
-
fredsheldon

- Platinum Member
- Posts: 1175
- Joined: Tue Jan 17, 2012 1:31 pm
- Location: The Woodlands, Texas
Nice project. Keep us updated Berry.
Fred Sheldon
The Woodlands, Tx
'52 10ER # 60869 (restored in 2012, used as a dedicated drill press), '52 10ER # 88712 (restored 01/2013), 52 10ER # 71368 (in process of restoring), '83 500 Shorty with OPR installed, '83 520 PowerPro with Lift Assist, 6" Joiner, 6" Belt Sander, 18" Jig Saw, 11" Band Saw, 12" ProPlaner, SS Crosscut Table. SS Dust Collector, Hitachi 1/2" router, Work Sharp 3000 with all attachement, Nova G3 Chuck, Universal Tool Rest, Appalachia Tool Works Sled.
Looks like fun. It will be a challenging and rewarding project. Is there room to cut the numbers from laminate and glue them on as an overlay? Or you might purchase vinyl or metallic numbers from a craft store to use.
Keep us posted.
Best regards.
Keep us posted.
Best regards.
Gary Kalyn
Kalynzoo Productions
Woodworking
Porter Ranch/Northridge
Los Angeles, CA
Kalynzoo Productions
Woodworking
Porter Ranch/Northridge
Los Angeles, CA
-
newportcycle
- Gold Member
- Posts: 191
- Joined: Sat May 05, 2012 5:43 am
- Location: Pittsfield, Maine
I should check out the craft stores. We have 3 major chains in town. After my Lake Superior Trip.kalynzoo wrote:Looks like fun. It will be a challenging and rewarding project. Is there room to cut the numbers from laminate and glue them on as an overlay? Or you might purchase vinyl or metallic numbers from a craft store to use.
Keep us posted.
Best regards.
New Leaf Custom Woodworking
Berry Conway - Chief Dust Maker
Berry Conway - Chief Dust Maker
WGC cont'd
Jeez this project is taking forever. (Well I did have that nice two week trip around Lake Superior and it is that time of year that I have to rake the endless supply of leaves I collect each autumn. And I've been trying to help my kid repair his 95 Honda after it was stolen.)
But you interested in the project. So I really struggled with how to add the numbers to the face. I ended up purchasing a set of rubber stamps (Garamond type) and added the numbers to the largest face. I made a little jig that helped my position them and used acrlyic paint.
[ATTACH]23249[/ATTACH]
When I went to add numbers to the other face my stamps were too large. Agh! So after some trials I ended up using the computer to set the numbers I needed, reversing them with Paint, printing them out onto Jolee's Easy Image a product used to transfer computer art to fabric. But it seems to work okay on wood.
[ATTACH]23250[/ATTACH]
Next step to cut and polish the arbors.
- Attachments
-
- WGC_2157.jpg (46.92 KiB) Viewed 4908 times
-
- WGC_2156.jpg (47.28 KiB) Viewed 4902 times
New Leaf Custom Woodworking
Berry Conway - Chief Dust Maker
Berry Conway - Chief Dust Maker
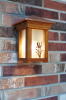
Clock On Wall
berry wrote:Jeez this project is taking forever. (Well I did have that nice two week trip around Lake Superior and it is that time of year that I have to rake the endless supply of leaves I collect each autumn. And I've been trying to help my kid repair his 95 Honda after it was stolen.)
But you interested in the project. So I really struggled with how to add the numbers to the face. I ended up purchasing a set of rubber stamps (Garamond type) and added the numbers to the largest face. I made a little jig that helped my position them and used acrlyic paint.
[ATTACH]23249[/ATTACH]
When I went to add numbers to the other face my stamps were too large. Agh! So after some trials I ended up using the computer to set the numbers I needed, reversing them with Paint, printing them out onto Jolee's Easy Image a product used to transfer computer art to fabric. But it seems to work okay on wood.
[ATTACH]23250[/ATTACH]
Next step to cut and polish the arbors.
BERRY, IT DOES LOOK LIKE A LOT OF WORK, BUT YOU REALLY SEEM TO ENJOY IT. PLEASE PODT A PICTURE OF IT HANGING ON YOUR SHOP WALL. THANKS BELLHEAD RON
Nice work so far, Berry:D . It is the longest time taking projects that give me the largest amount of wood shop happiness. Hope it's the same for you! Detail and fittings. -- Teaches us patients:D Mistakes can be fixed or replaced and the final one usually works the best. Personally, I've found I don't even cuss any more when a mistake happens.
One day or weekend projects go by so fast - it's like - That didn't last long enough to be real fun.
Nice project! Have fun!!
One day or weekend projects go by so fast - it's like - That didn't last long enough to be real fun.
Nice project! Have fun!!
Octogenarian's have an earned right to be a curmudgeon.
Chuck in Lancaster, CA
Chuck in Lancaster, CA
Wooden Gear Clock continued
I know it’s be a long time since I posted about this clock. You probably thought I died and the pigs ate me. But no I’m still kicking around but stuff happens.
The instructions called for polishing the brass shafts (1/16”, 1/8”, and 1/4”) that the gears rotate on. I mounted the shafts in the drill press, carefully tightened the chuck so as not to ‘ding’ the shafts, and turned on the SS at the lowest speed and polished each shaft. Turned them end for end to do the other halves.
[ATTACH]23580[/ATTACH]
Next these had to be mounted on the base. The shafts seemed loose so I applied a couple drops of CA glue to each so they are fixed to the base. The shafts have supports that are glued to the base. I used a waxed shaft to ensure the pieces didn’t move during glue-up.
[ATTACH]23581[/ATTACH]
Copper pipes are used for the weights. As you’d expect the copper was pretty oxidized. I cleaned all the copper in a roasting pan (jeeze don’t tell my wife PLEASE). I used 1.5 cups of vinegar and tablespoon of salt and the hottest water I could get from the tap. I let it soak about an hour and then brushed it with “0” steel wool.
[ATTACH]23582[/ATTACH]
After the supports are glued to the base the author recommends mounting the unit, for the rest of the assembly, on a wall. My shop has zero available wall space. My youngest child moved out a few months back so I moved the project into that bedroom on the same level as the shop.
Even though I made the clicker (ratchet assembly) exactly as in the drawing they were too large for the clock. I had to re-cut those parts.
[ATTACH]23583[/ATTACH]
I also discovered a couple parts were miss-labeled between the directions and plans. Finally, there was no dimension for the length of the pendulum shaft But I got it all sorted.
I plan to mount this clock on a wall in the entry of our split level home. Splits all have those large wall spaces in the stair wells. The directions caution about use anywhere there are strong air currents e.g., by a HVAC register or window or door – because air currents disrupt the motion of the pendulum. (That’s why old clocks are encased in glass and/or wood.) I have no idea of another location so I may be compelled to make some kind of case to enclose the unit.
The overriding issue with mounting this in the stair well is figuring out how to wind it every day. I can’t very well bring a ladder in from the garage each morning.
I ended up using fishing sinkers for the weight. They're cheaper than the lead shot called out in the magazine. I didn’t take any pictures of the ‘bob’, the piece at the bottom of the pendulum. I guess I wasn’t thinking, sorry.
I sanded and glued the caps on the hands of the clock. I measured and wound the monofilament onto the wind pulley.
The pendulum shaft is 3/8 dowel. It connects the pallet (the part that engages the gears of the escape wheel) to the bob (that’s the round piece at the bottom of the pendulum). As mentioned the directions don’t provide a length for this piece!?! I looked at the picture in the magazine, which shows the whole clock and used a divider set to the length of the large weight. I know that’s supposed to be 13 ½”. I used that dimension and ‘walked’ the divider up the pendulum shaft and determined it close to 42”.
The hands and pendulum parts were made from cherry. I couldn’t find cherry dowels in lengths longer than 36” anywhere, so I fabricated my own.
[ATTACH]23584[/ATTACH]
I dug through the scrap bin and found a suitable piece of stock and ripped it to a 3/8” square. I set up the router table with a 3/8” round over bit and made 4 passes rotating the blank 90° after each pass. Bingo.
I gave the cherry parts a coat of BLO and on the sapwood pieces I also applied a couple coasts of Old Masters gel coat stain (Cedar) and I think it matches well now.
continued in the next post
- Attachments
-
- WGC_2158.jpg (71 KiB) Viewed 4728 times
-
- WGC_2165.jpg (62.85 KiB) Viewed 4730 times
-
- WGC_2168.jpg (72.18 KiB) Viewed 4728 times
-
- IMG_2167.jpg (53.78 KiB) Viewed 4732 times
-
- WGC_2180.jpg (65.67 KiB) Viewed 4729 times
New Leaf Custom Woodworking
Berry Conway - Chief Dust Maker
Berry Conway - Chief Dust Maker