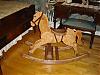
Started to make a few Christmas presents for the family.
One was a board to hold playing cards for those that play "hand and foot" The first was requested by my daughter to give to our grandson as he and his girlfriend are into games. Don't ask me how it's used, as I don't play cards. Usually I make them from scrap plywood and paint them but he wanted one in natural wood. When she saw it, my dear wife also wanted one so I am making several more. They are popular in the family. The first two photos show the finished product and the third shows those in progress.
Also in the third photo are blanks I hope to use to make a men's valet tray for another grandson. He requested one that would require about 48 box joint type fingers and I thought that was too much for the time I have. The one I hope to make will just be a cove cut down the middle of the blank, with end caps on the tray.
I also made a four dimensional tic-tac-toe game for the first grandson and his girlfriend, (shown in pic #4). The object of course is to get four balls in a line either vertically, horizontally or diagonally using any combination of posts. I also started a 3 way game too to use in our gift exchange in our hockey league.
Speaking of our hockey league, I started a website last year. For those that may be interested in a bunch of old men playing hockey and partying, the link is www.lesgerihatricks.weebly.com We thought our name was unique, but I found out differently when research it for our website. There is a league near Washington with the name Gerihatricks and many baseball and other sports in the U.S. with the same name so I put the "Les" in the name which just means "the" in French.
Hopefully I will have pics of the completed valet trays before Christmas.
Thanks for looking.
John
Christmas Presents
Moderator: admin
Christmas Presents
- Attachments
-
- DSCN0862.JPG (129.57 KiB) Viewed 2451 times
-
- DSCN0863.JPG (127.02 KiB) Viewed 2415 times
-
- DSCN0865.JPG (128.11 KiB) Viewed 2414 times
-
- DSCN0859.JPG (128.24 KiB) Viewed 2410 times

Very nice - I really like the 3D tic tac toe! Did you make a jig of some sort to index all the dowel holes in the correct place? Also, how did you make the balls?
'78 Mark V 500 #27995 (my Dad bought new)
'82 Mark V 500 #96309
Two '47 10E's (serial#4314+6149) - one a dedicated drill press and the other a lathe
Two 10E/ER in parts slowly being restored…#26822 and #????? (SS plate missing)
SPT's: Bandsaw, Belt Sander, Strip Sander, Jointer, Jigsaw, Biscuit Joiner
'82 Mark V 500 #96309
Two '47 10E's (serial#4314+6149) - one a dedicated drill press and the other a lathe
Two 10E/ER in parts slowly being restored…#26822 and #????? (SS plate missing)
SPT's: Bandsaw, Belt Sander, Strip Sander, Jointer, Jigsaw, Biscuit Joiner
-
terrydowning

- Platinum Member
- Posts: 1678
- Joined: Mon Jul 19, 2010 3:26 pm
- Location: Windsor, CO
On the X-Mas present front, I sat here a year ago amazed at the quality and productivity of everyone's X-Mas present postings and I vowed to get my workshop at our new house up and running in time this year to join the crowd...but sadly the new house and property to-do list has been longer than I hoped and in conjunction with work and kid obligations, my shop has made some headway but for the most part was habitually backburnered...oh well, I'll have to set my sights on 2014 and meanwhile look for more inspiration from the rest of you as X-Mas nears.
'78 Mark V 500 #27995 (my Dad bought new)
'82 Mark V 500 #96309
Two '47 10E's (serial#4314+6149) - one a dedicated drill press and the other a lathe
Two 10E/ER in parts slowly being restored…#26822 and #????? (SS plate missing)
SPT's: Bandsaw, Belt Sander, Strip Sander, Jointer, Jigsaw, Biscuit Joiner
'82 Mark V 500 #96309
Two '47 10E's (serial#4314+6149) - one a dedicated drill press and the other a lathe
Two 10E/ER in parts slowly being restored…#26822 and #????? (SS plate missing)
SPT's: Bandsaw, Belt Sander, Strip Sander, Jointer, Jigsaw, Biscuit Joiner
I have not made a jig for the Tic-Tac-Toe games but I should have since I have now made about 12 -15 of them and each time have to figure out my spacing. Since I make both the 3D and 4D, I would need two. I now have figured that the post holes are drilled with 1.5 inches between centers and I leave about 1 inch from the outside posts to the edge.
The balls are purchased. The ones I use are 1 inch in diameter with the 3/8 inch hole already drilled through. I think they are available in 3/4 inch as well which would save a little space and cost as they cost about 15 cents each. The 4d game takes 64 balls and I usually give one extra of each colour as they have a habit of rolling away to unknown places. . I do colour them myself and give them a couple of coats of spray finish. The posts are 5/16 inch dowel so the balls fit over easily.
Another way to play the 4d game is to fill the posts and count which player or team gets the most lines.
I still haven't started the valet trays as I need to grind down the mitre slot runners on the jig I bought to fit the Shopsmith.
Anyone else got some presents to show without letting any secrets out?
Have fun.
John
The balls are purchased. The ones I use are 1 inch in diameter with the 3/8 inch hole already drilled through. I think they are available in 3/4 inch as well which would save a little space and cost as they cost about 15 cents each. The 4d game takes 64 balls and I usually give one extra of each colour as they have a habit of rolling away to unknown places.
. I do colour them myself and give them a couple of coats of spray finish. The posts are 5/16 inch dowel so the balls fit over easily.Another way to play the 4d game is to fill the posts and count which player or team gets the most lines.
I still haven't started the valet trays as I need to grind down the mitre slot runners on the jig I bought to fit the Shopsmith.
Anyone else got some presents to show without letting any secrets out?
Have fun.
John
First One Done
Attached are pics of the first valet tray that is finished. This one is walnut with a contrasting piece of oak in the center. I used my new cove making jig and it went pretty good for this piece. Because the miter runners were a little proud of the saw table surface I had quite a bit of extra sanding to do but it turned out ok. It is finished with about five coats of semi-gloss wiping urethane.
My dear wife liked this one the best and also the shiny finish. Personally I would have rubbed it down with 0000 steel wool and maybe waxed it. I think I will give my grandson the choice when he gets it.
The second is still in progress and is a little different because of some challenges I had. Hopefully I will finish it for Christmas.
My dear wife liked this one the best and also the shiny finish. Personally I would have rubbed it down with 0000 steel wool and maybe waxed it. I think I will give my grandson the choice when he gets it.
The second is still in progress and is a little different because of some challenges I had. Hopefully I will finish it for Christmas.
- Attachments
-
- DSCN0891.JPG (128.46 KiB) Viewed 2294 times
-
- DSCN0893.JPG (125.51 KiB) Viewed 2291 times
Look great John - well done. I'd be curious to know how the cove making jig is made and used.john wrote:Attached are pics of the first valet tray that is finished. This one is walnut with a contrasting piece of oak in the center. I used my new cove making jig and it went pretty good for this piece. Because the miter runners were a little proud of the saw table surface I had quite a bit of extra sanding to do but it turned out ok. It is finished with about five coats of semi-gloss wiping urethane.
My dear wife liked this one the best and also the shiny finish. Personally I would have rubbed it down with 0000 steel wool and maybe waxed it. I think I will give my grandson the choice when he gets it.
The second is still in progress and is a little different because of some challenges I had. Hopefully I will finish it for Christmas.
'78 Mark V 500 #27995 (my Dad bought new)
'82 Mark V 500 #96309
Two '47 10E's (serial#4314+6149) - one a dedicated drill press and the other a lathe
Two 10E/ER in parts slowly being restored…#26822 and #????? (SS plate missing)
SPT's: Bandsaw, Belt Sander, Strip Sander, Jointer, Jigsaw, Biscuit Joiner
'82 Mark V 500 #96309
Two '47 10E's (serial#4314+6149) - one a dedicated drill press and the other a lathe
Two 10E/ER in parts slowly being restored…#26822 and #????? (SS plate missing)
SPT's: Bandsaw, Belt Sander, Strip Sander, Jointer, Jigsaw, Biscuit Joiner

Another Boring Day ....
while making some progress on a cribbage board for my daughter. Used my Incra in a slightly different manner.
[ATTACH]23481[/ATTACH]
A different angle....
[ATTACH]23482[/ATTACH]
Up close....
[ATTACH]23483[/ATTACH]
The final result...
[ATTACH]23484[/ATTACH]
Now to move the Incra back to the router table.
[ATTACH]23481[/ATTACH]
A different angle....
[ATTACH]23482[/ATTACH]
Up close....
[ATTACH]23483[/ATTACH]
The final result...
[ATTACH]23484[/ATTACH]
Now to move the Incra back to the router table.
- Attachments
-
- 1.jpg (109.67 KiB) Viewed 2423 times
-
- 2.jpg (94.94 KiB) Viewed 2458 times
-
- 3.jpg (93.62 KiB) Viewed 2423 times
-
- 4.jpg (75.12 KiB) Viewed 2426 times
Rob in San Diego
Email: SDSSmith51 AT gmail.com
Email: SDSSmith51 AT gmail.com
-
terrydowning
- Platinum Member
- Posts: 1678
- Joined: Mon Jul 19, 2010 3:26 pm
- Location: Windsor, CO
Early Christmas present for me.
[ATTACH]23486[/ATTACH]
I made this for holiday gift exchange at work (which was cancelled due to lack of interest) Someone in the family will be the recipient of this.
[ATTACH]23485[/ATTACH]
[ATTACH]23486[/ATTACH]
I made this for holiday gift exchange at work (which was cancelled due to lack of interest) Someone in the family will be the recipient of this.
[ATTACH]23485[/ATTACH]
- Attachments
-
- 2013-12-18 07.10.01.jpg (288.98 KiB) Viewed 2471 times
-
- 2013-11-29 16.40.08.jpg (447.33 KiB) Viewed 2486 times
--
Terry
Copy and paste the URLs into your browser if you want to see the photos.
1955 Shopsmith Mark 5 S/N 296860 Workshop and Tools
https://1drv.ms/i/s!AmpX5k8IhN7ahFCo9VvTDsCpoV_g
Public Photos of Projects
http://sdrv.ms/MaXNLX
Terry
Copy and paste the URLs into your browser if you want to see the photos.
1955 Shopsmith Mark 5 S/N 296860 Workshop and Tools
https://1drv.ms/i/s!AmpX5k8IhN7ahFCo9VvTDsCpoV_g
Public Photos of Projects
http://sdrv.ms/MaXNLX