Power Station
Moderator: admin
Power Station
Hello. Anyone ever made their own power station? Looking for some ideas. Thanks.

Do you mean something like this Mini Mark with variable speed ......Big John wrote:Hello. Anyone ever made their own power station? Looking for some ideas. Thanks.

Or something with just a motor and pulleys like Shopsmith's power stand........

The first option, Mini, is fairly straight forward if you have an extra headstock and bench assembly. The second option, power stand, takes a little more 'design' work. This instruction sheet is helpful for figuring pulley ratios.
Rob in San Diego
Email: SDSSmith51 AT gmail.com
Email: SDSSmith51 AT gmail.com
-
JPG

- Platinum Member
- Posts: 35598
- Joined: Wed Dec 10, 2008 7:42 pm
- Location: Lexington, Ky (TAMECAT territory)
camerio wrote:Very nice mini Mark .... Rob
Can you accommodate two tools at the same time ?
Does a chicken have teeth?;)
Rotation direction is an obstacle. Only those SPTs that can be driven either direction/side can be driven on the quill end(jig saw,belt sander).
╔═══╗
╟JPG ╢
╚═══╝
Goldie(Bought New SN 377425)/4" jointer/6" beltsander/12" planer/stripsander/bandsaw/powerstation /Scroll saw/Jig saw /Craftsman 10" ras/Craftsman 6" thicknessplaner/ Dayton10"tablesaw(restoredfromneighborstrashpile)/ Mark VII restoration in 'progress'/ 10E[/size](SN E3779) restoration in progress, a 510 on the back burner and a growing pile of items to be eventually returned to useful life. - aka Red Grange
[quote="JPG40504"]Does a chicken have teeth?]Generally that is true, but not in the case of the one shown. Here is a view of the headstock from behind.....notice the switch.
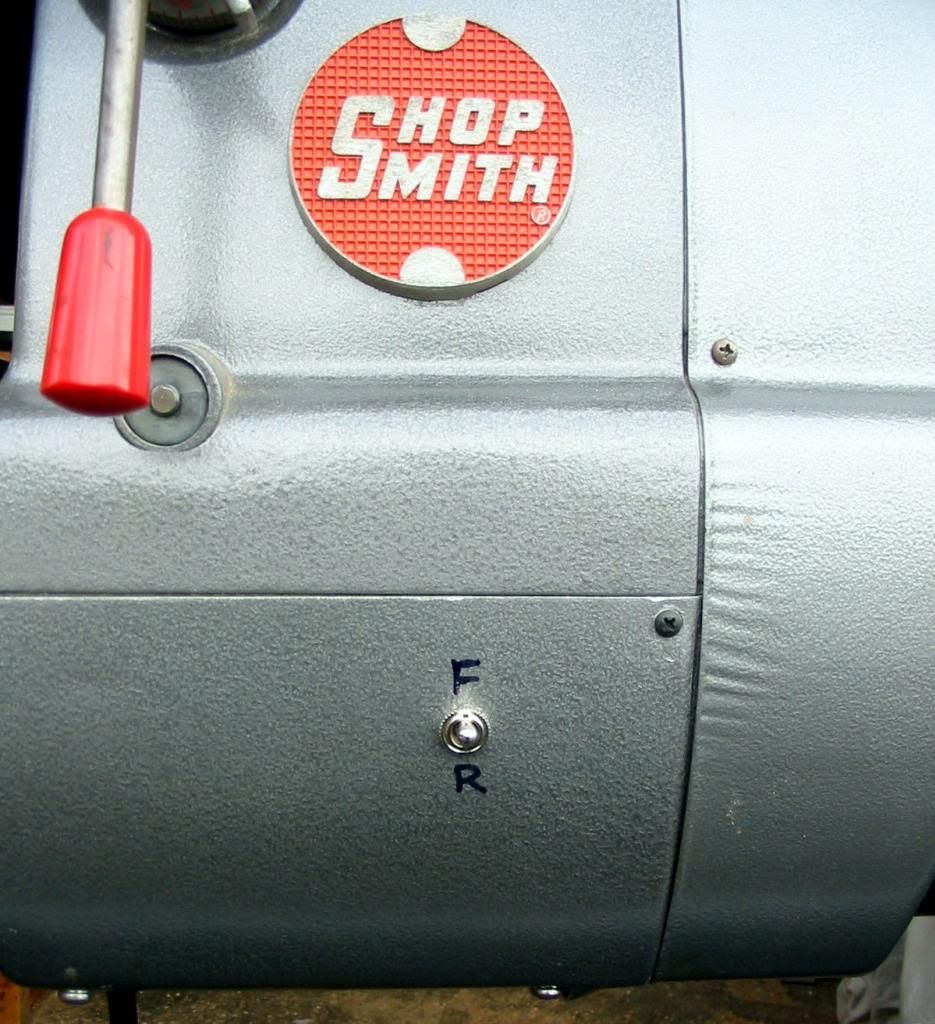
The switch allows the motor to run in reverse and allow the bandsaw and strip sander to also be mounted in the right hand power mount.
The switch allows the motor to run in reverse and allow the bandsaw and strip sander to also be mounted in the right hand power mount.
Rob in San Diego
Email: SDSSmith51 AT gmail.com
Email: SDSSmith51 AT gmail.com

Mark V Power Station
I was able to buy a Power Station that was badly damaged when it was shipped. I was able to mount a Mark V headstock on it. I am using it as my knife sharpening station now. The FWD/REV switch is located on the frame below the speed control dial. I need to add the F and R markings. Thanks.
- Attachments
-
- 100_0718.JPG (113.81 KiB) Viewed 6177 times
Bill Mayo bill.mayo@verizon.net
Shopsmith owner since 73. Sell, repair and rebuild Shopsmith, Total Shop & Wood Master headstocks, SPTs, attachments, accessories and parts. US Navy 1955-1975 (FTCS/E-8)
Shopsmith owner since 73. Sell, repair and rebuild Shopsmith, Total Shop & Wood Master headstocks, SPTs, attachments, accessories and parts. US Navy 1955-1975 (FTCS/E-8)
-
ChrisNeilan

- Platinum Member
- Posts: 1463
- Joined: Sun Oct 27, 2013 5:30 pm
- Location: Waterford, Connecticut
- Contact:
billmayo wrote:I was able to buy a Power Station that was badly damaged when it was shipped. I was able to mount a Mark V headstock on it. I am using it as my knife sharpening station now. The FWD/REV switch is located on the frame below the speed control dial. I need to add the F and R markings. Thanks.
I'll bite, how did you mount the headstock?
This mounting was quite easy. A 3/4" aluminum "L" bracket on outside of the sides of the headstock on top. I used my 3" grinder to remove the bottom front ridge on the opening for the belt and made motor mounts to mount a reversible Mark V 3/4 HP motor on the bottom of the frame. I slotted the motor brackets for forward and backward adjustment of the motor. The motor brackets are on longer bolts so I can adjust belt tension if needed. I used a link belt. I had to cut off the sides and bottom of the belt housing to fit.ChrisNeilan wrote:I'll bite, how did you mount the headstock?
I plan to move the headstock back so the Mark V headstock front edge is in the same location as the front edge of the original Power Station headstock and I can use a full belt housing without modification. I will cut the frame and legs as needed with my 3" grinder. I will use a 1/2" aluminum plate to hold the headstock and strengthen the cut frame. I have these plates from when I mounted DC motors under them and a controller on top of them previously. These plates used the same screw locations as the PowerPro motor as I used the PowerPro jig to drill and then tap the holes. I will post pictures when completed.
I really was disappointed with the Power Station as it will only work as a one function machine with a limited speed range. I found the vibration and noise was higher than I liked. I find the MINI Shopsmith (26 3/8" shorter) to have many advantages over the Power Station and can be used for multiple functions and set up for different types of functional stations.
I was able to get much better use with this Power Station by using a modified 500 main table that tilts. With the extendable quill, I can mount a saw blade for cutting lumber, use as a small horizontal drill press or as a very short wood lathe. Setting the headstock back a few more inches will give me more room to work.
Bill Mayo bill.mayo@verizon.net
Shopsmith owner since 73. Sell, repair and rebuild Shopsmith, Total Shop & Wood Master headstocks, SPTs, attachments, accessories and parts. US Navy 1955-1975 (FTCS/E-8)
Shopsmith owner since 73. Sell, repair and rebuild Shopsmith, Total Shop & Wood Master headstocks, SPTs, attachments, accessories and parts. US Navy 1955-1975 (FTCS/E-8)