Well, the bandsaw I got on eBay arrived yesterday, and I got it put together last night, and it runs! It is an old style cast iron table, but it has a plastic housing cover. I wonder when it was made. I like the grooved bearings upon which the back of the bade bears when a workpiece is being fed into it. I was hoping it would be designed that way. There's even one on the other side to keep the blade on the wheel. CHeck out the pics; it looks to be in good shape, and is only missing the table insert and rip fence.
Wanting to do this right, I notice a number of things I'd like to attend to.
1. How tight should the blade be adjusted?
2.How do I lubricate the bushings/bearings on the two large wheels on which the blade rides?
3. The little aluminum assembly that holds the blade guide blocks is loose, and I can't figure out how to tighten it without pulling the bearing off.
4. It looks like I can use the table saw miter gauge for some cuts, but what is the best rip/resawing fence to get for this model?
5. In the fourth pic, I notice the SPT drive gear doesn't fit as well on the upper shaft, the shaft being longer than the jointer drive shaft. Is there a longer drive gear that fits that shaft? I notice there is a pdf manual for sale, and I'll get that later on today, which may answer some of these questions.
I am excited about this; I've wanted a good bandsaw for years!
New old bandsaw!
Moderator: admin
-
teacherman
- Gold Member
- Posts: 155
- Joined: Sat Mar 01, 2014 8:11 pm
New old bandsaw!
- Attachments
-
- Bandsaw 1.jpg (91.28 KiB) Viewed 1565 times
-
- Blade Guide Assembly.jpg (75.4 KiB) Viewed 1554 times
-
- Serial number.jpg (82.64 KiB) Viewed 1540 times
-
- Upper shaft SPT drive gear.jpg (73.02 KiB) Viewed 1553 times

Looks good. The guide bearings behind the blade are not grooved, they are a wider bearing. If they are grooved then they have been worn by the blade and should be replaced.
I also noticed that the guide blocks are set too far forward and are contacting the teeth of the blade. The guide blocks should be set just behind the gullet of the teeth. If they enclose the teeth then the set of the blade teeth will be ruined. Good luck with your new purchase.
The blades are adjusted using the adjustment screw and the blade tension gauge on the left side of the frame.
The top wheel has needle roller bearings and they are lubricated by removing the upper whee and pressing some good quality wheel bearing grease into the rollers. Grease can be obtained from any auto parts store. The lower wheel does not usually need lubrication it has sealed bearings.
There is a small amount of play in the guide assembly but if it is small it should not be a problem
There is a longer hub but the one you have will work as long as it has the correct number of splines
Bill V
I also noticed that the guide blocks are set too far forward and are contacting the teeth of the blade. The guide blocks should be set just behind the gullet of the teeth. If they enclose the teeth then the set of the blade teeth will be ruined. Good luck with your new purchase.
The blades are adjusted using the adjustment screw and the blade tension gauge on the left side of the frame.
The top wheel has needle roller bearings and they are lubricated by removing the upper whee and pressing some good quality wheel bearing grease into the rollers. Grease can be obtained from any auto parts store. The lower wheel does not usually need lubrication it has sealed bearings.
There is a small amount of play in the guide assembly but if it is small it should not be a problem
There is a longer hub but the one you have will work as long as it has the correct number of splines
Bill V
-
teacherman
- Gold Member
- Posts: 155
- Joined: Sat Mar 01, 2014 8:11 pm
Thanks, Bill. Looks like it is ready to go, but the blade is kinked a bit, and I need a table insert. I noticed I can lock the table saw miter gauge in place with the little set screw, and so I now have a crude rip fence. I need to put some 9/16" spacers on the mounting rods so the height is right for the power coupler to line up when I drop the saw into place. I like the eccentric mounting rods; it allows for lateral adjustment for lining up with the power coupler. It's off to the SS website for a manual, a couple of blades, and a table insert.wa2crk wrote:Looks good. The guide bearings behind the blade are not grooved, they are a wider bearing. If they are grooved then they have been worn by the blade and should be replaced.
I also noticed that the guide blocks are set too far forward and are contacting the teeth of the blade. The guide blocks should be set just behind the gullet of the teeth. If they enclose the teeth then the set of the blade teeth will be ruined. Good luck with your new purchase.
The blades are adjusted using the adjustment screw and the blade tension gauge on the left side of the frame.
The top wheel has needle roller bearings and they are lubricated by removing the upper whee and pressing some good quality wheel bearing grease into the rollers. Grease can be obtained from any auto parts store. The lower wheel does not usually need lubrication it has sealed bearings.
There is a small amount of play in the guide assembly but if it is small it should not be a problem
There is a longer hub but the one you have will work as long as it has the correct number of splines
Bill V

[quote="teacherman"]Thanks, Bill. Looks like it is ready to go, but the blade is kinked a bit, and I need a table insert. I noticed I can lock the table saw miter gauge in place with the little set screw, and so I now have a crude rip fence. I need to put some 9/16" spacers on the mounting rods so the height is right for the power coupler to line up when I drop the saw into place. I like the eccentric mounting rods]You should not need any spacers, you just need to align your bandsaw's drive hub with the headstock. Should be a section in the manual. If you did not get a manual you might want to look on page 9 of this.
Rob in San Diego
Email: SDSSmith51 AT gmail.com
Email: SDSSmith51 AT gmail.com
Looks good. The guide bearings behind the blade are not grooved, they are a wider bearing. If they are grooved then they have been worn by the blade and should be replaced.
I also noticed that the guide blocks are set too far forward and are contacting the teeth of the blade. The guide blocks should be set just behind the gullet of the teeth. If they enclose the teeth then the set of the blade teeth will be ruined. Good luck with your new purchase.
Bill V
I also noticed that the guide blocks are set too far forward and are contacting the teeth of the blade. The guide blocks should be set just behind the gullet of the teeth. If they enclose the teeth then the set of the blade teeth will be ruined. Good luck with your new purchase.
Bill V
-
rcplaneguy
- Platinum Member
- Posts: 549
- Joined: Mon Sep 23, 2013 6:33 pm
- Location: Chapel Hill, NC

-
teacherman
- Gold Member
- Posts: 155
- Joined: Sat Mar 01, 2014 8:11 pm
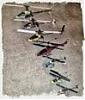
I think I can increase the height of the little fence made by the miter gauge (I'm sure glad the table has two grooves in it), because there are two holes in the top of the little fence that have set screws at the bottom of them. I bet there is an accessory for the miter gauge that does that. (see pic)rcplaneguy wrote:That crude rip fence works better than you think, just add a taller aux wood fence. I ripped hundreds of feet of 4" wide cedar with it on a basket weave fence project, here is a photo as I was assembling the 3/16" thick pieces.
I'm still going to add the spacers, unless I can slide the saw up on the mounting post and set the screws at that height. (see pic)
Bill, I noticed that only the tracking bearing is "grooved," and it is in fact two separate bearings that turn independently of one another.
One more thing: I cannot find a round table insert on the SS site- do I have to make that myself? I want to minimize the amount of sawdust falling down into the case.
One note: I am continually amazed at the thought that went into designing this machine. Versatility, quality, and just plain smart thinking are abundant here.
- Attachments
-
- Miter gauge.jpg (78.27 KiB) Viewed 1529 times
-
- Height.jpg (63.04 KiB) Viewed 1524 times
-
rcplaneguy
- Platinum Member
- Posts: 549
- Joined: Mon Sep 23, 2013 6:33 pm
- Location: Chapel Hill, NC
-
rcplaneguy
- Platinum Member
- Posts: 549
- Joined: Mon Sep 23, 2013 6:33 pm
- Location: Chapel Hill, NC

Do you have 2 eccentric tubes on your BS? They should just drop into the hole, then ya set the height of the bandsaw and tighten the 2 setscrews.
SS 500(09/1980), DC3300, jointer, bandsaw, belt sander, Strip Sander, drum sanders,molder, dado, biscuit joiner, universal lathe tool rest, Oneway talon chuck, router bits & chucks and a De Walt 735 planer,a #5,#6, block planes. ALL in a 100 square foot shop.
.
.
Bob
.
.
Bob