Heart-pine mantel

This is a forum for intermediate to advanced woodworkers. Show off your projects or share your ideas.

Moderator: admin

User avatar
BuckeyeDennis
Platinum Member
Posts: 3815
Joined: Tue Jul 24, 2012 10:03 pm
Location: Central Ohio

Re: Heart-pine mantel

Post by BuckeyeDennis »

JPG wrote:I dunno, it looks kind of pithy to me! :D
Whatsa matter, Red? You think maybe a few Christmas stockings are gonna break that beam? :D Seriously though, all that checking around the pith did indeed present a structural "problem-solving opportunity" on the corbels. :rolleyes: More on that later.

Paul, I just dropped a daughter off at the high school play, near the old sawmill. So I drove by to see what remained of the beam pile. No pile in sight, but maybe they moved it indoors. I'll call the guy this weekend and get back to you.

The rest of you guys, thanks for the kind words! Next installment, coming up.
User avatar
BuckeyeDennis
Platinum Member
Posts: 3815
Joined: Tue Jul 24, 2012 10:03 pm
Location: Central Ohio

Deciding on a finish

Post by BuckeyeDennis »

In the beam close-up below, you can see an interesting interplay between the wood grain and the saw marks from the antique circular saw.
Beam closeup.jpg
Beam closeup.jpg (240 KiB) Viewed 5348 times
I had originally intended to plane or sand the beam smooth, and I did exactly that on a piece of resaw scrap. But lo and behold, that just made it look like a giant piece of ordinary pine. I thought it was much prettier with the saw marks. So I decided to just knock down the surface roughness a bit by hand-sanding, but leave the saw-tooth marks. Kind of like a piece of barn wood that’s been rubbed smooth by livestock over the years. I would also knock the sharp edges off of the beam and corbels with a router and round-over bit, and then rough them back up with the coarse side of a hand rasp, to stay in character.

Heart pine is photosensitive, like cherry, and darkens naturally to a nice warm reddish brown. So I decide to forgo any stain, and just apply a clear finish. To test some alternatives, I masked a piece of the resaw scrap into sections, and applied a different low-gloss finish to each section -- tung oil, oil-based polyurethane, and brush-on lacquer. All the finishes looked good, but the lacquer did the best job of enhancing the color and popping out the figure in the wood. The photo below shows the same section of the beam, after three coats of clear lacquer and a couple years of light exposure.
Beam closeup finished.jpg
Beam closeup finished.jpg (265.64 KiB) Viewed 5348 times
User avatar
algale
Platinum Member
Posts: 4841
Joined: Thu Nov 04, 2010 8:13 am

Re: Heart-pine mantel

Post by algale »

I noticed the saw marks in the first photo and knew right away you had made a deliberate decision to keep them. I would have kept them too. It adds a lot of character and interest.
Gale's Law: The bigger the woodworking project, the less the mistakes show in any photo taken far enough away to show the entire project!

User avatar
BuckeyeDennis
Platinum Member
Posts: 3815
Joined: Tue Jul 24, 2012 10:03 pm
Location: Central Ohio

Structural engineering

Post by BuckeyeDennis »

So how do you mount a 200 lb. beam to a stucco-stone wall? Back in 1990, I had our builder frame the fireplace wall with doubled 2x4’s for mantel support. Before the drywall went up, I made a dimensioned sketch of the framing, so that I could locate it beneath the stone veneer when the time came. My proudest accomplishment of the project? When I finally got around to building the mantel, more than two decades later, I was able to find that sketch!
Framing sketch.jpg
Framing sketch.jpg (469.35 KiB) Viewed 5342 times
Of course, the sketch only told me where to mount the beam, not how. Since the wall was already veneered with stucco stone (a.k.a. cultured stone), mounting options were limited. Initial ideas involved embedding a heavy triangular steel shelf bracket into each of the corbels. But the winning idea was to cut mounting brackets from 1” square steel tubing, and bolt a pair of them vertically to the back of each corbel, each one aligned with a 2x4. The brackets would extend just far enough above and below the corbel to get 3/8” lag screws into the 2x4’s. I only needed an inch of vertical space for each lag screw, allowing the brackets to be completely hidden by a mortar joint around the corbel.

With the bracketry designed, it was time to cut the necessary mortises through the stone veneer. Below, behind the family dog, is the stucco-stone fireplace wall. The masking tape outlines the spots where I will have to cut away layers of stone, stucco, chicken wire, and drywall, in order to get the corbels mounted. According to my vintage sketch, that is. Sure hope I get this right!
X marks the spot.JPG
X marks the spot.JPG (396.77 KiB) Viewed 5342 times
One small tool purchase was needed to tackle this part of the project ... a diamond blade for my old circular saw. It would make the initial perimeter cuts, and the job would be finished with a masonry chisel, 4-pound hammer, wire cutters, and a vibratory saw for the drywall.
I can assure you that this part of the project was not fun. I expected lots of dust from the masonry cutting, so I erected a plastic curtain. And I ran hoses from two shop vacuums inside the curtain, in hopes that they would Hoover up the dust before it escaped the curtain. Yea, right. It took twice as long to clean the masonry dust from the family room as it did to cut the mortises.
Plastic curtain.jpg
Plastic curtain.jpg (528.66 KiB) Viewed 5342 times
But hey, I did hit the bulleseye! Not perfectly on center, but close enough.
Framing.jpg
Framing.jpg (488.85 KiB) Viewed 5342 times
I also stumbled across another little head-scratcher. Did you ever look at a real hand-dressed stone wall, and see a stone with a perfect 90 degree inside angle cut into it? Yea, me neither. The solution (at the lower left of the cutout) was to grind a slot across the “L” shape, for a new mortar “joint”. Presto, one L-shaped stone will now appear as two rectangular stones. My little Roto-Zip tool, in angle-grinder mode, made quick work of this task.

More to come tomorrow ...
User avatar
rjent
Platinum Member
Posts: 2121
Joined: Fri Mar 14, 2014 3:00 pm
Location: Hot Springs, New Mexico

Re: Heart-pine mantel

Post by rjent »

Nice work!
Dick
1965 Mark VII S/N 407684
1951 10 ER S/N ER 44570 -- Reborn 9/16/14
1950 10 ER S/N ER 33479 Reborn July 2016
1950 10 ER S/N ER 39671
1951 jigsaw X 2
1951 !0 ER #3 in rebuild
500, Jointer, Bsaw, Bsander, Planer
2014 Mark 7 W/Lift assist - 14 4" Jointer - DC3300
And a plethora of small stuff .....

"The trouble with quotes on the Internet is that you can never know if they are genuine." - Benjamin Franklin
charlese
Platinum Member
Posts: 7501
Joined: Fri Dec 08, 2006 10:46 pm
Location: Lancaster, CA

Re: Heart-pine mantel

Post by charlese »

Criminetly, Dennis!!!

That is one of the scariest projects I've seen! WoW! I feel your angst while cutting into the stone. :eek: Your sketch was right on!! :D

Beautiful job so far! :D Best wishes for the rest of the mounting. :)

That pine beam's a lot of heft! Assume you have some strong help!
Octogenarian's have an earned right to be a curmudgeon.
Chuck in Lancaster, CA
User avatar
BuckeyeDennis
Platinum Member
Posts: 3815
Joined: Tue Jul 24, 2012 10:03 pm
Location: Central Ohio

Cutting the beam and mounting the corbels

Post by BuckeyeDennis »

With the masonry mortises cut and the wall framing exposed, I could finalize the corbel length, and it was time to start cutting the beam. But the only tool in my arsenal that could cut clear through that big beam was my chainsaw, and I needed tighter tolerances than I could manage with it. At the time, I didn’t have the hand tools, or the hand-tool know-how, to clean up rough cuts on such a big piece.

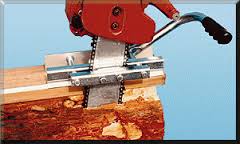
So after some more web research, I decided to buy a “Mini Mill II” from Granberg International. This is basically a bracket that clamps to the bar of your chainsaw, and guides the chainsaw down a section of inverted V-track that you mount to a straight guide board. The guide board is normally screwed to a rough log. In my case, I just clamped it to the resawn beam.

The Mini Mill worked very well indeed. It looks unwieldy (see the stock photo below), but is surprisingly well-balanced and accurate in use. I made an initial test cut to calibrate kerf width and offset, and to check squareness. Once calibrated, I was amazed to find that I could make nice square cuts to a layout line with an accuracy of about +/- 1/16”.
mini mill.jpg
mini mill.jpg (7.17 KiB) Viewed 5281 times
The component layout on the beam was simplicity itself. The center of the beam would be the mantel. Just outboard of that would be the two corbels. The most badly checked few inches at each end of the beam would be waste material.

The first cut was to remove the waste pieces, and that was a darned good thing. Cut free, those sections literally fell apart. So the checking extended well into the corbel sections. I found that the tops and bottoms of each corbel piece were sound, but that there were deep fissures dividing the top and bottom along the pith. After an extended “Aw crap!” moment, followed by some more head-scratching, I decided to reinforce the corbels before cutting them free of the beam. I installed four 3/8”x6” lag screws vertically in each corbel. The screw heads were recessed into counterbores on the top surface, where they would be hidden by the mantel beam. This solidly tied the top and bottom sections together. Only then did I saw the corbels off of the beam.

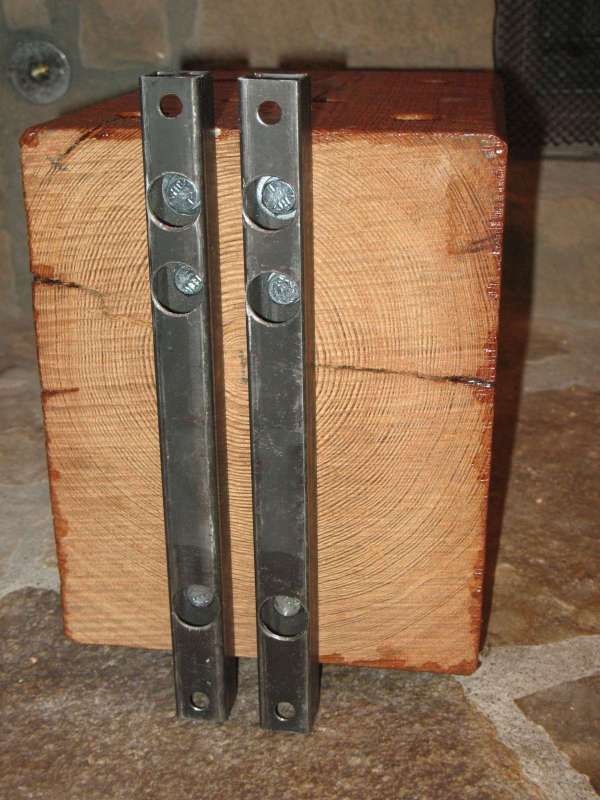
In the photo below, you can see the deep horizontal fissures threatening to split the corbel in two – but now bridged by the vertical lag screws. You’ll also notice that the brackets are mounted slightly off-center on the corbel. That was done intentionally, to match the position of the doubled 2x4 studs in the masonry mortises.

The rear of the corbel shows the surprisingly good surface finish produced by the Mini-Mill mounted chainsaw. Although the tooth marks are straight instead of circular, the surface roughness was very similar to what that antique sawmill produced on the sides of the beam. On the exposed front surfaces, I again just smoothed the surface roughness a bit with hand sanding, and otherwise left the saw marks in for character.
Corbel brackets.jpg
Corbel brackets.jpg (538.38 KiB) Viewed 5281 times
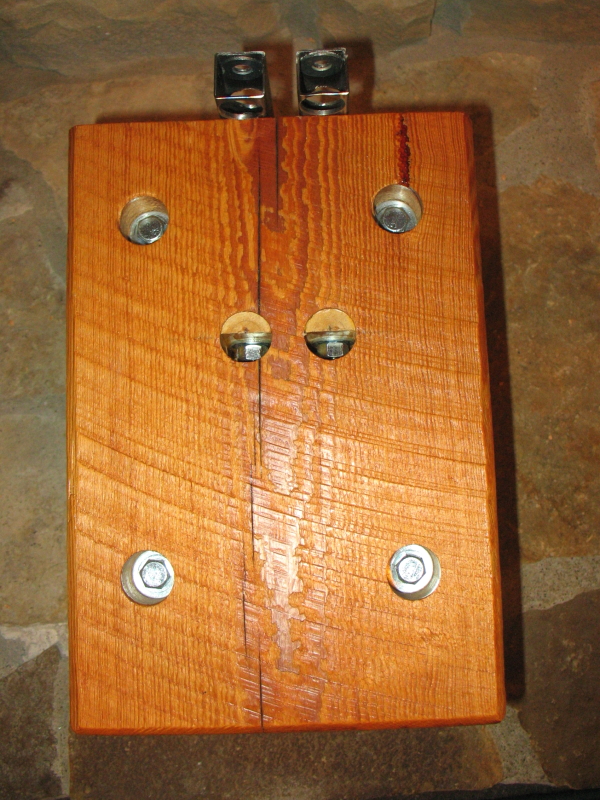
To mount the brackets to the corbel, I used lag screws in the middle and lower positions. But I didn’t trust them for the top positions, as they would be in end-grain, and the weight of the beam would be working to pull them out. So instead I bored clearance holes for 3/8” machine screws, and made intersecting bores from the top of the corbels for the washers and nuts. This is where my new-to-me Shopsmith came in mighty handy. The machine-screw bores were about 5” deep, and had to accurately intersect the cross bores. With my 520 in horizontal boring mode, it was a piece of cake. I clamped the corbels to a miter-gage fence and backed them up with the rip fence. The resulting bore centerlines intersected to within about 1/16”, no problem.

The photo below shows the heads of the vertical reinforcing screws, and also the nuts on the machine screws. To provide a flat surface for the nuts to seat, I turned a dowel to the bore diameter, split it in two, and glued it in place. In hindsight, I should have simply cut a square face into the bore with a chisel – that half-bore was a darned tight fit for an end wrench. But I don’t think I even owned a decent chisel at the time, and I quite obviously didn’t know what they were useful for.
Steel.jpg
Steel.jpg (553.2 KiB) Viewed 5281 times
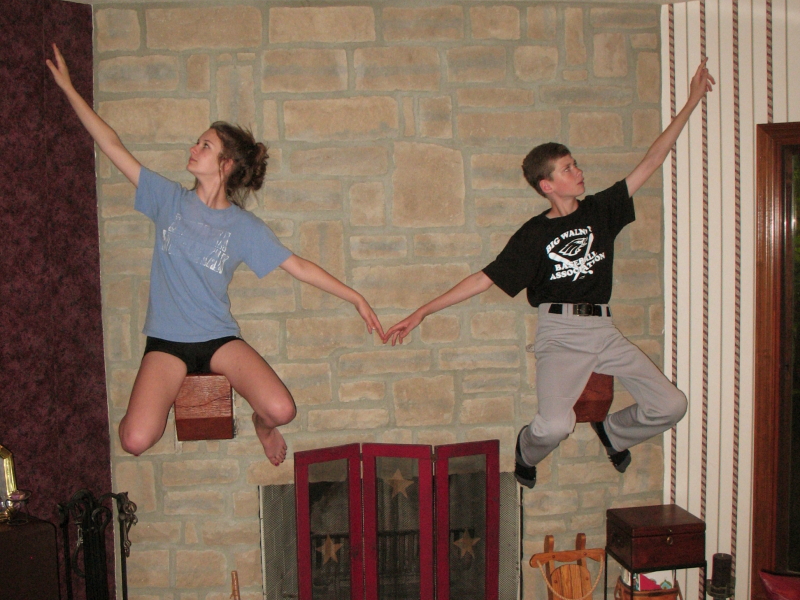
With the brackets attached to the corbels, mounting them to the wall was simplicity itself. A 3/8” lag screw in the top and bottom of each bracket gave a total of 8 beefy screws into the wall framing, which in turn was reinforced by all that masonry. To test it, I used my own 200lb carcass as a live load on each corbel, and the hardware handled it with ease. So for fun, I grabbed a nearby daughter and perched her on one of the corbels. This led to much silliness and goofball posing by all three kids.
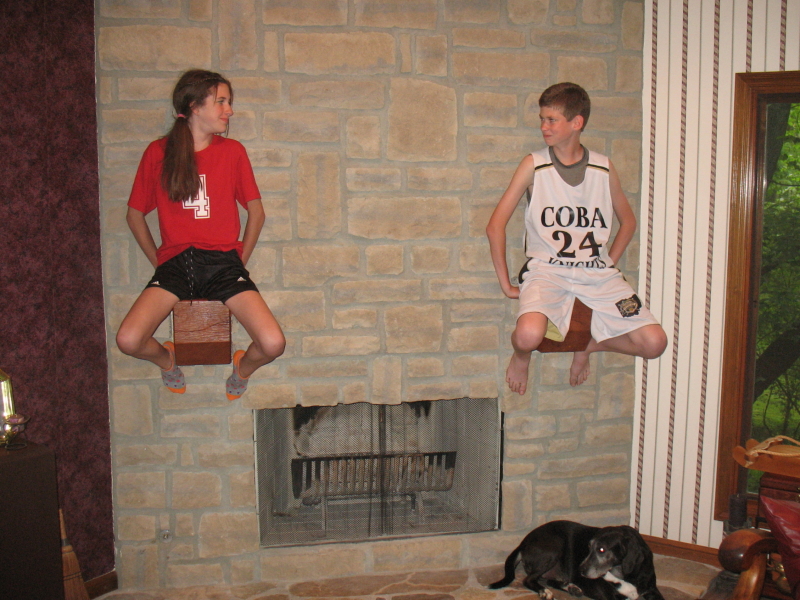
Twins.JPG
Twins.JPG (508.32 KiB) Viewed 5281 times
Ballet.JPG
Ballet.JPG (479.77 KiB) Viewed 5281 times
Then I mixed up some ready-mix mortar and jointed completely around the periphery of each corbel. After the mortar dried, the corbels were locked in on all sides, and felt as solid as the beam itself.

To be continued ...

User avatar
JPG
Platinum Member
Posts: 35600
Joined: Wed Dec 10, 2008 7:42 pm
Location: Lexington, Ky (TAMECAT territory)

Re: Heart-pine mantel

Post by JPG »

Ever hear of 'barrel nuts'? ;)
╔═══╗
╟JPG ╢
╚═══╝

Goldie(Bought New SN 377425)/4" jointer/6" beltsander/12" planer/stripsander/bandsaw/powerstation /Scroll saw/Jig saw /Craftsman 10" ras/Craftsman 6" thicknessplaner/ Dayton10"tablesaw(restoredfromneighborstrashpile)/ Mark VII restoration in 'progress'/ 10
E[/size](SN E3779) restoration in progress, a 510 on the back burner and a growing pile of items to be eventually returned to useful life. - aka Red Grange
User avatar
BuckeyeDennis
Platinum Member
Posts: 3815
Joined: Tue Jul 24, 2012 10:03 pm
Location: Central Ohio

Re: Heart-pine mantel

Post by BuckeyeDennis »

JPG wrote:Ever hear of 'barrel nuts'? ;)
A.k.a. "cross dowels", like these: http://www.woodpeck.com/crossdowels.html?

Funny you should ask. I learned of them well after building the mantel, but I didn't know you could get them in 3/8-16 until I found that Woodpeckers link a couple days ago. I was searching for them using the term "barrel nut", but McMaster uses that term for something else. They do list "cross dowels", but only offer them in 1/4-20 thread.

Regardless of what you call them, they're a slick solution. But with a 5" deep bore, I'd be worried that even a 16th off axis could be too much for those puppies.
User avatar
JPG
Platinum Member
Posts: 35600
Joined: Wed Dec 10, 2008 7:42 pm
Location: Lexington, Ky (TAMECAT territory)

Re: Heart-pine mantel

Post by JPG »

BuckeyeDennis wrote:
JPG wrote:Ever hear of 'barrel nuts'? ;)
A.k.a. "cross dowels", like these: http://www.woodpeck.com/crossdowels.html?

Funny you should ask. I learned of them well after building the mantel, but I didn't know you could get them in 3/8-16 until I found that Woodpeckers link a couple days ago. I was searching for them using the term "barrel nut", but McMaster uses that term for something else. They do list "cross dowels", but only offer them in 1/4-20 thread.

Regardless of what you call them, they're a slick solution. But with a 5" deep bore, I'd be worried that even a 16th off axis could be too much for those puppies.
One could always 'make' them. ;)
Attachments
Clipboard01.jpg
Clipboard01.jpg (329.33 KiB) Viewed 5252 times
╔═══╗
╟JPG ╢
╚═══╝

Goldie(Bought New SN 377425)/4" jointer/6" beltsander/12" planer/stripsander/bandsaw/powerstation /Scroll saw/Jig saw /Craftsman 10" ras/Craftsman 6" thicknessplaner/ Dayton10"tablesaw(restoredfromneighborstrashpile)/ Mark VII restoration in 'progress'/ 10
E[/size](SN E3779) restoration in progress, a 510 on the back burner and a growing pile of items to be eventually returned to useful life. - aka Red Grange
Post Reply