Today in the shop (birdsmouth project)

This is a forum for intermediate to advanced woodworkers. Show off your projects or share your ideas.

Moderator: admin

Post Reply
User avatar
reible
Platinum Member
Posts: 11283
Joined: Thu Jul 20, 2006 12:08 pm
Location: Aurora, IL

Today in the shop (birdsmouth project)

Post by reible »

I noticed some people had shown some interest in birdsmouth joints as cut with a router bit a week or so ago. Since I have such a set and have a project that I want to do I'll let you follow along if you wish.

This is posted in general wood working and not in the beginners area because while a simple project you do have to know something about routing before you start.

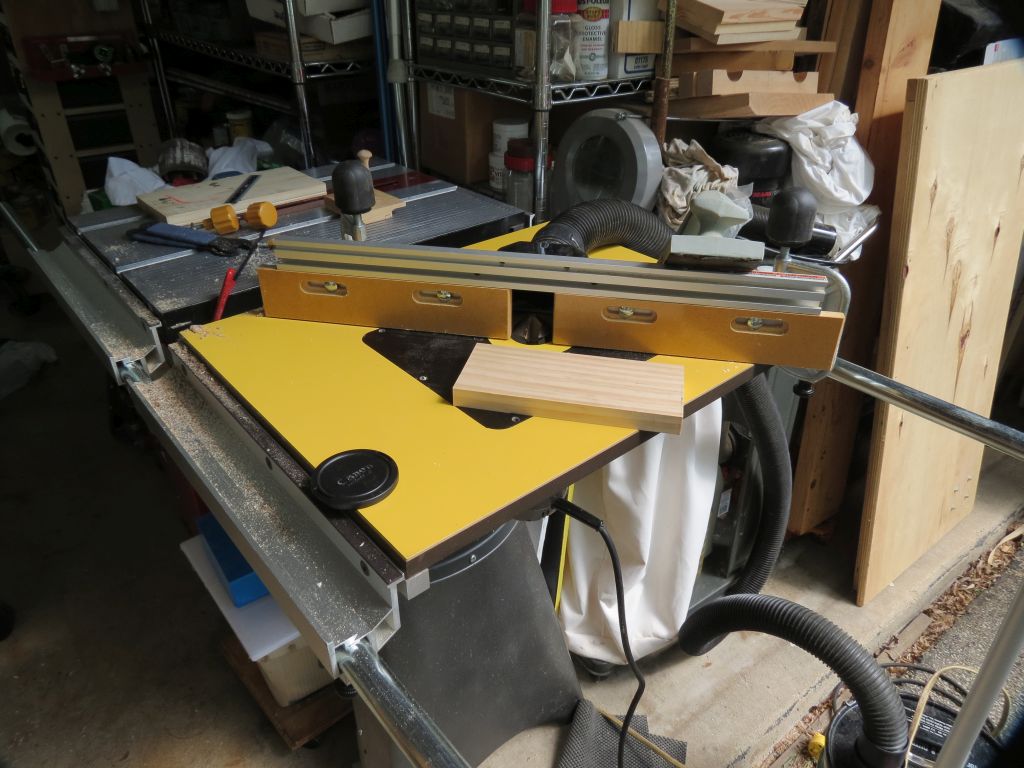
I set up my router table with a split fence today as the bit needs to be buried in the fence for safety and control. I am simply clamping the fence on at a convenient location. This fence has a dust port for what that is worth.
IMG_7663sc.jpg
IMG_7663sc.jpg (132.12 KiB) Viewed 2766 times
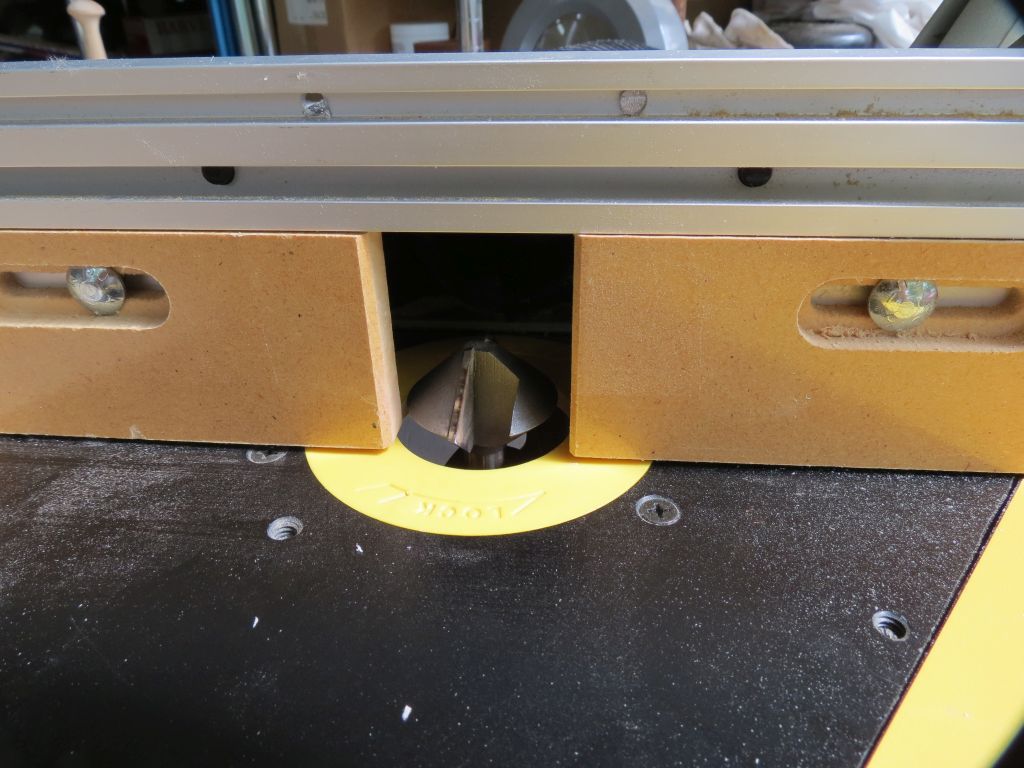
As I mentioned the bit is behind the fence with just the very tip extending beyond.
IMG_7664sc.jpg
IMG_7664sc.jpg (122.96 KiB) Viewed 2766 times
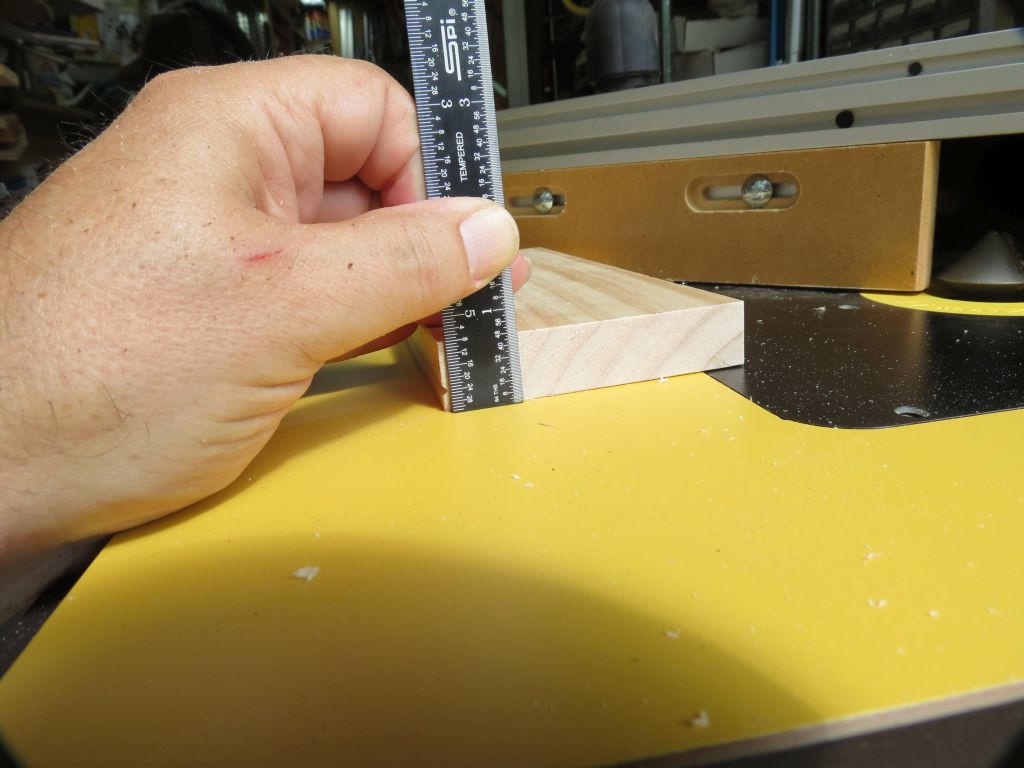
That tip needs to be 7/32" up from the table for my project. This dimension is critical so make sure it is where you set it and that it is set correctly.
IMG_7667sc.jpg
IMG_7667sc.jpg (93.55 KiB) Viewed 2766 times
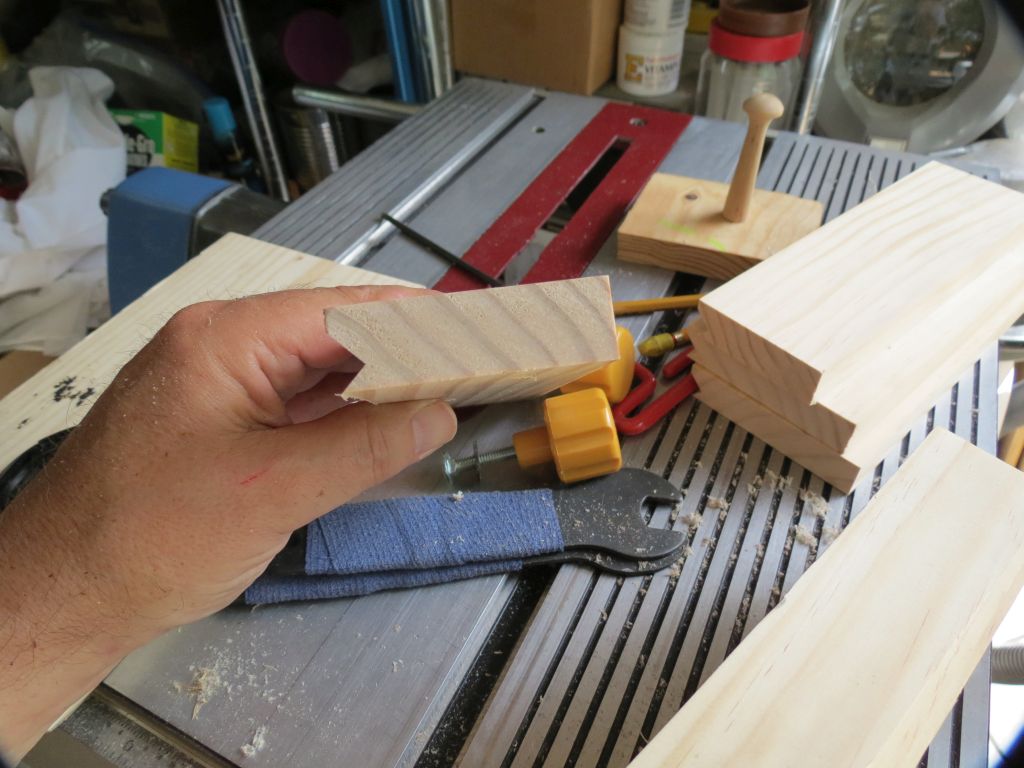
Once set you now move the fence to take a deeper cut and do this is steps, I used quite a few, some people might try to do it in one pass........ I don't think that is a good idea. What you are looking for is to get the top edge and the cut to match, but to be safe you really want to stop just before that happens. In this shot we have a ways to go.
IMG_7668sc.jpg
IMG_7668sc.jpg (118.2 KiB) Viewed 2766 times
The last cut is fine and slow to make sure you don't mess anything up. You can see how much of the cutter is now exposed.
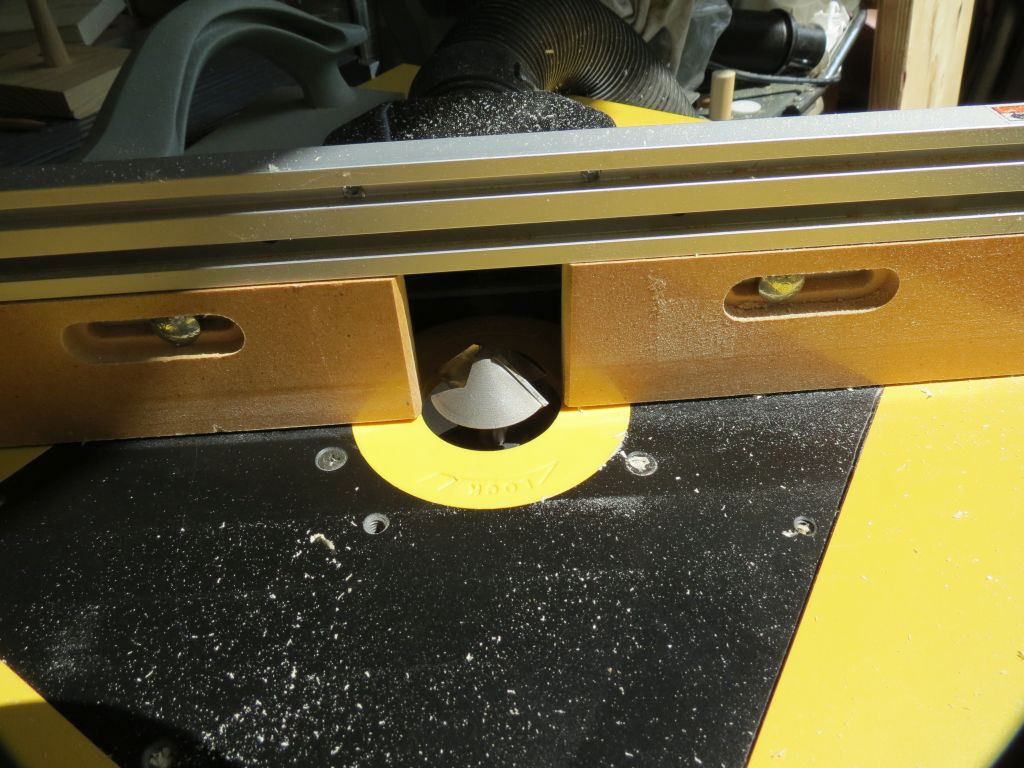
IMG_7670sc.jpg
IMG_7670sc.jpg (143.83 KiB) Viewed 2766 times
And the final cut looks like this.
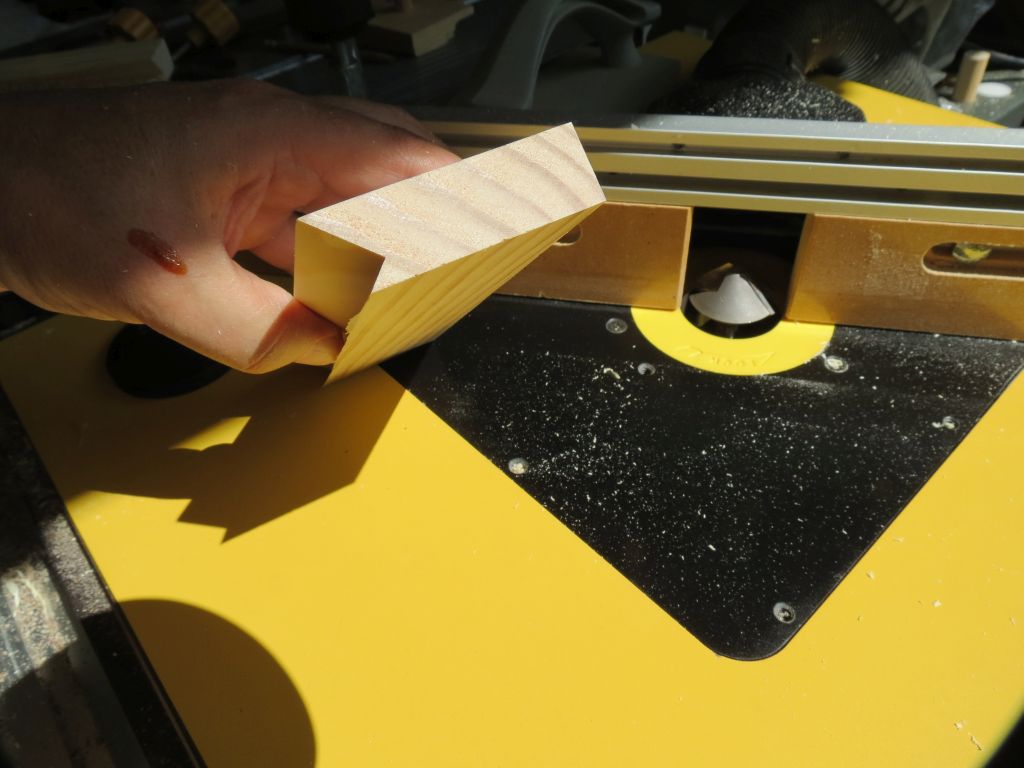
IMG_7671sc.jpg
IMG_7671sc.jpg (95.33 KiB) Viewed 2766 times
I'm going to have some popcorn and then come back with more on this.

Ed
{Knight of the Shopsmith} [Hero's don't wear capes, they wear dog tags]
User avatar
reible
Platinum Member
Posts: 11283
Joined: Thu Jul 20, 2006 12:08 pm
Location: Aurora, IL

Re: Today in the shop (birdsmouth project)

Post by reible »

The bit pictured in mounted in the router table is one of a set of three. I am attempting to make an eight sided object so this is the correct bit for that. I'm using 3/4" stock.
IMG_7672sc.jpg
IMG_7672sc.jpg (122.82 KiB) Viewed 2763 times
I am using a 2" insert in the table which is about right for this bit.
IMG_7673sc.jpg
IMG_7673sc.jpg (134.72 KiB) Viewed 2763 times
When most people here of an 8 sided object they picture a regular octagon. Not always the case, as seen here.
IMG_7674sc.jpg
IMG_7674sc.jpg (128.29 KiB) Viewed 2763 times
The sides are not tapered in case you are wondering.
IMG_7676sc.jpg
IMG_7676sc.jpg (143.19 KiB) Viewed 2763 times
In the next post I'll show you have I made the bottom.

Ed
{Knight of the Shopsmith} [Hero's don't wear capes, they wear dog tags]
User avatar
reible
Platinum Member
Posts: 11283
Joined: Thu Jul 20, 2006 12:08 pm
Location: Aurora, IL

Re: Today in the shop (birdsmouth project)

Post by reible »

With the part held together by rubber bands I was able to trace what the bottom looked like. Using an 1/8" brass bar I increased the size by 1/8". I then cut out the part.

Next I wanted to leave a 1/4" strip at that size and reduce the 1/2" back to the correct size. By adjusting the fence and height I then started trimming the edges.
IMG_7681sc.jpg
IMG_7681sc.jpg (144.1 KiB) Viewed 2759 times
Some of those edges were pretty short so I wanted to add a little extra support and length to them. That was done with double sided tape and a piece of waste stock as shown here.
IMG_7682sc.jpg
IMG_7682sc.jpg (148.57 KiB) Viewed 2759 times
When I was finished it looked like this.
IMG_7683sc.jpg
IMG_7683sc.jpg (145.53 KiB) Viewed 2759 times
I made a corresponding cut in the other pieces, which lend them selves to this hidden joint.
IMG_7684sc.jpg
IMG_7684sc.jpg (138.86 KiB) Viewed 2759 times
And in the end or bottom you have a captured part.
IMG_7686sc.jpg
IMG_7686sc.jpg (128.63 KiB) Viewed 2759 times
I still have a bit of work to do, might not bore you with all those details unless someone has some particular desired for me to do so. It will be several days before I can get back to this, more pressing projects and the likes.

Ed
{Knight of the Shopsmith} [Hero's don't wear capes, they wear dog tags]
User avatar
algale
Platinum Member
Posts: 4841
Joined: Thu Nov 04, 2010 8:13 am

Re: Today in the shop (birdsmouth project)

Post by algale »

Ed, Thanks for posting this. It is interesting to see how the bird's mouth joint is done on a router, having just done it on a table saw.

Also, can you tell us a little about the router fence you are using? Is it a commercially sold fence or something you assembled yourself (I assume the extrusion was purchased somewhere)? Thanks in advance. --Al
Gale's Law: The bigger the woodworking project, the less the mistakes show in any photo taken far enough away to show the entire project!

User avatar
reible
Platinum Member
Posts: 11283
Joined: Thu Jul 20, 2006 12:08 pm
Location: Aurora, IL

Re: Today in the shop (birdsmouth project)

Post by reible »

algale wrote:Ed, Thanks for posting this. It is interesting to see how the bird's mouth joint is done on a router, having just done it on a table saw.

Also, can you tell us a little about the router fence you are using? Is it a commercially sold fence or something you assembled yourself (I assume the extrusion was purchased somewhere)? Thanks in advance. --Al
The fence is from another router table, I believe it might have been from back in the late 1990's so it is unlikely to be in stores but perhaps at a garage sale?? It is pretty basic but does the job and I can use it on its intended table or here on my other router table.

Ed
{Knight of the Shopsmith} [Hero's don't wear capes, they wear dog tags]
Post Reply