Using a Shop Smith Mark V on a Chris Craft Roamer refit

Moderator: admin

roamer46
Platinum Member
Posts: 627
Joined: Mon Nov 18, 2013 10:22 am
Contact:

Re: Using a Shop Smith Mark V on a Chris Craft Roamer refit

Post by roamer46 »

I finally got the V-berth head side cabinet ready to install, but to wrap it up I had to install the sink plumbing. I've got all of the materials lined up and ready to finish the head--1708 fiberglass cloth, epoxy, that super expensive waterproof filler, and Awlgrip products for priming and painting. Unfortunately, winter temporarily returned and it's too cold to do fiberglass work this week. Hopefully, it'll warm up next week and we can get back on it.

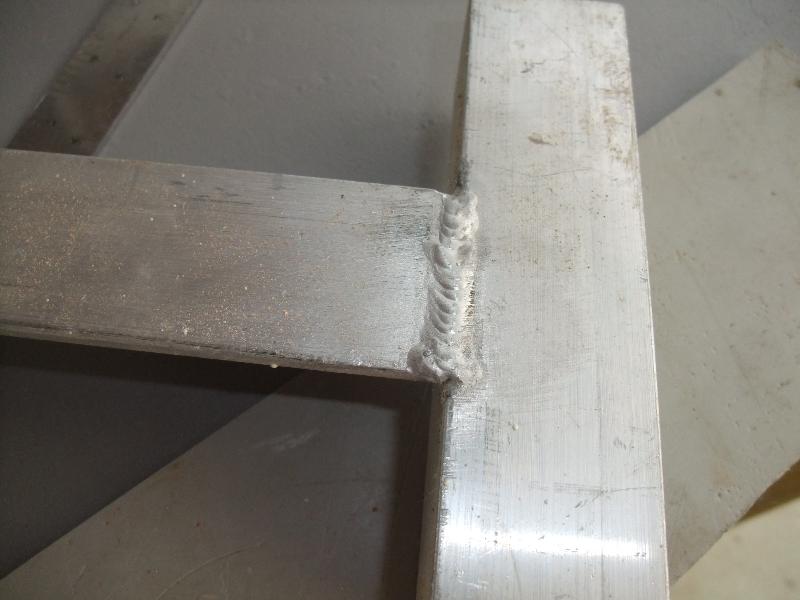
In the meantime, I'm getting more bench time with my new AHP AlphaTIG. My beads are looking better, now that I've got a variety of tunstens and filler rods to work with. The 1/16" tungsten that came with it was just too small for the aluminum I've got. 3/32" tungsten with 1/16" or even 1/8" 4043 filler on lap and T joints using 1/8" 5052 plate scraps is working out pretty well. And they say old dogs can't learn new tricks. Practice, practice, practice...

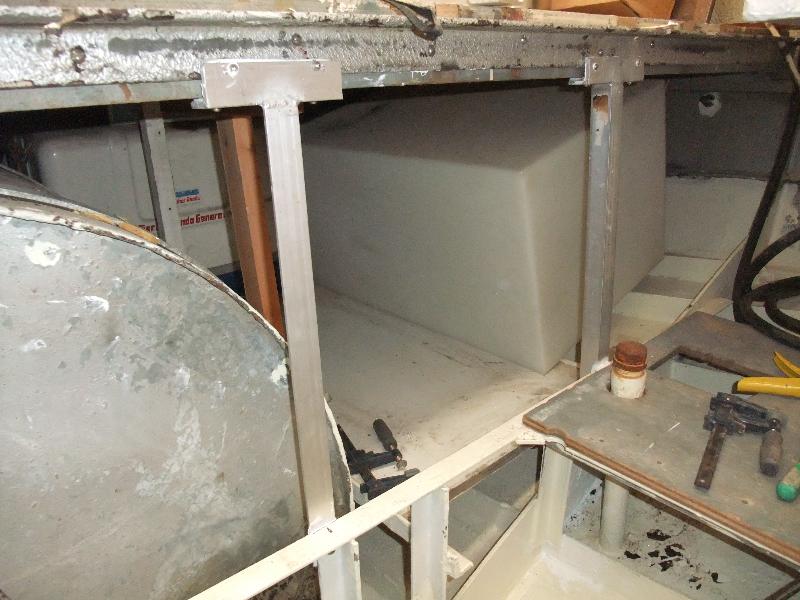
1969 Chris Craft Roamer 46 Refit: The V-berth “Throne Room” Plumbing

Cheers,
Q

Image
roamer46
Platinum Member
Posts: 627
Joined: Mon Nov 18, 2013 10:22 am
Contact:

Re: Using a Shop Smith Mark V on a Chris Craft Roamer refit

Post by roamer46 »

I found an old article in my draft folder that I forgot to post last year, so this is just playing catch-up.

I started making the galley storage and was pretty far along when I decided mahogany tambour (roll-top) doors would be a lot better than sliders or hinged doors. After looking around online, it looks like the doors won't be hard to make. Since I really want to get the boat out of this yard this year, I put the galley storage part of the project on hold with a couple of panels installed.

1969 Chris Craft Roamer 46 Refit: Galley Storage

Cheers,
Q

Image
roamer46
Platinum Member
Posts: 627
Joined: Mon Nov 18, 2013 10:22 am
Contact:

Re: Using a Shop Smith Mark V on a Chris Craft Roamer refit

Post by roamer46 »

Shifting back to current goings on, I'm working on the exhaust system now. I need to come up with a guide system for my bandsaw to make straight cuts on the 4" and 6" stainless tubing for the riser. But in the meantime, I've got to get the mufflers and elbows in so I know where to point the riser after the turn down to the showerhead. And that means I've got to put the anti-crush sleeves in the fiberglass tubes so they don't fail when I tighten the hose clamps.

1969 Chris Craft Roamer 46 Refit: Reinforcing the Exhaust Parts

Cheers,
Q

Image
roamer46
Platinum Member
Posts: 627
Joined: Mon Nov 18, 2013 10:22 am
Contact:

Re: Using a Shop Smith Mark V on a Chris Craft Roamer refit

Post by roamer46 »

In other news, I did my best on some very challenging out-of-position welding, relocating and plugging fuel tank fills. As a rank amateur, welding fillets while sort of hanging upside down looking up at the underside of the pipe was right up there as one of the toughest things I've done. It's not even close to stack 'o dimes work, but the welds are fused well all around.

1969 Chris Craft Roamer 46 Refit: Relocating the Fuel Tank Fills

Cheers
Q

First, a comparison of a $70/hr "professional" welder's work and my own practice beads. Guess which is which.

Image

And a capped and relocated tank fill

Image
roamer46
Platinum Member
Posts: 627
Joined: Mon Nov 18, 2013 10:22 am
Contact:

Re: Using a Shop Smith Mark V on a Chris Craft Roamer refit

Post by roamer46 »

The port fuel fill and cap are now installed and attached via the stainless tube I made to the fuel tank. That officially puts a check in one box on the honey-do list. I had to weld a machine screw inside the tube for a chain that attaches to the filler cap. I've only got a 17 Series torch, which was waaaay too big to fit inside the tube. I got it tacked on three sides, though, so I think it's not going anywhere.

1969 Chris Craft Roamer 46 Refit: Installing the Fuel Fills

Cheers,
Q

Image

Image

Image
roamer46
Platinum Member
Posts: 627
Joined: Mon Nov 18, 2013 10:22 am
Contact:

Re: Using a Shop Smith Mark V on a Chris Craft Roamer refit

Post by roamer46 »

Some of the items on my honey-do list to splash this year are pretty small, but they're all critical and some of them have been on hold for years. One of those things was completing the hydraulic steering installation. The system is in and works, but I didn't have the helm pump key stock so the steering wheel wasn't solidly mounted. Also, I aligned the rudders with 0° toe, but several people commented to say the rudders will judder without a bit of toe-in or out. I ended up buying the key stock at Fastenal and making the key myself. My Shopsmith 12" sanding disk came in handy for forming the round ends. I also toed-in the rudders. That's a big ol' check in the box next to Finish Steering on the honey-do list.
1969 Chris Craft Roamer 46 Refit: Completing the Hydraulic Steering System

Cheers,
Q

Image
roamer46
Platinum Member
Posts: 627
Joined: Mon Nov 18, 2013 10:22 am
Contact:

Re: Using a Shop Smith Mark V on a Chris Craft Roamer refit

Post by roamer46 »

I jumped back on the V-berth head. Unfortunately, it won't be done by the end of April like I'd hoped. But it's moving along pretty well. I fiberglassed the ceiling panels, then flipped the panels over and installed rare earth magnets in the back-side. The magnets will act as invisible shower curtain hardware, with corresponding magnets put into the "ears" of the shower curtain itself. The missus will be tasked with making the curtain. When nobody's using the shower, there'll be no sign of shower hardware. All you will have to do is hold the shower curtain ears up to the ceiling, and the rare earth magnets try to jump together. Each one can hold about a pound, which is plenty of strength to hold the shower curtain in place but not so much that it will rip things apart. Some of the stronger rare earth magnets are incredibly powerful. They can break things!

1969 Chris Craft Roamer 46 Refit: “Throne Room” Ceiling Panels

Cheers,
Q

Two magnets holding on to a fiberglassed sheet of 1/4" marine plywood
Image
roamer46
Platinum Member
Posts: 627
Joined: Mon Nov 18, 2013 10:22 am
Contact:

Re: Using a Shop Smith Mark V on a Chris Craft Roamer refit

Post by roamer46 »

More progress.

I finally got around to installing the V-berth head wall panel and cabinet. Insulating the backside of every plywood panel adds a lot of time to the construction process, since once the sticky epoxy is laid on there's not much more you can do with the pieces until it's cured. Still, I think it will be worth it in the end. I also got the sink drain line, PEX water pipes, and 120vac and 12vdc wiring permanently installed.

1969 Chris Craft Roamer 46 Refit: Throne Room Wiring, Plumbing, and Final Panel Install

Cheers,
Q

Image

Image
roamer46
Platinum Member
Posts: 627
Joined: Mon Nov 18, 2013 10:22 am
Contact:

Re: Using a Shop Smith Mark V on a Chris Craft Roamer refit

Post by roamer46 »

I got the toilet (AKA throne) dais installed and was ready to cut the last wall panel when I realized that the mahogany plywood I needed was way down on the bottom of the plywood stack in the salon. I need to move the stack to the other side of the salon to get the panel I need, but my tracksaw table is taking up that space. Normally, I'd just move the table to the galley, but the floor is still removed there and the forward fuel tank is sitting where the tracksaw would go. Before I can put the fuel tank back in place and finish that installation, I need to replace the temporary 2x4 floor supports with aluminum angle and insulate the underside of the floors. There's no way to do that stuff once the fuel tank and floors are back in position. So, I now have a whole bunch of other stuff I need to do before I can cut and install the last wall for the Throne Room. And I'm doing all this work in there so I can install the portholes to keep out the Chesapeake when I [hopefully] splash the boat later this year and run it around to my home port.

It's all work that needs to be done, but I do wish I'd foreseen this when I stacked the plywood. This little hitch is making it less and less likely that I can splash this year. I'm not giving up yet, though.

1969 Chris Craft Roamer 46 Refit: Throne Dias Install

Cheers,
Q

Image
roamer46
Platinum Member
Posts: 627
Joined: Mon Nov 18, 2013 10:22 am
Contact:

Re: Using a Shop Smith Mark V on a Chris Craft Roamer refit

Post by roamer46 »

To get that last piece of plywood for the Throne Room, which is on the bottom of the plywood stack in the salon, I've got to do a bunch of other stuff on the honey-do list. One of those things was installing the permanent galley floor supports. I had a "professional welder" put them together a year or two ago. The welds are solid but not very pretty...kinda like what mine look like! I'm sure they'll work fine, and they're lots better than the temporary supports made from 2x4s.

1969 Chris Craft Roamer 46 Refit: Galley Floor Supports

Cheers,
Q

Image

Image
Post Reply