I just gotta say the boat is looking absolutely great. I have been following this thread ever since I joined the forum a few years ago...even went back and perused a good bit of the start of the thread as well. I love the Teak...
Using a Shop Smith Mark V on a Chris Craft Roamer refit
Moderator: admin
Re: Using a Shop Smith Mark V on a Chris Craft Roamer refit
Q,
I just gotta say the boat is looking absolutely great. I have been following this thread ever since I joined the forum a few years ago...even went back and perused a good bit of the start of the thread as well. I love the Teak... ...I just wish it wasn't so darn expensive. Wishing you luck on splashing it soon. Sorry for all of the challenges you have had to endure to get to this point.
I just gotta say the boat is looking absolutely great. I have been following this thread ever since I joined the forum a few years ago...even went back and perused a good bit of the start of the thread as well. I love the Teak...
 RF Guy
Mark V 520 (Bought New '98) | 4" jointer | 6" beltsander | 12" planer | bandsaw | router table | speed reducer | univ. tool rest
Porter Cable 12" Compound Miter Saw | Rikon 8" Low Speed Bench Grinder w/CBN wheels | Jessem Clear-Cut TS™ Stock Guides
Festool (Emerald): DF 500 Q | RO 150 FEQ | OF 1400 EQ | TS 55 REQ | CT 26 E
DC3300 | Shopvac w/ClearVue CV06 Mini Cyclone | JDS AirTech 2000 | Sundstrom PAPR | Dylos DC1100 Pro particulate monitor
-
JPG

- Platinum Member
- Posts: 35598
- Joined: Wed Dec 10, 2008 7:42 pm
- Location: Lexington, Ky (TAMECAT territory)
Re: Using a Shop Smith Mark V on a Chris Craft Roamer refit
Do not be concerned re the 3/8" of water in the catch pan.
Rough water rolling will drain it out automatically.
I concur with RFGuy.
Rough water rolling will drain it out automatically.
I concur with RFGuy.
╔═══╗
╟JPG ╢
╚═══╝
Goldie(Bought New SN 377425)/4" jointer/6" beltsander/12" planer/stripsander/bandsaw/powerstation /Scroll saw/Jig saw /Craftsman 10" ras/Craftsman 6" thicknessplaner/ Dayton10"tablesaw(restoredfromneighborstrashpile)/ Mark VII restoration in 'progress'/ 10E[/size](SN E3779) restoration in progress, a 510 on the back burner and a growing pile of items to be eventually returned to useful life. - aka Red Grange
Re: Using a Shop Smith Mark V on a Chris Craft Roamer refit
One of my priority items is to confirm that the engines will light off when the boat gets splashed. I thought I was ready to start them, but neither passed the test.
On the starboard side, the injector pump lost prime because of a crack in the OEM fuel return line on the pump body. That was allowing fuel to leak out and air to leak in. And the steel line is in an awful place. To replace it requires R&Ring the injector pump...
The port side lit off almost immediately, but then died when I released the key. That happened a few times, and I discovered the key switch is shot. It doesn't send power to the RUN circuit, which energizes the locking RUN solenoid on the injector pump. Additionally, there was a bad battery connection (entirely my fault) that ended up blowing the main fuse.
So...the good news is both engines clearly are willing to start, so long as they get fuel and electricity where they need it. I've already fixed the battery connection problem, and the new key switches are ready to be picked up. The bad news is that fixing the fuel system is going to be a big project.
You can see the tests in the video at the linked blog article.
1969 Chris Craft Roamer 46 Refit: First Try Starting My Cummins Main Engines
Cheers,
Q
Re: Using a Shop Smith Mark V on a Chris Craft Roamer refit
Well, launching in November is starting to look challenging, too.
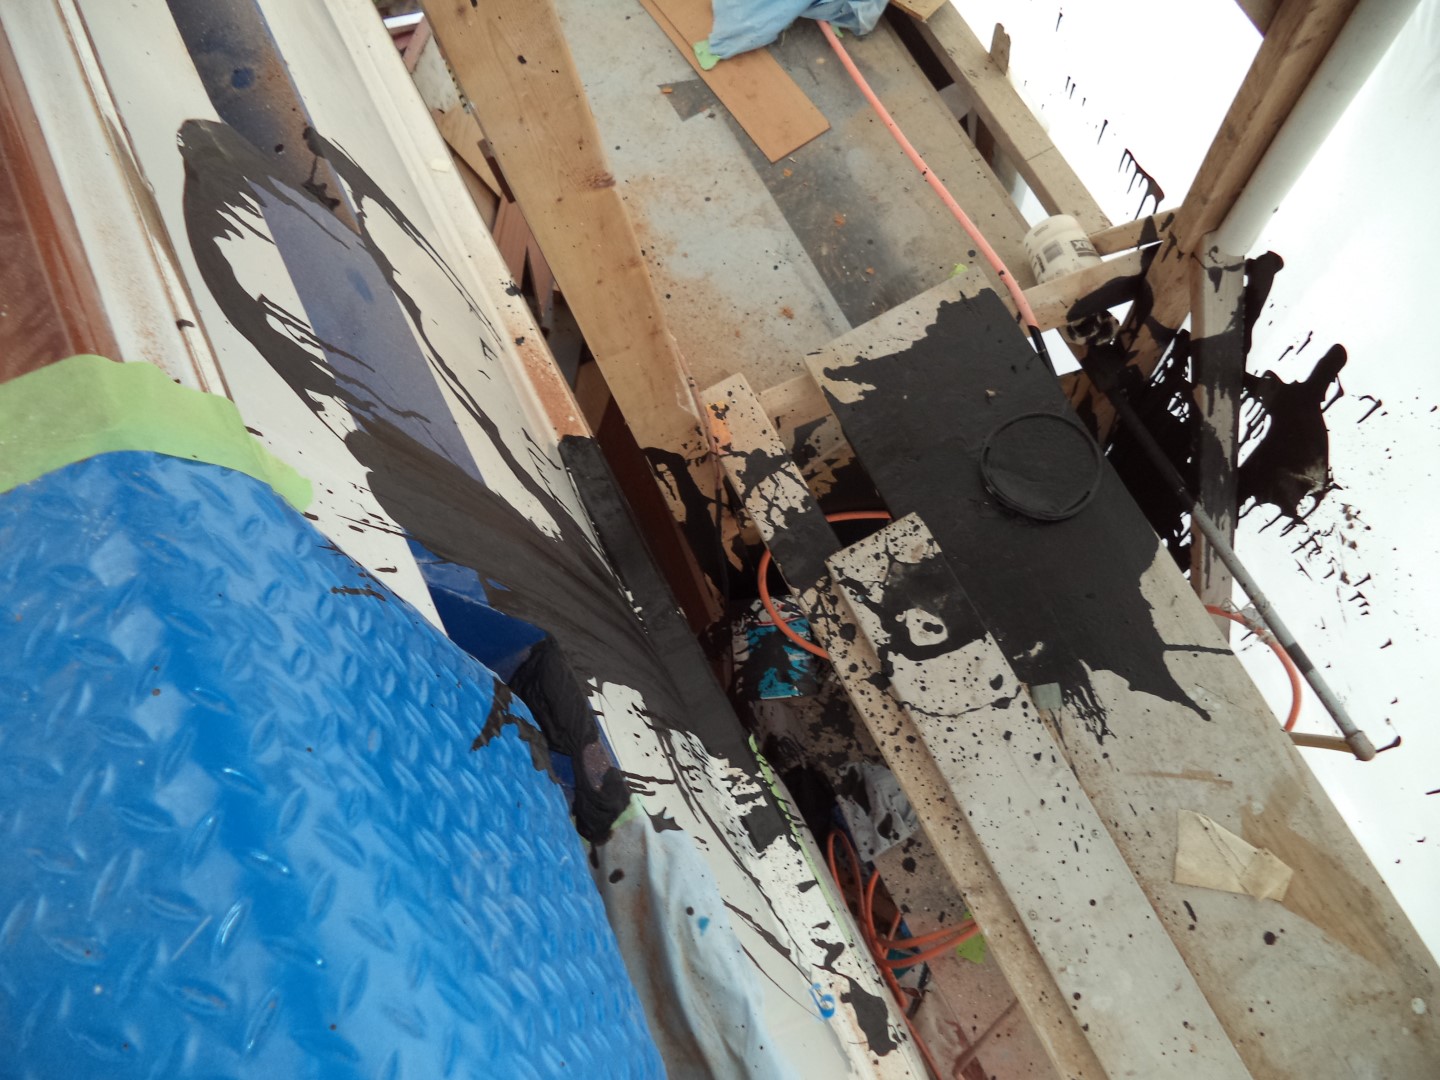
I figured I should come clean about why the boat's not floating yet: we're still doing paint repairs, and nobody allows open air spraying of Awl Grip. So the boat has to stay in the tent until all the repairs are done.
Repairs, you ask?
Yes. Repairs.
As in Hispanic Jackson Pollock grafitti removal and crack repairs from very expensive fairing compound that didn't adhere to the aluminum in spots. Also, professional fairing team incompetence.
Anyway, this is my longest blog article ever, with lots of pictures showing the various problems. I haven't given up yet. Who knows, we could still splash this month if it warms up enough to spray again.
1969 Chris Craft Roamer 46 Refit: Why My Boat Didn’t Splash in October 2022
Cheers,
Q
Re: Using a Shop Smith Mark V on a Chris Craft Roamer refit
This post is about a very important item that I made a while back but never got around to posting about it until now.
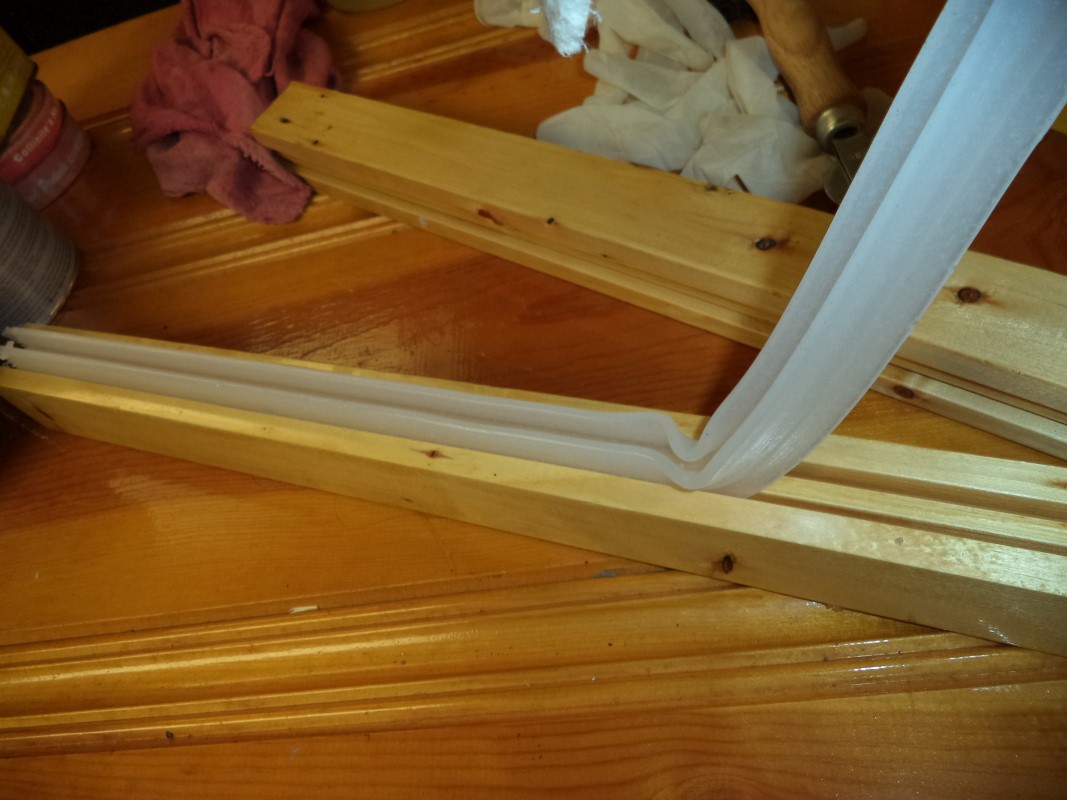
The missus wants a washer and dryer, which means the boat's got to have a dryer vent. Going out the porthole made the most sense, but I needed a gasket between the glass and the plate that the vent exits through and I couldn't find one with the right dimensions. So I made one out of silicone using the same basic process as when I made the porthole gaskets. It turned out really good...so good that a mouse munched on a bunch of it! Fortunately, enough uneaten gasket remained for my porthole.
1969 Chris Craft Roamer 46 Refit: Making a Silicone Gasket for the Laundry Closet Porthole
Cheers,
Q
-
JPG
- Platinum Member
- Posts: 35598
- Joined: Wed Dec 10, 2008 7:42 pm
- Location: Lexington, Ky (TAMECAT territory)
Re: Using a Shop Smith Mark V on a Chris Craft Roamer refit
No link!
╔═══╗
╟JPG ╢
╚═══╝
Goldie(Bought New SN 377425)/4" jointer/6" beltsander/12" planer/stripsander/bandsaw/powerstation /Scroll saw/Jig saw /Craftsman 10" ras/Craftsman 6" thicknessplaner/ Dayton10"tablesaw(restoredfromneighborstrashpile)/ Mark VII restoration in 'progress'/ 10E[/size](SN E3779) restoration in progress, a 510 on the back burner and a growing pile of items to be eventually returned to useful life. - aka Red Grange
╟JPG ╢
╚═══╝
Goldie(Bought New SN 377425)/4" jointer/6" beltsander/12" planer/stripsander/bandsaw/powerstation /Scroll saw/Jig saw /Craftsman 10" ras/Craftsman 6" thicknessplaner/ Dayton10"tablesaw(restoredfromneighborstrashpile)/ Mark VII restoration in 'progress'/ 10E[/size](SN E3779) restoration in progress, a 510 on the back burner and a growing pile of items to be eventually returned to useful life. - aka Red Grange
-
BuckeyeDennis

- Platinum Member
- Posts: 3812
- Joined: Tue Jul 24, 2012 10:03 pm
- Location: Central Ohio
Re: Using a Shop Smith Mark V on a Chris Craft Roamer refit
OOPS! Sorry!
That'll teach me to post before 5am! lol
That'll teach me to post before 5am! lol
Re: Using a Shop Smith Mark V on a Chris Craft Roamer refit
OK...it's after 5am, so I think I can post competently now. :-)
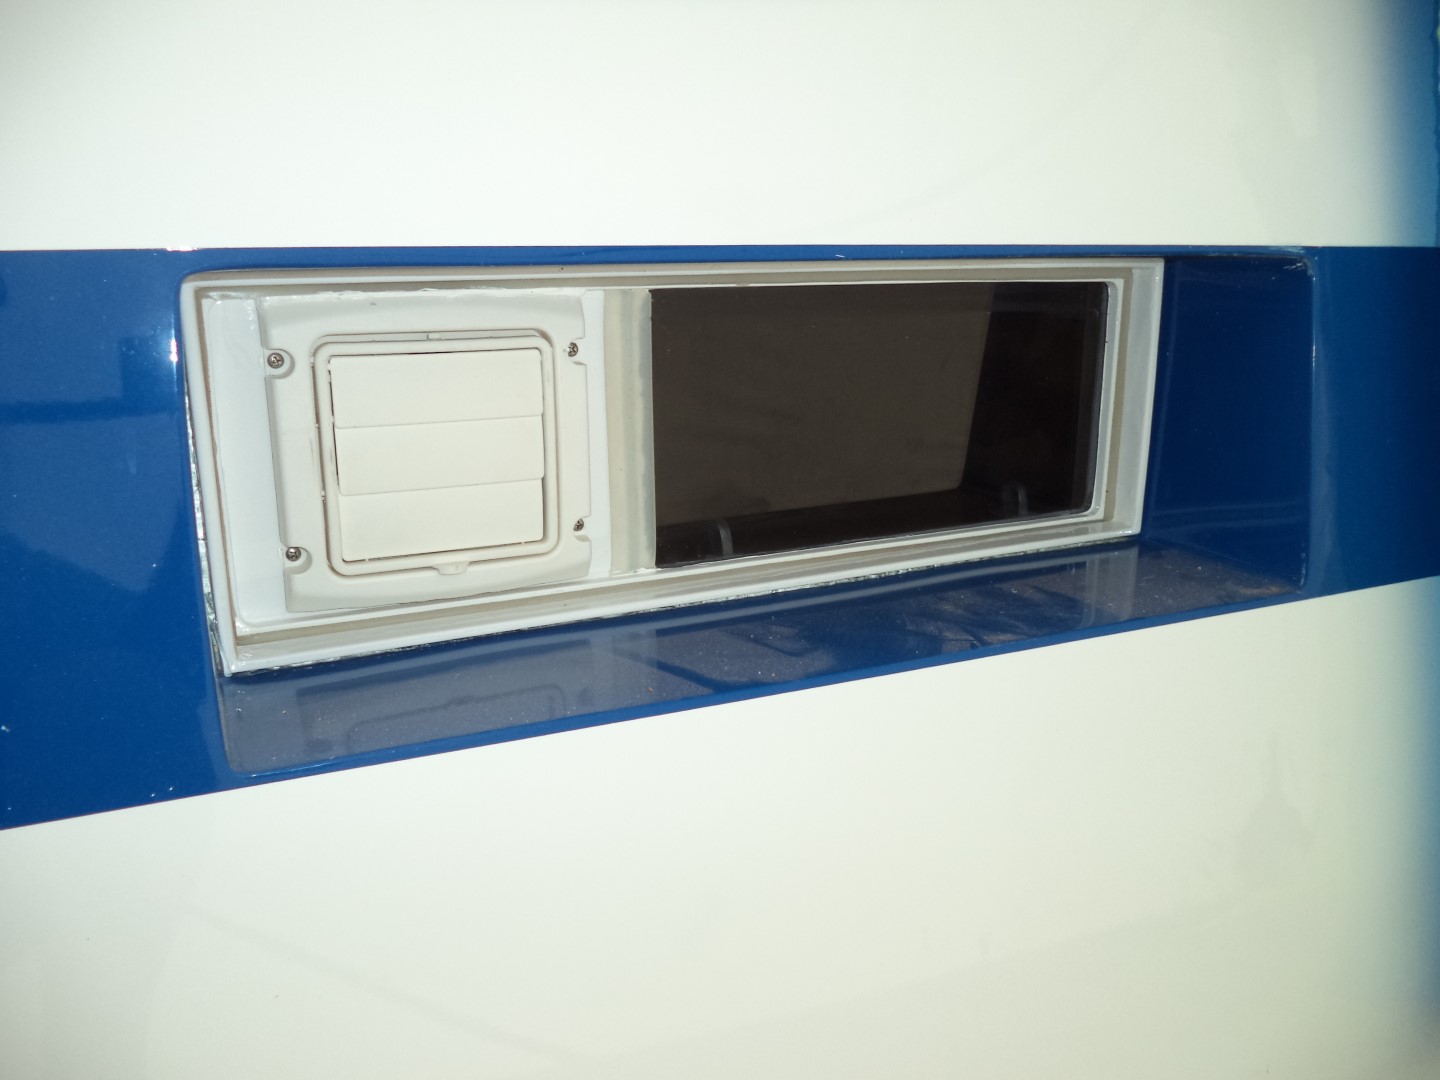
The dryer vent outlet plate I made FINALLY came back from the paint shop along with some other items I'll be writing about soon. It's too cold to paint in the tent, so it's good that Weaver Boatworks let's the painter there do side jobs with their spray booth.
The plate getting painted was the last thing I needed to put the laundry closet dryer vent porthole together. I gotta say, it turned out really well. I installed it and the last transom porthole, so now all the portholes are installed. The boat's getting very close to being weather-proof.
1969 Chris Craft Roamer 46 Refit: Installing the Last of the Portholes
Cheers,
Q