Headstock Reassembly Quill/feed (A)

Forum for Maintenance and Repair topics. Feel free to ask questions or contribute.

Moderator: admin

Post Reply
User avatar
JPG
Platinum Member
Posts: 35433
Joined: Wed Dec 10, 2008 7:42 pm
Location: Lexington, Ky (TAMECAT territory)

Headstock Reassembly Quill/feed (A)

Post by JPG »

This thread shows a method of reassembling the quill and quill feed into a headstock. This thread is the first of three.

hsasmq0.jpg
hsasmq0.jpg (445.41 KiB) Viewed 5592 times
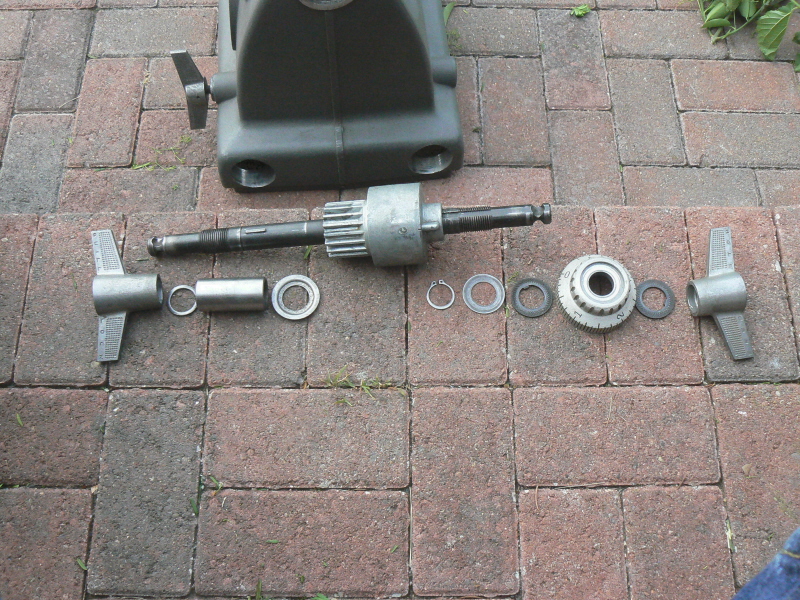
This shows the sequence the various parts are assembled onto the quill feed shaft. Early Mark 5 did not have the flat washer between the retaining ring and the first serrated washer.[3/21/2012]

hsasmq1.jpg
hsasmq1.jpg (328.4 KiB) Viewed 5585 times
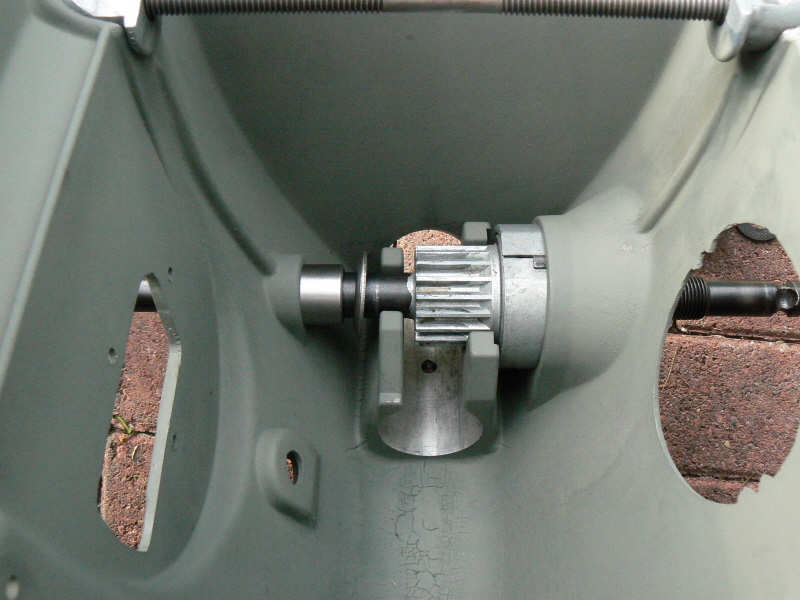
Slide the quill feed shaft into the headstock. The spring housing goes into the larger headstock hole. Slip the cup washer and sleeve on to the shaft at the other end. Notice the orientation of the cup washer. The 'flat' outer circumference faces the casting 'ears'.(faces right in the pix) The sleeve has a keyway in the inside which must align with a key on the shaft.

hsasmq2.jpg
hsasmq2.jpg (363.55 KiB) Viewed 5584 times
Notice the index mark and feed stop are at the 'top' of the 'larger' hole. Slip the retaining ring onto the shaft and into the groove.

hsasmq3.jpg
hsasmq3.jpg (378.62 KiB) Viewed 5575 times
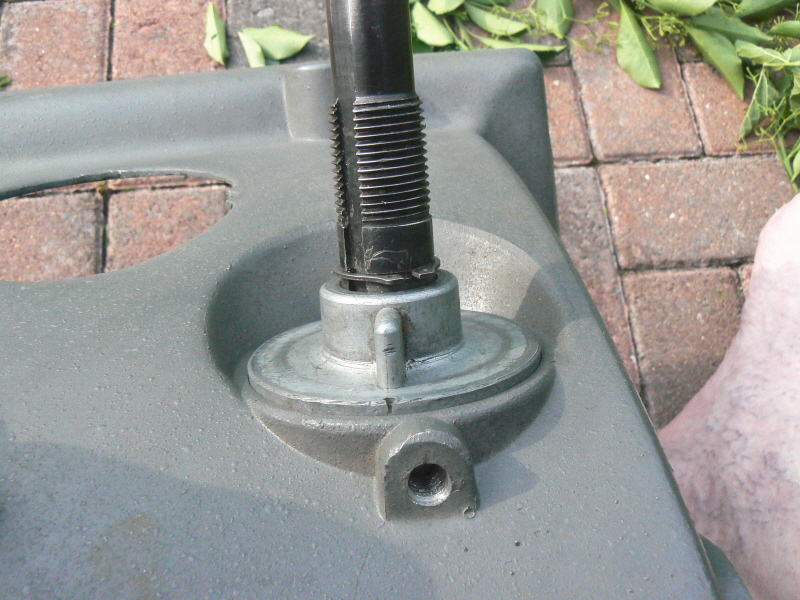
Slip the spring washer and wing nut onto the 'other ' end of the quill feed shaft and lightly snug it up.


This thread is intended to be ONE of several showing reassembly of a disassembled headstock. A single thread titled Headstock Reassembly https://forum.shopsmith.com/viewtopic.php?t=3765 links to all of these threads. These threads will be edited as necessary to correct any errors or confusion.

This thread is the first of 3 showing quill and quill feed reassembly.
╔═══╗
╟JPG ╢
╚═══╝

Goldie(Bought New SN 377425)/4" jointer/6" beltsander/12" planer/stripsander/bandsaw/powerstation /Scroll saw/Jig saw /Craftsman 10" ras/Craftsman 6" thicknessplaner/ Dayton10"tablesaw(restoredfromneighborstrashpile)/ Mark VII restoration in 'progress'/ 10
E[/size](SN E3779) restoration in progress, a 510 on the back burner and a growing pile of items to be eventually returned to useful life. - aka Red Grange
rustysaw
Silver Member
Posts: 10
Joined: Tue Jan 04, 2011 4:44 pm

Headstock quill reassembly

Post by rustysaw »

The info sent is really helpful to me,it is nice to see a picture of parts
to understand what it looks like before I try to take it a part.In the first picture
it show's a retainer clip and a large washer. I don't have these part's
on my unit, how important are these part's to move the quill. I am going to take
unit apart this week.
User avatar
JPG
Platinum Member
Posts: 35433
Joined: Wed Dec 10, 2008 7:42 pm
Location: Lexington, Ky (TAMECAT territory)

Post by JPG »

rustysaw wrote:The info sent is really helpful to me,it is nice to see a picture of parts
to understand what it looks like before I try to take it a part.In the first picture
it show's a retainer clip and a large washer. I don't have these part's
on my unit, how important are these part's to move the quill. I am going to take
unit apart this week.

Those two parts are 'hidden' inside/under the 'dial'. The retaining ring does just that and provides a stop for the 'large' flat washer which provides a surface for the inside keyed/serrated face washer to press against when the wing nut is tightened. They only contribute to the 'stop' function.
╔═══╗
╟JPG ╢
╚═══╝

Goldie(Bought New SN 377425)/4" jointer/6" beltsander/12" planer/stripsander/bandsaw/powerstation /Scroll saw/Jig saw /Craftsman 10" ras/Craftsman 6" thicknessplaner/ Dayton10"tablesaw(restoredfromneighborstrashpile)/ Mark VII restoration in 'progress'/ 10
E[/size](SN E3779) restoration in progress, a 510 on the back burner and a growing pile of items to be eventually returned to useful life. - aka Red Grange
Post Reply