JPG40504 wrote:1) As Dusty said, the first pix clearly shows a 510 table/rail. I would add that the rails are the later(post1986) version.
2) the tapped/clearance holes in the table are one of the differences between the old/later 510 table/rails(older tapped, newer clearance)
3) The newer 510 version used washers and nuts(with integrated lockwasher) to secure the rails which had a threaded stud which was inserted through the hole.(The earlier version had torx screws which screwed into the tapped hole in the table(s).
4) The original nuts and washers are used in fastening the new rails to the table. The 'kit' should have both new bolts and spacers.
5) Since you have a 'surplus' of tables, perhaps you have more than one 'version'(tapped/clearance table holes)
P.S. KEAKAP: Bet you won't have this confusion! :>}
Am I confused again? Are we attempting to install 510 rails or 520 rails? If we are working on 510 tables and rails - disregard all of my posts, please.
"Making Sawdust Safely" Dusty
Sent from my Dell XPS using Firefox.
Amen to your post. I'm a no instructions guy too, but the last thing I want to do is mess up my Shop Smith, so I thought I would be really really careful.
Putting the instructions aside it all makes perfect sense thus far. Front is all set, turning the table around
The next task will be alignment of the rails to the table top (working surface).
If you have questions there, let's handle those on a separate thread. I discarded that procedure too. The procedure in the installation sheets works; I'm just not one for following procedures (at least not up front).
Instructions are for use during a recovery process.
"Making Sawdust Safely" Dusty
Sent from my Dell XPS using Firefox.
dusty wrote:Am I confused again? Are we attempting to install 510 rails or 520 rails? If we are working on 510 tables and rails - disregard all of my posts, please.
He is(was) trying to upgrade from a 510 to 520. He apparently got confused because he was reading the procedure for upgrading an older(pre1986) 510.
I was attempting to explain to him the differences between the old and the newer version. He also alluded to having 'extra' tables, and I thought he might have both versions.
Seems it is all under control now! HURRAY!
╔═══╗
╟JPG ╢
╚═══╝
Goldie(Bought New SN 377425)/4" jointer/6" beltsander/12" planer/stripsander/bandsaw/powerstation /Scroll saw/Jig saw /Craftsman 10" ras/Craftsman 6" thicknessplaner/ Dayton10"tablesaw(restoredfromneighborstrashpile)/ Mark VII restoration in 'progress'/ 10E[/size](SN E3779) restoration in progress, a 510 on the back burner and a growing pile of items to be eventually returned to useful life. - aka Red Grange
JPG40504 wrote:1)
P.S. KEAKAP: Bet you won't have this confusion! :>}
Got that right!
My upgrade hasn't even shipped yet (tho it's in manufacturing at least) but I swear I can put it together already in my sleep (which I've done three nights in a row awready).
Btw, is the "button head screw" the old locking screw? If so, does the kit mention that it is no longer used?
Btw, is the "button head screw" the old locking screw? If so, does the kit mention that it is no longer used?
Yes, the button head screws are the new locking screws.
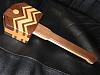
Front extension table screw:
[ATTACH]5904[/ATTACH]
Notice the spring around the threads? I assume it is so the locking bolt will not vibrate loose during use, especially without the extension tubes being used.

 Southern California (---