The next project MAY be a pair of these louver doors. Louvers don't move but you can see through them. Would get some more major brownie points with SWMBO. She had purchased a set for her office closet door and they cost her $150 for two 24" x 80". We have another closet she wanted to also buy a set for that measures 54" x 96". That put it into custom build size so I figured it may be worth giving it a try. I'd have to reverse engineer since there are no plans. I'll decide this week. So what do you think on a difficulty level?? 1 easy 5 hard
.
.
[ATTACH]8945[/ATTACH]
.
.
mickyd's Woodworking Projects
Moderator: admin
About an 8.mickyd wrote:The next project MAY be a pair of these louver doors. Louvers don't move but you can see through them. Would get some more major brownie points with SWMBO. She had purchased a set for her office closet door and they cost her $150 for two 24" x 80". We have another closet she wanted to also buy a set for that measures 54" x 96". That put it into custom build size so I figured it may be worth giving it a try. I'd have to reverse engineer since there are no plans. I'll decide this week. So what do you think on a difficulty level?? 1 easy 5 hard
.
.
[ATTACH]8945[/ATTACH]
.
.
Bob
Don't try to make sense out of nonsense!
Don't try to make sense out of nonsense!
-
shipwright

- Platinum Member
- Posts: 1165
- Joined: Tue Dec 15, 2009 7:28 pm
- Location: Vancouver Island, Canada
- Contact:
For an "official pretty darn good woodworker" (herinafter OPDGWW) like yourself, Mike, I'd say it's about a 3 out of five. I have done several for yacht interiors and can tell you that they are, as are most all woodworking projects, simply a series of steps and in the case of these type of doors none of those steps is beyond the capabilities that you have already demonstrated. I also applaud you for the decision to "explore and design" for yourself. When you finally succeed the feeling of accomplishment will be (deservedly) that much greater than from following someone else's plans. Good luck, but more importantly, have fun.
Paul M
Paul M
Paul M ........ The early bird gets the worm but the second mouse gets the cheese
-
JPG

- Platinum Member
- Posts: 35598
- Joined: Wed Dec 10, 2008 7:42 pm
- Location: Lexington, Ky (TAMECAT territory)
PTL! They be DONE! At $0.05 per hour, how much did they cost?:D
The things learned, Priceless!
The satisfaction acquired - only you know!
Shutters - You will get very tired of making the 'louvers'. The raised panel lower portion will be an education.
Lotsa opportunities for goof ups.
Will take more raw material than you would think at first.
A bandsaw would make resawing the louvers less difficult(An excuse/reason to go get one!:D).
At the rate of the lanterns, you should get them finished by 2020!;)
Using your 1-5 scale, a 3.5! A 5 would be something Charlese or Shipwright (and others) would take on!
╔═══╗
╟JPG ╢
╚═══╝
Goldie(Bought New SN 377425)/4" jointer/6" beltsander/12" planer/stripsander/bandsaw/powerstation /Scroll saw/Jig saw /Craftsman 10" ras/Craftsman 6" thicknessplaner/ Dayton10"tablesaw(restoredfromneighborstrashpile)/ Mark VII restoration in 'progress'/ 10E[/size](SN E3779) restoration in progress, a 510 on the back burner and a growing pile of items to be eventually returned to useful life. - aka Red Grange
-
mbcabinetmaker
- Platinum Member
- Posts: 1627
- Joined: Thu Jul 20, 2006 6:18 am
- Location: Greer SC
Congratulations Mike!!!! A superb effort and product.
As far as the louvered doors, if you don't need air flow, you might want to pick this up for your router....
http://www.rockler.com/product.cfm?page ... ter=louver
Been watching it since it came out and waiting for a review......now it's your turn.
As far as the louvered doors, if you don't need air flow, you might want to pick this up for your router....
http://www.rockler.com/product.cfm?page ... ter=louver
Been watching it since it came out and waiting for a review......now it's your turn.
Craig
Hartland, WI
-Mark 5 "Greenie" S/N 342238, Manuf. mmm/mmm 1957, Acq. Oct. 2008, Joiner S/N M067266
-10 E/ER(?) S/N Unknown, Joiner 4E S/N 40051
Hartland, WI
-Mark 5 "Greenie" S/N 342238, Manuf. mmm/mmm 1957, Acq. Oct. 2008, Joiner S/N M067266
-10 E/ER(?) S/N Unknown, Joiner 4E S/N 40051
-
horologist

- Gold Member
- Posts: 431
- Joined: Sat Dec 22, 2007 6:36 pm
- Location: Melrose, FL
The new water heater will be installed on Monday. When I asked the plumber about a drain pan, he said these are required. In all the damage was minor, just a serious nuisance.
Better late than never.... The finished product looks great perhaps some of this will help on your next batch.
The bench block is a simple thing to make and the following photos should give enough info to make one. It is one of the handiest tools in my shop.
[ATTACH]8955[/ATTACH]
[ATTACH]8956[/ATTACH]
The surface you clamp it to should be pretty high. My bench is 37" high, this puts it in your precision working range. Magnification is also helpful, I find myself using my Optivisor more and more.
The saw should be held so the blade is vertical and the work is held down with your free hand, assuming it isn't holding a camera at the time.
[ATTACH]8957[/ATTACH]
An old project shown with a few files. It is hard to have too many small files! The box with the old Nicholson escapement files is a favorite.
[ATTACH]8958[/ATTACH]
Saw frames come in all sizes. Technically the long one in the back isn't a saw but it arrived today and I had to include it.
[ATTACH]8959[/ATTACH]
The frames with the deeper throat allow you to cut larger items but are not as good for maintaining proper blade tension.
Some helpful points, many apply equally well to hand or power saws.
1. Keep in mind where your fingers are, even though hand powered these saws can give a nasty cut very quickly. I learned this lesson once after a particularly long sawing session.
2. Use steady strokes and let the blade do the work. Make sure the blade is moving any time you are attempting to change blade direction. Heavier blades are more forgiving but the fine ones will snap every time. My finest blades are about 0.008" thick.
3. If you have to make a long cut it is a good idea to make radial relief cuts so the waste can fall away in smaller bits. Attempting to back a blade out of a long cut is a sure fire way to break a blade.
4. There are people who say it is vital to lubricate the blade with bees wax, I have tried this and see no difference in cutting ability or blade life. If you are using the wax to cut something that has a paper template then it tends to stain the paper as you cut, making the line hard to see.
5. Good blade tension is important, it should make a nice "ping" when you pluck the blade.
6. High quality blades are much less expensive than cheap blades.
No doubt I have missed a few but this should give you a start.
Troy
- Attachments
-
- top.jpg (132.74 KiB) Viewed 3583 times
-
- side.jpg (61.57 KiB) Viewed 3582 times
-
- inuse.jpg (161.52 KiB) Viewed 3582 times
-
- hand.jpg (100.92 KiB) Viewed 3584 times
-
- saws.jpg (80.48 KiB) Viewed 3581 times
The best equipped laundry room in the neighborhood...
-
mickyd

- Platinum Member
- Posts: 2999
- Joined: Mon Feb 09, 2009 1:18 pm
- Location: San Diego, CA
- Contact:
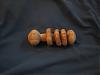
I wouldn't feel right closing out my candle lantern project without posting the stats for material usage and overall cost.
I started out with 2 B.F. (based on ACTUAL lumber dimensions) of African Mahogany (aka sepele). I had 4 nice left over 'scrap' 1 x 4 x 8 flooring pieces courtesy mbcabinatmaker along with a 1 x 8 x 32 board purchased at a local hardwood supplier.
I kept all scrap as I went along. The photo below shows what was left over in the end.
.
.
[ATTACH]9050[/ATTACH]
.
.
.
The 'waste' weighed just shy of 2-1/2 lbs. Based on the pounds per B.F. info provided on Nick's website, that means I had about 1 B.F. left over.
.
.
[ATTACH]9051[/ATTACH]
.
.
Total ACTUAL material used was about 1 B.F. (works out to a 50% waste factor). That on-line board foot calculator I used worked great. Had I entered 50% waste vs. 20%, it would have estimated exactly.
Total wood expense.....2.5 B.F. (nominal). x $7.30 / B.F. = $14.
Copper motifs required a 10" x 4" x .025" sheet of copper shim stock.......$10
Spectrum cord glass $17. (Had to buy $50 worth to meet order minimum, enough for 4 sets).
Grand total (excluding labor)....$41.
Grand total (including labor)......$1500
- Attachments
-
- Img_8523mod.jpg (77.74 KiB) Viewed 3528 times
-
- Img_8524mod.jpg (49.92 KiB) Viewed 3527 times
Mike
Sunny San Diego
Sunny San Diego
