efmaron wrote:Peter,
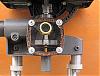
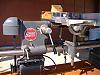
That is a beautiful piece of sharpening equipment you made. As others have said I do not see a need for you to buy one yours looks great.
I do not do any turning but I do a lot of carving and one thing that bothers me when reading threads on sharpening lathe chisels. How do you remove the burr left from grinding. Shipwright stated that he touches up his chisel every few minutes with the strip sander.
When carving my knives and chisels are sharpened I use several grit stones to remove the burr from the previous grit and then use a strop to polish them to a mirror finish. They never see a grinder again unless they get nicked and I stop every few minutes to strop them to remove the fine burr on the cutting edge.
Would this method work on lathe chisels and what do you do to remove the burr left from grinding?
With 'scraping' chisels, the burr is left on and acts as a 'razor' edge. Cutting chisels can be 'deburred' as you mentioned.(assuming you concern yourself with it) Since considerably more force is used when turning, the degree of 'sharpness' can be less than that needed for hand carving.
What you have described is referred to by many folks as 'scarey sharp'!:eek: