[ATTACH]10006[/ATTACH]
I have prepared the stock for the legs. They will be 5 inches wide and made up in sections. The center sections will be fluted. The piece to the right is for the plinth block on the upper cabinet. We will get to it later.
[ATTACH]10007[/ATTACH]
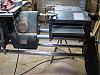
I have set up my Williams Hussey machine with a knife that cuts 4 flutes at one time.
[ATTACH]10008[/ATTACH]
This is the stock going in.
[ATTACH]10009[/ATTACH]
This is the fluted board coming out.
Mantel with glass door cabinet above
Moderator: admin
-
mbcabinetmaker
- Platinum Member
- Posts: 1627
- Joined: Thu Jul 20, 2006 6:18 am
- Location: Greer SC
- Attachments
-
- P1020818.JPG (293.65 KiB) Viewed 1391 times
-
- P1020820.JPG (345.96 KiB) Viewed 1390 times
-
- P1020821.JPG (338.29 KiB) Viewed 1388 times
-
- P1020822.JPG (313.81 KiB) Viewed 1391 times
****************
****************
Mark
2017 Power Pro Mark 7
2002 50th anniversary model 520
and a few other woodworking tools.
****************
Mark
2017 Power Pro Mark 7
2002 50th anniversary model 520
and a few other woodworking tools.
-
mbcabinetmaker
- Platinum Member
- Posts: 1627
- Joined: Thu Jul 20, 2006 6:18 am
- Location: Greer SC
[ATTACH]10015[/ATTACH]
I will use pocket screw joinery for the legs.
[ATTACH]10016[/ATTACH]
A little glue to help with the holding.
[ATTACH]10017[/ATTACH]
This works good when clamped to the edge of a work bench. I have a special ledge on mine just for working with pocket screws and face frames.
[ATTACH]10019[/ATTACH]
A view from the face side.
[ATTACH]10020[/ATTACH]
The legs are ready for the drum sander.
I will use pocket screw joinery for the legs.
[ATTACH]10016[/ATTACH]
A little glue to help with the holding.
[ATTACH]10017[/ATTACH]
This works good when clamped to the edge of a work bench. I have a special ledge on mine just for working with pocket screws and face frames.
[ATTACH]10019[/ATTACH]
A view from the face side.
[ATTACH]10020[/ATTACH]
The legs are ready for the drum sander.
- Attachments
-
- P1020836.JPG (299.5 KiB) Viewed 1369 times
-
- P1020838.JPG (290.09 KiB) Viewed 1370 times
-
- P1020841.JPG (321.66 KiB) Viewed 1366 times
-
- P1020842.JPG (320.21 KiB) Viewed 1367 times
-
- P1020843.JPG (183.41 KiB) Viewed 1365 times
****************
****************
Mark
2017 Power Pro Mark 7
2002 50th anniversary model 520
and a few other woodworking tools.
****************
Mark
2017 Power Pro Mark 7
2002 50th anniversary model 520
and a few other woodworking tools.
-
mbcabinetmaker
- Platinum Member
- Posts: 1627
- Joined: Thu Jul 20, 2006 6:18 am
- Location: Greer SC
[ATTACH]10021[/ATTACH]
I have retrieved the breast plate and will sand it and the legs at the same time.
[ATTACH]10022[/ATTACH]
[ATTACH]10023[/ATTACH]
There is some nasty looking saw marks on the legs that we need to remove before proceeding.
[ATTACH]10024[/ATTACH]
My preferred method for this operation is a sharp block plane.
[ATTACH]10025[/ATTACH]
Those are some really white shavings.
I have retrieved the breast plate and will sand it and the legs at the same time.
[ATTACH]10022[/ATTACH]
[ATTACH]10023[/ATTACH]
There is some nasty looking saw marks on the legs that we need to remove before proceeding.
[ATTACH]10024[/ATTACH]
My preferred method for this operation is a sharp block plane.
[ATTACH]10025[/ATTACH]
Those are some really white shavings.
- Attachments
-
- P1020844.jpg (309.26 KiB) Viewed 1366 times
-
- P1020846.jpg (311.54 KiB) Viewed 1363 times
-
- P1020847.jpg (282.72 KiB) Viewed 1365 times
-
- P1020848.jpg (315.44 KiB) Viewed 1363 times
-
- P1020849.jpg (298.71 KiB) Viewed 1361 times
****************
****************
Mark
2017 Power Pro Mark 7
2002 50th anniversary model 520
and a few other woodworking tools.
****************
Mark
2017 Power Pro Mark 7
2002 50th anniversary model 520
and a few other woodworking tools.
-
mbcabinetmaker
- Platinum Member
- Posts: 1627
- Joined: Thu Jul 20, 2006 6:18 am
- Location: Greer SC
[ATTACH]10026[/ATTACH]
We will join the legs and breast plate with dominos.
[ATTACH]10027[/ATTACH]
[ATTACH]10028[/ATTACH]
While this is tacking up I need to run some crown molding, two types of base cap and some edge molding.
[ATTACH]10029[/ATTACH]
3 1/2 inch crown
[ATTACH]10030[/ATTACH]
This is the way that I remove saw marks from stock under 3 inches wide. I just gang up 2 or 3 pieces and run them through the planer on each side. I take off 1/16" per pass so if I want 1 1/2" inch finished stock I'll rip it 1 5/8" wide.
We will join the legs and breast plate with dominos.
[ATTACH]10027[/ATTACH]
[ATTACH]10028[/ATTACH]
While this is tacking up I need to run some crown molding, two types of base cap and some edge molding.
[ATTACH]10029[/ATTACH]
3 1/2 inch crown
[ATTACH]10030[/ATTACH]
This is the way that I remove saw marks from stock under 3 inches wide. I just gang up 2 or 3 pieces and run them through the planer on each side. I take off 1/16" per pass so if I want 1 1/2" inch finished stock I'll rip it 1 5/8" wide.
- Attachments
-
- P1020859.jpg (289.28 KiB) Viewed 1362 times
-
- P1020853.jpg (331.15 KiB) Viewed 1360 times
-
- P1020860.jpg (328.49 KiB) Viewed 1360 times
-
- P1020867.jpg (316.78 KiB) Viewed 1362 times
-
- P1020869.jpg (211.31 KiB) Viewed 1360 times
****************
****************
Mark
2017 Power Pro Mark 7
2002 50th anniversary model 520
and a few other woodworking tools.
****************
Mark
2017 Power Pro Mark 7
2002 50th anniversary model 520
and a few other woodworking tools.
-
mbcabinetmaker
- Platinum Member
- Posts: 1627
- Joined: Thu Jul 20, 2006 6:18 am
- Location: Greer SC
[ATTACH]10038[/ATTACH]
[ATTACH]10037[/ATTACH]
Our next step is to build the mantle body out the depth of the marble from the sheetrock. The marble measures 1 3/8" so I have prepared some 1 1/2" strips to attach to the back of the legs.
[ATTACH]10039[/ATTACH]
Now we have the body of the mantle ready to sand and figure out the shelf.
[ATTACH]10040[/ATTACH]
All sanded up.
[ATTACH]10041[/ATTACH]
This 3 1/2" crown projects out 2". The edge molding starts there and projects an additional 3/4". I want the mantle shelf to be 8 inches deep. I will cut two pieces of plywood 7 1/4" and 4 inches longer than the mantle body or 61 1/2".
[ATTACH]10037[/ATTACH]
Our next step is to build the mantle body out the depth of the marble from the sheetrock. The marble measures 1 3/8" so I have prepared some 1 1/2" strips to attach to the back of the legs.
[ATTACH]10039[/ATTACH]
Now we have the body of the mantle ready to sand and figure out the shelf.
[ATTACH]10040[/ATTACH]
All sanded up.
[ATTACH]10041[/ATTACH]
This 3 1/2" crown projects out 2". The edge molding starts there and projects an additional 3/4". I want the mantle shelf to be 8 inches deep. I will cut two pieces of plywood 7 1/4" and 4 inches longer than the mantle body or 61 1/2".
- Attachments
-
- P1020934.jpg (188.17 KiB) Viewed 1349 times
-
- P1020931.jpg (187.38 KiB) Viewed 1348 times
-
- P1020935.jpg (297.81 KiB) Viewed 1348 times
-
- P1020946.jpg (326.28 KiB) Viewed 1349 times
-
- P1020945.jpg (190.38 KiB) Viewed 1346 times
****************
****************
Mark
2017 Power Pro Mark 7
2002 50th anniversary model 520
and a few other woodworking tools.
****************
Mark
2017 Power Pro Mark 7
2002 50th anniversary model 520
and a few other woodworking tools.
-
mbcabinetmaker
- Platinum Member
- Posts: 1627
- Joined: Thu Jul 20, 2006 6:18 am
- Location: Greer SC
[ATTACH]10042[/ATTACH]
[ATTACH]10043[/ATTACH]
I have attached the first piece of plywood with brads and screws. Notice that it hangs over by 2 inches on each end. This is the amount that the crown molding projects. I will glue the second piece of plywood to the first one and attach it with brads. This will create the very top of the mantle. The edge molding is 1 1/2" tall and will cover the plywood grain.
[ATTACH]10044[/ATTACH]
The next step is to determine the bottom of the crown molding. By bedding a piece and measuring the height I have concluded that it is 2 7/8" tall. We will need a piece of plywood at that location that is 2 inches less that the 7 1/4" top pieces. We also have to deduct the depth of the mantle body which is 2 1/4". This piece comes out to 3" and is the length of the mantle body. I have attached it with a spacer of 2 1/8" to give us the 2 7/8" required in height.
[ATTACH]10045[/ATTACH]
The next step is to wrap the crown molding.
[ATTACH]10046[/ATTACH]
Final step in finishing the shelf is to wrap the edge molding around the 2 layers of plywood fill all nail holes and sand when dry.
[ATTACH]10043[/ATTACH]
I have attached the first piece of plywood with brads and screws. Notice that it hangs over by 2 inches on each end. This is the amount that the crown molding projects. I will glue the second piece of plywood to the first one and attach it with brads. This will create the very top of the mantle. The edge molding is 1 1/2" tall and will cover the plywood grain.
[ATTACH]10044[/ATTACH]
The next step is to determine the bottom of the crown molding. By bedding a piece and measuring the height I have concluded that it is 2 7/8" tall. We will need a piece of plywood at that location that is 2 inches less that the 7 1/4" top pieces. We also have to deduct the depth of the mantle body which is 2 1/4". This piece comes out to 3" and is the length of the mantle body. I have attached it with a spacer of 2 1/8" to give us the 2 7/8" required in height.
[ATTACH]10045[/ATTACH]
The next step is to wrap the crown molding.
[ATTACH]10046[/ATTACH]
Final step in finishing the shelf is to wrap the edge molding around the 2 layers of plywood fill all nail holes and sand when dry.
- Attachments
-
- P1020947.jpg (290.51 KiB) Viewed 1347 times
-
- P1020949.jpg (298.35 KiB) Viewed 1346 times
-
- P1020963.jpg (168.38 KiB) Viewed 1346 times
-
- P1020972.jpg (283.19 KiB) Viewed 1348 times
-
- P1020974.jpg (175.14 KiB) Viewed 1348 times
****************
****************
Mark
2017 Power Pro Mark 7
2002 50th anniversary model 520
and a few other woodworking tools.
****************
Mark
2017 Power Pro Mark 7
2002 50th anniversary model 520
and a few other woodworking tools.
-
JPG

- Platinum Member
- Posts: 35600
- Joined: Wed Dec 10, 2008 7:42 pm
- Location: Lexington, Ky (TAMECAT territory)
Were the pilaster shelf supports deleted by the 'customer'?
╔═══╗
╟JPG ╢
╚═══╝
Goldie(Bought New SN 377425)/4" jointer/6" beltsander/12" planer/stripsander/bandsaw/powerstation /Scroll saw/Jig saw /Craftsman 10" ras/Craftsman 6" thicknessplaner/ Dayton10"tablesaw(restoredfromneighborstrashpile)/ Mark VII restoration in 'progress'/ 10E[/size](SN E3779) restoration in progress, a 510 on the back burner and a growing pile of items to be eventually returned to useful life. - aka Red Grange
╟JPG ╢
╚═══╝
Goldie(Bought New SN 377425)/4" jointer/6" beltsander/12" planer/stripsander/bandsaw/powerstation /Scroll saw/Jig saw /Craftsman 10" ras/Craftsman 6" thicknessplaner/ Dayton10"tablesaw(restoredfromneighborstrashpile)/ Mark VII restoration in 'progress'/ 10E[/size](SN E3779) restoration in progress, a 510 on the back burner and a growing pile of items to be eventually returned to useful life. - aka Red Grange
-
mbcabinetmaker
- Platinum Member
- Posts: 1627
- Joined: Thu Jul 20, 2006 6:18 am
- Location: Greer SC
JPG the supports or corbels have not been decided upon. I have designed it for this corbel [ATTACH]10049[/ATTACH] but it will be decided upon after installation.
- Attachments
-
- 8005.jpg (1.46 KiB) Viewed 1339 times
****************
****************
Mark
2017 Power Pro Mark 7
2002 50th anniversary model 520
and a few other woodworking tools.
****************
Mark
2017 Power Pro Mark 7
2002 50th anniversary model 520
and a few other woodworking tools.
-
JPG
- Platinum Member
- Posts: 35600
- Joined: Wed Dec 10, 2008 7:42 pm
- Location: Lexington, Ky (TAMECAT territory)
Knew 'corbel' was applicable to masonry, did not realize it was correct term here.mbcabinetmaker wrote:JPG the supports or corbels have not been decided upon. I have designed it for this corbel [ATTACH]10049[/ATTACH] but it will be decided upon after installation.
Pay attention, learning is there if you be observant(and ask the relevant question)! Thanks!
╔═══╗
╟JPG ╢
╚═══╝
Goldie(Bought New SN 377425)/4" jointer/6" beltsander/12" planer/stripsander/bandsaw/powerstation /Scroll saw/Jig saw /Craftsman 10" ras/Craftsman 6" thicknessplaner/ Dayton10"tablesaw(restoredfromneighborstrashpile)/ Mark VII restoration in 'progress'/ 10E[/size](SN E3779) restoration in progress, a 510 on the back burner and a growing pile of items to be eventually returned to useful life. - aka Red Grange
╟JPG ╢
╚═══╝
Goldie(Bought New SN 377425)/4" jointer/6" beltsander/12" planer/stripsander/bandsaw/powerstation /Scroll saw/Jig saw /Craftsman 10" ras/Craftsman 6" thicknessplaner/ Dayton10"tablesaw(restoredfromneighborstrashpile)/ Mark VII restoration in 'progress'/ 10E[/size](SN E3779) restoration in progress, a 510 on the back burner and a growing pile of items to be eventually returned to useful life. - aka Red Grange