
Excellent work on the restoration job! I'm pleased you chose to upgrade the quill and utilize Bill Mayo's services. I'm sure you will be pleased with the lathe and drilling performance. Bill installed a reverse switch in my motor and I ended up with a whole new/rebuilt motor.
If you have a copy of the self-study course, that may be a great place to start with your son. It's simple yet necessary instruction. Also, I would use a wire brush and take the paint of the work surface of the tool rest. That will provide a smoother surface for the lathe chisels to glide on and will be less likely to "skip" or catch on the comparatively rough painted surface. Just my two cents!
Oh, and be sure your son is included in the alignment procedures so he will have a better idea as to when and why things are off.
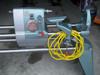
Our finally restored greenie
Moderator: admin
-
robinson46176

- Platinum Member
- Posts: 4182
- Joined: Mon Mar 09, 2009 9:00 pm
- Location: Central Indiana (Shelbyville)
ddvann79 wrote: Also, I would use a wire brush and take the paint of the work surface of the tool rest. That will provide a smoother surface for the lathe chisels to glide on and will be less likely to "skip" or catch on the comparatively rough painted surface. Just my two cents!
On my restorations I clamped the tool rest in a vise and draw-filed the top face and even the face that is toward the work piece. I then wrapped polishing cloth around the file and polished those surfaces down to a fine finish. When I painted them I masked off the top face and didn't paint it. I did wax it after the paint dried well. Any roughness on a tool rest at all is grounds for me to start polishing...
.
--
farmer
Francis Robinson
I did not equip with Shopsmiths in spite of the setups but because of them.
1 1988 - Mark V 510 (bought new), 4 Poly vee 1 1/8th HP Mark V's, Mark VII, 1 Mark V Mini, 1 Frankensmith, 1 10-ER, 1 Mark V Push-me-Pull-me Drillpress, SS bandsaw, belt sander, jointer, jigsaw, shaper attach, mortising attach, TS-3650 Rigid tablesaw, RAS, 6" long bed jointer, Foley/Belsaw Planer/molder/ripsaw, 1" sander, oscillating spindle/belt sander, Scroll saw, Woodmizer sawmill

-
robinson46176
- Platinum Member
- Posts: 4182
- Joined: Mon Mar 09, 2009 9:00 pm
- Location: Central Indiana (Shelbyville)
robinson46176 wrote:On my restorations I clamped the tool rest in a vise and draw-filed the top face and even the face that is toward the work piece. I then wrapped polishing cloth around the file and polished those surfaces down to a fine finish. When I painted them I masked off the top face and didn't paint it. I did wax it after the paint dried well. Any roughness on a tool rest at all is grounds for me to start polishing....
It occurred to me that draw-filing and using a file and polishing cloth together for polishing might be alien to some so here is a link to a video that shows it well. Note: when I saw the video I did not have the sound on but I "think" that he was saying all of the right things.
http://www.youtube.com/watch?v=Dec78RQsokw
.
--
farmer
Francis Robinson
I did not equip with Shopsmiths in spite of the setups but because of them.
1 1988 - Mark V 510 (bought new), 4 Poly vee 1 1/8th HP Mark V's, Mark VII, 1 Mark V Mini, 1 Frankensmith, 1 10-ER, 1 Mark V Push-me-Pull-me Drillpress, SS bandsaw, belt sander, jointer, jigsaw, shaper attach, mortising attach, TS-3650 Rigid tablesaw, RAS, 6" long bed jointer, Foley/Belsaw Planer/molder/ripsaw, 1" sander, oscillating spindle/belt sander, Scroll saw, Woodmizer sawmill
farmer
Francis Robinson
I did not equip with Shopsmiths in spite of the setups but because of them.
1 1988 - Mark V 510 (bought new), 4 Poly vee 1 1/8th HP Mark V's, Mark VII, 1 Mark V Mini, 1 Frankensmith, 1 10-ER, 1 Mark V Push-me-Pull-me Drillpress, SS bandsaw, belt sander, jointer, jigsaw, shaper attach, mortising attach, TS-3650 Rigid tablesaw, RAS, 6" long bed jointer, Foley/Belsaw Planer/molder/ripsaw, 1" sander, oscillating spindle/belt sander, Scroll saw, Woodmizer sawmill
-
dusty

- Platinum Member
- Posts: 21481
- Joined: Wed Nov 22, 2006 6:52 am
- Location: Tucson (Wildcat Country), Arizona
This same link makes available a video on a cold blue process the might work on chucks,etc.robinson46176 wrote:It occurred to me that draw-filing and using a file and polishing cloth together for polishing might be alien to some so here is a link to a video that shows it well. Note: when I saw the video I did not have the sound on but I "think" that he was saying all of the right things.
http://www.youtube.com/watch?v=Dec78RQsokw
.
"Making Sawdust Safely"
Dusty
Sent from my Dell XPS using Firefox.
Dusty
Sent from my Dell XPS using Firefox.
-
jcraigie
- Platinum Member
- Posts: 505
- Joined: Sun Sep 05, 2010 8:17 pm
- Location: Fowlerville, Michigan
I didn't even notice that the face of the tool rest got painted. I like the file idea I'll have to give it a try.
Two notes on this model that I didn't notice on my '84:
When installing the bench tubes there is no stop? I just put them in until I got to the end of where the reinforcments (?) are cast.
At first I couldn't get the speed dial to go past "R" on the speed dial. The antirattle clip is also a stop at "R" on the speed dial to go higher you need to push down on the clip under the power switch.
1984 Mark V 500 and an early 1954 greenie. jointer, belt sander, bandsaw, jigsaw, planner.
Jeff
Jeff