jcraigie, To be completely honest, I was unaware of the "key"
My first Mark V rebuild, heck my first Mark V
Moderator: admin
Thanks guys, I'll try what was suggested! JPG40504, the I had a nice jack in the box spring shot. I was to eager the remove it and didn't make the piece of wood to help hold it down while removing the pin. Luckily no major damage to me or the parts
jcraigie, To be completely honest, I was unaware of the "key"
That's the fun in learning. I'll let you know how it goes!
jcraigie, To be completely honest, I was unaware of the "key"
AND you'll NEED that board to reinstall the spring.
SS 500(09/1980), DC3300, jointer, bandsaw, belt sander, Strip Sander, drum sanders,molder, dado, biscuit joiner, universal lathe tool rest, Oneway talon chuck, router bits & chucks and a De Walt 735 planer,a #5,#6, block planes. ALL in a 100 square foot shop.
.
.
Bob
.
.
Bob
7 Ps
jayp413 wrote:Yeah Beeg. I plan on making one. I was just tinkering in the garage after work and thought it would be a good idea to tackle it "quick". Triple p's got me again. Piss Poor Planning!
It is the 7 Ps. Proper Prior Planning Prevents Piss Poor Performance
Bill Mayo bill.mayo@verizon.net
Shopsmith owner since 73. Sell, repair and rebuild Shopsmith, Total Shop & Wood Master headstocks, SPTs, attachments, accessories and parts. US Navy 1955-1975 (FTCS/E-8)
- JPG
- Platinum Member
- Posts: 35600
- Joined: Wed Dec 10, 2008 7:42 pm
- Location: Lexington, Ky (TAMECAT territory)
jayp413 wrote:Yeah Beeg. I plan on making one. I was just tinkering in the garage after work and thought it would be a good idea to tackle it "quick". Triple p's got me again. Piss Poor Planning!
I have been successful removing them with no board/press, but never putting it back together. I use a self made tool in the drill chuck and the ss/quill as a press for the 'clipped' retainer.
BTW keep the web between thumb and forefinger out from between the retaining clip and the spring 'housing'!:eek:
Yes it does!:rolleyes:
╔═══╗
╟JPG ╢
╚═══╝
Goldie(Bought New SN 377425)/4" jointer/6" beltsander/12" planer/stripsander/bandsaw/powerstation /Scroll saw/Jig saw /Craftsman 10" ras/Craftsman 6" thicknessplaner/ Dayton10"tablesaw(restoredfromneighborstrashpile)/ Mark VII restoration in 'progress'/ 10E[/size](SN E3779) restoration in progress, a 510 on the back burner and a growing pile of items to be eventually returned to useful life. - aka Red Grange
╟JPG ╢
╚═══╝
Goldie(Bought New SN 377425)/4" jointer/6" beltsander/12" planer/stripsander/bandsaw/powerstation /Scroll saw/Jig saw /Craftsman 10" ras/Craftsman 6" thicknessplaner/ Dayton10"tablesaw(restoredfromneighborstrashpile)/ Mark VII restoration in 'progress'/ 10E[/size](SN E3779) restoration in progress, a 510 on the back burner and a growing pile of items to be eventually returned to useful life. - aka Red Grange
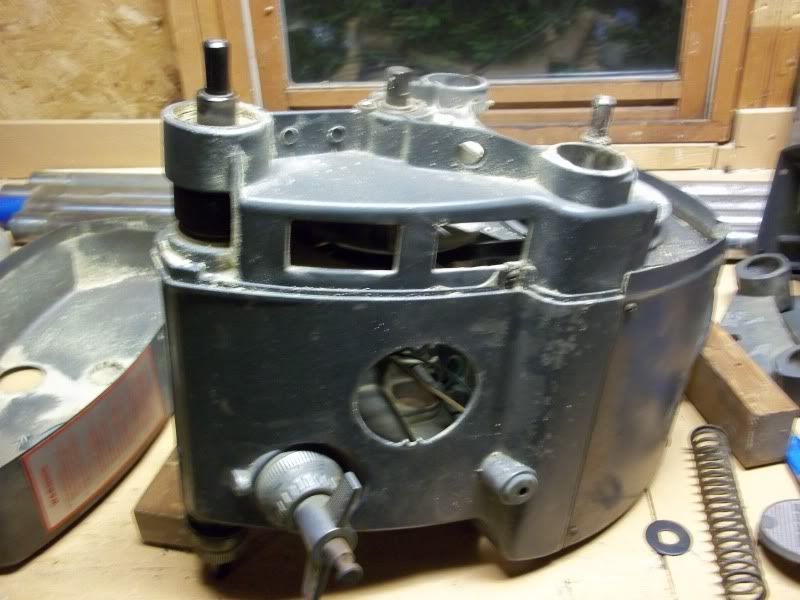
I made a small amount of progress the other night starting to tear down the headstock.
I removed the motor spring and floating sheave first. Mistake number one was not using a piece of wood with a hole drilled in the center to hold the spring down while I removed the reataining ring. I popped the retaining ring off and it flew apart like a jack in the box
Luckily the only missing part was the old retaining ring. I found the washer and spring no problem.
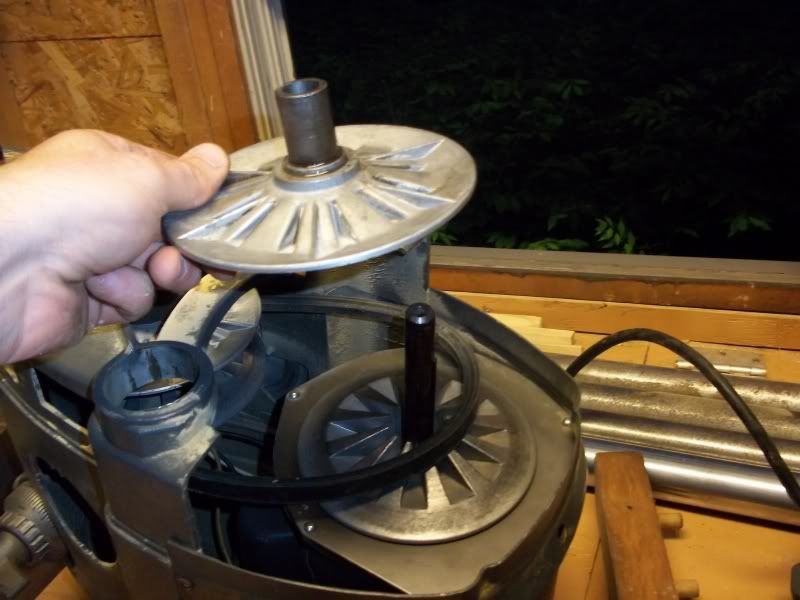
Then I unhooked the retaining loop on the backside of the control sheave and remove the speed control handle and housing.
To get to the retaining loop you just pop the shopsmith medallion off the side of the headstock. It pulls straight out and is held in by a spring type retainer.
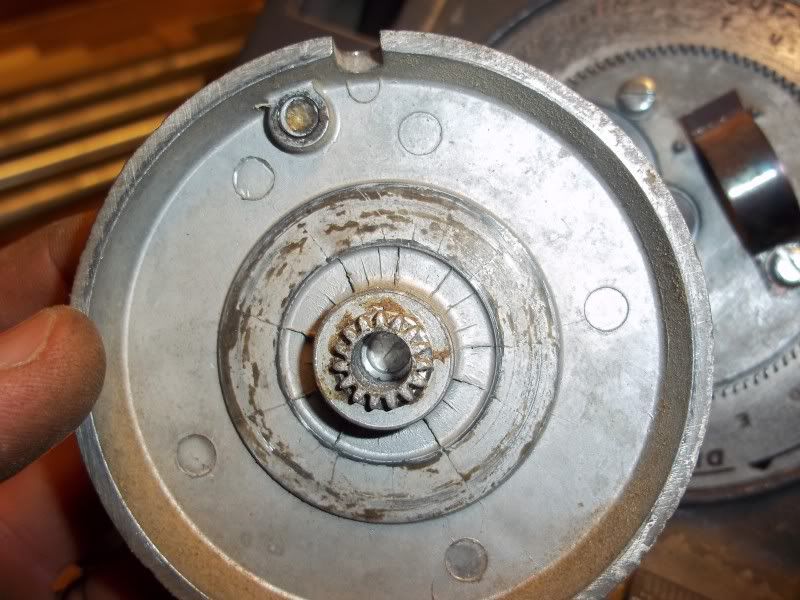
Heres a shot with the logo pulled off

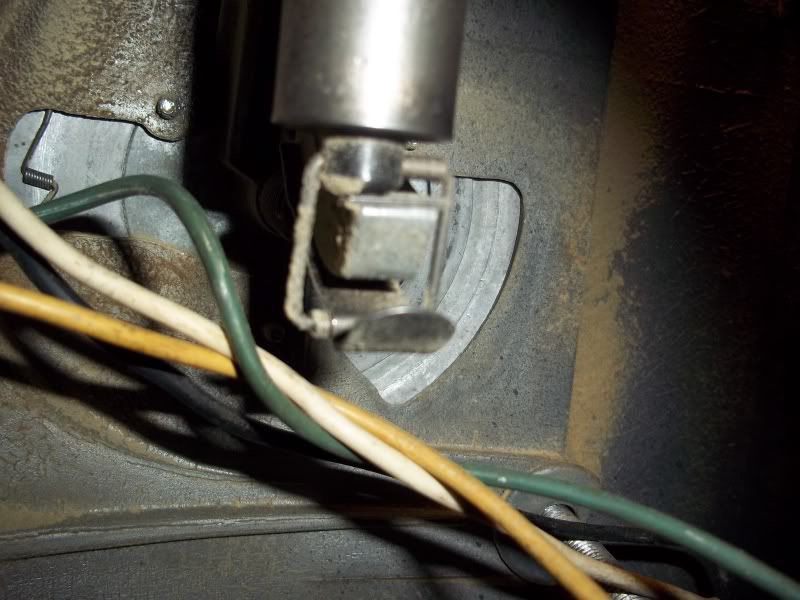
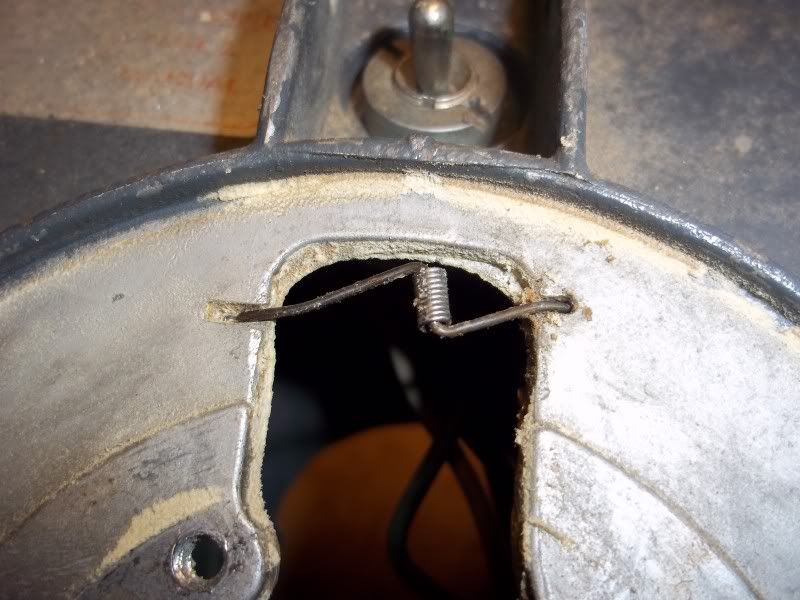
A look inside and you can see the retaining loop hooked on.

I removed the motor spring and floating sheave first. Mistake number one was not using a piece of wood with a hole drilled in the center to hold the spring down while I removed the reataining ring. I popped the retaining ring off and it flew apart like a jack in the box

Then I unhooked the retaining loop on the backside of the control sheave and remove the speed control handle and housing.
To get to the retaining loop you just pop the shopsmith medallion off the side of the headstock. It pulls straight out and is held in by a spring type retainer.
Heres a shot with the logo pulled off

A look inside and you can see the retaining loop hooked on.

(pictures added in the previous post)
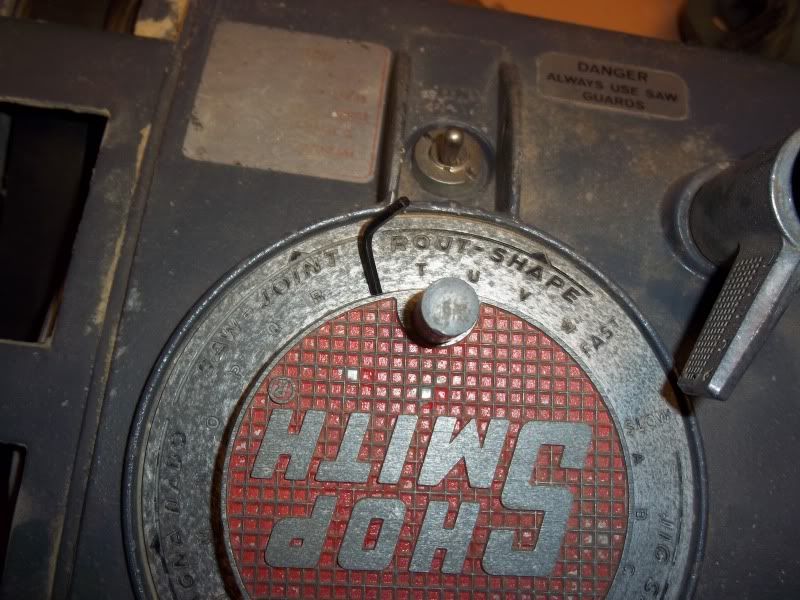
After removing the hook I took a few minutes to find the allen screw that holds the speed control handle on. It's in a tricky spot so be patient!

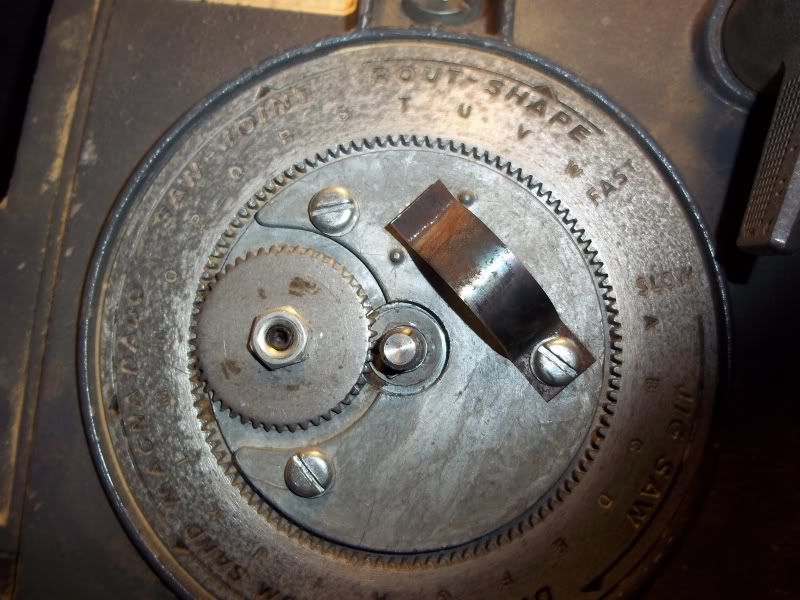
Once removed you can check the condition of your gears. Everything looked great here!


The only piece that will need to be replaced is this small anti-rattle spring.

Well that is it for tonight. More to come this week! 8-)
After removing the hook I took a few minutes to find the allen screw that holds the speed control handle on. It's in a tricky spot so be patient!

Once removed you can check the condition of your gears. Everything looked great here!


The only piece that will need to be replaced is this small anti-rattle spring.

Well that is it for tonight. More to come this week! 8-)
- JPG
- Platinum Member
- Posts: 35600
- Joined: Wed Dec 10, 2008 7:42 pm
- Location: Lexington, Ky (TAMECAT territory)
jayp413 wrote:
A look inside and you can see the retaining loop hooked on. <<<<It belongs behind the black flat spring! Remember that when reassembling!<<<<<<<<<<<<<<<<<<<<<<<
!!!!!!!!!!!!!!!!!!!!!!!!!!!
╔═══╗
╟JPG ╢
╚═══╝
Goldie(Bought New SN 377425)/4" jointer/6" beltsander/12" planer/stripsander/bandsaw/powerstation /Scroll saw/Jig saw /Craftsman 10" ras/Craftsman 6" thicknessplaner/ Dayton10"tablesaw(restoredfromneighborstrashpile)/ Mark VII restoration in 'progress'/ 10E[/size](SN E3779) restoration in progress, a 510 on the back burner and a growing pile of items to be eventually returned to useful life. - aka Red Grange
╟JPG ╢
╚═══╝
Goldie(Bought New SN 377425)/4" jointer/6" beltsander/12" planer/stripsander/bandsaw/powerstation /Scroll saw/Jig saw /Craftsman 10" ras/Craftsman 6" thicknessplaner/ Dayton10"tablesaw(restoredfromneighborstrashpile)/ Mark VII restoration in 'progress'/ 10E[/size](SN E3779) restoration in progress, a 510 on the back burner and a growing pile of items to be eventually returned to useful life. - aka Red Grange
- JPG
- Platinum Member
- Posts: 35600
- Joined: Wed Dec 10, 2008 7:42 pm
- Location: Lexington, Ky (TAMECAT territory)
jayp413 wrote:
The only piece that will need to be replaced is this small anti-rattle spring.
Spring looks normal!!!!!!
╔═══╗
╟JPG ╢
╚═══╝
Goldie(Bought New SN 377425)/4" jointer/6" beltsander/12" planer/stripsander/bandsaw/powerstation /Scroll saw/Jig saw /Craftsman 10" ras/Craftsman 6" thicknessplaner/ Dayton10"tablesaw(restoredfromneighborstrashpile)/ Mark VII restoration in 'progress'/ 10E[/size](SN E3779) restoration in progress, a 510 on the back burner and a growing pile of items to be eventually returned to useful life. - aka Red Grange
╟JPG ╢
╚═══╝
Goldie(Bought New SN 377425)/4" jointer/6" beltsander/12" planer/stripsander/bandsaw/powerstation /Scroll saw/Jig saw /Craftsman 10" ras/Craftsman 6" thicknessplaner/ Dayton10"tablesaw(restoredfromneighborstrashpile)/ Mark VII restoration in 'progress'/ 10E[/size](SN E3779) restoration in progress, a 510 on the back burner and a growing pile of items to be eventually returned to useful life. - aka Red Grange