Thanks Joe but I am guessing that here in the northeast it is significantly more expensive to hire someone to grind a stump for you. PLus I have about 5 stumps on my property that could stand to be ground up so the rental fee would be put to good use.joedw00 wrote:Michael
A lot times you can find someone that does stump removal a lot cheaper than what you can rent the machine for. I paid $60.00 to have one remove. $175 is about what one rents for here.
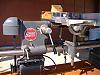
Shed install
Moderator: admin
-
wannabewoodworker

- Platinum Member
- Posts: 626
- Joined: Mon Feb 15, 2010 11:36 am
- Location: Milford, CT
Michael Mayo
Senior IT Support Engineer
Soft Designs Inc.
albiemanmike@gmail.com
1960's SS Mark VII, 1954 Greenie, 1983 Mark V, Jointer, Bandsaw, Jigsaw, Dewalt Slider, Delta Super 10, Delta 8" Grinder, Craftsman compressor, Drill Doctor, Kreg PH Jig, Bosch Jigsaw, Craftsman Router and Table...........and adding more all the time....
I recently used a stump grinder to get rid of about twenty stumps on my property. The only complaint I had about using it was that it was somewhat awkward to control when moving between locations. It steered by using a third wheel control at the rear of the machine and you had to walk sideways to make the move. Other than that the machines work well and get rid of stumps in quick order.
If the machines are the same as what I used you can only start it or move it when the grinder wheel is NOT engaged - a safety feature which is a good thing but takes a bit of getting used to.
Make sure you have good hearing protection and wear a face shield (or goggles at the least). The engines are loud and chips fly everywhere!
----------------------------------------
Leonard
La Vernia, TX
Wood Goods - Custom Woodwork
EMAIL: woodgoods "at" lavernia "dot" net
PowerPro 520, PowerPro 500 (was my father's 500), SS jointer, SS Mark V mount planer, SS bandsaws (2), belt sander, scroll saw, SS jig saws (2), strip sander, Jointech system, 12" Delta Compound Miter Saw, a small collection of routers, a router table and a Delta Unisaw. All in a 24' x 24' shop.
-
wannabewoodworker
- Platinum Member
- Posts: 626
- Joined: Mon Feb 15, 2010 11:36 am
- Location: Milford, CT
Well I ended up renting a Vermeer SC 232 Stump Grinder this past weekend and it worked like a charm and made quick work of the 5-6 stumps i needed to get rid of. It took a little practice to find the sweet spot of the grinder but once i figured it out it really ground up the stumps in no time at all. I also used it to remove a bunch of roots that have been slowly poking through the soil where I park my boat in the yard. Those damn things have been a PIA for a long time and will no longer be an issue. The Vermeer was literally brand new and they told me I was only the second person to rent it out. So that was pretty cool. The blades were nice and sharp and ready for action. I had been promised an older model Raymark or something that when I looked at it I wasn't too impressed but beggars can't be choosers. But when I went to pick it up later on Friday they told me the other guy took the older machine and I was getting the Vermeer which was a pleasant surprise and I am very happy I got it. Very safe machine to operate also. It has pressure sensitive controls that sense whether your hands are on them or not. If your hands do not stay on the controls the clutch auto-disengages and stops the blade from turning. The only thing that was difficult was seeing where the blade was and what you were grinding so it helped to have a second person to guide you although using the wife for this purpose was as usual a lesson in frustration......
Michael Mayo
Senior IT Support Engineer
Soft Designs Inc.
albiemanmike@gmail.com
1960's SS Mark VII, 1954 Greenie, 1983 Mark V, Jointer, Bandsaw, Jigsaw, Dewalt Slider, Delta Super 10, Delta 8" Grinder, Craftsman compressor, Drill Doctor, Kreg PH Jig, Bosch Jigsaw, Craftsman Router and Table...........and adding more all the time....
Senior IT Support Engineer
Soft Designs Inc.
albiemanmike@gmail.com
1960's SS Mark VII, 1954 Greenie, 1983 Mark V, Jointer, Bandsaw, Jigsaw, Dewalt Slider, Delta Super 10, Delta 8" Grinder, Craftsman compressor, Drill Doctor, Kreg PH Jig, Bosch Jigsaw, Craftsman Router and Table...........and adding more all the time....
-
wannabewoodworker
- Platinum Member
- Posts: 626
- Joined: Mon Feb 15, 2010 11:36 am
- Location: Milford, CT
Well I got started on the shed build last weekend with help from a good friend of mine. We made good progress on Saturday getting all four walls up. Then on Sunday my buddie Derrick came by again after going to the flea market at 3:00 am. I told him not to bother as i knew he would be exhausted and not much fun to be around. Well as I had feared he was not nice to be around. We ran into issues when we put the trusses up. We started to put the first piece of sheathing on the roof and it would not square up. This started a litany of finger pointing and bitching back and forth at which point I told Derrick to go home as I was done. He gladly quit and left. So this week I did a bunch of measuring to see where the problem was. The structure is basically square, I was only an 1/8" off on the floor diagonals. But where we screwed up was installing the front and back walls. We missed a step which was to center the walls up on each other. So they were off but our 24" on center measurements were dead on the top plate. So I just went with it. Had the wife helping me put the first two big sheets of ply on the roof. We got it flush to the top of the peak and then I had to push (rack) it towards her so that it would center up on the last truss on her end. This gave us the nailing space we needed and it was off to the races. I cranked long and hard on the shed all day Saturday by myself and got the majority of it done alone!
Today I put the rest of the trim on and then laid down the tar paper and drip edge. I still have to finish the drip edge tomorrow and then put the shingles on it. So I can see light at the end of tunnel. I spent most of the afternoon today building a ramp to enter the shed with the mowers and blowers. I had a bunch of pressure treated lumber hanging around mostly 2X4 and 2X6 so I just cut the 2X6's into 4 ft. lengths and then used the 2X4's to connect them together. I cut the angle on the ramp to match the door edge and then cut another 2X4 the same width as the ramp and angle cut that to support the ramp and it is flush to the entrance:eek: I think I am going to add a few more vertical braces in an L shape just to beef it up a little more but we have an entrance ramp now as well as a shed. I am tickled with this project as I have never done anything this extensive construction wise before. I always wanted to build my own stuff like this and I finally got the chance and it was a great learning experience. I will post some pics once we get it all painted up.
Today I put the rest of the trim on and then laid down the tar paper and drip edge. I still have to finish the drip edge tomorrow and then put the shingles on it. So I can see light at the end of tunnel. I spent most of the afternoon today building a ramp to enter the shed with the mowers and blowers. I had a bunch of pressure treated lumber hanging around mostly 2X4 and 2X6 so I just cut the 2X6's into 4 ft. lengths and then used the 2X4's to connect them together. I cut the angle on the ramp to match the door edge and then cut another 2X4 the same width as the ramp and angle cut that to support the ramp and it is flush to the entrance:eek: I think I am going to add a few more vertical braces in an L shape just to beef it up a little more but we have an entrance ramp now as well as a shed. I am tickled with this project as I have never done anything this extensive construction wise before. I always wanted to build my own stuff like this and I finally got the chance and it was a great learning experience. I will post some pics once we get it all painted up.
Michael Mayo
Senior IT Support Engineer
Soft Designs Inc.
albiemanmike@gmail.com
1960's SS Mark VII, 1954 Greenie, 1983 Mark V, Jointer, Bandsaw, Jigsaw, Dewalt Slider, Delta Super 10, Delta 8" Grinder, Craftsman compressor, Drill Doctor, Kreg PH Jig, Bosch Jigsaw, Craftsman Router and Table...........and adding more all the time....
Senior IT Support Engineer
Soft Designs Inc.
albiemanmike@gmail.com
1960's SS Mark VII, 1954 Greenie, 1983 Mark V, Jointer, Bandsaw, Jigsaw, Dewalt Slider, Delta Super 10, Delta 8" Grinder, Craftsman compressor, Drill Doctor, Kreg PH Jig, Bosch Jigsaw, Craftsman Router and Table...........and adding more all the time....
-
wannabewoodworker
- Platinum Member
- Posts: 626
- Joined: Mon Feb 15, 2010 11:36 am
- Location: Milford, CT
Well the shed project is winding down. We only have the shingles and painting to finish up. It has been a very enjoyable first big project for me and I am very pleased with the outcome. Been very educational to say the least but also has been very rewarding as well. Had to replace the door lock hasp as the one that came with the shed snapped right off when i tried to drill it out for the padlock we bought. That was actually a good thing as anyone could have just pried it right off as easily as it broke off. I bought a new locking hasp at the local Lowes and through bolted it to the door so it will be significantly more difficult for someone to break into the shed now. Thanks again for all the advice during my adventure been very helpful and I appreciate it.

Michael Mayo
Senior IT Support Engineer
Soft Designs Inc.
albiemanmike@gmail.com
1960's SS Mark VII, 1954 Greenie, 1983 Mark V, Jointer, Bandsaw, Jigsaw, Dewalt Slider, Delta Super 10, Delta 8" Grinder, Craftsman compressor, Drill Doctor, Kreg PH Jig, Bosch Jigsaw, Craftsman Router and Table...........and adding more all the time....
Senior IT Support Engineer
Soft Designs Inc.
albiemanmike@gmail.com
1960's SS Mark VII, 1954 Greenie, 1983 Mark V, Jointer, Bandsaw, Jigsaw, Dewalt Slider, Delta Super 10, Delta 8" Grinder, Craftsman compressor, Drill Doctor, Kreg PH Jig, Bosch Jigsaw, Craftsman Router and Table...........and adding more all the time....
-
wlhayesmfs
- Platinum Member
- Posts: 667
- Joined: Fri Jul 21, 2006 10:50 am
- Location: Broken Arrow OK
-
JPG

- Platinum Member
- Posts: 35600
- Joined: Wed Dec 10, 2008 7:42 pm
- Location: Lexington, Ky (TAMECAT territory)
If you did not double(jam nut) on the inside do so(the hasp).
╔═══╗
╟JPG ╢
╚═══╝
Goldie(Bought New SN 377425)/4" jointer/6" beltsander/12" planer/stripsander/bandsaw/powerstation /Scroll saw/Jig saw /Craftsman 10" ras/Craftsman 6" thicknessplaner/ Dayton10"tablesaw(restoredfromneighborstrashpile)/ Mark VII restoration in 'progress'/ 10E[/size](SN E3779) restoration in progress, a 510 on the back burner and a growing pile of items to be eventually returned to useful life. - aka Red Grange
-
wannabewoodworker
- Platinum Member
- Posts: 626
- Joined: Mon Feb 15, 2010 11:36 am
- Location: Milford, CT
Fender washers and nyloc nuts. Only problem is these hardware pieces always use such small hardware to mount them. I had to use 10/24 screws and nuts as anything larger would not have worked out.JPG40504 wrote:If you did not double(jam nut) on the inside do so(the hasp).
Michael Mayo
Senior IT Support Engineer
Soft Designs Inc.
albiemanmike@gmail.com
1960's SS Mark VII, 1954 Greenie, 1983 Mark V, Jointer, Bandsaw, Jigsaw, Dewalt Slider, Delta Super 10, Delta 8" Grinder, Craftsman compressor, Drill Doctor, Kreg PH Jig, Bosch Jigsaw, Craftsman Router and Table...........and adding more all the time....
Senior IT Support Engineer
Soft Designs Inc.
albiemanmike@gmail.com
1960's SS Mark VII, 1954 Greenie, 1983 Mark V, Jointer, Bandsaw, Jigsaw, Dewalt Slider, Delta Super 10, Delta 8" Grinder, Craftsman compressor, Drill Doctor, Kreg PH Jig, Bosch Jigsaw, Craftsman Router and Table...........and adding more all the time....