iaokie requesting help
Moderator: admin
-
Shop_Smith_Poppi
- Gold Member
- Posts: 181
- Joined: Fri Mar 20, 2009 6:26 pm
- Location: Oklahoma
-
Shop_Smith_Poppi
- Gold Member
- Posts: 181
- Joined: Fri Mar 20, 2009 6:26 pm
- Location: Oklahoma

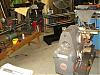
May not have been my best choice of paint and my painting skills leave a lot to be desired but this texture is very course and deep making it appear grayish when the light reflects off it a certain way
Also found out from our painter this paint cures at a temp of 350 ..it's been hot here but not that hot so it's going to take awhile longer to fully cure
I think between the dirt,sawdust & chips it's going to be difficult to keep clean
Live and learn:o...the next restore will use glossy finish[ATTACH]14041[/ATTACH]
[ATTACH]14043[/ATTACH]
Also found out from our painter this paint cures at a temp of 350
..it's been hot here but not that hot so it's going to take awhile longer to fully cureI think between the dirt,sawdust & chips it's going to be difficult to keep clean
Live and learn:o...the next restore will use glossy finish[ATTACH]14041[/ATTACH]
[ATTACH]14043[/ATTACH]
- Attachments
-
- DSC02628.JPG (146.36 KiB) Viewed 1658 times
-
- DSC02629.JPG (149.49 KiB) Viewed 1569 times
-
- DSC02630.JPG (140.34 KiB) Viewed 1659 times
-
Shop_Smith_Poppi
- Gold Member
- Posts: 181
- Joined: Fri Mar 20, 2009 6:26 pm
- Location: Oklahoma
So next time just use a spray paint Rustolum Hammer finish is what I used.iaokie wrote:May not have been my best choice of paint and my painting skills leave a lot to be desired but this texture is very course and deep making it appear grayish when the light reflects off it a certain way
Also found out from our painter this paint cures at a temp of 350
I think between the dirt,sawdust & chips it's going to be difficult to keep clean
Live and learn:o...the next restore will use glossy finish
Or you could use the oven and bake your parts to cure the paint. Just be sure you do it on lady afternoon out and make sure you send your wife to the spa for the day. this way you will be done by the time she gets back and she will never notice the difference. I would also suggest a new candle or candles as a gift for her return already burning of course. And a dinner ready made and set out. this way she has no reason to look in the oven and will be smitten by your romantic woes she will be off guard and not notice the paint smell.
Good luck with that!
Of course it might be cheaper to get your own over in your shop!
"Jerry! how many times do I have to tell you! Lick that knife before you put it back in the butter!" ..... Jerry Clower's Mother.

Waytube Finishing
[ATTACH]14047[/ATTACH]
[ATTACH]14048[/ATTACH]
[ATTACH]14049[/ATTACH]
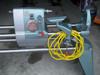
[ATTACH]14050[/ATTACH]Went with the rubber plug and caster setup and c-clamped to extension table instead of tailstock for a little extra length
Made sure it was level and then started refinishing the waytubes first
150 grit to start then 200 and on up
[ATTACH]14048[/ATTACH]
[ATTACH]14049[/ATTACH]
[ATTACH]14050[/ATTACH]Went with the rubber plug and caster setup and c-clamped to extension table instead of tailstock for a little extra length
Made sure it was level and then started refinishing the waytubes first
150 grit to start then 200 and on up
- Attachments
-
- DSC02632.JPG (133.16 KiB) Viewed 1612 times
-
- DSC02638.JPG (103.18 KiB) Viewed 1612 times
-
- DSC02637.JPG (110.78 KiB) Viewed 1612 times
-
- DSC02635.JPG (146.04 KiB) Viewed 1612 times

Tube Cleaning
The 1 3/4" way and bench tubes will fit through the tail stock. The tailstock insert will still fit and work. I slotted the holes for the casters to allow different size casters for different size pipes and rods to be cleaned.
[ATTACH]14051[/ATTACH]
[ATTACH]14051[/ATTACH]
- Attachments
-
- IMG_0714.JPG (20.11 KiB) Viewed 1624 times
Bill Mayo bill.mayo@verizon.net
Shopsmith owner since 73. Sell, repair and rebuild Shopsmith, Total Shop & Wood Master headstocks, SPTs, attachments, accessories and parts. US Navy 1955-1975 (FTCS/E-8)
Shopsmith owner since 73. Sell, repair and rebuild Shopsmith, Total Shop & Wood Master headstocks, SPTs, attachments, accessories and parts. US Navy 1955-1975 (FTCS/E-8)
I think I like your setup better
It seems safer also
Were you able to easily find various sized wheels with the same diameter hole
1 tube down 3 to go
Time for JPW [ATTACH]14056[/ATTACH]
[ATTACH]14057[/ATTACH]
[ATTACH]14058[/ATTACH]
It seems safer also
Were you able to easily find various sized wheels with the same diameter hole
1 tube down 3 to go
Time for JPW
[ATTACH]14056[/ATTACH][ATTACH]14057[/ATTACH]
[ATTACH]14058[/ATTACH]
- Attachments
-
- Finished Waytube 3 (1).JPG (111.5 KiB) Viewed 1631 times
-
- Finished Waytube 3 (2).JPG (138.5 KiB) Viewed 1633 times
-
- Finished Waytube 3.JPG (154.2 KiB) Viewed 1626 times