Newbie with a Greenie
Moderator: admin
-
jcraigie
- Platinum Member
- Posts: 505
- Joined: Sun Sep 05, 2010 8:17 pm
- Location: Fowlerville, Michigan
For the cord buy a 12-3 gauge extension cord (from whereever you can find the color you want), cut off the female plug to the desired length and attach to the shopsmith with a strain relief from your local electrical supply company (they will probably be cheaper than the hardware store). You will have to drill out the hole with a step drill bit.
1984 Mark V 500 and an early 1954 greenie. jointer, belt sander, bandsaw, jigsaw, planner.
Jeff
Jeff
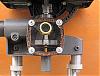
Jeff (restonut), I think this is the piece you described:
[ATTACH]14260[/ATTACH]
If so, I do not need it since I converted my greenie to a dedicated drill press and powered it with a tread mill motor, ( in a post here http://www.shopsmith.net/forums/showthr ... rill+press) so if you PM me your mailing address, I would be pleased to send it to you.(free)
[ATTACH]14260[/ATTACH]
If so, I do not need it since I converted my greenie to a dedicated drill press and powered it with a tread mill motor, ( in a post here http://www.shopsmith.net/forums/showthr ... rill+press) so if you PM me your mailing address, I would be pleased to send it to you.(free)
- Attachments
-
- button piece.jpg (54.78 KiB) Viewed 7088 times
Peter
a 510,a Mini, dedicated SS drillpress, SS spt's, home made SS belt grinder, SS piston air system, Southbend 10k lathe, mill/drill, Taig
a 510,a Mini, dedicated SS drillpress, SS spt's, home made SS belt grinder, SS piston air system, Southbend 10k lathe, mill/drill, Taig
-
trainguytom

- Gold Member
- Posts: 324
- Joined: Sat Feb 10, 2007 7:22 pm
- Location: Central WI
I've owned, rebuilt, and sold greenies, goldies and gray ones. From my experience, with new bearings in them, they all run pretty much the same. (meaning great) I haven't found the older 3/4hp machines to be under powered. The 3/4hp and my 1 1/8hp Mk5 have all done what I needed on any project. As to upgrading to the Power Pro, if you've got the cash, why not. I've never been one to own the newest model of anything if my older one does the job. I guess I just like the idea of having older tools that never seem to wear out.
Peter - That is exactly what I need. Mine is gone from the curve that goes down to the button though. PM sent! 
BTW, that is a really nice drill press setup! I didn't know SS even made a quill handle like that...
Love the extension cord idea...and I'm gonna shop around for the strain relief locally too
I picked up a later housing to switch the guts over, but I decided to use the old cast one instead...I just like the heaviness of it better, and I eventually plan on getting another one to make a shorty too... (shhh, don't tell the wife):rolleyes:
BTW, that is a really nice drill press setup! I didn't know SS even made a quill handle like that...
Love the extension cord idea...and I'm gonna shop around for the strain relief locally too
I picked up a later housing to switch the guts over, but I decided to use the old cast one instead...I just like the heaviness of it better, and I eventually plan on getting another one to make a shorty too... (shhh, don't tell the wife):rolleyes:
-
jcraigie
- Platinum Member
- Posts: 505
- Joined: Sun Sep 05, 2010 8:17 pm
- Location: Fowlerville, Michigan
If you don't find a strain relief CHEAP let me know I have a couple of extras that you can have for the cost of shipping itrestonut wrote:Peter - That is exactly what I need. Mine is gone from the curve that goes down to the button though. PM sent!
BTW, that is a really nice drill press setup! I didn't know SS even made a quill handle like that...
Love the extension cord idea...and I'm gonna shop around for the strain relief locally too
I picked up a later housing to switch the guts over, but I decided to use the old cast one instead...I just like the heaviness of it better, and I eventually plan on getting another one to make a shorty too... (shhh, don't tell the wife):rolleyes:
1984 Mark V 500 and an early 1954 greenie. jointer, belt sander, bandsaw, jigsaw, planner.
Jeff
Jeff
Here's a couple of pics on some of the "shining up" progress:
I stripped the paint from the inspection cover and started progressively sanding...

Stopped sanding before completely shiny, figured I would prinme and paint the red before the final buffing...

...and here it is before the final buffing up. I let the paint dry for a couple hours before gently shaving off the high spots with a razor blade.

...looks like I'm going to need to pick up a buffing wheel for my grinder to get the shine I want. Started on the quill lock and I must say after sanding for over an hour my fingers are killing me!!!:(
I stripped the paint from the inspection cover and started progressively sanding...

Stopped sanding before completely shiny, figured I would prinme and paint the red before the final buffing...

...and here it is before the final buffing up. I let the paint dry for a couple hours before gently shaving off the high spots with a razor blade.

...looks like I'm going to need to pick up a buffing wheel for my grinder to get the shine I want. Started on the quill lock and I must say after sanding for over an hour my fingers are killing me!!!:(
-
JPG

- Platinum Member
- Posts: 35600
- Joined: Wed Dec 10, 2008 7:42 pm
- Location: Lexington, Ky (TAMECAT territory)
restonut wrote:Here's a couple of pics on some of the "shining up" progress:
I stripped the paint from the inspection cover and started progressively sanding...
Stopped sanding before completely shiny, figured I would prinme and paint the red before the final buffing...
...and here it is before the final buffing up. I let the paint dry for a couple hours before gently shaving off the high spots with a razor blade.
...looks like I'm going to need to pick up a buffing wheel for my grinder to get the shine I want. Started on the quill lock and I must say after sanding for over an hour my fingers are killing me!!!:(
Considered using a fine wire brush wheel on that grinder??
╔═══╗
╟JPG ╢
╚═══╝
Goldie(Bought New SN 377425)/4" jointer/6" beltsander/12" planer/stripsander/bandsaw/powerstation /Scroll saw/Jig saw /Craftsman 10" ras/Craftsman 6" thicknessplaner/ Dayton10"tablesaw(restoredfromneighborstrashpile)/ Mark VII restoration in 'progress'/ 10E[/size](SN E3779) restoration in progress, a 510 on the back burner and a growing pile of items to be eventually returned to useful life. - aka Red Grange
╟JPG ╢
╚═══╝
Goldie(Bought New SN 377425)/4" jointer/6" beltsander/12" planer/stripsander/bandsaw/powerstation /Scroll saw/Jig saw /Craftsman 10" ras/Craftsman 6" thicknessplaner/ Dayton10"tablesaw(restoredfromneighborstrashpile)/ Mark VII restoration in 'progress'/ 10E[/size](SN E3779) restoration in progress, a 510 on the back burner and a growing pile of items to be eventually returned to useful life. - aka Red Grange
JPG40504 wrote:Considered using a fine wire brush wheel on that grinder??
I have some little brass ones for my Dremel, and I used them to initially clean off the crud in the nooks and crannies. I was afraid to go aggressively for fear of marring the soft aluminum.
However, I did pick up a little buffing kit at the HD that had 3 wheels and 3 compounds, and after using two compounds and different wheels, the quill dial looks like chrome
 ...only around 10 more piece to go...then repainting the recessed areas can begin
greenies
annbill.mayo@comcast.net>
Before you order parts you might want to talk with Bill. There are lots of opinions out there about what makes the ideal SS. I have a Greenie and and 87 model. I am still learning too. Take you time and enjoy.
Before you order parts you might want to talk with Bill. There are lots of opinions out there about what makes the ideal SS. I have a Greenie and and 87 model. I am still learning too. Take you time and enjoy.