Hi one and all,
Yes I have an '80 MGB. It runs great but needs restored. Part of my retirement plan.
I also have a '57 Greenie and a '78 that I have been upgrading as I go. The '57 didn't need much except a good cleaning so not much restoration there. Maybe later. On the '78 so far it has a 2 bearing quil, redid the pork chop speed control, cleaned and lubed all of the sheaves and managed to make it run again. Great fun and all of the stuff is out there.
I am about to the point that I can actually do some projects.
I remember these from my childhood and can't believe I actually own two. These units are definitely fun. Kinda like a Swiss Army Knife in the work shop.
I have to agree that a 10 ER would be really cool to add to my collections so who knows.
I also do Lionel trains and originally thought this would be great for small projects on the layout without dragging my table saw out. Not much work getting done on the layout yet.
Bob
green and/or gray
Moderator: admin

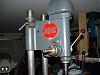
We're going to go green to start. Here's a side by side of the green and the gray, not much green paint though.
[ATTACH]16677[/ATTACH]
Figure on drilling an access hole behind the logo plate. Seems like the way to go. They're going to have to wait their turn though. So this motivates me to finish some other projects to dig into to these.
TC
[ATTACH]16677[/ATTACH]
Figure on drilling an access hole behind the logo plate. Seems like the way to go. They're going to have to wait their turn though. So this motivates me to finish some other projects to dig into to these.
TC
- Attachments
-
- DSCN0608.JPG (81.36 KiB) Viewed 2628 times
So, I got another project close enough to finished that I was able to steal some time to move forward on the dual restoration project. The first challenge was getting the Gray apart- I've code named it SS79 (that stands for ShopSmith 1979) to distinguish it from the Green. Since both machines will be apart I see the need to distinguish the parts in their plastic bags. The Green came without the vent cover, hence no serial number so the date is not know to me. The PO is moving soon and hopefully the cover will turn up. In the meantime I've called it SS50.
(As an aside, when year did they put the access hole behind the logo plate on these? I thought i saw this info somewhere.)
I got the carriage off the rusted way tubes using a mixture of acetone and automatic transmission fluid to smooth the way(s). Had a hard time getting the way tubes out of the tail end as the set screws refused to budge at first. Especially the one at the bottom of this pic:
[ATTACH]16779[/ATTACH]
Hard to get at with the hinge in the way, thought that'd have to come off and it's got a split pin and me with no "suitable drift" as its called in the literature. So applied the oil for challenges:
[ATTACH]16780[/ATTACH]
And heat to the casting from a paint stripper gun till the liquid bubbled, you could see it visibly sink down into the threads. As it was a nice day I walked with my son to a local pawn shop to see about the suitable drift (they had nothing). By the time I got back the screws were ready to come off and did. Here's a (partial inventory):
[ATTACH]16781[/ATTACH]
Made a tank for electrolytic rust removal or ERR ( to ERR is human):
[ATTACH]16782[/ATTACH]
Here's the recalcitrant way tubes newly tamed waiting for their turn on the jerry rigged lathe.
[ATTACH]16783[/ATTACH]
I've gotten a ton of useful information from this forum. I can't say I wouldn't have attempted this without the knowledge because I'm foolish enough- but it's certainly quicker and lots more fun. thanks to all who have posted great stuff and thanks in advance for the help I'm sure to get in the future.
TC
- Attachments
-
- DSCN0634.JPG (79.7 KiB) Viewed 2141 times
-
- DSCN0639.JPG (91.34 KiB) Viewed 2141 times
-
- DSCN0630.JPG (70.13 KiB) Viewed 2142 times
-
- DSCN0628.JPG (71.33 KiB) Viewed 2134 times
-
- DSCN0642.JPG (75.45 KiB) Viewed 2135 times
I have 2 "greenies". The older one has serial number 332010 and is a late 1956 model probably October. It has the 1 7/8" diameter lower tubes on it.
My newer one is # 355382 which is 1959 and has the narrower lower tubes.
That should help a little.
My newer one is # 355382 which is 1959 and has the narrower lower tubes.
That should help a little.
www.wirewerkes.com
Hiding in a Joshua Tree.
Hiding in a Joshua Tree.
-
JPG

- Platinum Member
- Posts: 35599
- Joined: Wed Dec 10, 2008 7:42 pm
- Location: Lexington, Ky (TAMECAT territory)
1 7/8" vs 1 3/4" bench tubes - when introduced
It would appear that I am incorrect in my understanding of when the bench tube od changed.wiredone wrote:I have 2 "greenies". The older one has serial number 332010 and is a late 1956 model probably October. It has the 1 7/8" diameter lower tubes on it.
My newer one is # 355382 which is 1959 and has the narrower lower tubes.
That should help a little.
I was under the impression that the early(gilmer,3/4hp)goldies were 1 7/8" and the 1 3/4" tubes were introduced with the poly-v Goldies.
As I recall forum members who have the early goldies have indicated their tubes were 1 7/8". Either my recollection is faulty or there is something else that happened(maybe some early(1959) test run production?). It would be interesting to see a pix of the rib that locates the bench tubes on that "59" Greenie. Hint Hint:D
╔═══╗
╟JPG ╢
╚═══╝
Goldie(Bought New SN 377425)/4" jointer/6" beltsander/12" planer/stripsander/bandsaw/powerstation /Scroll saw/Jig saw /Craftsman 10" ras/Craftsman 6" thicknessplaner/ Dayton10"tablesaw(restoredfromneighborstrashpile)/ Mark VII restoration in 'progress'/ 10E[/size](SN E3779) restoration in progress, a 510 on the back burner and a growing pile of items to be eventually returned to useful life. - aka Red Grange
-
JPG
- Platinum Member
- Posts: 35599
- Joined: Wed Dec 10, 2008 7:42 pm
- Location: Lexington, Ky (TAMECAT territory)
cranehead wrote:So, I got another project close enough to finished that I was able to steal some time to move forward on the dual restoration project. The first challenge was getting the Gray apart- I've code named it SS79 (that stands for ShopSmith 1979) to distinguish it from the Green. Since both machines will be apart I see the need to distinguish the parts in their plastic bags. The Green came without the vent cover, hence no serial number so the date is not know to me. The PO is moving soon and hopefully the cover will turn up. In the meantime I've called it SS50.
(As an aside, when year did they put the access hole behind the logo plate on these? I thought i saw this info somewhere.)
I got the carriage off the rusted way tubes using a mixture of acetone and automatic transmission fluid to smooth the way(s). Had a hard time getting the way tubes out of the tail end as the set screws refused to budge at first. Especially the one at the bottom of this pic:
[ATTACH]16779[/ATTACH]
Hard to get at with the hinge in the way, thought that'd have to come off and it's got a split pin and me with no "suitable drift" as its called in the literature. So applied the oil for challenges:
[ATTACH]16780[/ATTACH]
And heat to the casting from a paint stripper gun till the liquid bubbled, you could see it visibly sink down into the threads. As it was a nice day I walked with my son to a local pawn shop to see about the suitable drift (they had nothing). By the time I got back the screws were ready to come off and did. Here's a (partial inventory):
[ATTACH]16781[/ATTACH]
Made a tank for electrolytic rust removal or ERR ( to ERR is human):
[ATTACH]16782[/ATTACH]
Here's the recalcitrant way tubes newly tamed waiting for their turn on the jerry rigged lathe.
[ATTACH]16783[/ATTACH]
I've gotten a ton of useful information from this forum. I can't say I wouldn't have attempted this without the knowledge because I'm foolish enough- but it's certainly quicker and lots more fun. thanks to all who have posted great stuff and thanks in advance for the help I'm sure to get in the future.
TC
She's a bit battle scarred, but she is yours if you want. E-mail me with snail mail address.
[ATTACH]16784[/ATTACH]
- Attachments
-
- vent plate greenie x.jpg (430.55 KiB) Viewed 2106 times
╔═══╗
╟JPG ╢
╚═══╝
Goldie(Bought New SN 377425)/4" jointer/6" beltsander/12" planer/stripsander/bandsaw/powerstation /Scroll saw/Jig saw /Craftsman 10" ras/Craftsman 6" thicknessplaner/ Dayton10"tablesaw(restoredfromneighborstrashpile)/ Mark VII restoration in 'progress'/ 10E[/size](SN E3779) restoration in progress, a 510 on the back burner and a growing pile of items to be eventually returned to useful life. - aka Red Grange
╟JPG ╢
╚═══╝
Goldie(Bought New SN 377425)/4" jointer/6" beltsander/12" planer/stripsander/bandsaw/powerstation /Scroll saw/Jig saw /Craftsman 10" ras/Craftsman 6" thicknessplaner/ Dayton10"tablesaw(restoredfromneighborstrashpile)/ Mark VII restoration in 'progress'/ 10E[/size](SN E3779) restoration in progress, a 510 on the back burner and a growing pile of items to be eventually returned to useful life. - aka Red Grange
-
robinson46176

- Platinum Member
- Posts: 4182
- Joined: Mon Mar 09, 2009 9:00 pm
- Location: Central Indiana (Shelbyville)
mgbbob wrote: Kinda like a Swiss Army Knife in the work shop.
You do realize that I am now going to be forced to steal this line...
.
--
farmer
Francis Robinson
I did not equip with Shopsmiths in spite of the setups but because of them.
1 1988 - Mark V 510 (bought new), 4 Poly vee 1 1/8th HP Mark V's, Mark VII, 1 Mark V Mini, 1 Frankensmith, 1 10-ER, 1 Mark V Push-me-Pull-me Drillpress, SS bandsaw, belt sander, jointer, jigsaw, shaper attach, mortising attach, TS-3650 Rigid tablesaw, RAS, 6" long bed jointer, Foley/Belsaw Planer/molder/ripsaw, 1" sander, oscillating spindle/belt sander, Scroll saw, Woodmizer sawmill
-
JPG
- Platinum Member
- Posts: 35599
- Joined: Wed Dec 10, 2008 7:42 pm
- Location: Lexington, Ky (TAMECAT territory)
And different models no less!;)robinson46176 wrote:You do realize that I am now going to be forced to steal this line...
.
╔═══╗
╟JPG ╢
╚═══╝
Goldie(Bought New SN 377425)/4" jointer/6" beltsander/12" planer/stripsander/bandsaw/powerstation /Scroll saw/Jig saw /Craftsman 10" ras/Craftsman 6" thicknessplaner/ Dayton10"tablesaw(restoredfromneighborstrashpile)/ Mark VII restoration in 'progress'/ 10E[/size](SN E3779) restoration in progress, a 510 on the back burner and a growing pile of items to be eventually returned to useful life. - aka Red Grange
╟JPG ╢
╚═══╝
Goldie(Bought New SN 377425)/4" jointer/6" beltsander/12" planer/stripsander/bandsaw/powerstation /Scroll saw/Jig saw /Craftsman 10" ras/Craftsman 6" thicknessplaner/ Dayton10"tablesaw(restoredfromneighborstrashpile)/ Mark VII restoration in 'progress'/ 10E[/size](SN E3779) restoration in progress, a 510 on the back burner and a growing pile of items to be eventually returned to useful life. - aka Red Grange
Living (inert actually) proof.JPG40504 wrote:It would appear that I am incorrect in my understanding of when the bench tube od changed.
I was under the impression that the early(gilmer,3/4hp)goldies were 1 7/8" and the 1 3/4" tubes were introduced with the poly-v Goldies.
As I recall forum members who have the early goldies have indicated their tubes were 1 7/8". Either my recollection is faulty or there is something else that happened(maybe some early(1959) test run production?). It would be interesting to see a pix of the rib that locates the bench tubes on that "59" Greenie. Hint Hint:D
The repainted piece has a hole size of 2.03" it is from late 1956.
The unfinished original picture is from my 1959 model and the hole is about 1 7/8 or so, I'm not willing to disassemble it for a pic.
I have a 1960 goldie/brownie that I'm parting out and it has the same size hole as the late greenie.
So, I can ascertain that sometime between 1957-late 59 they changed.
- Attachments
-
- SS GRN TECH PIC-1 rszed.jpg (171.92 KiB) Viewed 1825 times
-
- SS GRN TECH PIC-2 rszd.jpg (117.46 KiB) Viewed 1810 times
www.wirewerkes.com
Hiding in a Joshua Tree.
Hiding in a Joshua Tree.
The bench tubes on the green are 1 7/8 so I'm going to call it 1956 then til the true serial number surfaces.wiredone wrote: So, I can ascertain that sometime between 1957-late 59 they changed.
Here's the mechanicals:
[ATTACH]16788[/ATTACH]
TC
- Attachments
-
- DSCN0632.JPG (100.81 KiB) Viewed 2125 times