Mark VII gear rack

Forum for Maintenance and Repair topics. Feel free to ask questions or contribute.

Moderator: admin

User avatar
JPG
Platinum Member
Posts: 35457
Joined: Wed Dec 10, 2008 7:42 pm
Location: Lexington, Ky (TAMECAT territory)

Re: Mark VII gear rack

Post by JPG »

Noticed you put these on E-Bay.

You might consider mentioning there that only two are needed to replace one of the two originals.

Aside from breakage, a common problem is wear caused by belt slap. I think that wear typically occurs only on the end piece.

:) :cool:
╔═══╗
╟JPG ╢
╚═══╝

Goldie(Bought New SN 377425)/4" jointer/6" beltsander/12" planer/stripsander/bandsaw/powerstation /Scroll saw/Jig saw /Craftsman 10" ras/Craftsman 6" thicknessplaner/ Dayton10"tablesaw(restoredfromneighborstrashpile)/ Mark VII restoration in 'progress'/ 10
E[/size](SN E3779) restoration in progress, a 510 on the back burner and a growing pile of items to be eventually returned to useful life. - aka Red Grange
User avatar
JPG
Platinum Member
Posts: 35457
Joined: Wed Dec 10, 2008 7:42 pm
Location: Lexington, Ky (TAMECAT territory)

Re: Mark VII gear rack

Post by JPG »

I was fortunate to get my hands on four of these. I am attempting here to describe how to make use of them.

First step is to establish the location of the center for the new holes to be drilled in the way tube. By laying tape against the original rivet holes the center can be approximated.
tape hole layout.jpg
tape hole layout.jpg (108.17 KiB) Viewed 7829 times
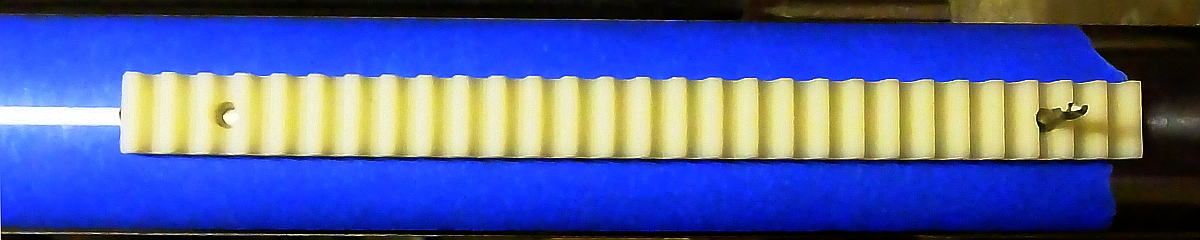
The original rack consisted of THREE pieces secured by TWO rivets each. The new rack pieces are half as long and are secured by two rivets each. One end of each new rack piece is to be riveted in the original holes at the end of the original rack pieces. Two new holes need be drilled for a rivet on both sides away from the original center hole to rivet the new rack pieces in place.

So align one new rack piece using a 0.120 drill bit by using one of the end holes securing the original piece. Then mark the location of the other hole centered between the two tape edges.
align 1.jpg
align 1.jpg (177.01 KiB) Viewed 7829 times
Repeat for the other 'half'.
align 2.jpg
align 2.jpg (220.49 KiB) Viewed 7829 times
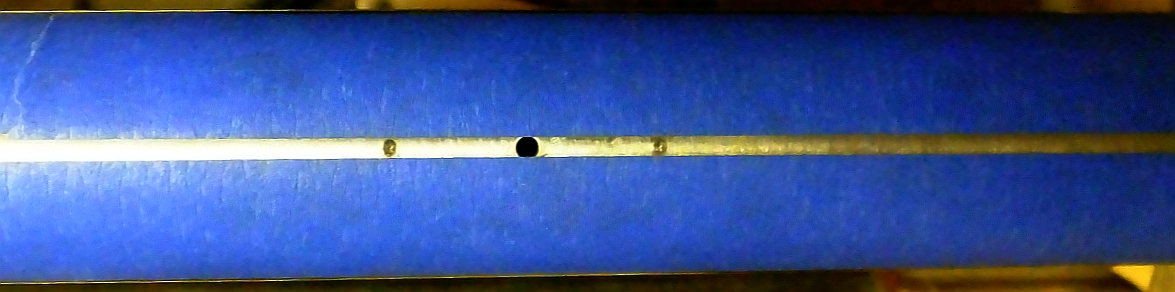
You should have a mark on both sides away from the original center rivet hole. Carefully dimple each location with a center punch. Since the way tube is round, care must be exercised to make sure the dimple is properly located. I find that progressively deeper small 'licks' will allow one to shift the location as the dimple is gradually made deeper.
1,2 marked.jpg
1,2 marked.jpg (237.38 KiB) Viewed 7829 times
Repeat for the other 'half'.


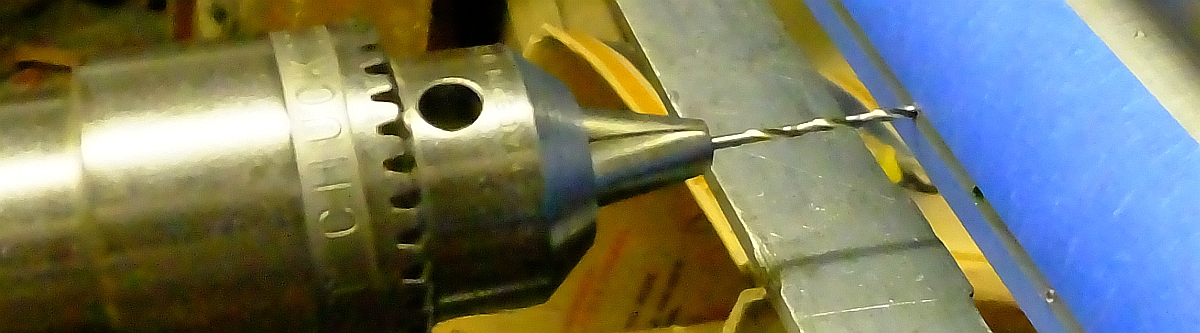
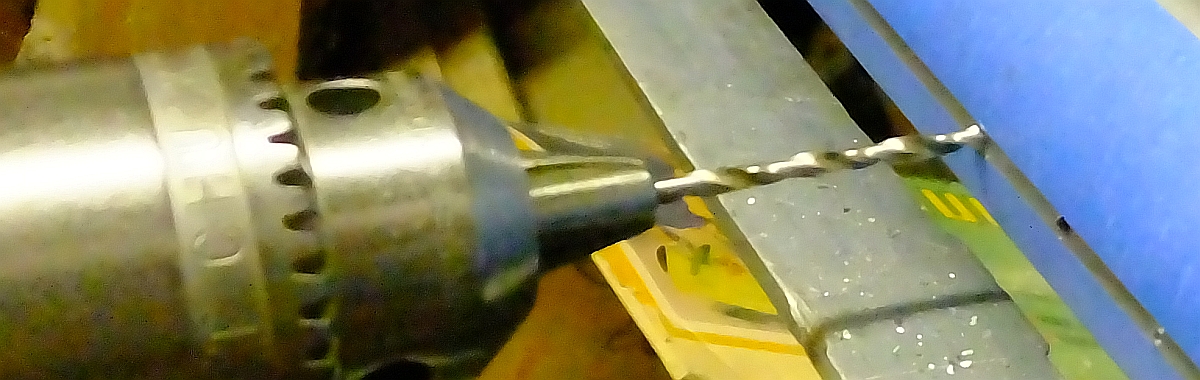
Now for the dicey part. I located the table top 7/8" below the drill bit center. Then used the rip fence to back up the way tube. I manually positioned the way tube horizontally to place the dimple directly in line with the drill bit. I used the smallest bit the chuck would securely hold to drill a pilot hole. It is quite easy to break a bit unless you hold it all very tightly. I find that clamping does not allow me to make minute position adjustments. The drill bit will let you know the way tube needs tweaking without breaking. A product of much practice. ;)
pilot hole.jpg
pilot hole.jpg (307.47 KiB) Viewed 7821 times
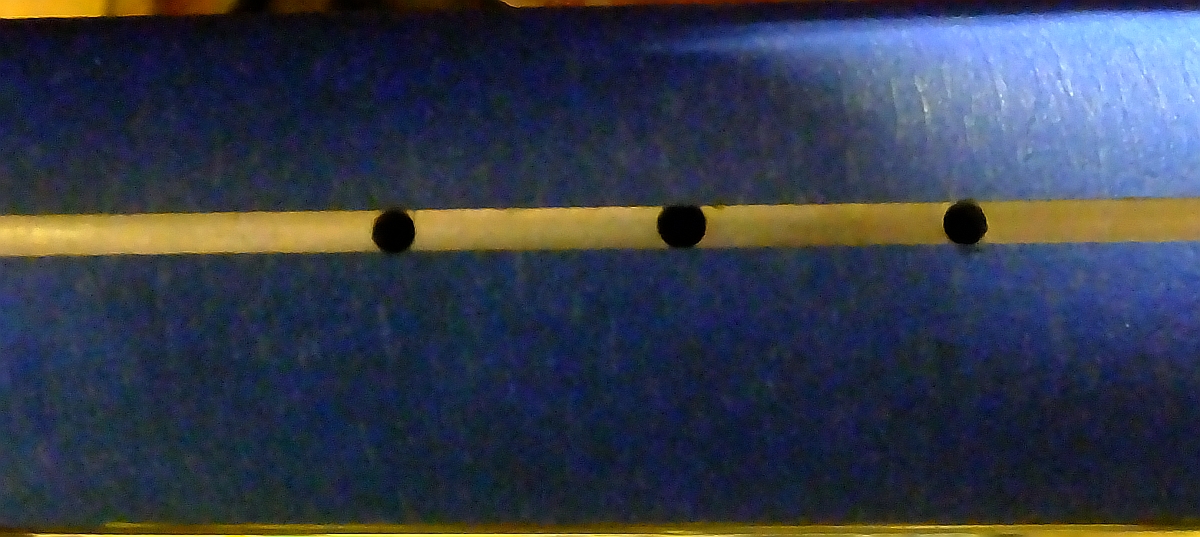
Repeat with a 1/8" bit. I originally drilled 0.120 holes, but could not locate any pop rivets of the original size(3mm I believe). So eventually the holes were enlarged to 1/8"(manually).
final size.jpg
final size.jpg (343.22 KiB) Viewed 7821 times
Holes drilled
1,2 drilled.jpg
1,2 drilled.jpg (461.7 KiB) Viewed 7821 times
Repeat (again).

As just mentioned pop rivets like the originals(I have never ever seen them elsewhere). The closest I could locate were supposedly 3mm(also 1/8"????) but measured 0.122" (3.09mm) so I bit the bullet and enlarged the holes. The new rack pieces needed to be enlarged also.

I feel steel rivets are preferable to aluminum ones but that leads to additional procurement issues. I found these at Lowes.
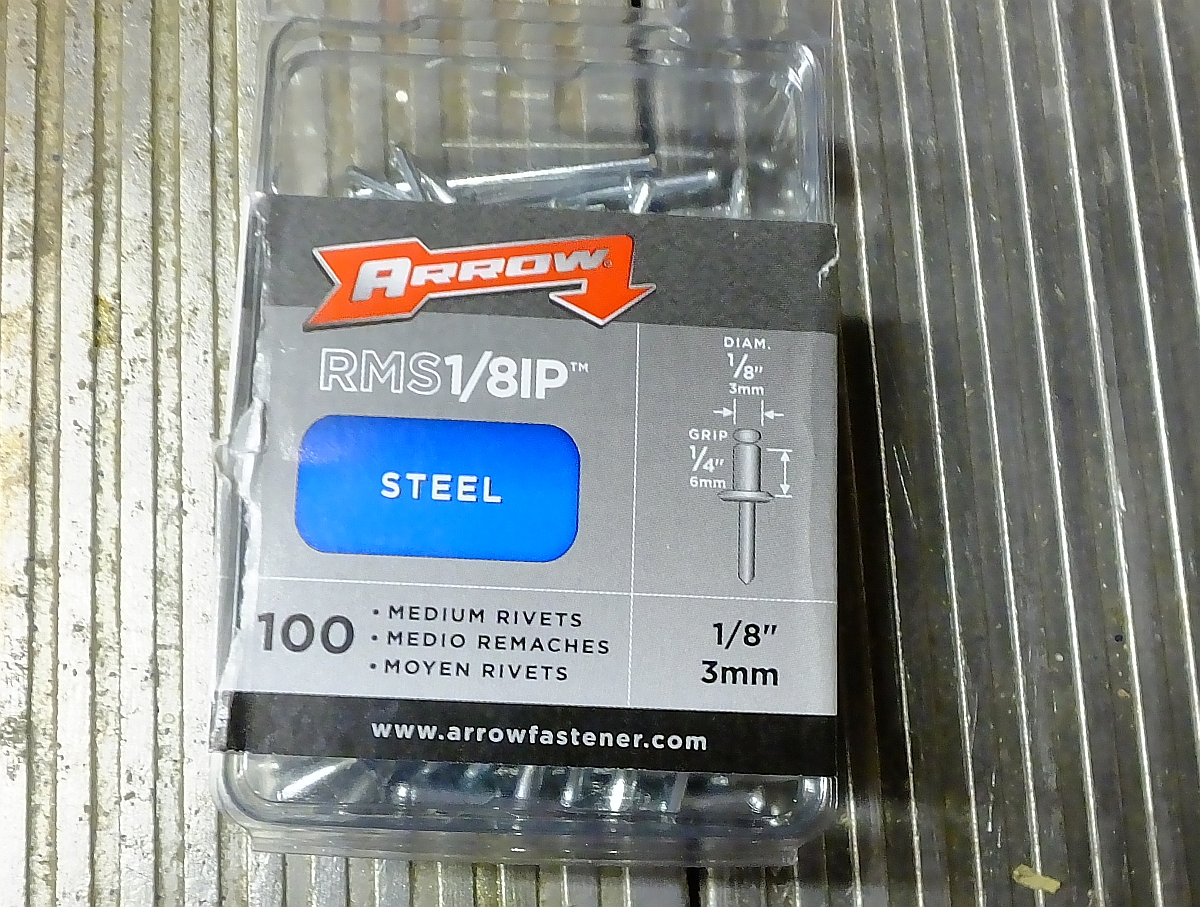
POP RIVETS.jpg
POP RIVETS.jpg (880.44 KiB) Viewed 7821 times
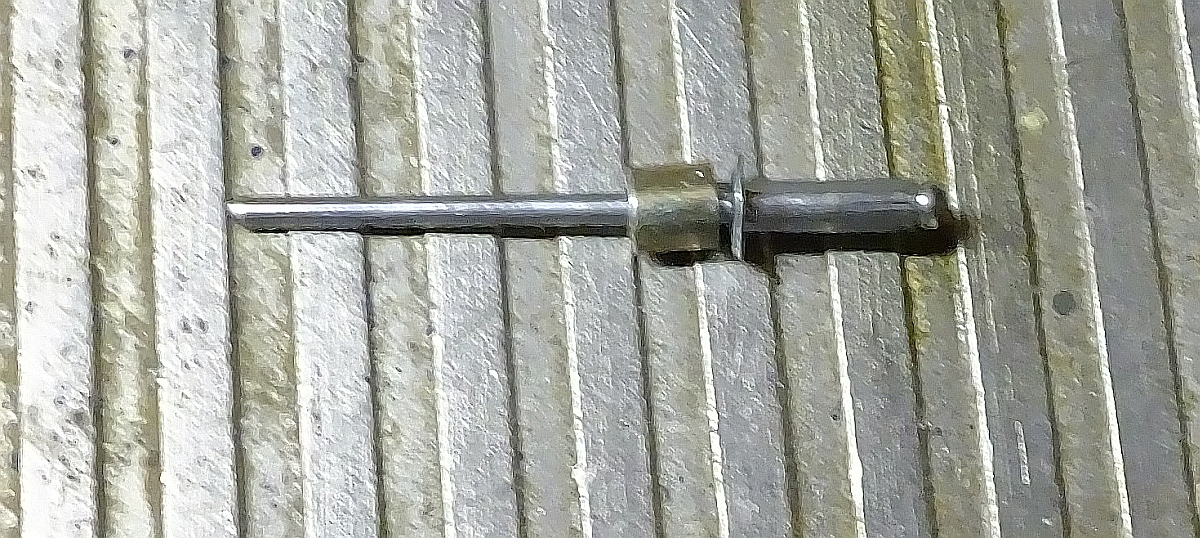
The grip range is a bit excessive, but they were available.

Now for the other shoe. The pop rivet heads are 1/4" od and the new piece holes are 0.200(matches the original(again)). So, they need to be 'resized'(fancy word for filed down). Slow with frequent measuring will get them down to 0.198 to 0.200".
RESIZE RIVET HEAD.jpg
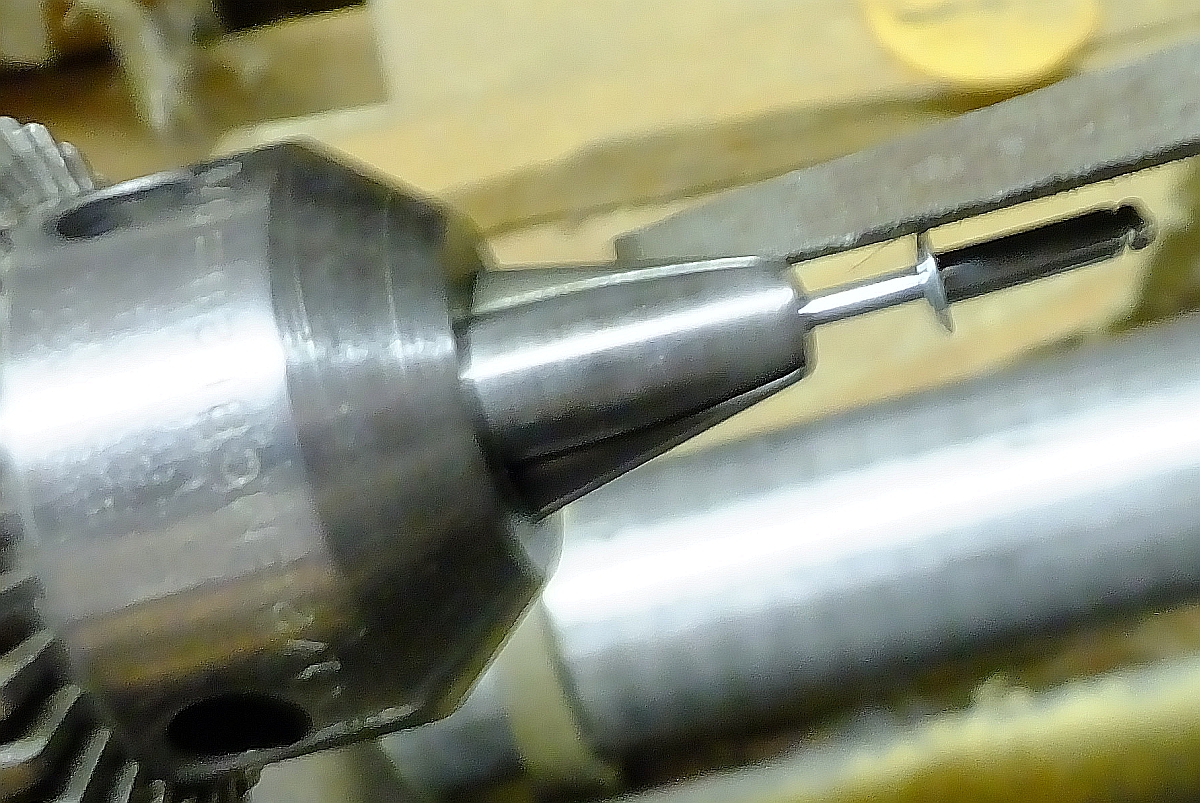
RESIZE RIVET HEAD.jpg (760.01 KiB) Viewed 7821 times
Moving on the the next 'issue' is the rivet head must be recessed into the rack. So a spacer is needed that will fit into the rack 'counterbore' and longer than the bore is deep.

From the miscellaneous jun. . parts jar.
RIVET SPACER.jpg
RIVET SPACER.jpg (615.9 KiB) Viewed 7821 times
Last edited by JPG on Fri Nov 06, 2015 2:51 pm, edited 2 times in total.
╔═══╗
╟JPG ╢
╚═══╝

Goldie(Bought New SN 377425)/4" jointer/6" beltsander/12" planer/stripsander/bandsaw/powerstation /Scroll saw/Jig saw /Craftsman 10" ras/Craftsman 6" thicknessplaner/ Dayton10"tablesaw(restoredfromneighborstrashpile)/ Mark VII restoration in 'progress'/ 10
E[/size](SN E3779) restoration in progress, a 510 on the back burner and a growing pile of items to be eventually returned to useful life. - aka Red Grange
User avatar
JPG
Platinum Member
Posts: 35457
Joined: Wed Dec 10, 2008 7:42 pm
Location: Lexington, Ky (TAMECAT territory)

Re: Mark VII gear rack

Post by JPG »

Hokay, we are now ready to actually mount these suckers! [Almost]

I think that seating the pop rivet firmly in that counter bore is cheap insurance to guarantee the pop rivet will not stray as the other end is being 'swaged' by pulling on the center pin. So another trip to the hardware store for a pair(only one needed unless you lose one) of these 'rivet sets'.
RIVET SET.jpg
RIVET SET.jpg (679.92 KiB) Viewed 7819 times
Used to tamp the rivet down to the bottom of the bore(in the new rack piece).
TAMPING RIVET.jpg
TAMPING RIVET.jpg (587.42 KiB) Viewed 7819 times
And then the spacer. Again use the 'tamping' tool to bottom the spacer onto the rivet head.
SPACER SET.jpg
SPACER SET.jpg (504.96 KiB) Viewed 7819 times
FINALLY! It is time to get out the pop rivet tool. I needed two squeezes to break the pin loose(a result of both the added spacer and the parts being less that the 'grip range'(1/4"). It is easier to only set a half pull the first time then go all the way the second pull(the tool gives greater leverage at the end of the pull where greater pulling is needed to break the 'pull pin').
SETTING RIVET.jpg
SETTING RIVET.jpg (405.33 KiB) Viewed 7819 times


One end done!!!!!
ONE END DONE.jpg
ONE END DONE.jpg (533.25 KiB) Viewed 7819 times
Repeat at the other end.
1 OF 4 DONE.jpg
1 OF 4 DONE.jpg (227.38 KiB) Viewed 7819 times
Repeat (again) . . . 3x.

Okay it should now look like this.
INSTALLED.jpg
INSTALLED.jpg (103.91 KiB) Viewed 7819 times
Finally compared to 'an original'.
NEW - OLD.jpg
NEW - OLD.jpg (160.7 KiB) Viewed 7819 times
╔═══╗
╟JPG ╢
╚═══╝

Goldie(Bought New SN 377425)/4" jointer/6" beltsander/12" planer/stripsander/bandsaw/powerstation /Scroll saw/Jig saw /Craftsman 10" ras/Craftsman 6" thicknessplaner/ Dayton10"tablesaw(restoredfromneighborstrashpile)/ Mark VII restoration in 'progress'/ 10
E[/size](SN E3779) restoration in progress, a 510 on the back burner and a growing pile of items to be eventually returned to useful life. - aka Red Grange
richardrouse
Gold Member
Posts: 220
Joined: Tue Jul 21, 2015 7:16 pm
Location: Haines City FLorida

Re: Mark VII gear rack

Post by richardrouse »

How does the head move along new track? You happy with it?
User avatar
JPG
Platinum Member
Posts: 35457
Joined: Wed Dec 10, 2008 7:42 pm
Location: Lexington, Ky (TAMECAT territory)

Re: Mark VII gear rack

Post by JPG »

richardrouse wrote:How does the head move along new track? You happy with it?
Cannot try for a while. All disassembled - waiting on base finalization/assembly.

I have no reservations that it will work A-OK.

Except fer strength, but so far no indication that will be an issue.
╔═══╗
╟JPG ╢
╚═══╝

Goldie(Bought New SN 377425)/4" jointer/6" beltsander/12" planer/stripsander/bandsaw/powerstation /Scroll saw/Jig saw /Craftsman 10" ras/Craftsman 6" thicknessplaner/ Dayton10"tablesaw(restoredfromneighborstrashpile)/ Mark VII restoration in 'progress'/ 10
E[/size](SN E3779) restoration in progress, a 510 on the back burner and a growing pile of items to be eventually returned to useful life. - aka Red Grange
richardrouse
Gold Member
Posts: 220
Joined: Tue Jul 21, 2015 7:16 pm
Location: Haines City FLorida

Re: Mark VII gear rack

Post by richardrouse »

In terms of tensile strength, that plastic is surprisingly durable. I'll have to track down the white sheet on it. I've got it around here somewhere.

The only thing that really degrades the plastic is heat over 300 degrees.
User avatar
JPG
Platinum Member
Posts: 35457
Joined: Wed Dec 10, 2008 7:42 pm
Location: Lexington, Ky (TAMECAT territory)

Re: Mark VII gear rack

Post by JPG »

richardrouse wrote:In terms of tensile strength, that plastic is surprisingly durable. I'll have to track down the white sheet on it. I've got it around here somewhere.

The only thing that really degrades the plastic is heat over 300 degrees.
Curious re compression.(think pop rivet pressure).
╔═══╗
╟JPG ╢
╚═══╝

Goldie(Bought New SN 377425)/4" jointer/6" beltsander/12" planer/stripsander/bandsaw/powerstation /Scroll saw/Jig saw /Craftsman 10" ras/Craftsman 6" thicknessplaner/ Dayton10"tablesaw(restoredfromneighborstrashpile)/ Mark VII restoration in 'progress'/ 10
E[/size](SN E3779) restoration in progress, a 510 on the back burner and a growing pile of items to be eventually returned to useful life. - aka Red Grange
User avatar
rcplaneguy
Platinum Member
Posts: 549
Joined: Mon Sep 23, 2013 6:33 pm
Location: Chapel Hill, NC

Re: Mark VII gear rack

Post by rcplaneguy »

Nice job! I wonder if there is enough metal in the tube walls to drill then tap for threads (using machine screws rather than rivets).
User avatar
JPG
Platinum Member
Posts: 35457
Joined: Wed Dec 10, 2008 7:42 pm
Location: Lexington, Ky (TAMECAT territory)

Re: Mark VII gear rack

Post by JPG »

rcplaneguy wrote:Nice job! I wonder if there is enough metal in the tube walls to drill then tap for threads (using machine screws rather than rivets).
There is more than enough thickness, but the diameter of the original holes is .120" and the diameter of the counterbore in the rack is .200". That leaves too far little for both threads and a head.
╔═══╗
╟JPG ╢
╚═══╝

Goldie(Bought New SN 377425)/4" jointer/6" beltsander/12" planer/stripsander/bandsaw/powerstation /Scroll saw/Jig saw /Craftsman 10" ras/Craftsman 6" thicknessplaner/ Dayton10"tablesaw(restoredfromneighborstrashpile)/ Mark VII restoration in 'progress'/ 10
E[/size](SN E3779) restoration in progress, a 510 on the back burner and a growing pile of items to be eventually returned to useful life. - aka Red Grange
hobbies
Gold Member
Posts: 67
Joined: Wed Jan 27, 2016 10:21 am

Re: Mark VII gear rack

Post by hobbies »

thank for info
Post Reply