Page 2 of 3
Re: Table Alignment, Using Dual Dial Indicators
Posted: Wed Nov 30, 2016 2:45 pm
by dusty
algale wrote:Yes, thanks Dusty, I see. I like the idea a lot.
I may make something similar, only with a tight fitting miter bar of its own. A properly sized plywood board would be screwed/glued to the miter bar and extend over the table and half way across the table insert.
If you browse through the forum posts that discuss table alignment, you will find something like what you are proposing.
Re: Table Alignment, Using Dual Dial Indicators
Posted: Wed Nov 30, 2016 2:57 pm
by algale
That's what I was thinking of and it may be because you had previously posted it! Why did you go with the current version in the photo (no miter bar) vs the one in the illustration?
Re: Table Alignment, Using Dual Dial Indicators
Posted: Wed Nov 30, 2016 4:38 pm
by sehast
Just to expand on what Ed had to say, all blade and arbor combinations will have some degree of runout or wobble (.002-.004" is not uncommon). Folks even have developed techniques and measurement devices to not only measure the runout of both the blade and the arbor separately but to set the blade in the arbor to best cancel out the overall runout of the two together. If you only set the table parallel to the blade at just one arbitrary blade position it will only be parallel at that one position and out of parallel during the rest of the rotation by as much as the total runout. The single tooth method of setup is more robust because it cancels the runout and aligns the kerf the blade makes as it turns instead of the blade at any static position. That being said the runout is rarely more than .005 inches so if that is your acceptable tolerance you can say it doesn't make any difference.
Re: Table Alignment, Using Dual Dial Indicators
Posted: Wed Nov 30, 2016 5:10 pm
by dusty
algale wrote:That's what I was thinking of and it may be because you had previously posted it! Why did you go with the current version in the photo (no miter bar) vs the one in the illustration?
That is a hard question. Hard because I have been there before and did not carry through. I don't know why. I do like the idea of being able to check the relationship of the miter tracks to the blade. BUT That flies in the face of why this jig at all. The primary purpose (for me) has been to minimize the effort required to align the table while at the same time being very certain that the table was properly and accurately aligned.
If you do anything with your idea, think about a jig using both miter tracks. Sort of like the jig I have been using to make ZCI.
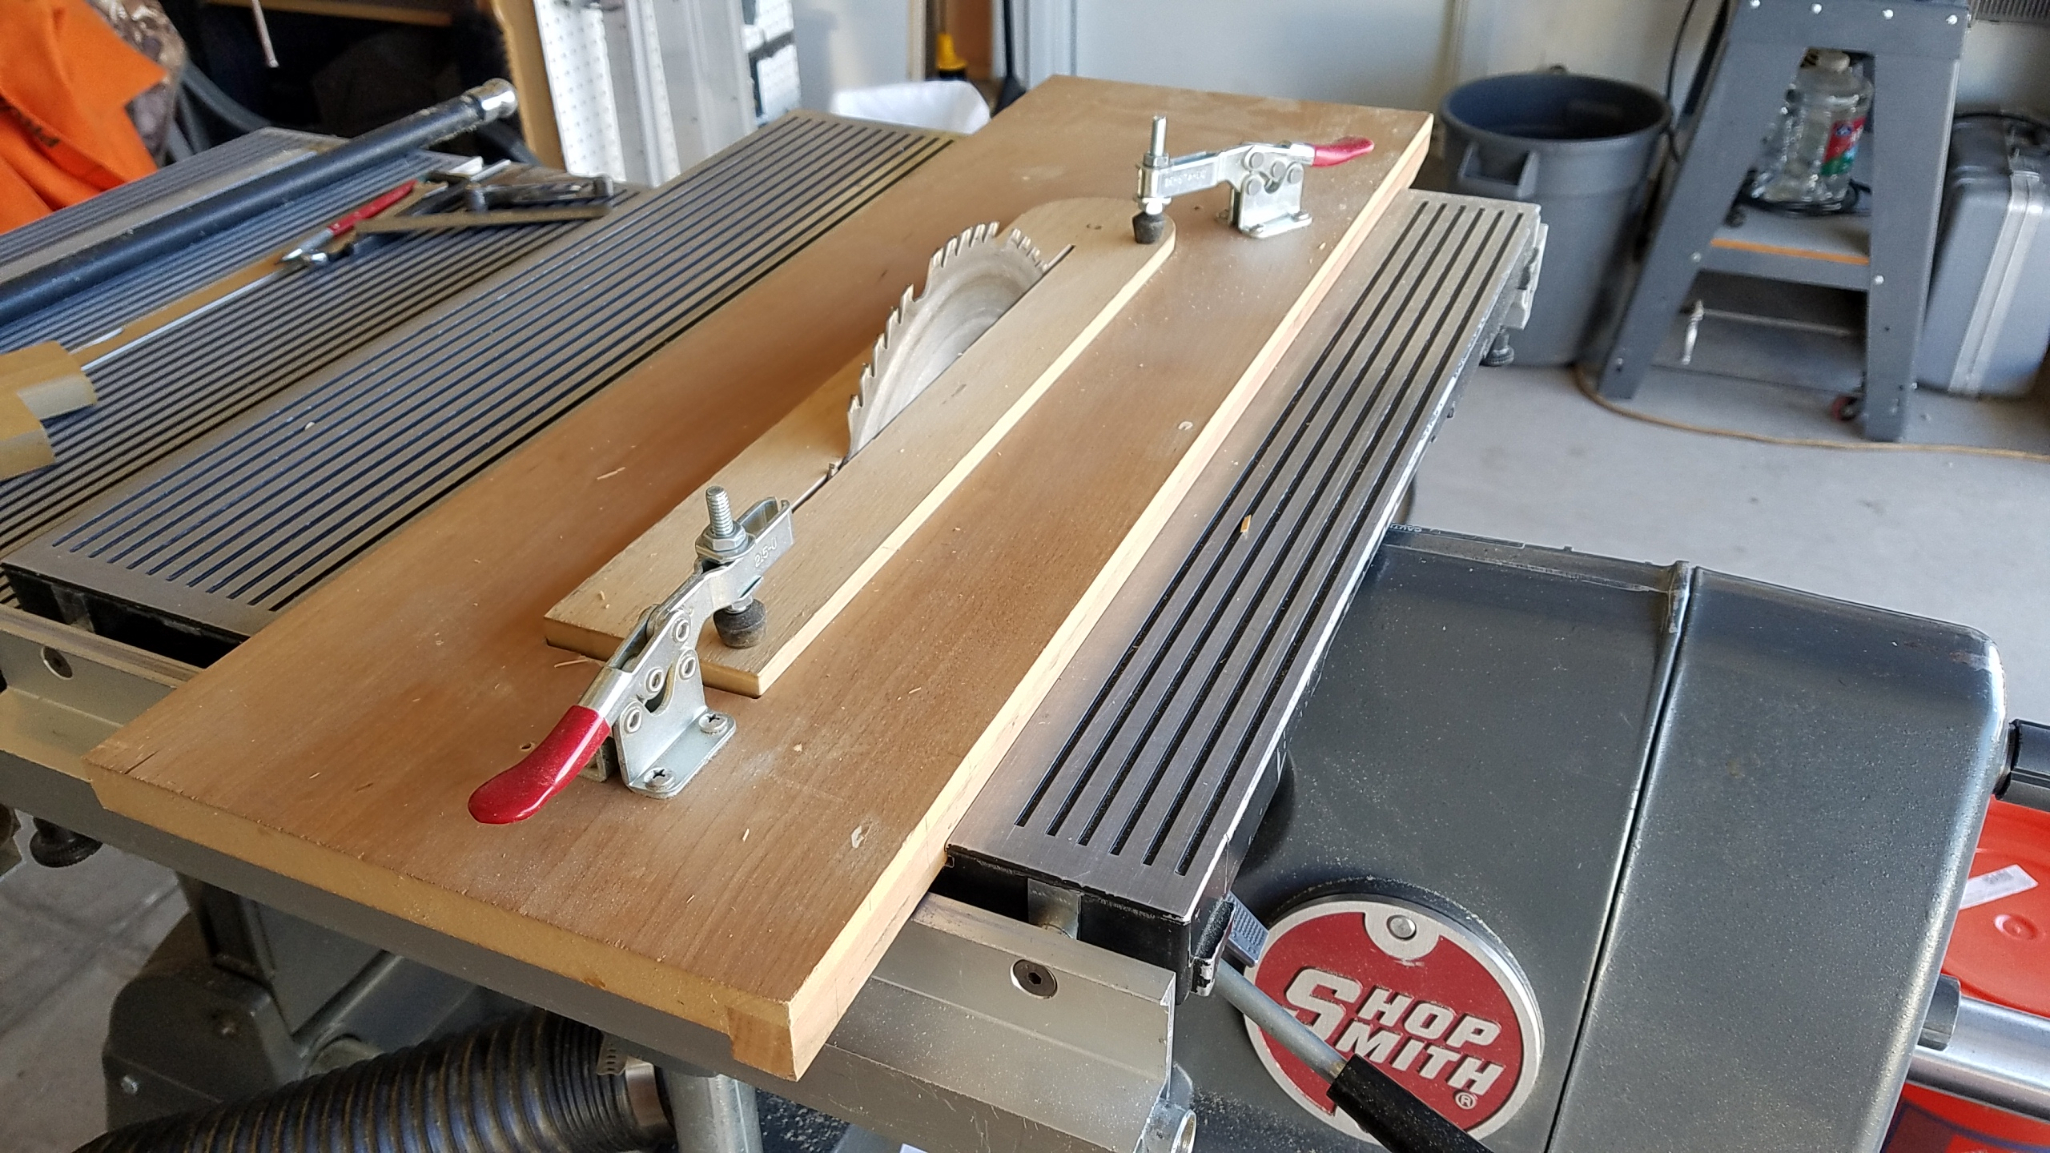
- ZCI Cutting Jig 006.jpg (2.11 MiB) Viewed 11209 times
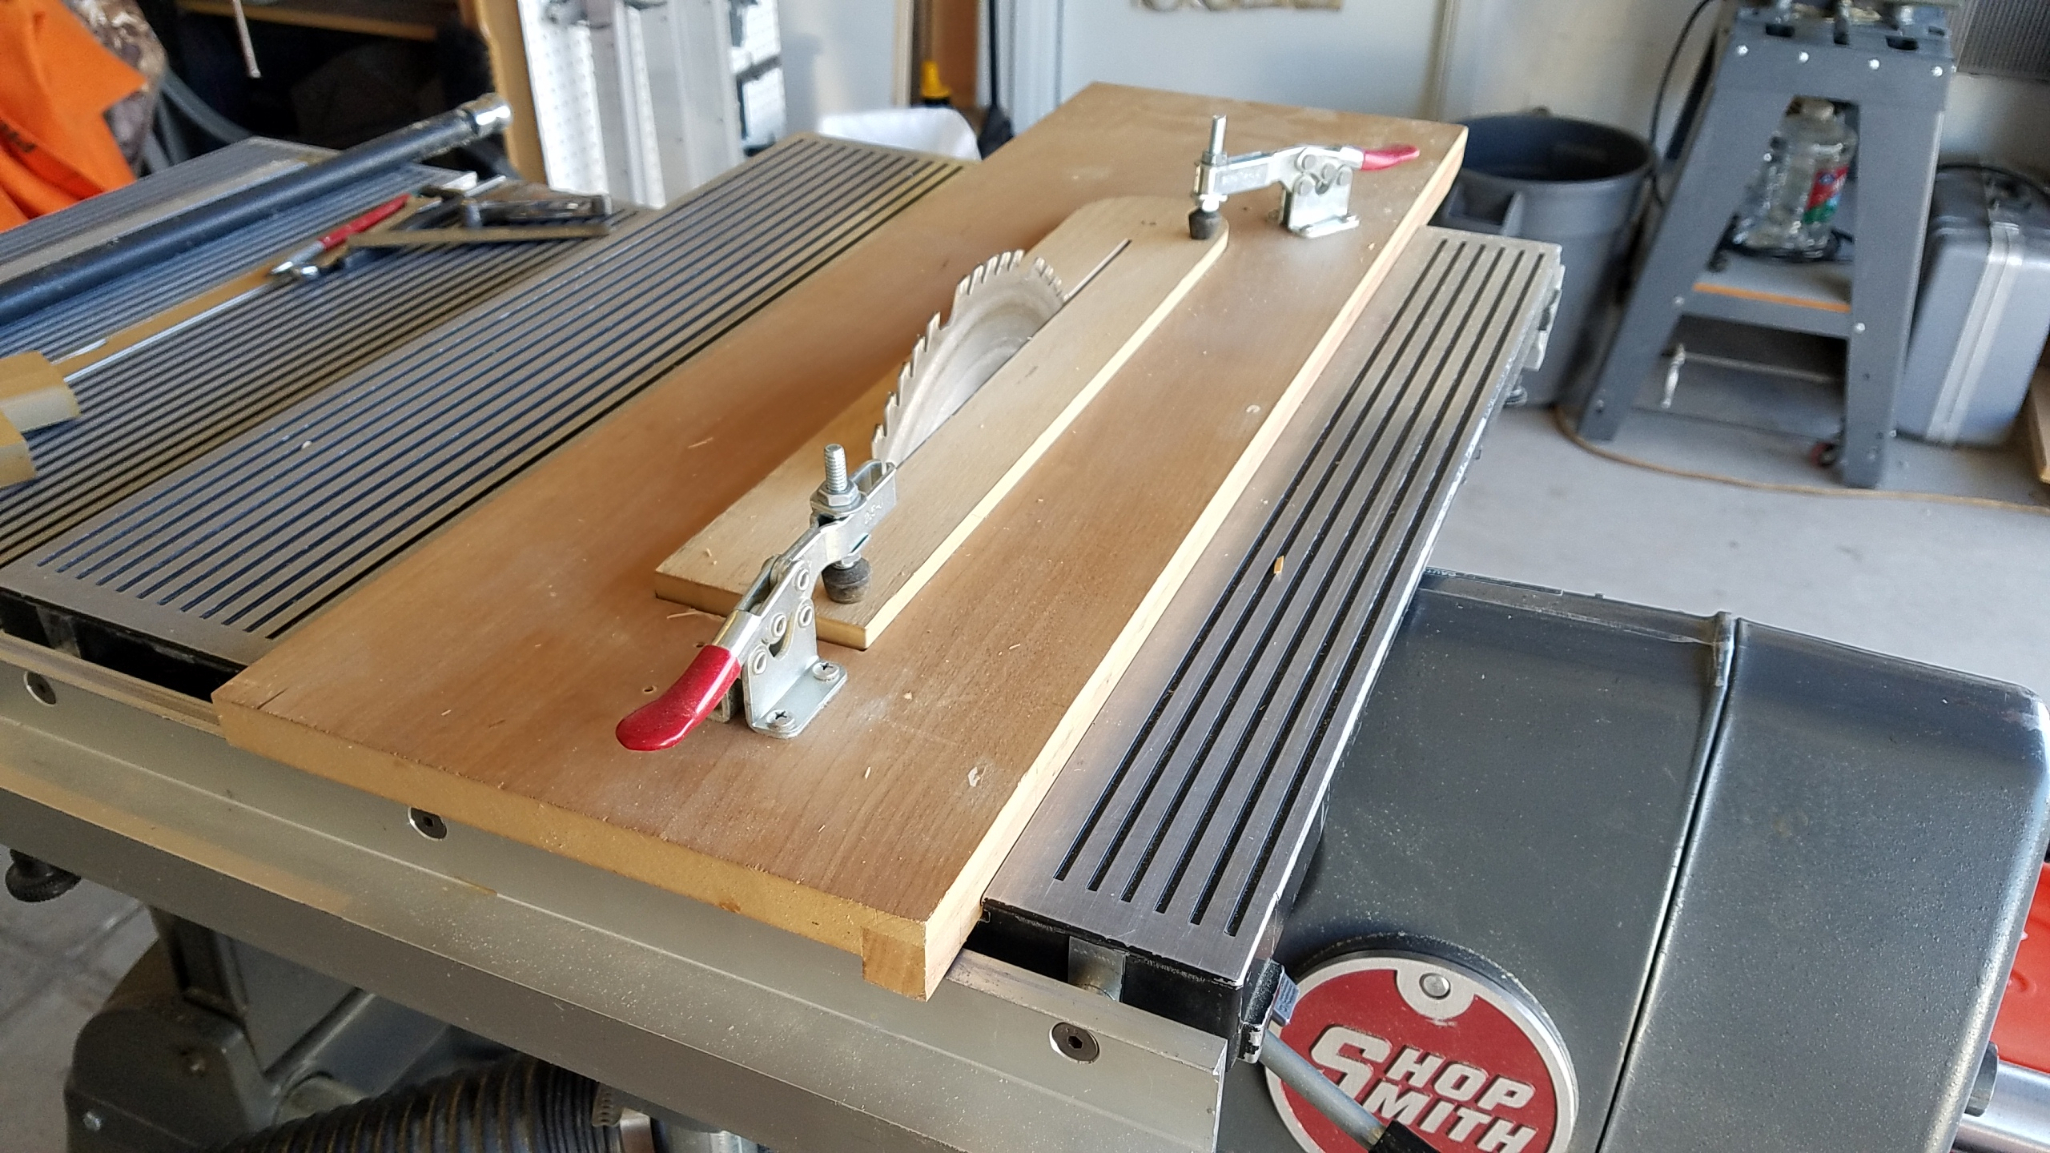
- ZCI Cutting Jig 007.jpg (2.06 MiB) Viewed 11209 times
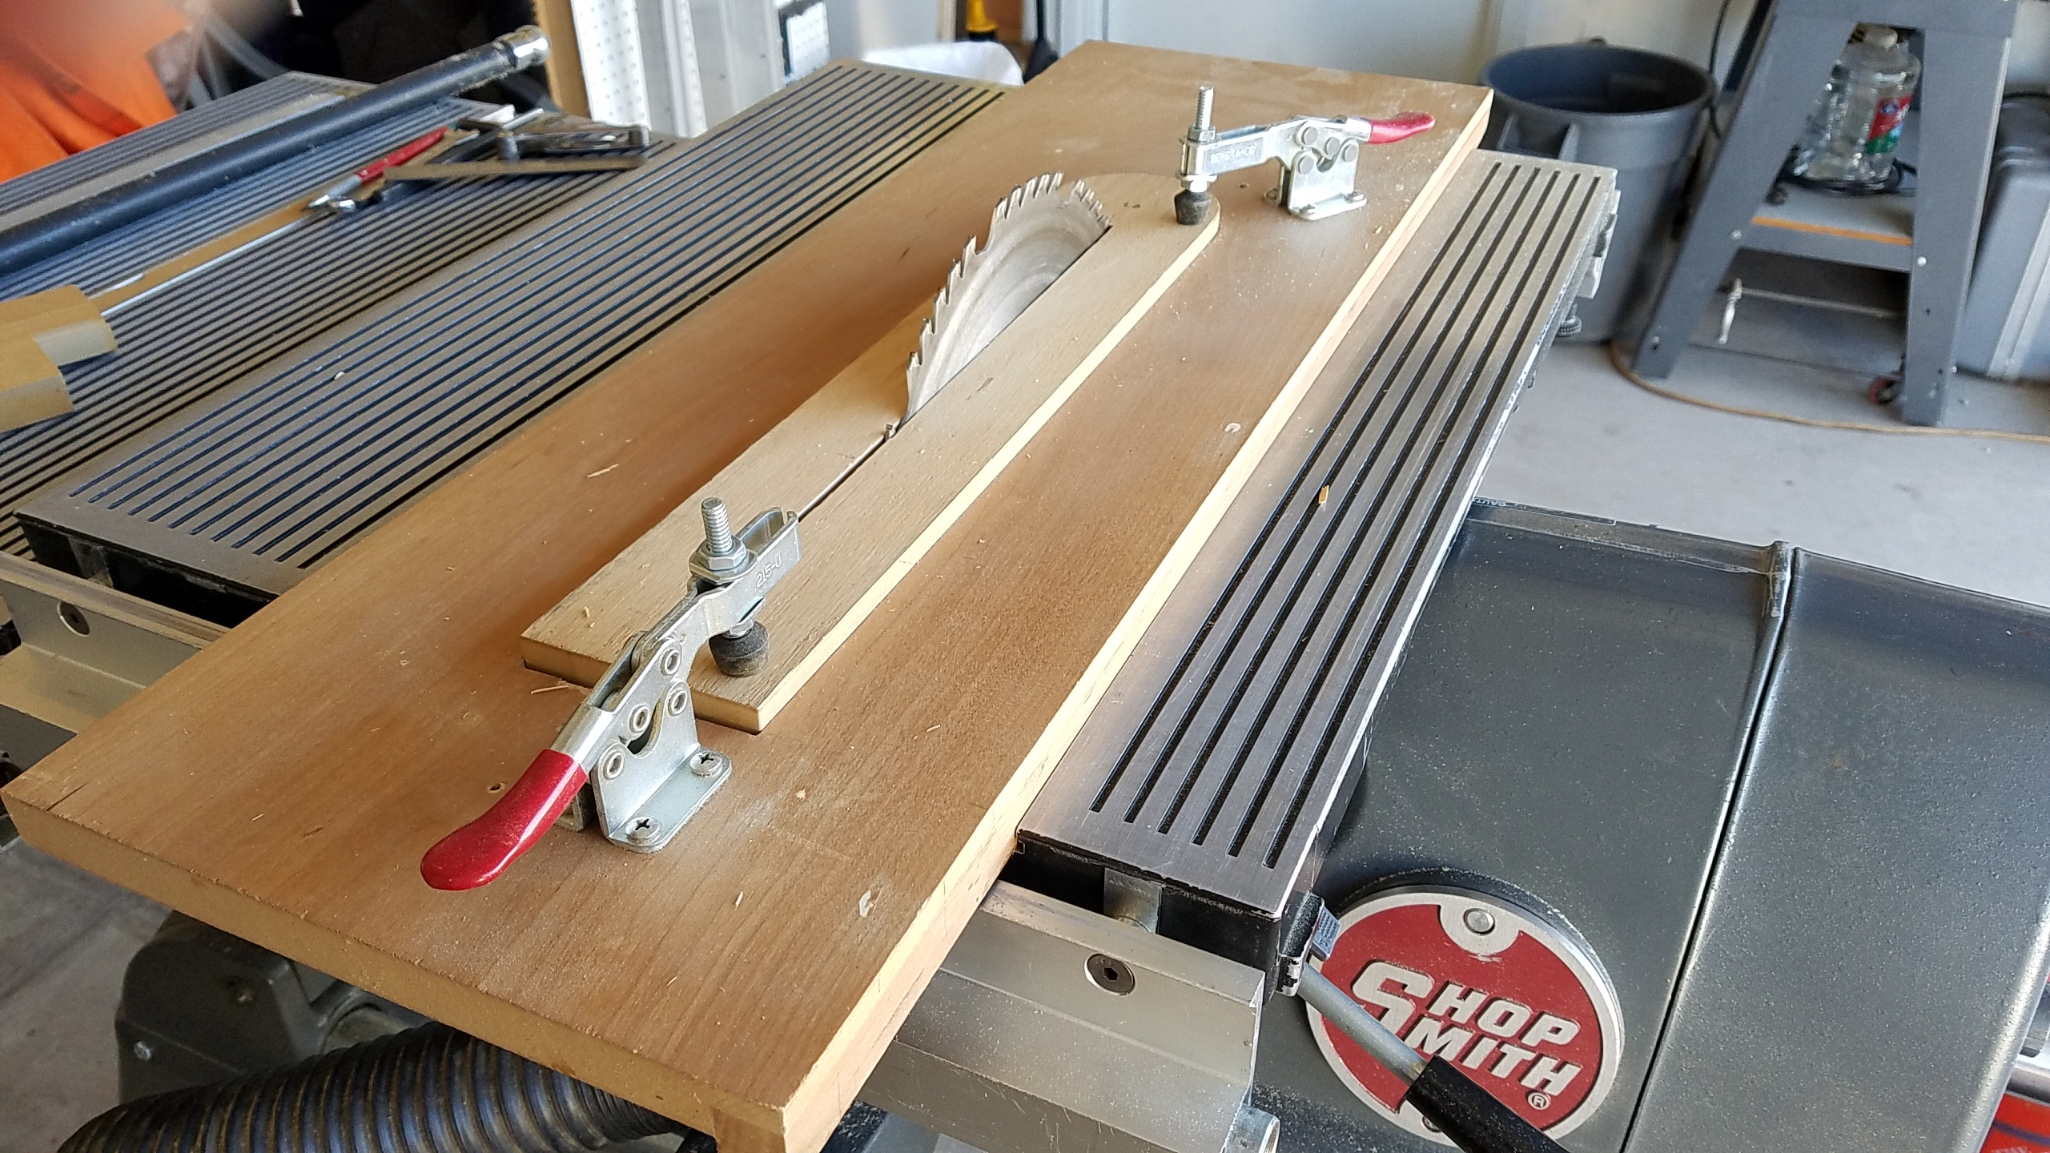
- ZCI Cutting Jig 008.jpg (2.24 MiB) Viewed 11209 times
This jig was created initially to allow me to cut a kerf in my ZCI long enough to facilitate the riving knife.
The ZCI shown here was to have been used as a 3/4" thick ZCI. Abandoned the idea because it interfered with the lower saw guard. I need to reexamine this because I think that could be fixed without giving up the thicker ZCI and could be a setup block for table alignment.
This sled has but one runner but it is wide enough to accommodate a second one. I might also add a miter track to the top to facilitate the dial indicators.
I also have a drill template as an accessory to this jig. I move the whole works to the drill press and punch the holes for the Table Insert Hold Down Screws. Previous to this I had a heck of a time drilling two holes in a table insert that were properly located.
Please excuse all the saw dust and the clutter in the back ground. I don't do well at keeping this place clean and neat. I do clear the table tops when I start a project.
Re: Table Alignment, Using Dual Dial Indicators
Posted: Wed Nov 30, 2016 5:29 pm
by algale
I think I already have a jig that may be adapted to this purpose. My scarfing jig (made to scarf gunwales on the Slow Boat). Basically it is a tight fitting miter bar with a deck and an angled fence on top. The fence on top is irrelevant to this purpose. I usually don't pay much attention to centering the blade, so as is it probably isn't centered. But if I turn the jig around, the deck may be wide enough to recut. What I would do is align the table with the blade centered using the normal (for me) method of a dial indicator but paying attention to centering. Then I would run the jig through the blade. That would the trimmed deck would then be the future reference surface for alignments.

Re: Table Alignment, Using Dual Dial Indicators
Posted: Wed Nov 30, 2016 5:36 pm
by dusty
algale wrote:I think I already have a jig that may be adapted to this purpose. My scarfing jig (made to scarf gunwales on the Slow Boat). Basically it is a tight fitting miter bar with a deck and an angled fence on top. The fence on top is irrelevant to this purpose. I usually don't pay much attention to centering the blade, so as is it probably isn't centered. But if I turn the jig around, the deck may be wide enough to recut. What I would do is align the table with the blade centered using the normal (for me) method of a dial indicator but paying attention to centering. Then I would run the jig through the blade. That would the trimmed deck would then be the future reference surface for alignments.
Yup. You are on the way to a new jig.
I like that storage location for your drill chuck. I keep an eye open for a suitable magnet but have yet to find one.
Is that sanding disk mounted for operation or is it in "temporary storage"?
Re: Table Alignment, Using Dual Dial Indicators
Posted: Wed Nov 30, 2016 5:39 pm
by algale
dusty wrote:
I like that storage location for your drill chuck. I keep an eye open for a suitable magnet but have yet to find one.
That's a "free" Harbor Freight magnetic parts dish. If you have a Harbor Freight near to you, keep an eye open on their flyers. It is a frequent give away, the other one being a tape measure.
If you buy it, it's a $3 item.
http://www.harborfreight.com/4-inch-mag ... 90566.html
Re: Table Alignment, Using Dual Dial Indicators
Posted: Wed Nov 30, 2016 5:41 pm
by dusty
algale wrote:dusty wrote:
I like that storage location for your drill chuck. I keep an eye open for a suitable magnet but have yet to find one.
That's a "free" Harbor Freight magnetic parts dish. If you have a Harbor Freight near to you, keep an eye open on their flyers. It is a frequent give away, the other one being a tape measure.
Harbor Freight Flyers??? I guess I have to stop by there tomorrow and check. I am, probably for obvious reasons, not on their email flyer list.
Re: Table Alignment, Using Dual Dial Indicators
Posted: Wed Nov 30, 2016 9:51 pm
by JPG
ecom1 wrote:Is the main table locked to the accessory table when you make these tests? I remember seeing a Sawdust Session showing a little play in the main table that could be limited by locking it to the extension - I ask because I could see myself leaning against the machine while making the reading and possibly "twisting" the table.
That would be a way to align the accessory table
after the main table is aligned.

Re: Table Alignment, Using Dual Dial Indicators
Posted: Thu Dec 01, 2016 10:53 am
by roopurt5
JPG wrote:
That would be a way to align the accessory table
after the main table is aligned.
I was actually just going to ask this question.
I did routine maintenance and alignment on my 520 a couple of months ago, and aligning the accessory table was a huge PITA. I've been thinking about how to simplify the process, and thought that I could perhaps loosen the bolts under the accessory table, then lock it to to the main table (while keeping a square against the disc sander), and then tighten everything down. I can't see why this wouldn't work.
Is this what everyone else does?