Alan,
Let's go through some basics and see what you have got. If you look at page 3 in the manual it describes the common terms for the different parts of the Mark 5. It also has a list of the original accessories included as a reference. You have more than just the standard included accessories.
To find out what has been done to your Mark 5 when it went in for factory service look at item 2 the Headstock. Where the arrow is pointing is the Belt Cover and to remove it your Headstock originally had 8 screws. With the Headstock on the right side of the Bench remove the Belt Cover screws. Slide the Belt Cover to the left on the Way Tubes and look at the upper end of the belt. It goes around the Drive Sleeve and will look like one of the first 2 pictures below.
_
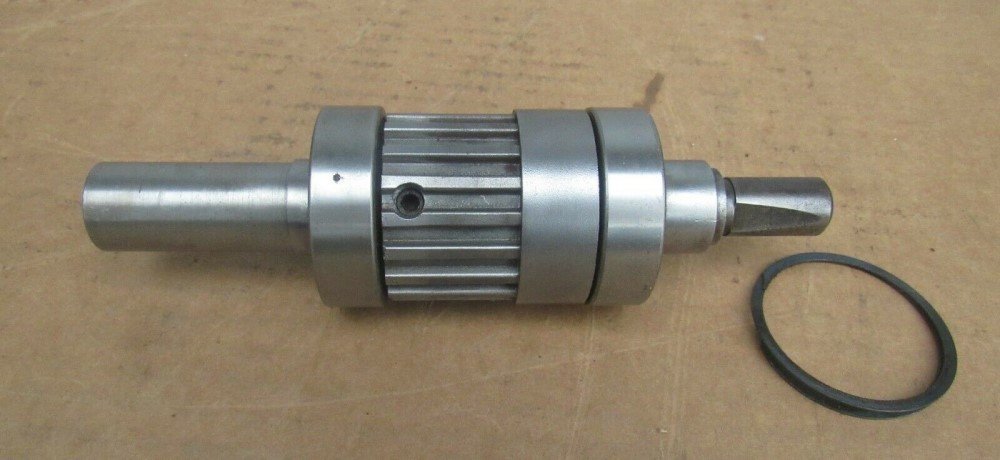
- Drive Sleeve Assembly - Gilmer - no clutch.jpg (68.45 KiB) Viewed 975 times
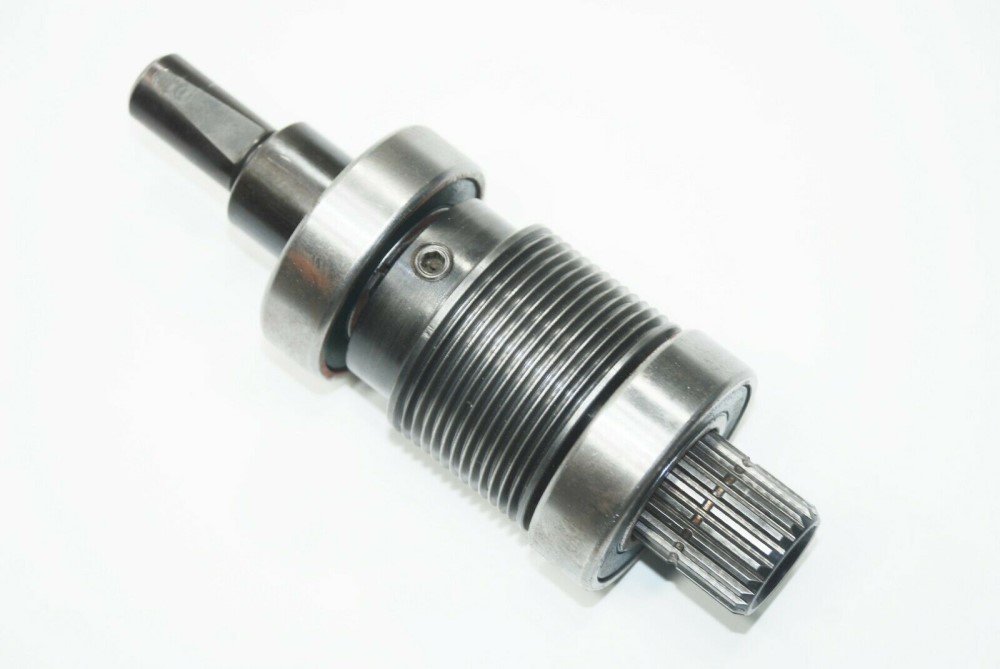
- Drive Sleeve Assembly - Poly V.jpg (56.73 KiB) Viewed 975 times
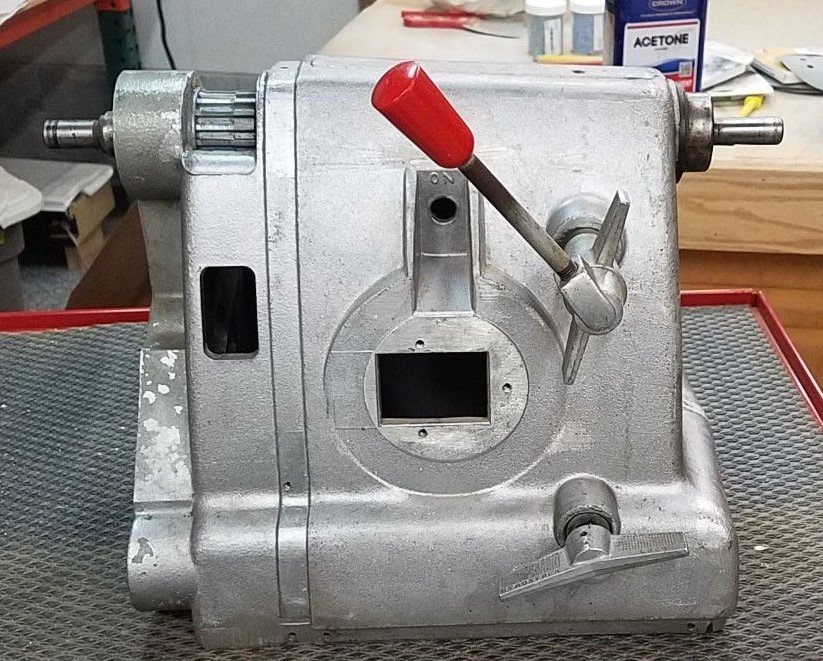
- Headstock A front w-parts.jpg (167.38 KiB) Viewed 975 times
.
Keep in mind you are seeing the Drive Sleeves in the above pictures without a belt on them or even in the Headstock for the top 2. The top picture is a Gilmer Drive Sleeve and uses a belt from the Idler Shaft Assembly that is described as a tank tread. It is the type of drive originally in your Mark 5. The second picture is the Poly V Drive and would be an upgrade for your Mark 5. In the 3rd picture note the top of the main Headstock casting on the left side under where the Belt Cover was. That is the location of the Drive Sleeve and the end of it that protrudes out of the Belt Cover is the upper auxiliary drive. If your Drive Sleeve looks like the Gilmer Drive in the first picture than your Mark 5 was not upgraded at the factory to the Poly V Drive as shown on the second picture. If it has the Poly V Drive that is a great upgrade for you.
With the Belt Cover off it is a good time to check the conditions inside the Headstock. Is it clean or does it need dust and debris cleaned out. Because you have the A Headstock it did not have an access hole behind the Shopsmith Logo Cover on the back side of the Headstock unless added at some point. That access hole allows you to get to the back side of the Idler Shaft Assembly to lubricate the sheave and the back of the Speed Control Assembly aka Speed Dial #8 on page 3. If you have read page 4 of the manual it describes how the pulley system works to change speeds with the Speed Dial. It is the moving sheaves of the Idler and motor pullies that make it work and need lubrication. Page 31 in your manual talks about Maintenance and Lubrication but in fact does a lousy job of it. It has already been suggested you get a newer Manual to help and this is a subject that is covered better in later Manuals. At the link below is a PDF Mark V 500 Summary Manual from here on the Shopsmith website.
https://www.shopsmith.com/getting_start ... Manual.pdf
Starting on page 53 it covers in more detail Lubrication and Maintenance. This is a summary of the complete manual and does not include all of the pages so page 53 is the 39th page in the PDF copy. For oiling the sheaves a light weight oil like sewing machine oil is recommended. One of the easiest oils to use because of it's container is the Zoom Spout Oiler. It has the extendable tube that makes it easier to reach those hard-to-reach spots. If your Mark 5 was upgraded to the Poly V Drive than it should have the oil holes in the sheave ends as shown in the Summary Manual but if not upgraded it may not have those oil holes. Do use several drops of oil for the sheaves since it may have been a while since it was last done.
You may have to remove the Motor to get to the back of the Idler Shaft to lubricate the Sheave. Not necessarily a bad thing at this time. Removing the Motor pan from the main Headstock casting will give you a better view of the motor and you may be able to see the information plate on the Motor to see if it has been upgraded. The original Motor was 3/4 HP but if upgraded it would be 1-1/8 HP. Do be careful when removing the Motor and pan since the wiring is still connected to the switch in the main casting.
I know it has been a lot of information so far and I hope I am not being to simplistic for you. If so let me know and I can be a little less detailed in my posts.
One last thought for today. There are some good YouTube videos available like the Jacob Anderson ones. Remember anyone can post a YouTube video and the information may not be the best. Do remember we are always glad to help here on the Shopsmith Forum.