cooch366 wrote: ↑Sun Jun 01, 2025 8:56 am
I’d be very interested in more details about your build and info about what you learned.
Steve, bainin
Thanks for your patience. And I apologize for the long winded explanation....
Here is how I did it:
There are 2 key steps:
1.
Getting the spacing between the posts exact, and
2.
Avoiding epoxy leakage onto the extension tubes and/or SS casting
You will need two SS extension table replacement tubes. I did not keep the SS part number, but if you call SS customer phone number, the lady will know what you are asking for. The parts are not on the Web site, but are available for $29 each. If you have a metal lathe, you can buy 1 and 1/4 inch steel pipe at the box store, but the ID of the SS casting is about 3 or 4 mils smaller than the OD of store bought 1 and 1/4 inch pipe, so you would need to mill it down to fit. I have no such skill, so I bought the extension table tubes directly from SS.
Next you should mill up two slabs of 8/4 hardwood. I used 28" in length and 6" wide. One will become the fixed jaw, the other a floating or adjustable jaw. In the floating jaw, the outer edge is chamfered at 45 degrees to allow for a tilted saw cut on stock mounted in the vice (for half-blind dovetails esp). After doing a lot of testing, I found that a 28" wide vice will allow for me to stabilize long pieces that stand on the floor while held vertically in the jaws outside of the screws.
In the stationary jaw,
two 1 and 1/4" holes are drilled 2 inches deep (in a series of steps) to receive the extension tubes. If the spacing is off by a little bit, the tubes will not engage the SS casting correctly and the completed vice will bind when lifting/lowering.
How to get the spacing between the tubes exact? Forget using measurements!! If you are off by 1/32, the tubes will not slide in the SS castings.
Instead, I used a template. I cut some scrap wood as wide as the thickness of the stationary jaw (2 inches wide by about 1/2 thick").
I cut off a section of that scrap piece as a spacer and placed it onto the SS castings, matching one edge to the outer rim of the recess in the casting and then trimming the opposite end to fit exactly in the distance between the casting recesses. IOWs, this is
a spacer that exactly represents the distance between the two tubes. Getting the spacer the exact length was just by feeling the edge as it rests on the casting recess. Small adjustments were made with the disc sander until an
exact fit.
Next, I drilled a 1 and 1/4" hole with Forstener bit in the longer template piece. This represents the position of the first extension tube. Then I hot glued the spacer to the template, aligning one edge to the previous cut hole, by feel. I rotated the template 180 degrees and butted the spacer up against the bit and drilled the second hole.

- MoxonTemplate1.jpg (101.96 KiB) Viewed 2638 times
Now the holes are the exact same distance apart that they would be on the SS casting.
To confirm this, I put the template over the casting and dropped both extension tubes through the template and into the casting. I was gratified they both slid into the casting without resistance. A stop collar was very helpful to keep the tubes from falling down through the casting while I fumbled with the twist knob.

- MoxonTemplate4.jpg (124.57 KiB) Viewed 2638 times
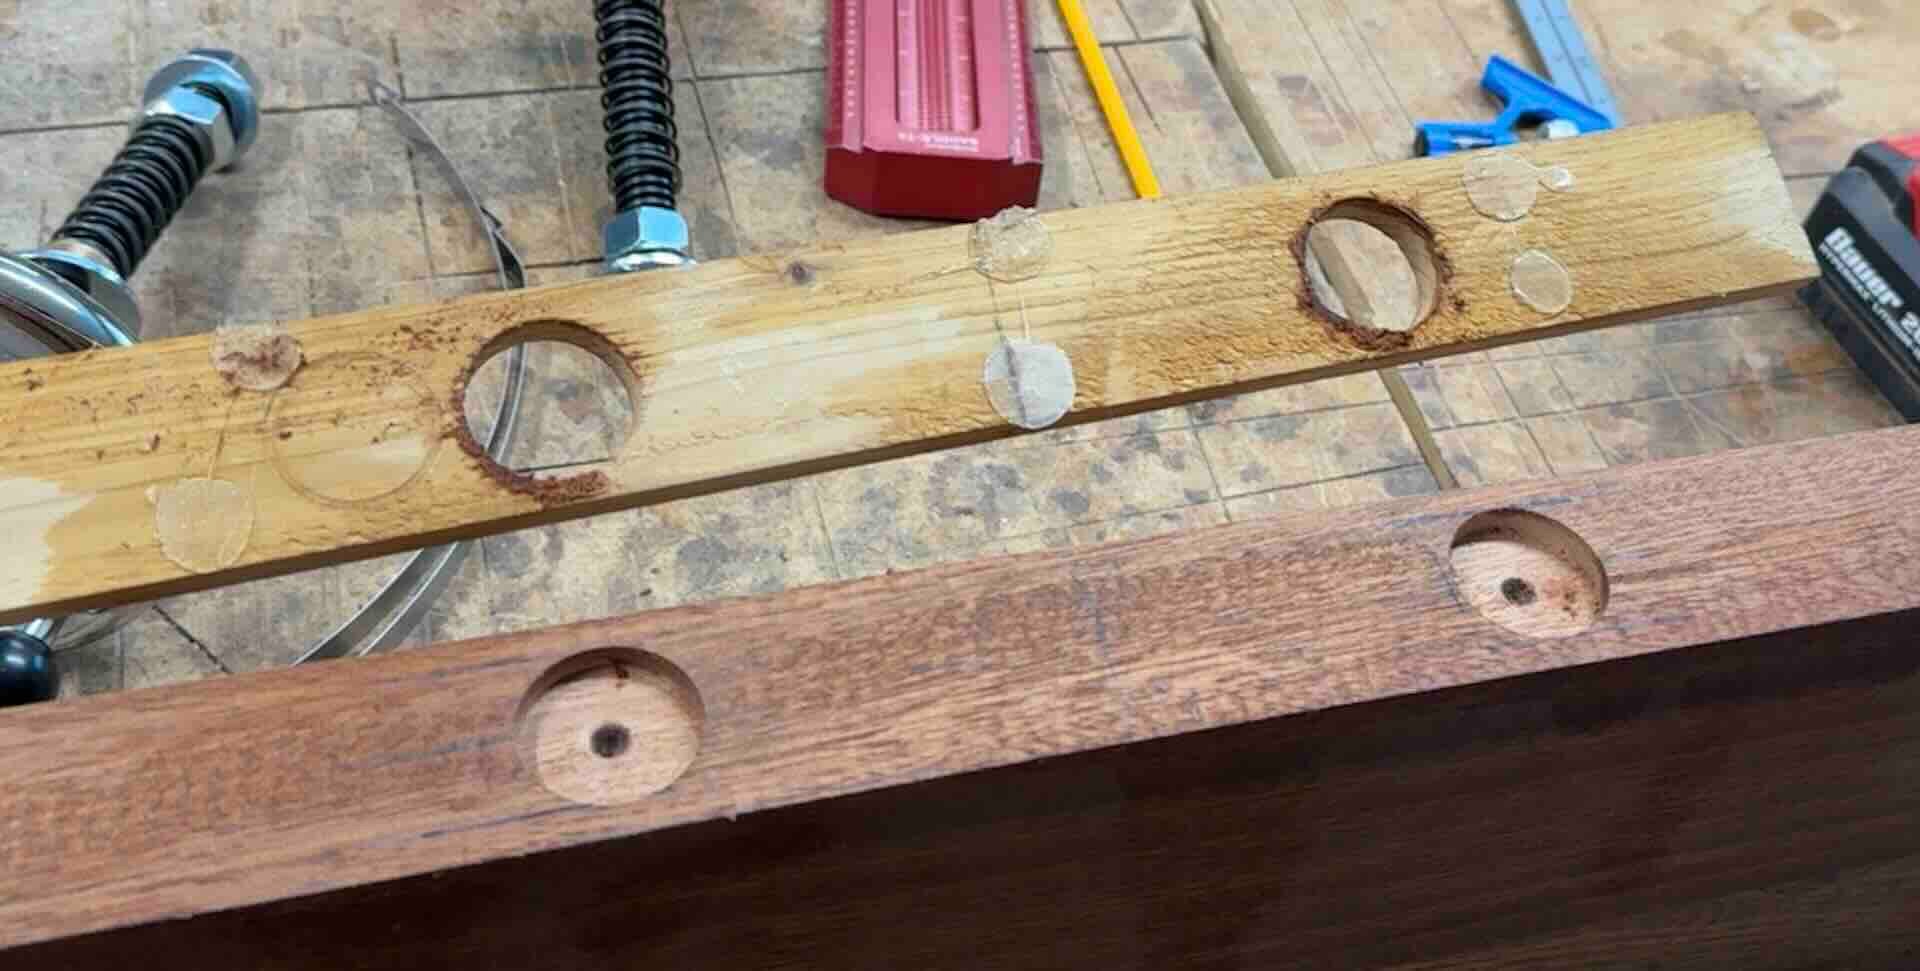
Now the goal is to use the template to transfer the same drill hole positions to the stationary jaw. To do this, I marked the dead center of the jaw blank, and
drew guides lines down the length of the blank to represent the OD of the extension tube, positioning the tube in the middle of the blank.

- MoxonTemplate3.jpg (177.31 KiB) Viewed 2638 times
Looking through the holes in the template, I adjusted its position until the outline of the holes were precisely over the guide lines and then held it down with hot glue.

- MoxonTemplate5.jpg (68.86 KiB) Viewed 2638 times
Then I started the 1 and 1/4 inch Forstener holes in the jaw blank with the template glued in place. After each hole was about 1/2" deep, I could remove the template and just deepen the holes to a final 2" depth.
BTW, if you haven't heard of this trick, you can just
spill denatured alcohol on hot glue and it quickly unbonds!!
- MoxonTemplate2.jpg (109.95 KiB) Viewed 2638 times
To permanently secure the extension tubes into these holes, I used epoxy. The trick is to
epoxy them into place and stand the stationary jaw upright in the SS casting so the epoxy cures with the exact (and I mean exact) correct tube position. However, if any epoxy runs out of the drill holes, it could ruin either your project or your SS. Here is how I solved that problem.
To prepare for glue up, I put the tubes into the forstener holes of the jaw blank and marked the depth of travel with a Sharpie. I removed the tubes, and scratched the surface by twisting the tubes inside a rolled up 100 grit sandpaper. This maneuver etched scratch marks into the top 1 inch of each tube so the epoxy had something to grip.
Then I covered the SS casting and the bottom of the stationary jaw with painters tape and used a utility knife to remove the tape from the recesses on both the SS and the jaw. This is a precaution to avoid accidental gluing of these surfaces.
To keep the epoxy from bleeding out of the holes,
I mixed the activated epoxy with sawdust from the same species of wood until the stirred glue mixture was thick like peanut butter and wouldn't run. Then I used a tongue depressor to apply the thickened epoxy to the deepest 1 inch of the forstener holes in the stationary jaw. I then inserted the etched portion of both extension tubes, gave them a twirl to distribute the epoxy, and finally
stood the entire assembly into the SS and guided the extension tubes about 50% of the distance downard into the castings, tightening the twist knob to secure the assembly in place. I waited 24 hours and found the tubes were securely bonded to the stationary jaw. I removed the painters tape. There was no epoxy spillage.
Now that the stationary jaw was prepared, all that was left was to make the correct drill holes for the twin screw hardware. There is no need for me to describe that, because there are several excellent videos on that subject, such as:
https://www.youtube.com/watch?v=2QbDh76mzCg
https://www.youtube.com/watch?v=S6ebOGM40mg
https://www.youtube.com/watch?v=UwdpWl3EICQ&t=303s
And many more videos...just search YouTube yourself. Its not a difficult build. Just two 3/4' holes for the twin screws, and recesses for the nuts.
Have a go and see what yours turns out like. Post some photos of your vice on this thread for all to see....
I am thoroughly happy with mine, and finding new uses for it every day. Great addition to the SS platform.
Thanks for your interest. Hope this helps....
Mark V 510 | Bosch Compound Miter Saw | Bosch Router w/ Rockler router lifts (2) | Laguna 16" bandsaw | Grizzly 8" jointer | Laguna SuperMax 19/38 drum sander with Stockroom Supply Hook-Look upgrade | SawStop cabinet saw | Grizzly Scroll Saw | Ryobi mini bandsaw | Ryobi belt / disc sander | Harbor Freight benchtop drill press, strip sander
 RF Guy