Robert,
Your German 4 wheeled workbench is awsome!:D
Sincerely,
Ron
$75 Shopsmith - let the fun begin...
Moderator: admin
I don't THINK so. It came with what it came with. The guy I bought it from said he bought it at a garage sale, and it had belonged to the seller's ex-husband. I have a feeling she had no idea what parts were associated with it, and several things probably remained in her basement, or were simply thrown out. So I'll have to eventually acquire those missing bits. It has no drill chuck for example, nor miter gauge, nor tail stock.etc92guy wrote:Don't see it in the photos........Did you get a jointer fence with it?
Oh well, at that price, I can't really complain can I?;)
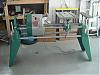
Good eye, Ron! Yeah, my "garage queen" is one of my pride and joys. Haven't had it on the road this summer because I've been so busy with the cottage purchase and fixup, and I have 2 other vehicles to drive...Ron309753 wrote:Robert,
Your German 4 wheeled workbench is awsome!:D
The plan is to fixup the Shopsmith and haul it to the cottage, where it will sit in the woodshed and help me do woodwork up there, upgrading the cottage etc.
Disassembly underway
Disassembly got underway this afternoon. Removed the table saw etc.
Managed to get the headstock off the tubes (PB Blaster penetrating oil is my friend!).
Headstock is now on the bench, and I was having a look inside. Things seem to be where they should be. All the shafts and the engine turn well by hand, belts engage, etc.
The power cord on the unit had the ground pin broken off, so I spliced on a 3 prong connector, plugged it in, and figured I'd just power it on momentarily to see what happened. When the seller plugged it in at his house, it just hummed.
Well this time, the motor fired up and gained speed, there was some noise like some dirt was moving around, then it tripped the breaker and stopped, after only 2-3 seconds.
I didn't try it again, figuring that I had better take the headstock apart (using the Sawdust sessions as a guide), and then do some better tests of the wiring and the motor.
I also took the cover off the bandsaw to look inside, and all looks well. Things turn nicely. I seem to be missing the attachment piece to connect it to the headstock (will add that to my list of things to get).
I attach a few pictures for your entertainment. Still a long way to go, but today was a good start. What would have made it even better is if the motor had turned smoothly and cycled well through all the speeds...
Question: is there anything holding the top tubes into the end piece that swings upward for the drill-press function? One is wiggling pretty good but won't pull out yet. I'll let PBlaster do its work overnight...
Cheers.
[ATTACH]5499[/ATTACH]
[ATTACH]5500[/ATTACH]
[ATTACH]5501[/ATTACH]
[ATTACH]5502[/ATTACH]
[ATTACH]5503[/ATTACH]
Managed to get the headstock off the tubes (PB Blaster penetrating oil is my friend!).
Headstock is now on the bench, and I was having a look inside. Things seem to be where they should be. All the shafts and the engine turn well by hand, belts engage, etc.
The power cord on the unit had the ground pin broken off, so I spliced on a 3 prong connector, plugged it in, and figured I'd just power it on momentarily to see what happened. When the seller plugged it in at his house, it just hummed.
Well this time, the motor fired up and gained speed, there was some noise like some dirt was moving around, then it tripped the breaker and stopped, after only 2-3 seconds.
I didn't try it again, figuring that I had better take the headstock apart (using the Sawdust sessions as a guide), and then do some better tests of the wiring and the motor.
I also took the cover off the bandsaw to look inside, and all looks well. Things turn nicely. I seem to be missing the attachment piece to connect it to the headstock (will add that to my list of things to get).
I attach a few pictures for your entertainment. Still a long way to go, but today was a good start. What would have made it even better is if the motor had turned smoothly and cycled well through all the speeds...
Question: is there anything holding the top tubes into the end piece that swings upward for the drill-press function? One is wiggling pretty good but won't pull out yet. I'll let PBlaster do its work overnight...
Cheers.
[ATTACH]5499[/ATTACH]
[ATTACH]5500[/ATTACH]
[ATTACH]5501[/ATTACH]
[ATTACH]5502[/ATTACH]
[ATTACH]5503[/ATTACH]
- Attachments
-
- ssbandsaw.jpg (53.49 KiB) Viewed 2187 times
-
- ssbench.jpg (44.05 KiB) Viewed 2181 times
-
- ssshaft.jpg (55.41 KiB) Viewed 2181 times
-
- sstubes.jpg (63.47 KiB) Viewed 2175 times
-
- ssinternals.jpg (58.41 KiB) Viewed 2184 times

There should be a set screw underneath. You also may have to work at it to get the tube out, since it's been in there a long time.rstl99 wrote:Question: is there anything holding the top tubes into the end piece that swings upward for the drill-press function? One is wiggling pretty good but won't pull out yet. I'll let PBlaster do its work overnight...
Cheers.
SS 500(09/1980), DC3300, jointer, bandsaw, belt sander, Strip Sander, drum sanders,molder, dado, biscuit joiner, universal lathe tool rest, Oneway talon chuck, router bits & chucks and a De Walt 735 planer,a #5,#6, block planes. ALL in a 100 square foot shop.
.
.
Bob
.
.
Bob
Motor is good!
Took out the circlip and spring attached to motor shaft, and removed the belt after prying the two sheaves apart. They appeared to be stuck together, which may have caused the resistance that caused the motor to trip the 15A breaker.
With the belt off, the motor turns very smoothly. I'm glad of that , and will continue to remove components (sheaves etc.) and do a good cleaning and lubrication job inside.
I'll have to check out the floating sheaves, and also the bearings.
Based on my serial number (11874) I gather that my SS was built in the mid-70's.
Anyway, it was pretty clean inside (a small clump of sawdust here and there), so whoever originally owned it either did not use it much, or cleaned it before putting it into storage (different screws holding the belt cover etc. are indicative to someone having been in there before).
The rusty tubes and flaked off paint on the unit are indicative that it didn't see very good treatment after that original owner, and obviously the most recent previous owner left it outside in rain/snow which is pretty silly.
Once I get the headstock sorted out, I'll start on the tubes, then address some of the cosmetics (paint things up a bit). I don't want to turn this into a showroom restoration model (don't have the time nor the inclination, though I greatly admire what some of you have done to neglected specimens!) but I'd like it to look neat and tidy, and work well.
Cheers.
With the belt off, the motor turns very smoothly. I'm glad of that
, and will continue to remove components (sheaves etc.) and do a good cleaning and lubrication job inside.I'll have to check out the floating sheaves, and also the bearings.
Based on my serial number (11874) I gather that my SS was built in the mid-70's.
Anyway, it was pretty clean inside (a small clump of sawdust here and there), so whoever originally owned it either did not use it much, or cleaned it before putting it into storage (different screws holding the belt cover etc. are indicative to someone having been in there before).
The rusty tubes and flaked off paint on the unit are indicative that it didn't see very good treatment after that original owner, and obviously the most recent previous owner left it outside in rain/snow which is pretty silly.
Once I get the headstock sorted out, I'll start on the tubes, then address some of the cosmetics (paint things up a bit). I don't want to turn this into a showroom restoration model (don't have the time nor the inclination, though I greatly admire what some of you have done to neglected specimens!) but I'd like it to look neat and tidy, and work well.
Cheers.
Ron - you might have trouble with the 15A circuit. The SS tends to blow those when running - even in top operating condition. I was lucky enough to have a garage wired in 20A, never had a problem.
The motors are rated for - if memory serves - 13A continuous, but spike at startup. Just make sure that is the only thing you have running on that circuit and start it up at the slowest speed, will give you the best chance.
Matt
The motors are rated for - if memory serves - 13A continuous, but spike at startup. Just make sure that is the only thing you have running on that circuit and start it up at the slowest speed, will give you the best chance.
Matt
Lost count, over a dozen rebuilt/repaired/restored
Personal equipment: 510 made in 1993, belt sander, jig saw, band saw, planer and jointer
Matt in GA
Personal equipment: 510 made in 1993, belt sander, jig saw, band saw, planer and jointer
Matt in GA
Thanks Matt (eight and counting eh? where do you find the room?!)
I searched the site and found some very enlightening (and at times confusing) discussions about amperage and house wiring.
Indeed, I gather that one safer with a 20A circuit to run this tool. I have an older house which still has a fuse panel, and the insurance inspector advised me to replace all the fuses with 15A ones, indicating that's what the wiring was good for. Obviously, I'll replace one of them with a 20A one, and plug the SS into that garage circuit. Eventually, I want to get the panel upgraded to breakers, and at the time, can get proper shop wiring installed too, with dedicated 20A circuits.
A couple of pics of the inside of my headstock (needs a good cleaning, but all looks in decent shape - porkchop, etc.). The motor pan has obviously served as a recipient of rainwater (sigh...), so will need to be derusted and painted.
A lot of elegant simplicity of design in this machine, I must admit.
Coming along...
Oh, and yes indeed, I finally found the set screws holding the other end of the tubes (kind of hidden underneath there!).
[ATTACH]5505[/ATTACH]
[ATTACH]5506[/ATTACH]
[ATTACH]5507[/ATTACH]
I searched the site and found some very enlightening (and at times confusing) discussions about amperage and house wiring.
Indeed, I gather that one safer with a 20A circuit to run this tool. I have an older house which still has a fuse panel, and the insurance inspector advised me to replace all the fuses with 15A ones, indicating that's what the wiring was good for. Obviously, I'll replace one of them with a 20A one, and plug the SS into that garage circuit. Eventually, I want to get the panel upgraded to breakers, and at the time, can get proper shop wiring installed too, with dedicated 20A circuits.
A couple of pics of the inside of my headstock (needs a good cleaning, but all looks in decent shape - porkchop, etc.). The motor pan has obviously served as a recipient of rainwater (sigh...), so will need to be derusted and painted.
A lot of elegant simplicity of design in this machine, I must admit.
Coming along...
Oh, and yes indeed, I finally found the set screws holding the other end of the tubes (kind of hidden underneath there!).
[ATTACH]5505[/ATTACH]
[ATTACH]5506[/ATTACH]
[ATTACH]5507[/ATTACH]
- Attachments
-
- ssheadinside.jpg (86.64 KiB) Viewed 2177 times
-
- ssmotorpan.jpg (52.12 KiB) Viewed 2174 times
-
- ssheadinside2.jpg (72.78 KiB) Viewed 2173 times

 Ron - 14 gauge will handle a 15 amp fuse/breaker. 12 gauge wire is for a 20 amp fuse/breaker. It is not recommended to put a 20 amp fuse/breaker on a 14 gauge circuit. This could lead to the SS not making it to the cottage, but being used to put your house back together.
 In regards to the motor, it also comes apart. Since you have the headstock this far apart, take it apart. Since it moves the windings are good, but you should check the motor bearings. The one closest to the sheaves seems to take a beating. This is a preventive move that could save you more than $300 in the long run if the bearings fail.

-
JPG

- Platinum Member
- Posts: 35600
- Joined: Wed Dec 10, 2008 7:42 pm
- Location: Lexington, Ky (TAMECAT territory)
Considering its RECENT past, it look purty solid!(motor pan excepted, but good enough)rstl99 wrote:Thanks Matt (eight and counting eh? where do you find the room?!)
I searched the site and found some very enlightening (and at times confusing) discussions about amperage and house wiring.
Indeed, I gather that one safer with a 20A circuit to run this tool. I have an older house which still has a fuse panel, and the insurance inspector advised me to replace all the fuses with 15A ones, indicating that's what the wiring was good for. Obviously, I'll replace one of them with a 20A one, and plug the SS into that garage circuit. Eventually, I want to get the panel upgraded to breakers, and at the time, can get proper shop wiring installed too, with dedicated 20A circuits.
A couple of pics of the inside of my headstock (needs a good cleaning, but all looks in decent shape - porkchop, etc.). The motor pan has obviously served as a recipient of rainwater (sigh...), so will need to be derusted and painted.
A lot of elegant simplicity of design in this machine, I must admit.
Coming along...
Oh, and yes indeed, I finally found the set screws holding the other end of the tubes (kind of hidden underneath there!).
BANDSAW! Release the blade tension!!!!!! The screw is run ALL the way in. It should be 'stored' with the tension RELEASED(The red spring's back edge showing below the 1/8 mark, and the blade untensioned. Lubricate the threads b4 backing out IF there is any rust(powdered graphite if no rust). If it was 'stored for years' in this position, the spring bar may be "sprung".
FUSE! Do NOT merely replace the 15A fuse with a 20A! Look for a slo-blow/time delay 15A fuse and try to eliminate any other loads on the branch circuit protected by that fuse. BTW did the PO have a blown fuse/tripped breaker after the attempted startup b4 you bought it? If an extension cord was being used then, it would have contributed to the result then.
Glad you found the set screw. They have a disturbing habit of being loose. I think they are being tightened with the hinge pin installed and IN THE WAY!
IF you have not already 'discovered' the following, check it out!:D
url to follow http://www.shopsmith.net/forums/showthr ... #post41339
╔═══╗
╟JPG ╢
╚═══╝
Goldie(Bought New SN 377425)/4" jointer/6" beltsander/12" planer/stripsander/bandsaw/powerstation /Scroll saw/Jig saw /Craftsman 10" ras/Craftsman 6" thicknessplaner/ Dayton10"tablesaw(restoredfromneighborstrashpile)/ Mark VII restoration in 'progress'/ 10E[/size](SN E3779) restoration in progress, a 510 on the back burner and a growing pile of items to be eventually returned to useful life. - aka Red Grange
╟JPG ╢
╚═══╝
Goldie(Bought New SN 377425)/4" jointer/6" beltsander/12" planer/stripsander/bandsaw/powerstation /Scroll saw/Jig saw /Craftsman 10" ras/Craftsman 6" thicknessplaner/ Dayton10"tablesaw(restoredfromneighborstrashpile)/ Mark VII restoration in 'progress'/ 10E[/size](SN E3779) restoration in progress, a 510 on the back burner and a growing pile of items to be eventually returned to useful life. - aka Red Grange