My ’54 Greenie doesn’t have either of these lubrication holes and I want to add them. I have my headstock all apart and I can determine the location of the hole in the shaft for the moveable sheave well enough to drill it accurately. However, I need to determine the position of the hole in the motor shaft properly. Does anyone have a “disassembled” photo of the motor shaft that shows the hole and maybe some measurements I can use to drill this thing while I have it apart???
By the way, check out my post on adding the hole behind the medallion, as mentioned earlier. https://forum.shopsmith.com/viewtopic.php?t=5176
Lubricating the Headstock
Moderator: admin
Read the second post to this thread:
https://forum.shopsmith.com/viewtopic.php?t=2014
Sincerely,
Ron309753
https://forum.shopsmith.com/viewtopic.php?t=2014
Sincerely,
Ron309753

I find the Greenies I rebuild do not have an oil hole in the control or floating sheaves. I drill a 5/32" hole on the keyway 1/8" from the raised collar on both sheaves. This is where Shopsmith had their oiling holes for these sheaves. It is thin metal over the keyway so if not using a drill press, be careful not to allow the drill bit to travel to the other side of the sheave. I use a center punch and find the weight of the drill is all that is needed to drill the oiling holes in the sheaves.sliver wrote:My ’]https://forum.shopsmith.com/viewtopic.php?t=5176[/url]
Bill Mayo bill.mayo@verizon.net
Shopsmith owner since 73. Sell, repair and rebuild Shopsmith, Total Shop & Wood Master headstocks, SPTs, attachments, accessories and parts. US Navy 1955-1975 (FTCS/E-8)
Shopsmith owner since 73. Sell, repair and rebuild Shopsmith, Total Shop & Wood Master headstocks, SPTs, attachments, accessories and parts. US Navy 1955-1975 (FTCS/E-8)
Picture worth a 1000 words. TY
Never has that quote been more true. You don't know how thankful I am. New user btw. I am going to change the belts soon that should be fun.
bluekayak wrote:Boy am I every glad I asked you all for help. I almost took a pry bar to my Greenie's nameplate. I took some pictures of the Gray in case anyone else is wondering how this is done. Make sure your machine is unplugged before doing this.
The hole behind the Shopsmith nameplate is easy to find. Putting three drops of oil in that hole, using a stick (the manual's method) is not so easy.
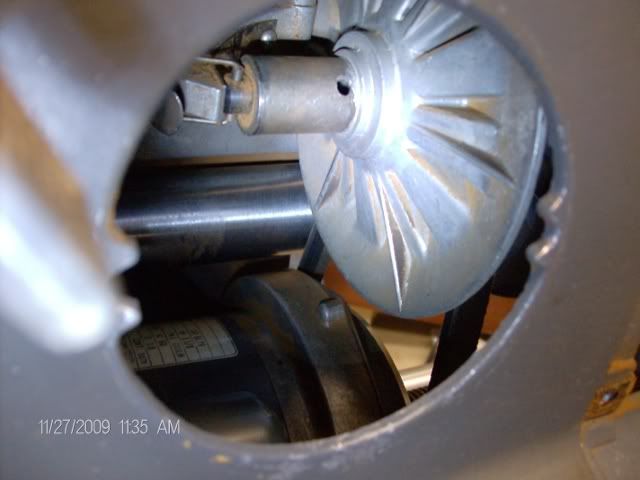
Finding the hole on the motor's shaft is much more difficult (impossible if you follow the manual's instructions). Here the sheave is spread wide apart -- set at the slowest speed setting. This will never work. The hole is under the spring, which is very tight at the slow speed setting. In fact, the hole may be under the sheave.
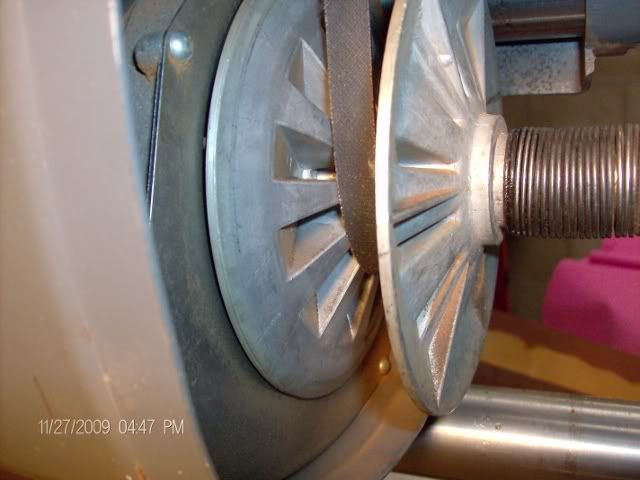
To access the hole, you have to set the headstock at the highest speed. This compresses the sheave and makes the spring as loose as possible.
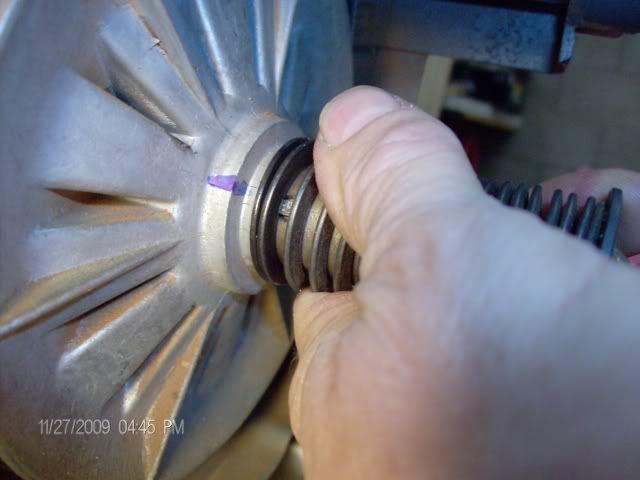
I think this is the hole and hope one of you can confirm. I was expecting it to be about 1/2 inch away from the sheave as the manual states. If this is not the hole, I oiled the wrong thing. Once you find it, mark it with a permanent marker.
One thing you have to watch out for is restarting your machine after it is set at the highest possible setting. I'd recommend putting on a sanding wheel and turning the machine while you lower the speed setting before starting it up.
Jerry Floren
St. Peter, MN
-
JPG

- Platinum Member
- Posts: 35600
- Joined: Wed Dec 10, 2008 7:42 pm
- Location: Lexington, Ky (TAMECAT territory)
redrock wrote:Never has that quote been more true. You don't know how thankful I am. New user btw. I am going to change the belts soon that should be fun.
That be the correct hole. You can see the key!(excellent pix). Putting some oil at the opposite end in the keyway slot be good also.
BTW: No the hole is NOT 'under the sheave'! It is on the 'snout' as shown in the last pix.
╔═══╗
╟JPG ╢
╚═══╝
Goldie(Bought New SN 377425)/4" jointer/6" beltsander/12" planer/stripsander/bandsaw/powerstation /Scroll saw/Jig saw /Craftsman 10" ras/Craftsman 6" thicknessplaner/ Dayton10"tablesaw(restoredfromneighborstrashpile)/ Mark VII restoration in 'progress'/ 10E[/size](SN E3779) restoration in progress, a 510 on the back burner and a growing pile of items to be eventually returned to useful life. - aka Red Grange