dusty wrote:The real trick to avoiding build up is too buff it out very well. If you put it on and then sorta give it a promise, you will have buildup. I recommend that you put it on frequently and then only sparingly. Let it dry for 10-15 minures and buff it thoroughly. Even with Johnsons Wax, which I use exclusively, will come off on your projects if you do not buff it well. Used in this manner there will be no buildup.
If you get the black marks out, please post some pictures here of the before and after and tell how. I have some made by droppings from the quail that seasonally attempt to roost on my upper storage shelves. I have tried everything short of taking an abrasive to the table tops. The two on my jointer really tick me off.
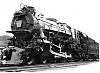
Here are some before and after pics of what I've done so far.
First I used some Citristrip and painted it on with a paint brush and left it on overnight. Then went over it with some fine (#00000) steel wool and Odorless Mineral Spirits. This got a good portion of the dark spots off, but I was still not satisfied. I tried to fine some Fine Brass Wire Wheels for my grinder, but could only fine steel or brass coated steel at the big box stores. I have since ordered some from Amazon. In my Noobie excitement/impatient, I took my orbital sander and 220 grit and went to it. About 30 seconds into this process I got the impression I was removing more Aluminum than Alox and stopped. I may try some naval jelly next while I wait for my wire wheels to come. Unless anyone advises against this.
Note on After Pic: (The obvious curved lines appeared before my sanding experiment and appear to be old damage that was hidden under the alox)
Attachments
DSCN0567.JPG (51.5 KiB) Viewed 2782 times
4781582956_50a5e9f894.jpg (103.38 KiB) Viewed 2784 times
4780945871_c73fae5eb7.jpg (71.64 KiB) Viewed 2783 times
barsymes wrote:Here are some before and after pics of what I've done so far.
First I used some Citristrip and painted it on with a paint brush and left it on overnight. Then went over it with some fine (#00000) steel wool and Odorless Mineral Spirits. This got a good portion of the dark spots off, but I was still not satisfied. I tried to fine some Fine Brass Wire Wheels for my grinder, but could only fine steel or brass coated steel at the big box stores. I have since ordered some from Amazon. In my Noobie excitement/impatient, I took my orbital sander and 220 grit and went to it. About 30 seconds into this process I got the impression I was removing more Aluminum than Alox and stopped. I may try some naval jelly next while I wait for my wire wheels to come. Unless anyone advises against this.
Note on After Pic: (The obvious curved lines appeared before my sanding experiment and appear to be old damage that was hidden under the alox)
I do not think that is a good idea! It is for steel, not aluminum, and is an acid(eats good with the bad).
Fine steel wire wheel will do a pretty good job. Understand it will go in stages. The alox will polish, then get removed creating a lighter but duller finish. Which finish you shoot for is up to you. If ya got dark 'spots' then the heavier removal will be more satisfactory. Resist the temptation to press hard, let the wire wheel do the 'work'. Getting it all even is a challenge. Changing directions will show!
It is not going to get to looking like a new one, be reasonable in your expectations. Its gonna change with use!!!
╔═══╗
╟JPG ╢
╚═══╝
Goldie(Bought New SN 377425)/4" jointer/6" beltsander/12" planer/stripsander/bandsaw/powerstation /Scroll saw/Jig saw /Craftsman 10" ras/Craftsman 6" thicknessplaner/ Dayton10"tablesaw(restoredfromneighborstrashpile)/ Mark VII restoration in 'progress'/ 10E[/size](SN E3779) restoration in progress, a 510 on the back burner and a growing pile of items to be eventually returned to useful life. - aka Red Grange
Thanks for the step-by-step JPG, I really appreciate all the advice. My expectations for the table have already begun adjusting and have quickly realized there is going to be wear and tear that will show which I'm rapidly becoming ok with.
dusty wrote: I have some made by droppings from the quail that seasonally attempt to roost on my upper storage shelves. I have tried everything short of taking an abrasive to the table tops. The two on my jointer really tick me off.
I have used the black 3M pads and Johnson's original paste wax that Nick suggested. It worked very well. I will say a bit of patina on hard working aluminum tables doesn't bother me much. As long as I avoid chemicals that will migrate to wood and the surface remains slick. fjimp
F. Jim Parks
Lakewood, Colorado:)
When the love of power is replaced by the power of love the world will have a chance for survival.
As they do for kitchen aluminum pots and pans in the food industry....the aluminum is simply cleaning with vinegar and water. This removes the dark spots and most "baked on" foodstuffs. I also understand that adding cream of tarter helps in the solution. In any event, worth a try.