Page 3 of 3

Re: What's the easiest way to make a 1-3/4" hole?

Posted: Tue Oct 15, 2019 1:37 pm
by chapmanruss
I use the same method as John and JPG for supporting the tube ends. A couple of casters mounted to a piece of plywood attached to an extension table. I have finished and polished a lot of Way Tubes and some Bench Tubes that way. It Works Great! :D

If you are not doing a bunch I understand wanting to use scrap parts found in the shop. But if you plan to do more it's worth the few bucks to do it with the fixed casters on plywood. The small casters needed are pretty cheap.

Re: What's the easiest way to make a 1-3/4" hole?

Posted: Tue Oct 15, 2019 3:50 pm
by reible
https://www.shopsmith.com/ss_forum/view ... rt#p216173

Just make an insert for the tail stock and away you go. Pretty small to store as well.

Ed

Re: What's the easiest way to make a 1-3/4" hole?

Posted: Tue Oct 15, 2019 7:44 pm
by BuckeyeDennis
chapmanruss wrote:I use the same method as John and JPG for supporting the tube ends. A couple of casters mounted to a piece of plywood attached to an extension table. I have finished and polished a lot of Way Tubes and some Bench Tubes that way. It Works Great! :D

If you are not doing a bunch I understand wanting to use scrap parts found in the shop. But if you plan to do more it's worth the few bucks to do it with the fixed casters on plywood. The small casters needed are pretty cheap.
I actually already have a cast-iron, 3-roller steady rest that I picked up cheap a while back. Problem is, it’s made to mount to the bed of a conventional lathe. When I have the time, I’ll make a way-tube mounted adapter for it — that’s one of the planning-stage fixtures that I wanted a 1-3/4” Forstner bit on hand for. It will be a dandy solution for any future way-tube polishing, and I do still have a 10E to go.

Re: What's the easiest way to make a 1-3/4" hole?

Posted: Tue Oct 15, 2019 8:01 pm
by BuckeyeDennis
reible wrote:https://www.shopsmith.com/ss_forum/view ... rt#p216173

Just make an insert for the tail stock and away you go. Pretty small to store as well.

Ed
I must have remembered that thread, Ed. When I discovered that I didn’t have any quick & easy drilling options, I considered making a 3D-printed tailstock insert. I even grabbed a 3DP scrap part, and rubbed it on the way tube for a little while to get a feel for the wear characteristics. It looked like it would work OK. But the measuring, modeling, and mounting would have taken me an hour or two, and I was looking for a quick & dirty, five- or ten-minute solution.

Re: What's the easiest way to make a 1-3/4" hole?

Posted: Wed Oct 16, 2019 1:50 pm
by bainin
Why hasn't anyone suggested a slug cartridge and a shotgun?

=)

Re: What's the easiest way to make a 1-3/4" hole?

Posted: Wed Oct 16, 2019 4:17 pm
by rpd
bainin wrote:Why hasn't anyone suggested a slug cartridge and a shotgun?

=)
Would that be a 4 gauge slug. ;)

Re: What's the easiest way to make a 1-3/4" hole?

Posted: Fri May 15, 2020 1:10 pm
by BuckeyeDennis
I just ran across some photos from my cell phone, and realized that I had never posted the results from this little project. I did buy a 1-3/4" Forstner bit, as I have several other uses for it.

The first pic shows my quick-and-dirty tube support ready for drilling. It's nothing but a couple scraps of construction lumber fastened together with decking screws, and it mounts to the Aux table with a couple of clamps. The hardwood scrap was clamped on just to back up the bearing block for through-drilling.
Ready to drill.JPG
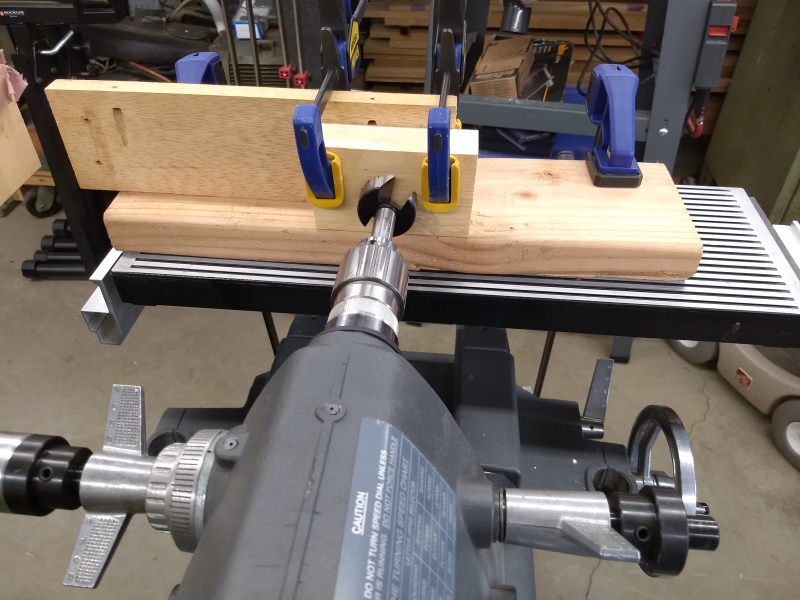
Ready to drill.JPG (392.72 KiB) Viewed 11867 times
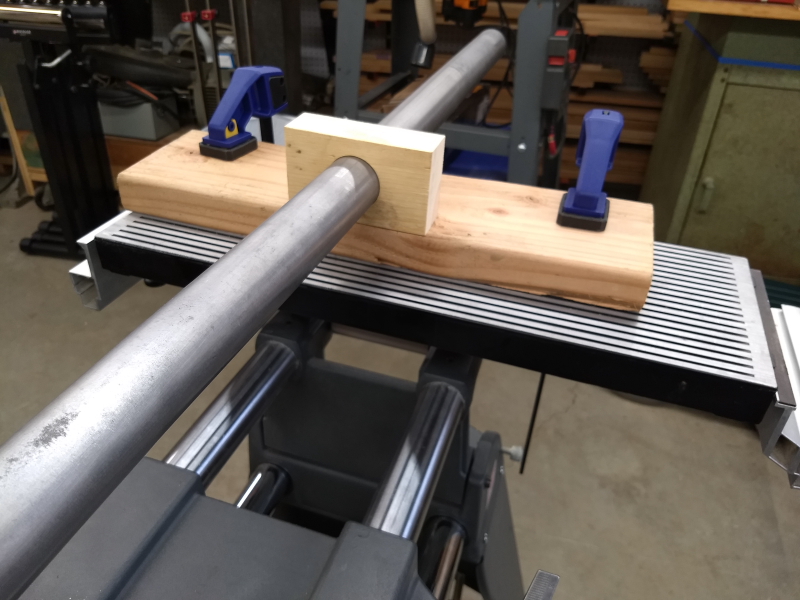
And now we have a nice clean hole. I applied some JPW to the ID as "sleeve bearing" lubrication.
Just drilled.JPG
Just drilled.JPG (395.56 KiB) Viewed 11867 times
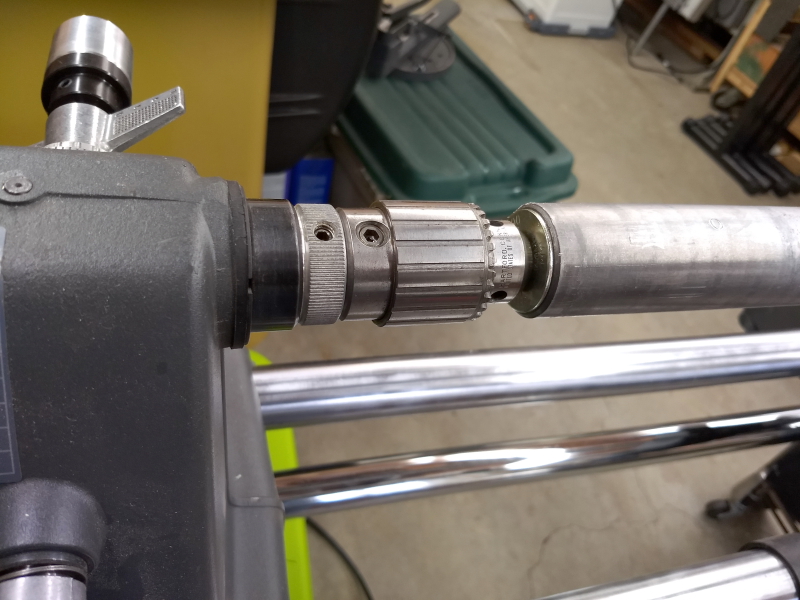
In the pic below, the tube had just emerged from a good soak in a PVC pipe full of Evaporust. It slipped into the bearing bore easily, but with minimal slop.
De-rusted tube.JPG
De-rusted tube.JPG (334.07 KiB) Viewed 11867 times
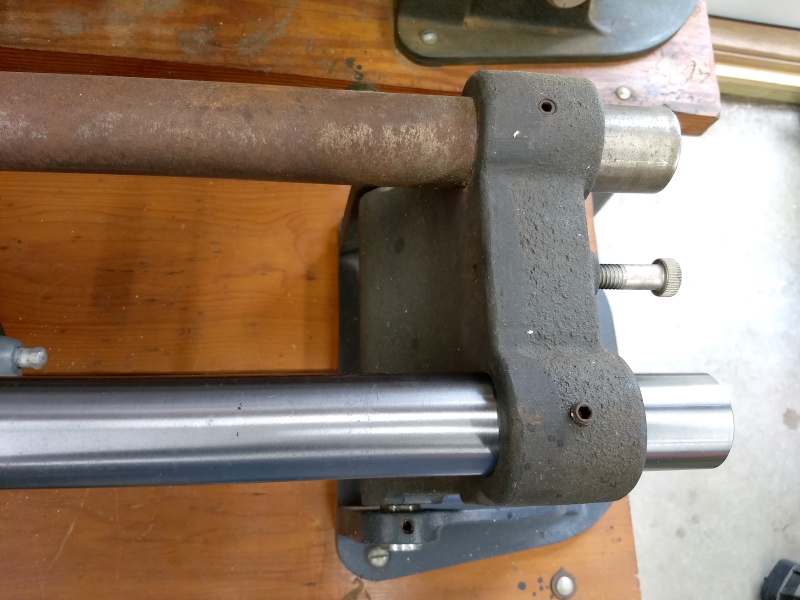
Because I already had one, I used a rubber expansion plug to drive the tube. To get a better grip on it with the drill chuck, I replaced the hex nut with a longer hex standoff.
Expansion plug.JPG
Expansion plug.JPG (345.03 KiB) Viewed 11867 times
The "sleeve bearing" worked perfectly. After filing down the set-screw burrs, I cleaning the tube with 320-grit sandpaper, lubricated with mineral spirits. Because the "bearing" fully captures the tube, I was free to work from the front side of the machine, pressing the sandpaper upward against the bottom of the tube. Bearing friction was minimal, and the tube temperature rose only a little bit in the vicinity of the bearing. To access the part of the tube occluded by the bearing, I only had to extend the quill.

However, I realized that I should have relieved the bracket base back behind the bearing block. As pictured, the space between the tube and the bearing base is just the right size to suck in careless fingers. Needless to say, I sanded that little section of the tube from the top side, very very carefully.

Final polishing was done with a Nyalox brush in a cordless drill, with both the tube and the brush spinning. Here's a pic taken after polishing just the front tube.
Much better!.JPG
Much better!.JPG (373.07 KiB) Viewed 11867 times