Page 4 of 8
Posted: Sat Feb 06, 2010 5:42 pm
by ------------------------
For a couple bucks, you can get a new plug. Make sure to get a nice heavy duty one that screws together as opposed to one that just snaps together. When I rewired mine I put a 20'+ cord (cut off a new extension cord) I got to tell you it was nice to plug it directly into the wall and not have to deal with an extension cord.
Posted: Sat Feb 06, 2010 6:46 pm
by robinson46176
JPG40504 wrote:(I assume your receptacles are 3 'prong' grounding type).
I usually refer to them as "outlets" instead of "receptacles"... No scientific reasons, I just have trouble spelling "receptacles"...

I'm usually pretty good at spelling, just some kind of mental black hole I guess.

BTW, the 2 hole kind are just as hard for me to spell as the 3 hole kind.
-
-
-
Posted: Sat Feb 06, 2010 6:51 pm
by a1gutterman
robinson46176 wrote:I usually refer to them as "outlets" instead of "receptacles"... No scientific reasons, I just have trouble spelling "receptacles"...
I'm usually pretty good at spelling, just some kind of mental black hole I guess.
BTW, the 2 hole kind are just as hard for me to spell as the 3 hole kind.
-
-
-
Darn! Even though you spelled the word correctly, I can see where the confusion can happen! A two hole receptacle and a three hole receptacle: Who'ld 'a thought they wood be spelled the same??? An outlet is where I go buy my clothes; there and the thrift stores!
Posted: Sat Feb 06, 2010 7:09 pm
by robinson46176
mark-b wrote: When I rewired mine I put a 20'+ cord (cut off a new extension cord) I got to tell you it was nice to plug it directly into the wall and not have to deal with an extension cord.
I do that quite a bit too. I can normally buy a good heavy duty outdoor extension cord for much less than a plug and the same cord. I use what I want and then stick a plug on the piece left over for a short extension cord. I like having short extensions about 8' long. Around construction sites you see guys all of the time using another 50' extension when the tool cord was only 3 feet too short.
Posted: Sun Feb 07, 2010 10:10 am
by kameljoe21
i have done the same
buy a cheap extension cord that is a heavy gauge and cut it to make what i want, it way cheaper than buying the 2 sepreat and the plug is molded in and you dont have to worry about making it just right
i rewired my newish dish washer with one and spent less than 6 dollars rather than spending 7 to 8 and didnt have to fuss with it now i have a really nice 4 foot extension cord ( i had a spare male end around ) works great for what ever
Posted: Sun Feb 07, 2010 3:24 pm
by JPG
[quote="a1gutterman"]Darn! Even though you spelled the word correctly, I can see where the confusion can happen! A two hole receptacle and a three hole receptacle: Who'ld 'a thought they wood be spelled the same??? An outlet is where I go buy my clothes]
OK! The male end is a plug. The female end is. . . . . . (hopefully she's receptive)!:rolleyes:
Outlets were originally identical to a screw base lamp socket. Parallel blade plugs and 'receptacles' came later.

Posted: Mon Feb 08, 2010 11:56 am
by heathicus
[quote="JPG40504"]Outlets were originally identical to a screw base lamp socket. Parallel blade plugs and 'receptacles' came later.]
Back then they were called "convenience outlets." They were "convenient" because you didn't have to unscrew the lightbulb hanging from the ceiling to plug in your toaster or mixer or whatever newfangled electrical appliance you might have.
Posted: Mon Feb 08, 2010 1:03 pm
by wa2crk
This one is for Albie;
Hang on to that special pliers. It is for the plastic strain relief for power cords and a new one ranges anywhere from $50 to as high as $90
Bill V
Posted: Wed Mar 10, 2010 9:45 am
by heathicus
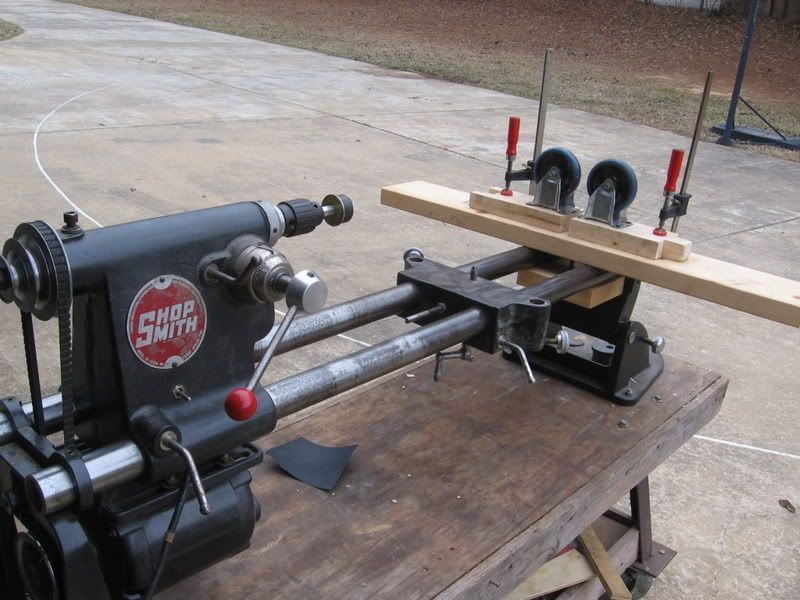
Finally making progress again. Got around to working on cleaning up the tubes this past weekend. Not much really new here. Same concept that we seem to have already proven very effective. This was just my first time to use a Shopsmith to spin the tube instead of a hand drill.
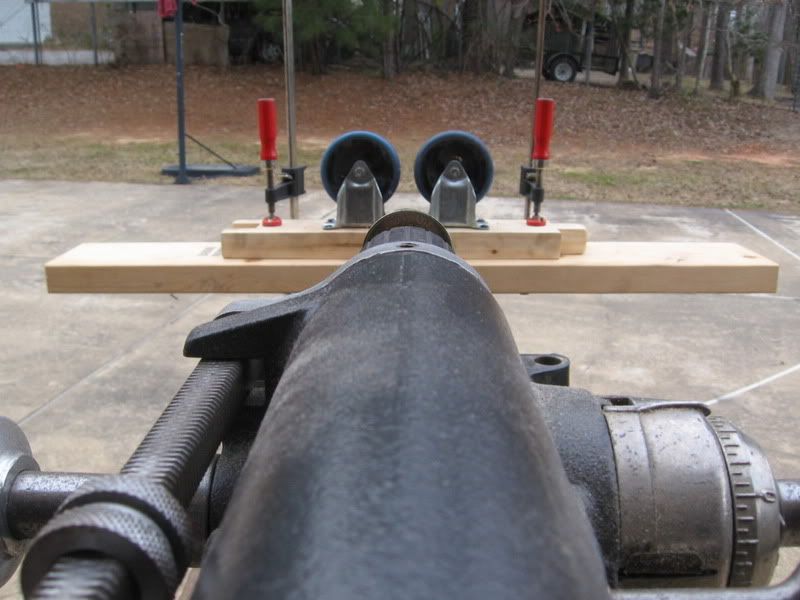
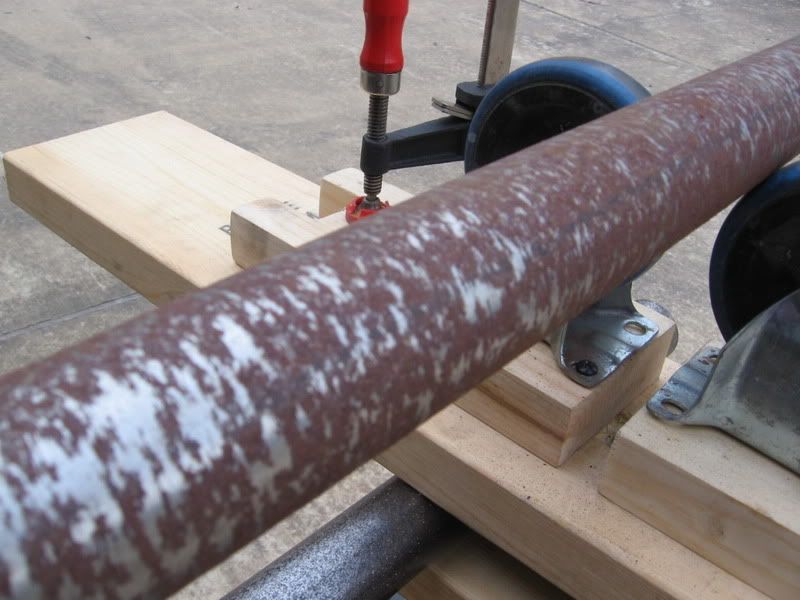
I removed the tailstock and placed a 2x6 across the tubes and used a lag screw screwed to a shorter piece of 2x6 under the tubes to act as a clamp to hold it in place. I didn't need a lot of clamping pressure and there was no need to rig up something fancy with holes cut out to fit perfectly over the tubes. But I almost did that anyway.
I then screwed my casters to two pieces of used 2x4 and just clamped them to the 2x6. I could move the casters closer together or further apart to adjust the height of the tube on that end and, with the help of a torpedo level, get it true with the quill.
I moved the ER's belt to the lowest speed setting, spun the tube by hand a few times and everything looked good, but I was still nervous about turning it on as the ER's lowest speed is still pretty fast sometimes. I flicked the switch on and off a few times letting it slowly get up to speed until I felt comfortable it was safe. I still did most of my sanding with one hand on the switch or, when that was out of reach, on the power cord where it was plugged in to the outlet on my workbench.
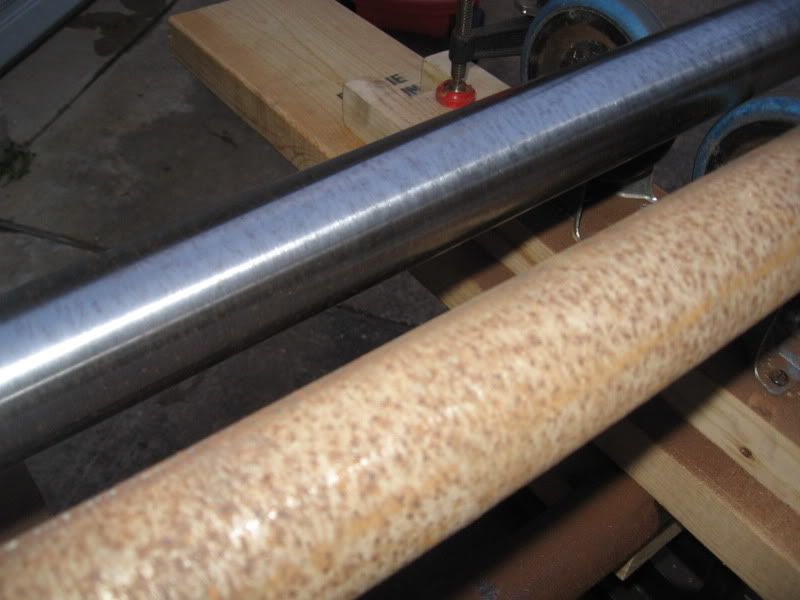
I didn't do any rust removal prior to sanding. No Evapo-Rust, no electrolysis, no potato water. Just sanding. The way tubes weren't in very bad shape so didn't take a lot of work. The bench tubes were pretty bad (but nowhere near as bad as either of my ER's tubes were originally). I'm still working on the first of the bench tubes.
Posted: Wed Mar 10, 2010 12:25 pm
by thainglo
What did you use in the quill to mount to the tube you were polishing? I've been using pipe caps with a hand drill that were pretty good, but not always perfect.
Thanks!
Matt