Shop Building
Moderator: admin
-
papahammer8
- Gold Member
- Posts: 161
- Joined: Fri Apr 06, 2007 9:03 pm
- Location: lafayette alabama
shop building
fianally after all the years in the garage. my mark v has a proper home. been reading a lot of post. if i can figure out how to send pics of my shop i will. shop building is 16 x 16 w/ gambrell roof, gives me a second floor gives me storage, and my shop office, moved in my mark v last weekend. worried over floor space, no problem. now want a mini to accomadated my spts. post ? about way tube lenghts. will study how to send pics. and take new photos this weekend. hagreat day thanks
-
dusty

- Platinum Member
- Posts: 21530
- Joined: Wed Nov 22, 2006 6:52 am
- Location: Tucson (Wildcat Country), Arizona
shop building
nice shop, papahammer. it looks like a really nice place to go make sawdust. is all of the surrounding area like we see in the avatar.
it is good to hear from you again. it seems like awhile since you last posted.
i am really looking forward to seeing some photos. just a bit of advice on photo taking. most people who have trouble posting photos seem to have trouble because they have taken high resolution pictures. if you set your camera at its lowest resolution setting and then follow the instructions for posting photos, i think you'll have no trouble.
"Making Sawdust Safely"
Dusty
Sent from my Dell XPS using Firefox.
Dusty
Sent from my Dell XPS using Firefox.
-
papahammer8
- Gold Member
- Posts: 161
- Joined: Fri Apr 06, 2007 9:03 pm
- Location: lafayette alabama
shop building
thanks dusty will try to sent pics next monday. had no idea to put camera on low resolutin. i bought 2 acres heavily wooded property. hehe built shop first;) plannin on building my house there a nice place to retire too. read ur post on a shopsmith designed shop. love to see one done by shopsmith. my shop is all shopsmith. except my tablesaw by sears. work keeps me from my hobby making sawdust. i do plenty of it at work but nothing like being lost in my shop, shut the world out. thanks again jim

-
papahammer8
- Gold Member
- Posts: 161
- Joined: Fri Apr 06, 2007 9:03 pm
- Location: lafayette alabama
signatures
how do i put my signature below my post as most of the posts i read. where they show their ss tools thanks jim
-
dusty
- Platinum Member
- Posts: 21530
- Joined: Wed Nov 22, 2006 6:52 am
- Location: Tucson (Wildcat Country), Arizona
shop building
jim, you have two posts going with the same subject.
in the other you ask how to add your signature
In the red bar across the top of this page: click on User CP. That takes you to another page. Look for the Edit Signature, click on that. You are now on the page that allows you to put in your signature.
in the other you ask how to add your signature
In the red bar across the top of this page: click on User CP. That takes you to another page. Look for the Edit Signature, click on that. You are now on the page that allows you to put in your signature.
"Making Sawdust Safely"
Dusty
Sent from my Dell XPS using Firefox.
Dusty
Sent from my Dell XPS using Firefox.
-
papahammer8
- Gold Member
- Posts: 161
- Joined: Fri Apr 06, 2007 9:03 pm
- Location: lafayette alabama
signatures and posting pics
thanks again dusty got my signature down still working on posting pic. i have found the lil box with the mountains and the sun. have tried that then ask me for a url. got to get past that first still scratching my head.
jim bandy lafayette alabama 79 model 500 /80 model 500/94model 510 mini/ planer/dc3300/bandsaw/jointer/ lathe duplicator/ router table with a porter cablerouter.
Jim:
Congratulations on your new shop. I also have a gambrel roof and a loft, which I use for wood drying and storage. You will find that storing youir wood up there solves the space problem down below. OK....., well maybe it just improves the situation a whole bunch.
Rather than a "shorty", I'm using a Shopsmith variable speed power station (555422). With two Shopsmiths, I can have two set-ups going at the same time and use the power station for the bandsaw, scroll saw, and belt sander. I am merely mimicking the shop tool layout that I experienced when I took a class at Shopsmith in Dayton back in '05. It was apparent to me that this layout gave almost all of the advantages of stand alone tools plus the versitality of the Shopsmith.

-
dusty
- Platinum Member
- Posts: 21530
- Joined: Wed Nov 22, 2006 6:52 am
- Location: Tucson (Wildcat Country), Arizona
Shop Building
I see that you have done a signature. Good job.
Now let's do pictures.
First click on Post Reply, this takes you to a new screen. Fill in the Title. Move the cursor down to the message area and right click. To enter a photo, right click on the down arrow that is to the right of the paper clip icon.
This brings up a new screen that is titled Manage Attachments. Right click on (Browse). You can now browse through the directory of your computer looking for the photos you want to attach. Mine are all in a folder title . Your photos may be somewhere else; you have to figure that out. Once you have located the photo, double click on it.
This will take you back to the Manage Attachments screen. Click on Upload.
You should see a message that says "Uploading Files - (Please Wait). After a short wait, the title of your photo (whatever it is) should show up on the Manage Attachments screen.
Inserted during an edit:
Click on Submit Reply in the red Additional Options section. This completes the insertion of a single photo into your post.
Note:If you want the photo inserted as an attachment, click on the down arrow next to the paper clip. Doing so takes you to a Manage Attachments insert. Click on the photo name in the Manage Attachments insert. Click on Submit Reply in the red Additional Options section.
If you want to do additional; photos (you are limited to five), repeat what was just done for each photo. When done, click on Submit Reply in the Additional Options section.
There are some other ways to do this but this is what I find works best for me. Good luck. Can't wait to see your pictures.
Remember, the pictures can not be larger that 800x600 pixels. I find the easiest way to accomplish that is to take the pictures with my camera on a low resolution setting (I use the lowest my camera offers).
- Attachments
-
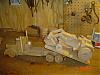
- Tilt Far Left.jpg (82.06 KiB) Viewed 15993 times
"Making Sawdust Safely"
Dusty
Sent from my Dell XPS using Firefox.
Dusty
Sent from my Dell XPS using Firefox.
-
dusty
- Platinum Member
- Posts: 21530
- Joined: Wed Nov 22, 2006 6:52 am
- Location: Tucson (Wildcat Country), Arizona
papahammer8 wrote:how do i put my signature below my post as most of the posts i read. where they show their ss tools thanks jim
jim, I edited the instructions contained earlier in this thread. The edit is intended to explain how to put the photos in as a reference rather than as an attachment. I hope this helps.
"Making Sawdust Safely"
Dusty
Sent from my Dell XPS using Firefox.
Dusty
Sent from my Dell XPS using Firefox.