Today in the shop (drilling tips 102)

Forum for people who are new to woodworking. Feel free to ask questions or contribute.

Moderator: admin

Post Reply
User avatar
reible
Platinum Member
Posts: 11283
Joined: Thu Jul 20, 2006 12:08 pm
Location: Aurora, IL

Today in the shop (drilling tips 102)

Post by reible »

I'm working on a project which is a fixture for my mitersaw. It requires me to make some cut outs and match radius on the saw. As I was getting the layout done it occurred to me that I have not done any tips in a while. To the relieve of some I'm sure but for other these might be helpful.

The more common one when you have a right angle and want make a radius to match both the sides is often done by measuring using the radius from each line to locate the center. But measuring takes time and is not always needed. Besides some people are fractional phobic and don't want to have to figure the radius of a 1-7/8 drill bit..... right??

As always I've taken some pictures to help explain. First lets look at two lines that are forming a 90 degree angle. They would look like this:
IMG_4416ac.jpg
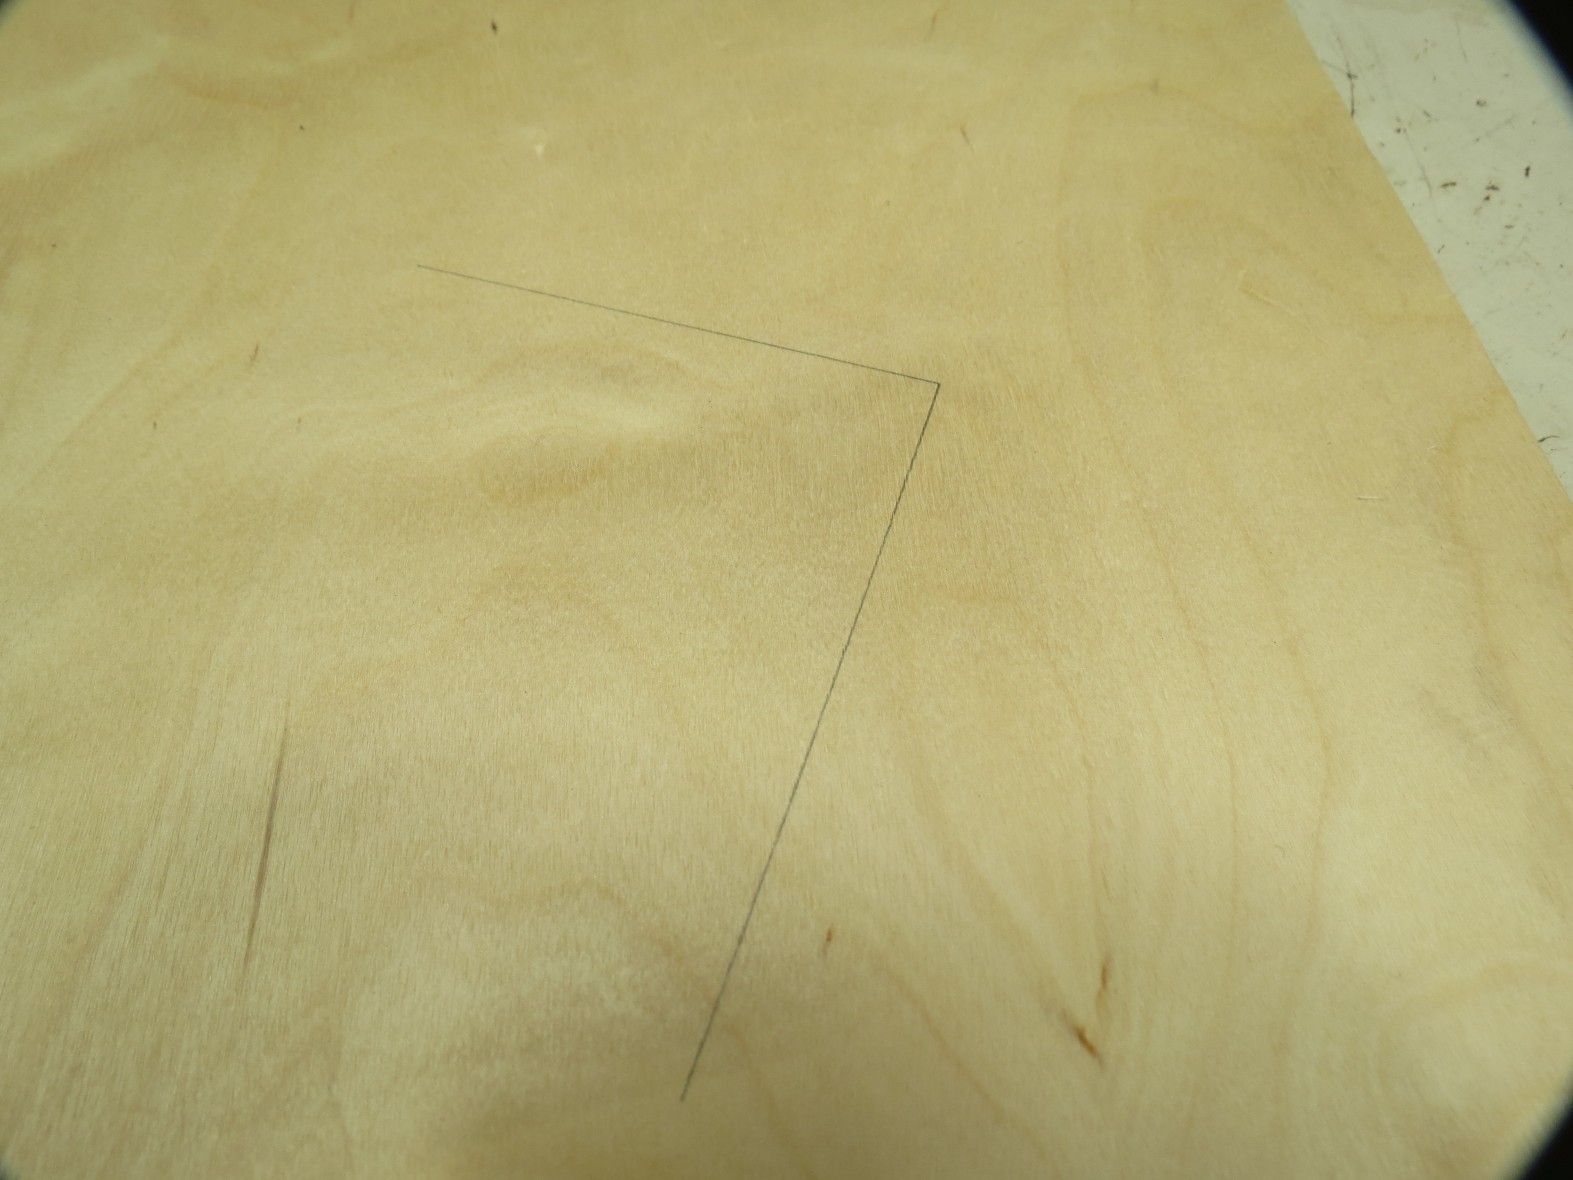
IMG_4416ac.jpg (241.65 KiB) Viewed 10511 times
For our purposes lets say you want to use a 1" dia bit and this is not a critical hole but one that you might make on a fixture for the shop. Mmmm sounds like my project. So option one that I mention before is the addition of line 1/2" away and parallel to the existing lines. Where those line intersect would be the location of the center point for you to drill at. But what if we didn't want to do that? Well guessing works, sort of and depending on your skill level.....

So you can see this better I added some tape along the lines. You do not want to do this in real life but I think it helps for the purpose of this discussion.
IMG_4417sc.jpg
IMG_4417sc.jpg (250.93 KiB) Viewed 10511 times
In this next photo I'm showing a small Rockler corner square but any square will work so long as it is tall enough to touch the edge of the bit at maximum diameter. You can even make your own out of a piece of scrap. The edges of the square align with the edges of the square.
IMG_4418sc.jpg
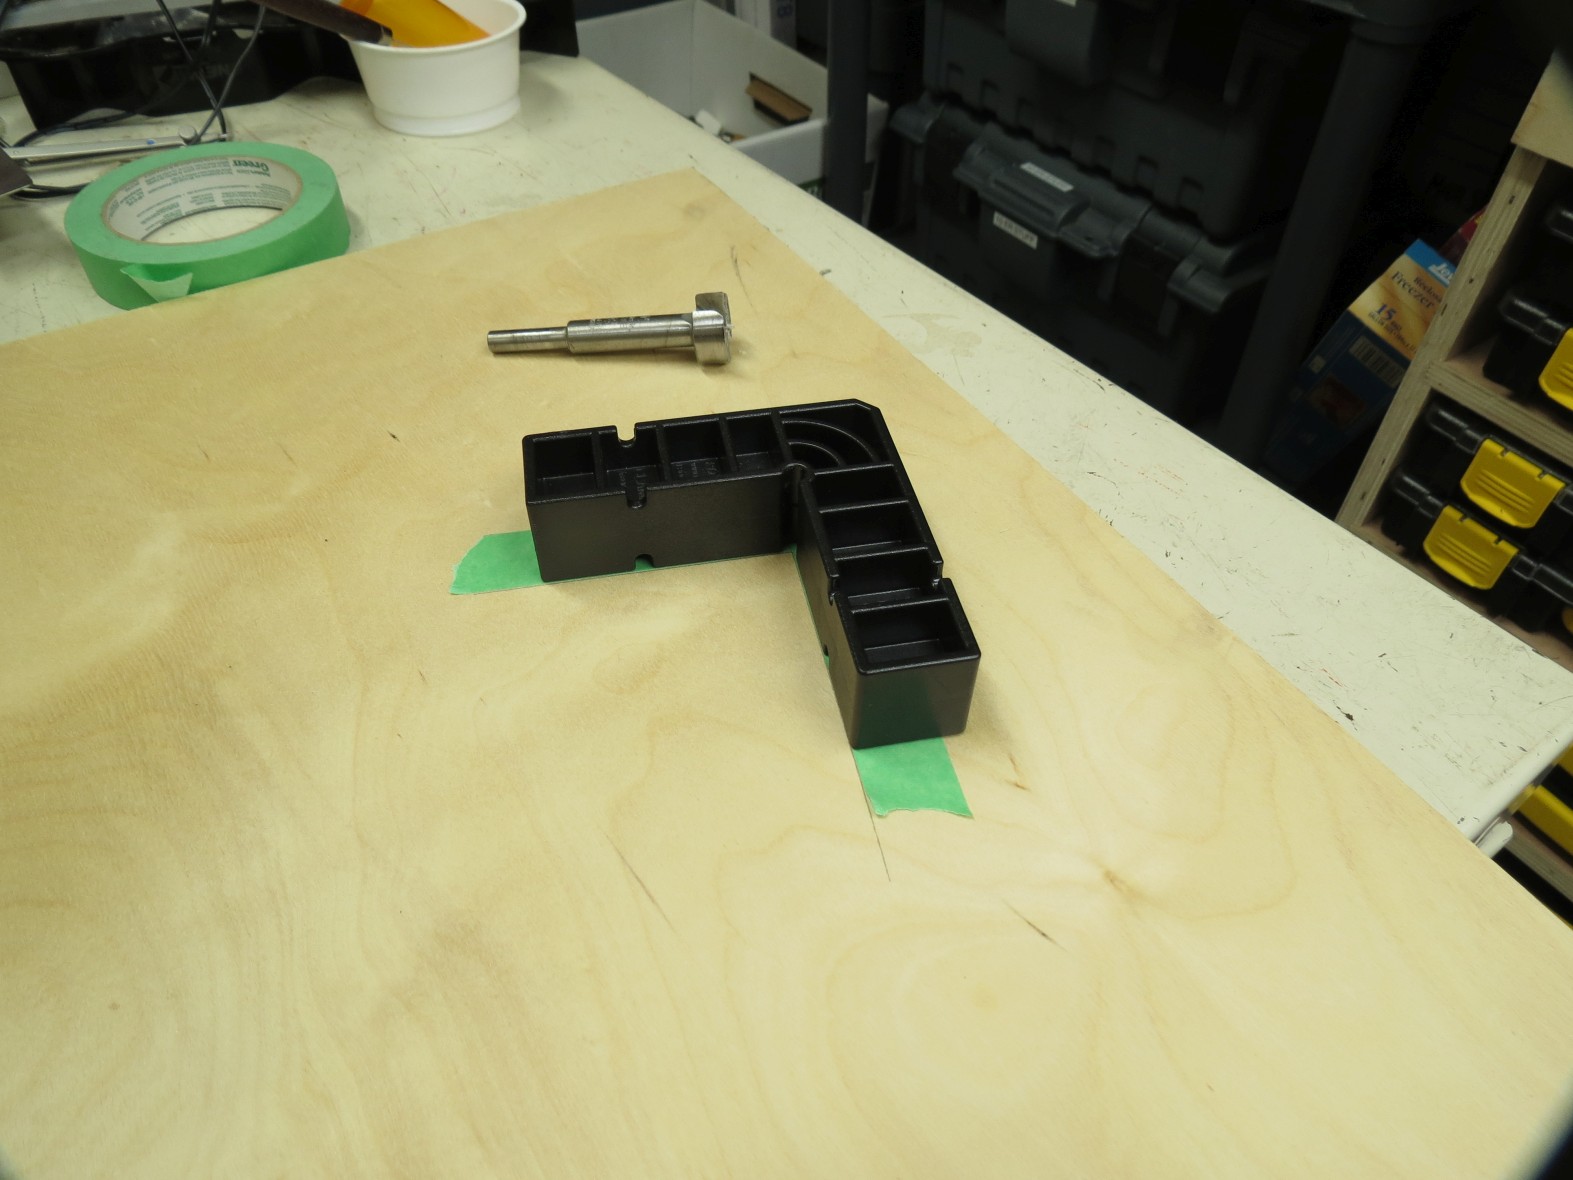
IMG_4418sc.jpg (244.77 KiB) Viewed 10511 times
Now you can take the bit and have it touch both sides of the square and mark the center with the center of the bit. A very light tap will leave a center point for to to use later.
IMG_4419sc.jpg
IMG_4419sc.jpg (247.24 KiB) Viewed 10511 times
I like to make it easier to find by making it with a * as shown here:
IMG_4420smc.jpg
IMG_4420smc.jpg (263.35 KiB) Viewed 10511 times
Now I'm doing it here in the layout stage but you can do the same sort of thing at the drill press. In that case you can chuck the bit and use the quill feed to locate and drill the hole.

Now this works great for thing that meet at right angles and things that are very close to a right angle. So what do you do when that is not the case? Check in on the next post and find out how I handle that situation.

Ed
{Knight of the Shopsmith} [Hero's don't wear capes, they wear dog tags]
User avatar
reible
Platinum Member
Posts: 11283
Joined: Thu Jul 20, 2006 12:08 pm
Location: Aurora, IL

Re: Today in the shop (drilling tips 102)

Post by reible »

In this picture you can see the situation I have in this build. I have a curved line meeting a straight line and while guessing is still an option I find I do better when I find a better way. So lets look at what I'm talking about.
IMG_4421smc.jpg
IMG_4421smc.jpg (197.32 KiB) Viewed 10500 times
Now there are several ways that I could go but since I want this to be educational I'll show you a simple way to get the radius I want. In my case I have a lot of scrap Sam's Club cutting board pieces so I picked out one of these and drilled the same 1" diameter hole that I want to use for the 1/2" radius. Any scrap will work.
IMG_4422sc.jpg
IMG_4422sc.jpg (305.55 KiB) Viewed 10500 times
Now I can visually look in the hole and see the tangent points of the lines and hole. I then can use the same bit to again mark the center point.
IMG_4423sc.jpg
IMG_4423sc.jpg (277.86 KiB) Viewed 10500 times
And I again mark it with the *:
IMG_4424smc.jpg
IMG_4424smc.jpg (344.51 KiB) Viewed 10500 times
And as mentioned in the last post this can also all be done at the drill press.

Now with the holes drilled I'm ready for some other cutting, and that will happen later today.
IMG_4426sc.jpg
IMG_4426sc.jpg (262.69 KiB) Viewed 10500 times
I'm not sure I will post anymore of the project because it is pretty much miter saw dependent and would not be all that useful to most people.

Ed
{Knight of the Shopsmith} [Hero's don't wear capes, they wear dog tags]
User avatar
reible
Platinum Member
Posts: 11283
Joined: Thu Jul 20, 2006 12:08 pm
Location: Aurora, IL

Re: Today in the shop (drilling tips 102)

Post by reible »

But on the other side of the coin I think it only fair to let you see the finished product.
20170605_154125_resized.jpg
20170605_154125_resized.jpg (378.01 KiB) Viewed 10461 times
Ed
{Knight of the Shopsmith} [Hero's don't wear capes, they wear dog tags]
User avatar
dusty
Platinum Member
Posts: 21481
Joined: Wed Nov 22, 2006 6:52 am
Location: Tucson (Wildcat Country), Arizona

Re: Today in the shop (drilling tips 102)

Post by dusty »

As usual, Ed, outstanding lesson.

However, it is as useful as a lesson in layout as it is a drilling tip.

I assume the cutout was done with a router.
"Making Sawdust Safely"
Dusty
Sent from my Dell XPS using Firefox.
User avatar
reible
Platinum Member
Posts: 11283
Joined: Thu Jul 20, 2006 12:08 pm
Location: Aurora, IL

Re: Today in the shop (drilling tips 102)

Post by reible »

The outside curves were done on the bandsaw and the inside with a jig saw. Had this been something of more value yes I would have used a router.

This is an experiment as previous versions either covered the angle gauge or broke apart at some point from lack of strength. After the initial cuts are made there is little material to hold things together. I don't know how well this one will work but I have a project coming up where I will be cutting a bunch of smaller parts and wanted a nicer way of doing them..... and not have the little parts thrown about.

In the past I have just cone with clamps to attach them. This time I have cleats on both ends so it slides on and the alignment seems to work well enough so the kerf will not get to big to fast.

Ed
{Knight of the Shopsmith} [Hero's don't wear capes, they wear dog tags]
Post Reply