I got a chance to work on this mystery project today. Since I know how some of you love to hate it when I do these sorts of guessing games but since this is now a done project the answer will appear later tonight.
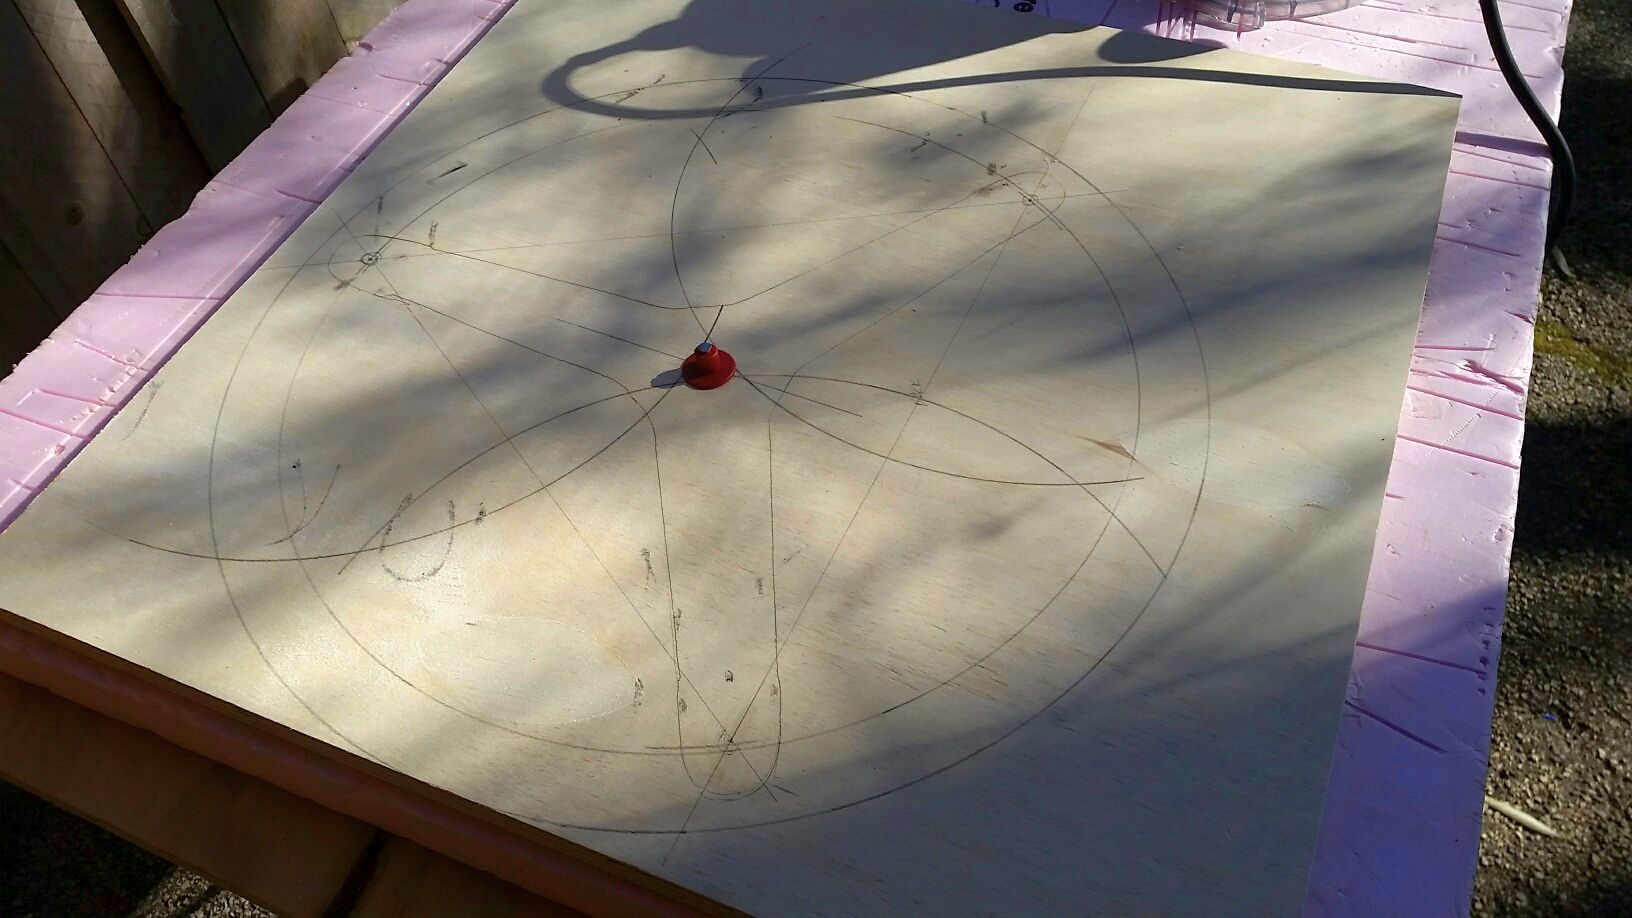
So first off this is the scrap piece of plywood that I'm using. A little HS geometry was involved but since some of you hate the math parts of projects I didn't want to get into that. It was a matter of having three holes then offsetting and have 6 locations around the circle. But I'm getting a head of myself.
Again shadows, but they know things so I live with them.
So step two of the project was to cut the circle out of the square. I have a circle cutting guide for a router so that is how I did it. Nothing says a bandsaw or jig saw or what ever else one has couldn't do the job but for me I love projects that get a router involved.
In the last picture you maybe noticed the red thing nailed in the "center". That is the center and the jig uses that to swing around on. I went with a plunge router and set the turret to do the cut out in three steps.
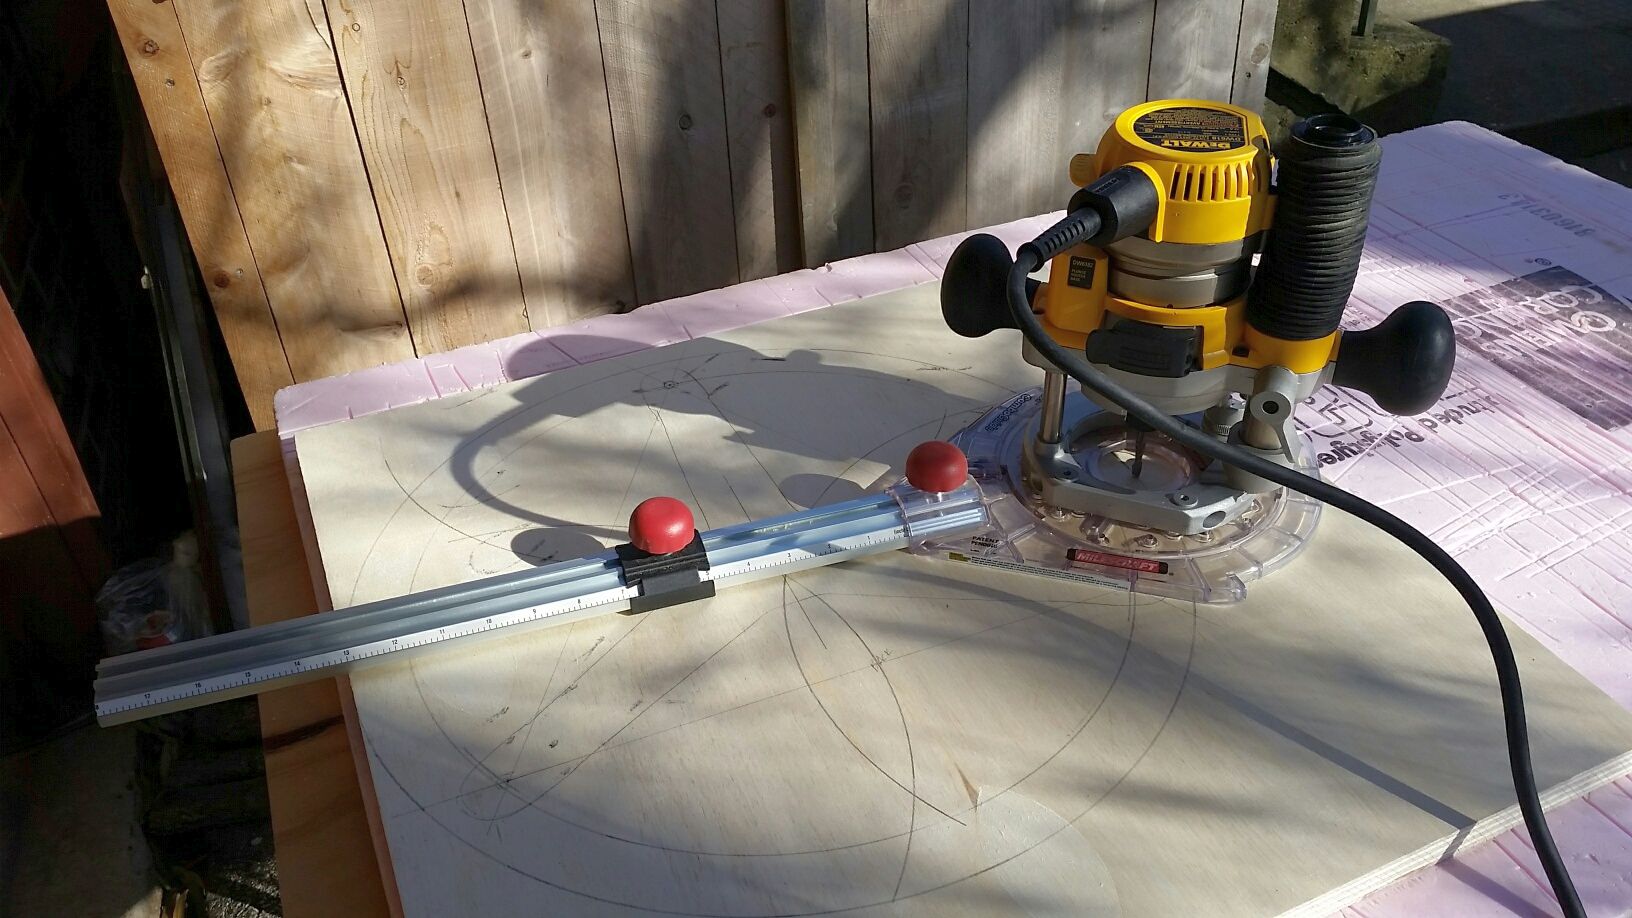
Should have brought the dusk mask inside to warm up! Well it wasn't that bad and it warmed up quickly but I don't love that about using them this time of year, almost as bad as in the summer when it hot and uncomfortable as well.
It didn't take long and I was on to the next portion of the project. Wow look at all those caster!! Harbor Freight specials, way over kill as they are not going to see that large a load.
They are mounted offset to the 3 holes that will be for mounting something.....
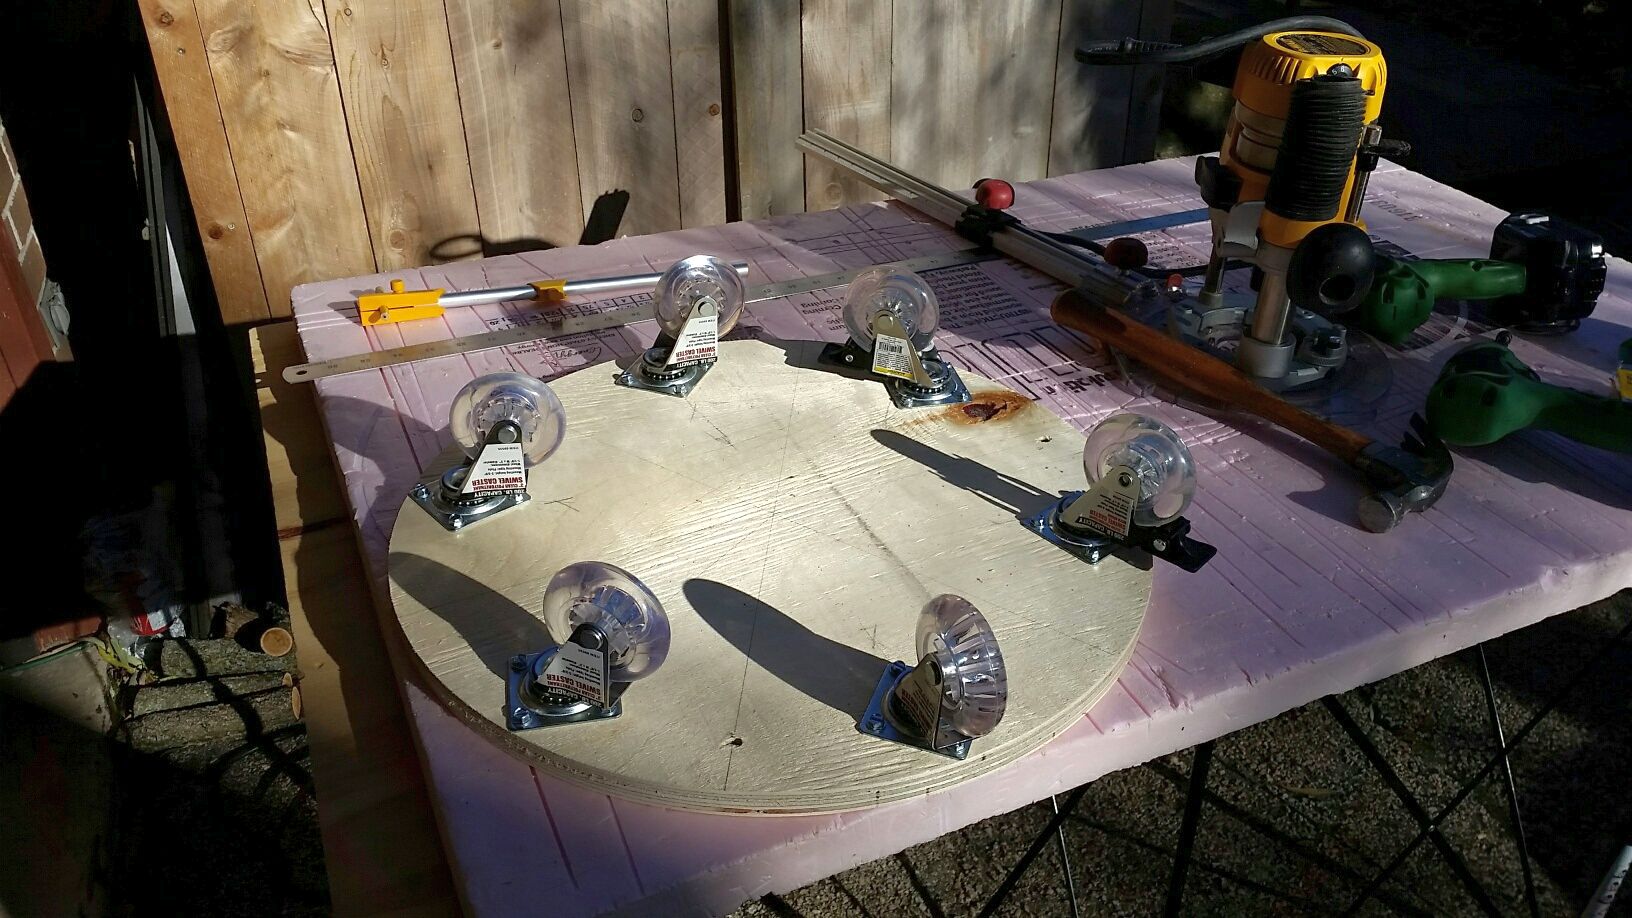
At some point my inner child came out and I decided to take a ride down the driveway with it. Brave as I am I sat on it, too old for trying to ride it in a standing position. Gave the wife a look laugh but she declined taking a ride herself. BTW it worked pretty well, reminds me of those old metal snow saucers we use to have. I wonder how the grand kids would like one of these wheeled versions for driveway use...... parents wouldn't like it I'm sure, not safe enough.
OK so there you have the mystery. So what am I building?
Ed
Today in the shop (what am I building now?)
Moderator: admin
Today in the shop (what am I building now?)
{Knight of the Shopsmith} [Hero's don't wear capes, they wear dog tags]
Re: Today in the shop (what am I building now?)
I would say a mobile stand for a very large potted plant. The one in the picture was not made by me but I have made quite a few for my wife's cactus's.
The barrel cactus in the picture was bought 8 or 9 years ago. It was legally grown and harvested in Arizona. It grew in diameter over the years but never grew taller at all until this year. All the new growth is from this year. It and others spend the summer every year on our west facing deck. Hence the need for mobile stands.
- Attachments
-
- 20171123_161229_Burst01.jpg (252.18 KiB) Viewed 7741 times
John & Mary Burger
Eagle's Lair Woodshop
Hooper, UT
Eagle's Lair Woodshop
Hooper, UT
Re: Today in the shop (what am I building now?)
I know almost nothing about cactus plants but I like the look of that one, does it need the metal band to keep it for splitting the pot?jsburger wrote:I would say a mobile stand for a very large potted plant. The one in the picture was not made by me but I have made quite a few for my wife's cactus's.
The barrel cactus in the picture was bought 8 or 9 years ago. It was legally grown and harvested in Arizona. It grew in diameter over the years but never grew taller at all until this year. All the new growth is from this year. It and others spend the summer every year on our west facing deck. Hence the need for mobile stands.
And more importation to the subject, while it could hold a pretty massive plant that is not what it is for. I too have made some plant rollers but not as big as this item.
Ed
{Knight of the Shopsmith} [Hero's don't wear capes, they wear dog tags]
Re: Today in the shop (what am I building now?)
The pot is what it came in originally. It was cracked when we bought it so we got a big discount. We put the SS band on it when we got it and we have never had a problem. It had about an inch of exposed dirt around the pot when we bought it. It would be almost impossible to move it to another pot. If it ever becomes necessary there is a tropical/cactus plant shop in Salt Lake that I would take it to to have it replanted. That thing is over 100 pounds.reible wrote:I know almost nothing about cactus plants but I like the look of that one, does it need the metal band to keep it for splitting the pot?jsburger wrote:I would say a mobile stand for a very large potted plant. The one in the picture was not made by me but I have made quite a few for my wife's cactus's.
The barrel cactus in the picture was bought 8 or 9 years ago. It was legally grown and harvested in Arizona. It grew in diameter over the years but never grew taller at all until this year. All the new growth is from this year. It and others spend the summer every year on our west facing deck. Hence the need for mobile stands.
And more importation to the subject, while it could hold a pretty massive plant that is not what it is for. I too have made some plant rollers but not as big as this item.
Ed
My wife has a green thumb when it comes to house plants. Her cactus's grow like crazy. We have one that keeps growing up to the 10+' ceiling in the entry way. We have cut it off 3 or 4 times in the last 5 or 6 years. The oldest cut off is about 7' tall and has also been cut off twice. The cut off's are also growing.
John & Mary Burger
Eagle's Lair Woodshop
Hooper, UT
Eagle's Lair Woodshop
Hooper, UT
Re: Today in the shop (what am I building now?)
It's getting late and I'm about done for the day so here is the picture of the object doing what it was intended to do:
I still have some storage additions that I will be adding sometime so I have some place to keep the different arms of the oneway jig.
I'm thinking this is stable enough, normally a grinder is bolted down or sitting on a bench but I wanted mine to be mobile. When turning it can be right need door and other wise rolled off into a storage area. It has two locking wheels but if that doesn't work I can update it with a couple more or just roll it up off the wheels..........
Ed
I still have some storage additions that I will be adding sometime so I have some place to keep the different arms of the oneway jig.
I'm thinking this is stable enough, normally a grinder is bolted down or sitting on a bench but I wanted mine to be mobile. When turning it can be right need door and other wise rolled off into a storage area. It has two locking wheels but if that doesn't work I can update it with a couple more or just roll it up off the wheels..........
Ed
{Knight of the Shopsmith} [Hero's don't wear capes, they wear dog tags]
Re: Today in the shop (what am I building now?)
Today was stage two of the project. What I was eyeing up was the plywood bottom, it looks like a good place to store things.
And what do I want to store there? Well for now this collection would be nice:
Here is what I did, first I found a piece of plywood of about the right size then cut out a section for the front leg plus some and that would be the piece I would use to mount several things. First I needed to cut some PVC pipe, the section I had only provided 8 pieces and for now that is plenty. I drilled the PVC so I could screw them to the plywood. The front hole is large enough for the screwdriver to pass through.
On the back I used a clamp bracket, had one in my stash and it was the right size, an oddity for sure but it sure came in handy.
The clamp had to be loose enough to allow the whole assembly to rotate and it was, now that was dumb luck.
From the front it looks like this:
I needed some feet for the tubes so they would protect the plywood when the tool holder is rotated. I had scraps from a Sam's Club cutting board and used that. Here you can see the pen mandrel holding the parts, by pairing them like I did it was pretty simple to make the cuts. The outside diameter is the same as the PVC and the turned down section is the inside dimension of the tubing. And yes that is a mandrel saver in the tail stock. A washer is used between the disks as a spacer. BTW the parts were cut out on the drill press with a hole saw as a starting point.
And here it is, sorry the picture is a little off but I only had my phone with me today and that is what it turned out like....
So for now that is done. I think I'll pick up a small tool box to put the other parts in......... more when that happens.
Ed
And what do I want to store there? Well for now this collection would be nice:
Here is what I did, first I found a piece of plywood of about the right size then cut out a section for the front leg plus some and that would be the piece I would use to mount several things. First I needed to cut some PVC pipe, the section I had only provided 8 pieces and for now that is plenty. I drilled the PVC so I could screw them to the plywood. The front hole is large enough for the screwdriver to pass through.
On the back I used a clamp bracket, had one in my stash and it was the right size, an oddity for sure but it sure came in handy.
The clamp had to be loose enough to allow the whole assembly to rotate and it was, now that was dumb luck.
From the front it looks like this:
I needed some feet for the tubes so they would protect the plywood when the tool holder is rotated. I had scraps from a Sam's Club cutting board and used that. Here you can see the pen mandrel holding the parts, by pairing them like I did it was pretty simple to make the cuts. The outside diameter is the same as the PVC and the turned down section is the inside dimension of the tubing. And yes that is a mandrel saver in the tail stock. A washer is used between the disks as a spacer. BTW the parts were cut out on the drill press with a hole saw as a starting point.
And here it is, sorry the picture is a little off but I only had my phone with me today and that is what it turned out like....
So for now that is done. I think I'll pick up a small tool box to put the other parts in......... more when that happens.
Ed
{Knight of the Shopsmith} [Hero's don't wear capes, they wear dog tags]