Repair of a broken carriage casting - Photos

Forum for Maintenance and Repair topics. Feel free to ask questions or contribute.

Moderators: HopefulSSer, admin

User avatar
mickyd
Platinum Member
Posts: 2999
Joined: Mon Feb 09, 2009 1:18 pm
Location: San Diego, CA
Contact:

Repair of a broken carriage casting - Photos

Post by mickyd »

A design "oversight" on the old Greenie's lead many an owner to a broken carriage casting if the headstock was not tightly securely to the way tubes when put in a vertical position to do drilling. The headstock would drop down striking the carriage stop set screwin turn, fracturing the casting. When I got my Greenie, it was broken, but fortunately the guy saved the piece.


[ATTACH]3679[/ATTACH]


I was initially going to get the piece welded on but a mountain bike buddy of mine suggested using a cold weld product called “J-B Weld” available in the paint section of Home Depot, Lowe’s, Ace. It’s a 2 part material that you mix. After mixing, you have about 40 minutes to use it before it starts to set up too much. I actually liked the way it worked after about 25 minutes. It started acting more like a putty than the initial liquidy paste. Initially, it had a tendency to flow too much, which made filling a big gap at the top difficult.

The first step was to grind a hefty chamfer on ALL contact edges, including the backside.


[ATTACH]3680[/ATTACH]


The chamfer went about halfway through the material. This way here, when the cold weld material was applied, it would actually pass through to the backside, forming a kind of hourglass shape (if you looked at it in cross-section). This gave it maximum gripping area.

Probably the most critical step (from a cosmetic standpoint) is to make sure that the piece is properly clamped to the parent material before applying the cold weld. The piece should be flush on all edges. This can take some finagling with the clamping setup to get it right.


[ATTACH]3681[/ATTACH]


Once clamped, you apply the cold weld with any applicator you want to use. I used a bamboo BBQ skewer treating it like a small putty knife. Probably would have been neater if I used something flexible but since I planned on sanding it down after, it really didn’t matter.


[ATTACH]3682[/ATTACH]


It takes about a day to fully cure. The next day, I sanded the surface down flush with my dremel tool with a 150 sanding disk on it. I could have sanded by hand but after the time I’ve had the past few day with hand polishing, I decided to take the easy route.

This is how it finally came out.


[ATTACH]3683[/ATTACH]


You can see the finished work is nice and flush with the original cast surface and once painted, it won’t even be visible.

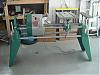
This was purely a cosmetic repair job. The carriage would have worked fine with the piece missing but I wanted to get it back to near original condition and I did NOT want to pay for a new casting.

Fun project. It was almost like doing body work with bondo.

Update 10-19-09 Final painted verison is in post #7
Attachments
Img_5113mod.jpg
Img_5113mod.jpg (65.8 KiB) Viewed 17157 times
Img_5167mod.jpg
Img_5167mod.jpg (73.18 KiB) Viewed 17158 times
Img_5172mod.jpg
Img_5172mod.jpg (33.29 KiB) Viewed 17157 times
Img_5176mod.jpg
Img_5176mod.jpg (61.66 KiB) Viewed 17156 times
Img_5210mod.jpg
Img_5210mod.jpg (69.5 KiB) Viewed 17157 times
Mike
Sunny San Diego
User avatar
thainglo
Gold Member
Posts: 81
Joined: Mon May 19, 2008 10:28 pm
Location: Silver Creek, GA

Post by thainglo »

Mike - that turned out great, very impressed with the results. I had the exact same issue on the first SS I restored, couldn't figure out then what caused it. I went the easy (and more expensive route) by finding a replacement carriage on eBay. That JB Weld is great stuff, I've used it on several repair items before, just didn't cross my mind for that application.

Hit that with some hammered paint, you'll never know!

Matt
Lost count, over a dozen rebuilt/repaired/restored
Personal equipment: 510 made in 1993, belt sander, jig saw, band saw, planer and jointer

Matt in GA
User avatar
JPG
Platinum Member
Posts: 34695
Joined: Wed Dec 10, 2008 7:42 pm
Location: Lexington, Ky (TAMECAT territory)

Post by JPG »

Mike: If you have the stud and nut which were in that threaded hole originally, why not put in back in that hole, but backwards so that the 'battering ram' is INSIDE the carriage and the end of the stud even with the outside surface. That would retain all the 'original' hardware and NOT be a risk of repeating the damage. It would also make the hole SEEM to serve some purpose rather than an empty hole.
╔═══╗
╟JPG ╢
╚═══╝

Goldie(Bought New SN 377425)/4" jointer/6" beltsander/12" planer/stripsander/bandsaw/powerstation /Scroll saw/Jig saw /Craftsman 10" ras/Craftsman 6" thicknessplaner/ Dayton10"tablesaw(restoredfromneighborstrashpile)/ Mark VII restoration in 'progress'/ 10
E[/size](SN E3779) restoration in progress, a 510 on the back burner and a growing pile of items to be eventually returned to useful life. - aka Red Grange
User avatar
mickyd
Platinum Member
Posts: 2999
Joined: Mon Feb 09, 2009 1:18 pm
Location: San Diego, CA
Contact:

Post by mickyd »

JPG40504 wrote:Mike: If you have the stud and nut which were in that threaded hole originally, why not put in back in that hole, but backwards so that the 'battering ram' is INSIDE the carriage and the end of the stud even with the outside surface. That would retain all the 'original' hardware and NOT be a risk of repeating the damage. It would also make the hole SEEM to serve some purpose rather than an empty hole.

Ya jpg that was my plan. I am going to retrofit the Greenie with the carriage stop ring (ref. part 189) that was used on later models. Forum member SDSSmith has an extra that he offered to give me. Since he lives here in San Diego, that works out great. I get to meet him!! I am picking it up this weekend.
Mike
Sunny San Diego
User avatar
tom_k/mo
Platinum Member
Posts: 856
Joined: Mon Jul 14, 2008 3:58 pm
Location: St. Louis, MO
Contact:

Post by tom_k/mo »

Excellent repair job. JB Weld rocks... Thanks for sharing.
ShopSmith MarkV-520 with Belt Sander, Jointer, Band Saw, Strip Sander, Scroll Saw and Biscuit Jointer SPTs and a DC-3300...
Woodworking Hobbyist (Check out all my Woodworking Plans (http://vbwhiz.isa-geek.net/plans)
Aspiring Sandcarver: Breaking glass one grain at a time.
Black Powder Shooter (love the smell of burning sulfur).
User avatar
etc92guy
Gold Member
Posts: 263
Joined: Mon Aug 25, 2008 10:15 pm
Location: Hartland, WI

Post by etc92guy »

I've used JB Weld to repair the mounting holes on the running boards of the conversion van. Has held up through 100 degree temperature change, snow, salt, and rain. Not to mention the strain of my 200+lbs. when I step on it. Great stuff. The product I use is a roll with 1 part wrapped around the other. You cut off a piece and need it to mix it. No dripping!!!!
User avatar
mickyd
Platinum Member
Posts: 2999
Joined: Mon Feb 09, 2009 1:18 pm
Location: San Diego, CA
Contact:

Post by mickyd »

Here's the final painted piece. It's almost perfect. (If viewed under an electron beam microscope, you can see a slight depression...:D :D ) Driving by 60 mph you'll never know the difference!!!!

[ATTACH]3876[/ATTACH]
Attachments
Img_5314mod1.jpg
Img_5314mod1.jpg (73.78 KiB) Viewed 17057 times
Mike
Sunny San Diego
User avatar
beeg
Platinum Member
Posts: 4791
Joined: Sun Oct 14, 2007 2:33 pm
Location: St. Louis,Mo.

Post by beeg »

GREAT job there Mike.
SS 500(09/1980), DC3300, jointer, bandsaw, belt sander, Strip Sander, drum sanders,molder, dado, biscuit joiner, universal lathe tool rest, Oneway talon chuck, router bits & chucks and a De Walt 735 planer,a #5,#6, block planes. ALL in a 100 square foot shop.
.
.

Bob
User avatar
a1gutterman
Platinum Member
Posts: 3653
Joined: Tue Jan 09, 2007 12:45 am
Location: "close to" Seattle

Post by a1gutterman »

It looks fantastic, Mike!
Tim

Buying US made products will help keep YOUR job or retirement funds safer.
User avatar
thainglo
Gold Member
Posts: 81
Joined: Mon May 19, 2008 10:28 pm
Location: Silver Creek, GA

Post by thainglo »

Taping off all those holes in the carriage for painting is a great time! I was planning for the next one I strip and repaint to fab up a set of plugs that will snug into each size hole. Something like PVC pipe or wood dowels that can be turned down to fit...
Lost count, over a dozen rebuilt/repaired/restored
Personal equipment: 510 made in 1993, belt sander, jig saw, band saw, planer and jointer

Matt in GA
Post Reply