Latest Shop Upgrade

This is a forum for intermediate to advanced woodworkers. Show off your projects or share your ideas.

Moderator: admin

User avatar
tdubnik
Platinum Member
Posts: 545
Joined: Wed Nov 12, 2008 8:04 am
Location: Talmo, GA

Latest Shop Upgrade

Post by tdubnik »

I have completed the latest additions to my shop upgrade. These are additional pieces that continue with the same theme as my Ultimate Storage Unit and Shop Cart.

Image

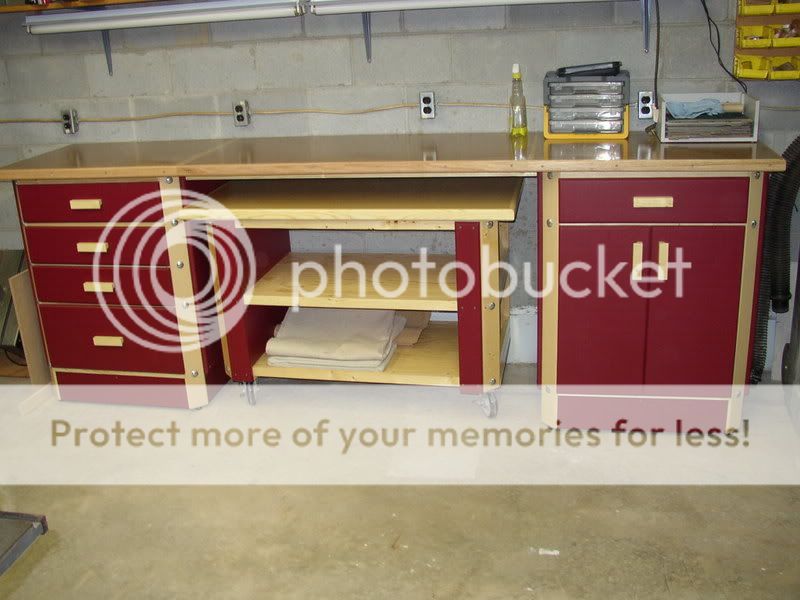
This shows the two pedestal storage and worksurface. I modified the left unit to contain extra drawers instead of the lower cabinet like the unit on the right. The shop cart I built previously neatly tucks into the area beneath the worksurface and the two pedestals.

Image

Image

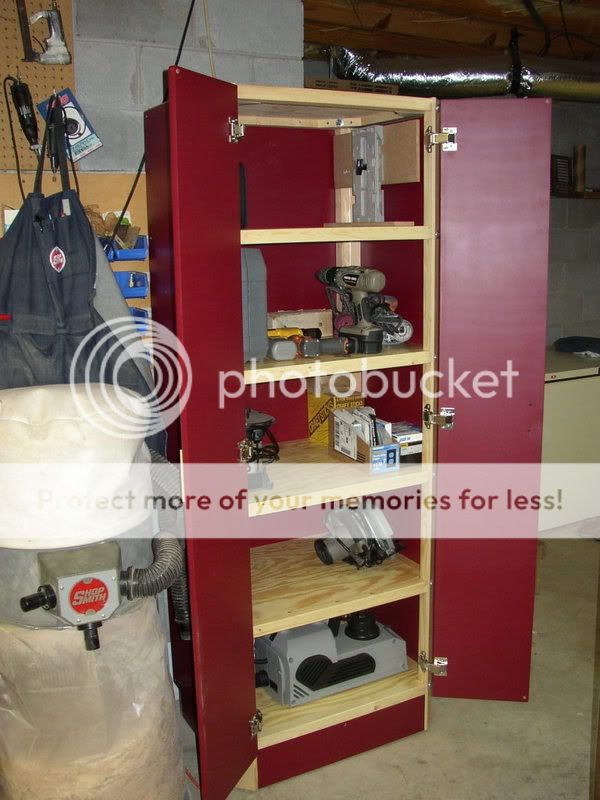
This is an upright storage cabinet I built to hold various hand and bench tools.

Image

This shows a general picture of my Shopsmith and work area.
ldh
Gold Member
Posts: 430
Joined: Sun Sep 10, 2006 6:09 pm
Location: Phoenix, AZ

Post by ldh »

Very nice work. How large is your shop area?
ldh
User avatar
tom_k/mo
Platinum Member
Posts: 856
Joined: Mon Jul 14, 2008 3:58 pm
Location: St. Louis, MO
Contact:

Post by tom_k/mo »

Very nice looking. Almost too nice looking to get dirty (almost)... ;) the matching beveled corners on everything in the natural wood looks cool.
ShopSmith MarkV-520 with Belt Sander, Jointer, Band Saw, Strip Sander, Scroll Saw and Biscuit Jointer SPTs and a DC-3300...
Woodworking Hobbyist (Check out all my Woodworking Plans (http://vbwhiz.isa-geek.net/plans)
Aspiring Sandcarver: Breaking glass one grain at a time.
Black Powder Shooter (love the smell of burning sulfur).
User avatar
tdubnik
Platinum Member
Posts: 545
Joined: Wed Nov 12, 2008 8:04 am
Location: Talmo, GA

Post by tdubnik »

ldh wrote:Very nice work. How large is your shop area?
ldh
My shop is in my basement. The basement is a daylight basement with one long side not underground. This side contains windows, an entry door, and a garage type door for easy access. The basement measures about 1600 SF total and I use about half of it. The area in the picture is only the wood butchering protion of about 300 SF. I use the rest for assembly, cutting sheet goods and whatever else needs doing. I try to keep a large area open and move things in and out of that area as needed.
User avatar
etc92guy
Gold Member
Posts: 263
Joined: Mon Aug 25, 2008 10:15 pm
Location: Hartland, WI

Post by etc92guy »

tdubnik - I really like what you did. Workmanship is high. And you can break it down to take with you if that's ever necessary.

One suggestion - at the back of the bench, use some conduit between those electrical boxes. I'd hate to hear that you had a electrifying time because something slipped and nailed the wiring.
User avatar
JPG
Platinum Member
Posts: 35457
Joined: Wed Dec 10, 2008 7:42 pm
Location: Lexington, Ky (TAMECAT territory)

Post by JPG »

[quote="tom_k/mo"]Very nice looking. Almost too nice looking to get dirty (almost)... ]
The corners are not 'beveled'. They are at a 45* angle 2x4's.

BTW pvc conduit is EASY to work with!

Good Work. They ALL look great!!!!
╔═══╗
╟JPG ╢
╚═══╝

Goldie(Bought New SN 377425)/4" jointer/6" beltsander/12" planer/stripsander/bandsaw/powerstation /Scroll saw/Jig saw /Craftsman 10" ras/Craftsman 6" thicknessplaner/ Dayton10"tablesaw(restoredfromneighborstrashpile)/ Mark VII restoration in 'progress'/ 10
E[/size](SN E3779) restoration in progress, a 510 on the back burner and a growing pile of items to be eventually returned to useful life. - aka Red Grange
User avatar
tdubnik
Platinum Member
Posts: 545
Joined: Wed Nov 12, 2008 8:04 am
Location: Talmo, GA

Post by tdubnik »

The conduit upgrade is on my list, just haven't got there yet. The outlets were installed 20 years ago when I was a lot younger and didn't think about the safety aspect very much.

The corner posts started as 2x4's. I then beveled two sides at 45 degrees. The beveled sides make a 90 degree angle that fits into a notch in the shelves. A 5" carrige bolt goes through the post and connector block on the shelves making for a very strong connection. If you look under the top of the tall unit you can see this connection.
User avatar
beeg
Platinum Member
Posts: 4791
Joined: Sun Oct 14, 2007 2:33 pm
Location: St. Louis,Mo.

Post by beeg »

Good looking upgrades ya have there. I'm jealous of the room ya have.
SS 500(09/1980), DC3300, jointer, bandsaw, belt sander, Strip Sander, drum sanders,molder, dado, biscuit joiner, universal lathe tool rest, Oneway talon chuck, router bits & chucks and a De Walt 735 planer,a #5,#6, block planes. ALL in a 100 square foot shop.
.
.

Bob
eartigas
Gold Member
Posts: 205
Joined: Tue Feb 17, 2009 1:10 pm
Location: Carmel, NY

Shop upgrade

Post by eartigas »

Excellent work!

Could you give us some details of the materials you used?

What is the reddish stuff?

Thanks.

Ed
User avatar
tdubnik
Platinum Member
Posts: 545
Joined: Wed Nov 12, 2008 8:04 am
Location: Talmo, GA

Post by tdubnik »

eartigas wrote:Excellent work!

Could you give us some details of the materials you used?

What is the reddish stuff?

Thanks.

Ed
The "reddish stuff" is 3/4 MDF painted with Krylon spray paint. The work surface is 2 layers of 3/4 MDF with red oak edging finished with poly. The posts are constructed from construction 2x4s. The shelves are 1/2" plywood set in 1 1/2 x 2" construction lumber frames.
Post Reply