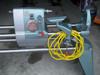
I replaced the Gilmer belt on a 1957 Mark V yesterday and I have a couple of observations that might be useful to others.
First, I found it convenient to wrap a bungy cord around the belt cover and hook it to the way tube tie bar such that the cover is held securely to the left. With the cover held out of the way, raising the tool to the vertical position made it much to clean the grunge from around the drive assembly retaining ring and remove that ring. Of course you have to do this before dropping the motor pan though.
Everything went about as demonstrated in the video (http://www.shopsmithacademy.com/SS_Arch ... _Belts.htm) with one serious exception. Using the quill feed lever to push out the drive sleeve would never, ever work on the machine I've got. In the process of finding this out, even though I was aware of the potential problem and was thinking about avoiding it, I managed to let the feed assembly snap back so hard that the spring inside the spring housing came unhooked from the keeper pin. This added another dimension to the belt replacement procedure. With the feed assembly removed for repair it was easy to clean and lube spindle and verify that it slides freely through the guides and over the drive shaft.
In order to remove the drive assembly I inserted a dowel through the spindle guides to contact the end of the drive shaft. Hammering the dowel with a ball peen hammer would not move the drive bearing out of the housing. Using a 2 lb sledge hammer shattered the dowel. I selected a stronger piece of wood and tried again. Ultimately I had to pry behind the gilmer teeth against the casting with screw drivers first, then a small crow bar, while hammering on the dowel against the end of the drive shaft. Man - if I'd actually tried to leverage that out with the quill feed I'm sure I would have busted the teeth or bent the lever.
My Gilmer belt replacement experience
Moderator: admin
My Gilmer belt replacement experience
Woodmizer LT15 Komatsu PC60

Hi;
When I remove the upper shaft from a machine I use a length of broom handle or other strong dowel. First remove the quill and then insert the dowel into the quill bore and hold it against the splined nylon coupler. Then TAP with a hammer and the assembly will move to the rear of the machine. Of course, don't forget to remove the keeper that keeps the rear bearing in place!!
In an older machine it is advisable to apply a bit of penetrating oil to the outer race of the bearing. Aluminum does not rust but rust forming on the outer race of the bearing can cause it to be difficult to remove from the aluminum casting.
Bill V
When I remove the upper shaft from a machine I use a length of broom handle or other strong dowel. First remove the quill and then insert the dowel into the quill bore and hold it against the splined nylon coupler. Then TAP with a hammer and the assembly will move to the rear of the machine. Of course, don't forget to remove the keeper that keeps the rear bearing in place!!
In an older machine it is advisable to apply a bit of penetrating oil to the outer race of the bearing. Aluminum does not rust but rust forming on the outer race of the bearing can cause it to be difficult to remove from the aluminum casting.
Bill V
[quote="wa2crk"]Hi]
"TAP"?! I had to beat mine aggressively with a 2 lb hammer to get it to budge. I don't see any nylon coupler and a search for "nylon" or "coupler" in the parts list returns no results. I hammered directly against the end of the quill housing (#59 in the parts diagram http://www.shopsmith.com/ownersite/part ... xpview.htm)
Am I missing something?
"TAP"?! I had to beat mine aggressively with a 2 lb hammer to get it to budge. I don't see any nylon coupler and a search for "nylon" or "coupler" in the parts list returns no results. I hammered directly against the end of the quill housing (#59 in the parts diagram http://www.shopsmith.com/ownersite/part ... xpview.htm)
Am I missing something?
Woodmizer LT15 Komatsu PC60
-
dusty

- Platinum Member
- Posts: 21530
- Joined: Wed Nov 22, 2006 6:52 am
- Location: Tucson (Wildcat Country), Arizona
deec wrote:"TAP"?! I had to beat mine aggressively with a 2 lb hammer to get it to budge. I don't see any nylon coupler and a search for "nylon" or "coupler" in the parts list returns no results. I hammered directly against the end of the quill housing (#59 in the parts diagram http://www.shopsmith.com/ownersite/partscat/headstockassemblyexpview.htm)
Am I missing something?
I don't have a Mark V with a gilmer so there is likely something I am missing BUT did you remove the quill first. You said you were TAPPING on item #59 which I would think had already been removed before you began to use the sledge hammer.
Having pounded that hard on the drive line, I suggest you seriously consider ALL NEW bearings (quill and drive sleeve assembly).
"Making Sawdust Safely"
Dusty
Sent from my Dell XPS using Firefox.
Dusty
Sent from my Dell XPS using Firefox.
Part 59 should have been removed along with the quill as an assembly.Then it should require only light taps to remove the drive sleeve. There is a spring clip behind the rear bearing that has to be removed before the drive sleeve can be pushed out. The quill assy can be removed by backing out the set screw on top of the headstock and extending the quill assy all the way out. I haven't worked on a gilmer drive in so long I forget the details but they are similar to the poly v drive of later units.
However heavy pounding is NOT required to remove the drive sleeve.
Bill V
However heavy pounding is NOT required to remove the drive sleeve.
Bill V
I was confused about this. Yes, certainly - #59 comes out with the spindle. What I pounded on though was apparently the drive sleeve, and so now I'm confused about the "splined nylon coupler". Would that be #57 "Drive and Ring Assembly"? - If so, was that a metal part in 1957? By the time the drive sleeve came out (yes, the retaining spring was removed first!) I had pounded on it so hard that the dowel had imbedded itself into the (metal) receiving hole for the spindle splines. I had to use vice grips to remove it. Wish I still had it apart so I could verify #56 & 57 configuration.wa2crk wrote:Part 59 should have been removed along with the quill as an assembly.
Bill V
The good news is that IT WORKS and I was running the lathe all night until the wee hours of this morning.
Woodmizer LT15 Komatsu PC60

Shopsmith Drive Sleeve
I find many drive sleeves can be very difficult to remove. I spray Kroil (any penetrating oil) on both sides of the back bearing and use a curved scribe to remove as much crud as possible. I have used a 24" 1/2" rebar rod with the nubs ground off for many years. I have a 3 pd hammer to tap with and use whatever force is required to remove the drive sleeve shaft. Some times the front bearing will stay in the back housing that I later tap out from the back side. I then use very fine grade emery cloth to clean the bearing bores.
Care must be taken the when installing the drive sleeve that the front bearing is not cocked going into the housing. I have machined a 6" metal driver sleeve that contacts both the inner and outter races of the back bearing (fits snug on the shaft) and helps me keep the front bearing aligned straight when installing the drive sleeve. If more than hand force is needed, than I will emery cloth the housing again. This should not occur if the housing bearing surfaces are really cleaned with a good solvent. Little pressure should be placed on any of the bearing balls at any time. I do not use any LocTite or similar material to secure the drive sleeve bearings.
I always replace both of the drive sleeve bearings with ABEC3 rated bearings as I find over 50% of the drive sleeve bearings do need replacing.
Care must be taken the when installing the drive sleeve that the front bearing is not cocked going into the housing. I have machined a 6" metal driver sleeve that contacts both the inner and outter races of the back bearing (fits snug on the shaft) and helps me keep the front bearing aligned straight when installing the drive sleeve. If more than hand force is needed, than I will emery cloth the housing again. This should not occur if the housing bearing surfaces are really cleaned with a good solvent. Little pressure should be placed on any of the bearing balls at any time. I do not use any LocTite or similar material to secure the drive sleeve bearings.
I always replace both of the drive sleeve bearings with ABEC3 rated bearings as I find over 50% of the drive sleeve bearings do need replacing.
Bill Mayo bill.mayo@verizon.net
Shopsmith owner since 73. Sell, repair and rebuild Shopsmith, Total Shop & Wood Master headstocks, SPTs, attachments, accessories and parts. US Navy 1955-1975 (FTCS/E-8)
Shopsmith owner since 73. Sell, repair and rebuild Shopsmith, Total Shop & Wood Master headstocks, SPTs, attachments, accessories and parts. US Navy 1955-1975 (FTCS/E-8)
Thanks Bill. Good to know I'm not the only guy in the world that can't take out a drive assembly by lightly tapping! I'll be replacing some bearings on my machine probably sometime soon as they are feeling a little gritty. Control sheave bearing are good though for some reason. Others are a little sticky and noisy. Are those bearings you mention stock parts or do we get them somewhere other than SS?billmayo wrote:
I always replace both of the drive sleeve bearings with ABEC3 rated bearings as I find over 50% of the drive sleeve bearings do need replacing.
Woodmizer LT15 Komatsu PC60