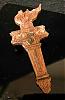
Is there any way to do this on a Shopsmith?
[ATTACH]15559[/ATTACH]
http://projectguitar.ibforums.com/index ... ntry284848
If so, how?
Also I would like to try to get a 7.25" radius block too - any way?
Cutting a 12" radius groove in sanding block
Moderator: admin
Cutting a 12" radius groove in sanding block
- Attachments
-
- groove-cutting.jpg (47.91 KiB) Viewed 2375 times
Hand Engraver of Metals; Maker of Exquisite Kindling; 1955 Greenie Mark V (NOW with a 1989 Headstock); Magna Band Saw; Magna 4" Jointer; Miscellaneous Craftsman & Porter-Cable electric woodworking tools.
3D CADCAM Designs - Gemstone Facetor
3D CADCAM Designs - Gemstone Facetor

I've seen that safe t plane before. Not used one but it looks straightforward. Anything you could use on a drill press you can use on the SS, typically. Now it looks like the safe t plane just has an arbor that goes into a drill chuck. Not sure I like that but it seems to be what they have. Cutting the radius seems to be a function of the tilt of the table. Like when cutting coves on a table saw the radius is a relation of the blade to the board being fed into it.
My guess is a tighter radius is achieved by a steeper table angle. The SS tilts differently but there's no reason you can't make a ramp for the board to travel.
My guess is a tighter radius is achieved by a steeper table angle. The SS tilts differently but there's no reason you can't make a ramp for the board to travel.

Hi,
I have one of these cutters for my shopsmith, but I've never attempted a cut like that. It should word.
Here is another idea, see lower in the page under coving:
http://www.shopsmith.com/academy/tblsaw_spops/index.htm
Ed
I have one of these cutters for my shopsmith, but I've never attempted a cut like that. It should word.
Here is another idea, see lower in the page under coving:
http://www.shopsmith.com/academy/tblsaw_spops/index.htm
Ed
On the Shopsmith, you'd use drill press mode and need to tilt the table the 5 degrees and then run your stock across the table with the stock going between the two way tubes for a 12" radius. One of the guys commenting on that set-up said he would do the math for the proper angles for other radii, but never posted a follow-up. Perhaps that info is somewhere on that site. Barring that, if you have a sample of the 7 1/4" radius block you likely can use it to determine the table tilt angle needed for making the cut.
It goes without saying that you need to exercise caution when using one of those Safe-T-Planer gizmos.
It goes without saying that you need to exercise caution when using one of those Safe-T-Planer gizmos.
Art in Western Pennsylvania
mgdesigns wrote:Is there any way to do this on a Shopsmith?
[ATTACH]15559[/ATTACH]
http://projectguitar.ibforums.com/index.php?showtopic=25182&st=0&p=284848&#entry284848
If so, how?
Also I would like to try to get a 7.25" radius block too - any way?
Sure, you could use this tool on a Shopsmith. I wouldn't recommend using a drill chuck. Instead I recommend a 1/2" router chuck. Shopsmith cautions that a drill chuck is not designed for side pressure. Evidently, others ignore this fact.
You can use the normal tilt feature of the Shopsmith and feed into the center of the machine (between the way tubes). Of course you'd have to mount your guide block on the side of the table - and make sure your "Arm lock knob" is secured so the unit will not tilt toward horizontal position.
Don't know what speed is to be used and also don't know what tilt is necessary to get a 7.25" radius.
Octogenarian's have an earned right to be a curmudgeon.
Chuck in Lancaster, CA
Chuck in Lancaster, CA
-
JPG

- Platinum Member
- Posts: 35600
- Joined: Wed Dec 10, 2008 7:42 pm
- Location: Lexington, Ky (TAMECAT territory)
He wants a 12" radius That would require a 24" diameter blade fed 90° to the blade.
The 7.25 radius would require a 14 1/2" blade.
Notice the coving results in coves smaller than the blade.
EDIT:
Hooookay! None so blind . . .
The SS does not tilt side to side(front to back) so feeding right to left is needed.
Oughta work if tubes etc. do not interfere. I would use a small diameter blade(7 1/4 comes to mind). Maybe stacked for stability(side thrusting going on).
Guardless spinning blades in drill press mode is a mite 'scarey' even for me!:eek:
I think I would stick to the tool suggested!;) Still kinda scarey!
The 7.25 radius would require a 14 1/2" blade.
Notice the coving results in coves smaller than the blade.
EDIT:
Hooookay! None so blind . . .
The SS does not tilt side to side(front to back) so feeding right to left is needed.
Oughta work if tubes etc. do not interfere. I would use a small diameter blade(7 1/4 comes to mind). Maybe stacked for stability(side thrusting going on).
Guardless spinning blades in drill press mode is a mite 'scarey' even for me!:eek:
I think I would stick to the tool suggested!;) Still kinda scarey!
╔═══╗
╟JPG ╢
╚═══╝
Goldie(Bought New SN 377425)/4" jointer/6" beltsander/12" planer/stripsander/bandsaw/powerstation /Scroll saw/Jig saw /Craftsman 10" ras/Craftsman 6" thicknessplaner/ Dayton10"tablesaw(restoredfromneighborstrashpile)/ Mark VII restoration in 'progress'/ 10E[/size](SN E3779) restoration in progress, a 510 on the back burner and a growing pile of items to be eventually returned to useful life. - aka Red Grange
╟JPG ╢
╚═══╝
Goldie(Bought New SN 377425)/4" jointer/6" beltsander/12" planer/stripsander/bandsaw/powerstation /Scroll saw/Jig saw /Craftsman 10" ras/Craftsman 6" thicknessplaner/ Dayton10"tablesaw(restoredfromneighborstrashpile)/ Mark VII restoration in 'progress'/ 10E[/size](SN E3779) restoration in progress, a 510 on the back burner and a growing pile of items to be eventually returned to useful life. - aka Red Grange
I have a Wagner Safety Planer and it does work well (even on the SS). But this technique seems to be more chore than glory. I'd have to make a ramp to be able pull the piece through the safety planer, and just making the ramp seems daunting to me. Just thought I'd pose the question and see if it's something easy enough for a novice like me to do.
Hand Engraver of Metals; Maker of Exquisite Kindling; 1955 Greenie Mark V (NOW with a 1989 Headstock); Magna Band Saw; Magna 4" Jointer; Miscellaneous Craftsman & Porter-Cable electric woodworking tools.
3D CADCAM Designs - Gemstone Facetor
3D CADCAM Designs - Gemstone Facetor
-
foxtrapper
- Gold Member
- Posts: 439
- Joined: Fri Feb 16, 2007 10:05 am
Why would you need the ramp? You can tilt the table and pass the piece between the ways. You could even use a pair of miter guages (one facing forward in the left slot, the other backwards in the right slot) with extension fences to create a nice tunnel setup.mgdesigns wrote:I have a Wagner Safety Planer and it does work well (even on the SS). But this technique seems to be more chore than glory. I'd have to make a ramp to be able pull the piece through the safety planer, and just making the ramp seems daunting to me. Just thought I'd pose the question and see if it's something easy enough for a novice like me to do.
Mark 7, Pro Planer, Jointer, Bandsaw w/Kreg, Biscuit Joiner, Belt Sander, Jig Saw, Ringmaster, DC3300, Overarm Pin Router, Incra Ultimate setup
JWBS-14 w/6" riser, RBI Hawk 226 Ultra, Bosch GSM12SD Axial Glide Dual Compound Miter Saw
-- I have parts/SPTs available, so if you are in the Seattle area and need something let me know --
damagi AT gmail DOT com
JWBS-14 w/6" riser, RBI Hawk 226 Ultra, Bosch GSM12SD Axial Glide Dual Compound Miter Saw
-- I have parts/SPTs available, so if you are in the Seattle area and need something let me know --
damagi AT gmail DOT com
-
rlkeeney

- Platinum Member
- Posts: 784
- Joined: Fri Nov 14, 2008 5:53 am
- Location: Tallahassee FL
- Contact:
There are lots of easier ways to make a radius sanding block. A quick Google search find plenty.
I like these:
http://tinyurl.com/7ss4v2k
http://tinyurl.com/6rqda5y
I like these:
http://tinyurl.com/7ss4v2k
http://tinyurl.com/6rqda5y