The step drills are awesome, I use the heck outta mine.
I bought my first one back in 1980, have used it hard, and it is still going strong and staying sharp even after 30+ years.
I currently have 4 different styles and use every one.
Modifying/Upgrading a 1955 Greenie
Moderator: admin
www.wirewerkes.com
Hiding in a Joshua Tree.
Hiding in a Joshua Tree.
-
robinson46176

- Platinum Member
- Posts: 4182
- Joined: Mon Mar 09, 2009 9:00 pm
- Location: Central Indiana (Shelbyville)
wiredone wrote:The step drills are awesome, I use the heck outta mine.
I bought my first one back in 1980, have used it hard, and it is still going strong and staying sharp even after 30+ years.
I currently have 4 different styles and use every one.
Yes they can work awesome for thin drilling applications. Not so well on some of the 3/4" steel I drill now and then.

The first one I bought years ago (very cheap crappy import) wouldn't drill Jello but now there are a lot of very good ones out there and usually at a decent price and quality.
You just can't have too many tools of all kinds...

.
--
farmer
Francis Robinson
I did not equip with Shopsmiths in spite of the setups but because of them.
1 1988 - Mark V 510 (bought new), 4 Poly vee 1 1/8th HP Mark V's, Mark VII, 1 Mark V Mini, 1 Frankensmith, 1 10-ER, 1 Mark V Push-me-Pull-me Drillpress, SS bandsaw, belt sander, jointer, jigsaw, shaper attach, mortising attach, TS-3650 Rigid tablesaw, RAS, 6" long bed jointer, Foley/Belsaw Planer/molder/ripsaw, 1" sander, oscillating spindle/belt sander, Scroll saw, Woodmizer sawmill
farmer
Francis Robinson
I did not equip with Shopsmiths in spite of the setups but because of them.
1 1988 - Mark V 510 (bought new), 4 Poly vee 1 1/8th HP Mark V's, Mark VII, 1 Mark V Mini, 1 Frankensmith, 1 10-ER, 1 Mark V Push-me-Pull-me Drillpress, SS bandsaw, belt sander, jointer, jigsaw, shaper attach, mortising attach, TS-3650 Rigid tablesaw, RAS, 6" long bed jointer, Foley/Belsaw Planer/molder/ripsaw, 1" sander, oscillating spindle/belt sander, Scroll saw, Woodmizer sawmill

I removed the old bearings from the motor armature today. I had to get a little creative on one of them since my largest puller was about 1/2 and inch too short. I pulled some linkage parts off another puller to extend the reach.
The next step is to build a jig/press for my bottle jack and get this thing put back together!

The next step is to build a jig/press for my bottle jack and get this thing put back together!
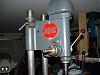
I worked on the 1955 Greenie this weekend, and made some great progress.
I finished putting the Magna Jigsaw back together. I used it on the 1984 that I cleaned up to sell my brother, and it works great. My wife said it looks and sounds like a sewing machine.
I installed the new bearings in the motor and put it back together. It works great - forwards and backwards!
I installed the driveshaft bearings and the quill bearing and put the clutch back together. I smoothed the metal and fiber disks with 1000 grit. I didn't have time to drill and tap a nut with a setscrew to test the clutch with a torque wrench, but I put a crescent wrench on the flat of the shaft to turn the clutch. It turned smoothly. I can't guarantee that it was exactly 10-20 ft-lbs, but it was certainly in the ballpark.
I re-wound the quill spring without the serious drama that I've read about, then put the pinion shaft, driveshaft, quill, and idler shaft back in the headstock.
I drilled the oil hole in the control sheave and the floating sheave.
I'm getting so close I can taste it. The next step is to cut a small notch in the square headstock opening so the speed control will fit back in with the bolt in place of the stock roll pin.
I finished putting the Magna Jigsaw back together. I used it on the 1984 that I cleaned up to sell my brother, and it works great. My wife said it looks and sounds like a sewing machine.
I installed the new bearings in the motor and put it back together. It works great - forwards and backwards!
I installed the driveshaft bearings and the quill bearing and put the clutch back together. I smoothed the metal and fiber disks with 1000 grit. I didn't have time to drill and tap a nut with a setscrew to test the clutch with a torque wrench, but I put a crescent wrench on the flat of the shaft to turn the clutch. It turned smoothly. I can't guarantee that it was exactly 10-20 ft-lbs, but it was certainly in the ballpark.
I re-wound the quill spring without the serious drama that I've read about, then put the pinion shaft, driveshaft, quill, and idler shaft back in the headstock.
I drilled the oil hole in the control sheave and the floating sheave.
I'm getting so close I can taste it. The next step is to cut a small notch in the square headstock opening so the speed control will fit back in with the bolt in place of the stock roll pin.
It's finished!
I filled the bench and way tubes with used lead wheel weights. I estimate that it added 60 lbs. I put one or two weights in, then rammed them down with a ramrod, then added a few more and repeated the process. It was slow going, but in the end, I fit more of them in, and they are tight so they don't rattle. In addition to the extra weight for stability, it should cut down on vibrations quite a bit.
I had to undo and re-solder all the jumpers and wires on/between the on-off switch and the new reversing switch because I had wires coming in at wrong angles and did not have clearance for the control sheave once installed in the headstock.
While we're on that subject, I have a question about my on-off switch. It is a 3 position switch: on, off, momentary on. Is that a stock switch for a 1955 Greenie? I'm not sure how useful it will be having the ability to bump the motor over when it is just as easy to turn the quill by hand, but that is the switch she was wearing when I got her. The switch worked perfectly well so I left it.
I already posted that the Magna Jigsaw is up and running so the only thing left to do now is re-grind and sharpen the original Disston jointer blades.
The two ways I have read about to grind and sharpen the jointer blades involve cutting a 45 degree kerf in a scrap of wood to hold the blade. One technique is to use a conical disk sander and advance the blade into the sander with the miter gage. The other is to skew the rip fence and advance the blade into the flat disk sander by sliding along the fence.
Can anyone give me a good reason to not clamp the block holding the blade stationary on the table and advance the 12 inch sanding disk using the quill feed? My thinking is that if I skew the fence, only the trailing edge of the disk sander is doing the cutting, but if I square everything up and advance the sanding disk, then the cutting (and heat generated) is spread over a 4" wide annulus on the disk sander, instead of being concentrated on one spot.
I'm excited to have my Greenie put back together and to be able to start using it!
I filled the bench and way tubes with used lead wheel weights. I estimate that it added 60 lbs. I put one or two weights in, then rammed them down with a ramrod, then added a few more and repeated the process. It was slow going, but in the end, I fit more of them in, and they are tight so they don't rattle. In addition to the extra weight for stability, it should cut down on vibrations quite a bit.
I had to undo and re-solder all the jumpers and wires on/between the on-off switch and the new reversing switch because I had wires coming in at wrong angles and did not have clearance for the control sheave once installed in the headstock.
While we're on that subject, I have a question about my on-off switch. It is a 3 position switch: on, off, momentary on. Is that a stock switch for a 1955 Greenie? I'm not sure how useful it will be having the ability to bump the motor over when it is just as easy to turn the quill by hand, but that is the switch she was wearing when I got her. The switch worked perfectly well so I left it.
I already posted that the Magna Jigsaw is up and running so the only thing left to do now is re-grind and sharpen the original Disston jointer blades.
The two ways I have read about to grind and sharpen the jointer blades involve cutting a 45 degree kerf in a scrap of wood to hold the blade. One technique is to use a conical disk sander and advance the blade into the sander with the miter gage. The other is to skew the rip fence and advance the blade into the flat disk sander by sliding along the fence.
Can anyone give me a good reason to not clamp the block holding the blade stationary on the table and advance the 12 inch sanding disk using the quill feed? My thinking is that if I skew the fence, only the trailing edge of the disk sander is doing the cutting, but if I square everything up and advance the sanding disk, then the cutting (and heat generated) is spread over a 4" wide annulus on the disk sander, instead of being concentrated on one spot.
I'm excited to have my Greenie put back together and to be able to start using it!

Culprit wrote:While we're on that subject, I have a question about my on-off switch. It is a 3 position switch: on, off, momentary on. Is that a stock switch for a 1955 Greenie?
The OEM switch was just an on/off type.
SS 500(09/1980), DC3300, jointer, bandsaw, belt sander, Strip Sander, drum sanders,molder, dado, biscuit joiner, universal lathe tool rest, Oneway talon chuck, router bits & chucks and a De Walt 735 planer,a #5,#6, block planes. ALL in a 100 square foot shop.
.
.
Bob
.
.
Bob