My approach to this would be to make one part to size, Drop it between the fence and the disc. Move the quill out to make gentle contact with the part. Lock the quill in place and set the quill stop to "0". Unlock the quill and back it off. Sand your workpieces moving the quill a little each time until the lock hits "0" again.
Basically what I was taught at the Traveling Academy years ago.
Adjusting depth of cut on conical disc
Moderator: admin
-
dusty

- Platinum Member
- Posts: 21530
- Joined: Wed Nov 22, 2006 6:52 am
- Location: Tucson (Wildcat Country), Arizona
It seems to me that the question of how to accurately change the depth of cut, when using the conical disk, has been adequately addressed. Some very good ideas here.
Remaining question: How to accurately change the table tilt when using the conical disk or for any other reason. Let us say. you do not want a 90° edge.
If you have thoughts about this, please post them here.
Remaining question: How to accurately change the table tilt when using the conical disk or for any other reason. Let us say. you do not want a 90° edge.
If you have thoughts about this, please post them here.
"Making Sawdust Safely"
Dusty
Sent from my Dell XPS using Firefox.
Dusty
Sent from my Dell XPS using Firefox.
Sliding bevel or T-bevel would be the simplest. Set angle, slide it up to the conical sander, adjust table. Exactly the way I set the 90º using an engineer square.dusty wrote:It seems to me that the question of how to accurately change the depth of cut, when using the conical disk, has been adequately addressed. Some very good ideas here.
Remaining question: How to accurately change the table tilt when using the conical disk or for any other reason. Let us say. you do not want a 90° edge.
If you have thoughts about this, please post them here.
Use protractor or another type of angle measuring device to set the sliding bevel.
Jim in Bakersfield:D
I'll 'third' that! And if I had it I'd use it.JPG40504 wrote:Yes Indeed!!!!
{and oh, by the way- shim stock, pack of plastic playing cards. This is "Engineering Grade" stuff!}
I generally use jpg's method of using the end of the workpiece against the disc off center by wee bits. Quick n ez, espec. when doing a lot of diffo sized stuff.
For extreme nitpickiness the Incra tsls is the ultimate of a screw (stop collar) idea- increments of .001, each with an audible- and feelable- 'click'.
But whichever, I always run the piece across the disc MINimum three times if I need 'perfection' in a run (finishing pass). Takes but a few seconds, catches any little stubborn (grain) spots.
Mark V 520, Power-Pro!; Speed Reducer; B/S; Jointer; ShopMate DCS; SS Tenon Master; Rip-Strate; Incra; BCTW; DW734; var. SS sanding systems; Wood River;
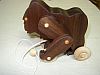
Just a quick update on my shim adjustment process.
When I set up for the initial pass, I use the two hardboard shims with no paper shims. This establishes the base for further adjustments on subsequent passes. To move the disc 1/64" I advance the quill a little and slip in two paper shims. I then retract the quill until it compresses the rubber washer and then let it go. At that point I lock down the quill. This whole process takes less than 10 seconds and gives me very predictable results.
Since my original post, I have sanded a bunch of toy parts to size. It went very easy and similar parts ended up the same dimension. By using the 150 grit disc, the edges required no further sanding.
I am VERY pleased with the results.
When I set up for the initial pass, I use the two hardboard shims with no paper shims. This establishes the base for further adjustments on subsequent passes. To move the disc 1/64" I advance the quill a little and slip in two paper shims. I then retract the quill until it compresses the rubber washer and then let it go. At that point I lock down the quill. This whole process takes less than 10 seconds and gives me very predictable results.
Since my original post, I have sanded a bunch of toy parts to size. It went very easy and similar parts ended up the same dimension. By using the 150 grit disc, the edges required no further sanding.
I am VERY pleased with the results.