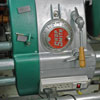
I was recently horizontally boring some holes and the upper drive belt broke. I had never been inside the head before and had no idea how to change the belt.
Thanks to the posts here and the videos at Sawdust Sessions, I repaired the the broken belt. There was so much info here. People had painted their SS in different color schemes and shortened the SS.
So I set out to re-do my three SS's. One I bought new in the 70's, a gray. Second a used goldie I bought in the 80's and the third is a greenie I bought this year after the belt broke on number 2. Here's the results.
The goldie & greenie I cut down to shorty's and my plan was to use them as power stations for the accessories, and the gray one I shortened by 4" so it could be vertical in my low height basement.
I wanted all to look the same and one of the things that was different was the control handles. My newest one had long tapered red plastic handles and back when, I changed the handles on the goldie to match. The greenie had the short red handles. And looking to buy replacement from the factory, I discovered now they are all black. So decided to make my own with oak handles to match on all three machines.
Also wanted more light in the basement. So I made wood brackets to hold swing arm lights. Numbered the brackets to ID each machine. Needed an outlet to plug the lights in so added short outlets from HFT to the headstock.
Wanted newer, larger casters, but couldn't accept the price for the 3" ones from SS. Bought 3" ones from HFT. But did have to drill out and tap the mounts to fit the HFT version.
While I had the SS's apart, replaced all the bearings & belts. Replaced the power cords with 12AWG and new power switches. Finally after I got all three back together, read about the bandsaw. Ended up putting a window & vacuum port on it, and new self printed SS logo over the Yuba one. Replaced the old broken saw guard it had as well and put guide bearing in it as well.
Did the jigsaw overhaul as well. Then added a vacuum port on the planer. One problem was I had to mount the planer on one of the machines. And that planer and my old back don't get along. Found a "new" planer stand on ebay and decided having the planer as a stand alone was better than having to carry it. Also found a used set of casters to install on the stand. Put 3" HFT casters on it as well.
Bought the lathe chisel sharpening guide from SS on sale with the new steel disk sanding disk. Modified the sanding disk so one side could have the 150 grit for the chisels and the backside have 120 grit. Upgraded the disks to the newer ones as well. New disk are green and about match the green hammertone paint.
With three machines I had three drum sanders now. One in each grit. Did the same with the disk sanders with one in each grit.
Still plan to add a vacuum port on the jointer, but that's a project for next year.
One of the things I found was magnetic mount swing arm lights. I mounted steel electric cover plates all over my shop, so I can increase the light where needed.
Here's my SS
Moderator: admin
Here's my SS
- Attachments
-
- DSC00777.jpg (128.45 KiB) Viewed 2168 times
-
- DSC00778.jpg (110.39 KiB) Viewed 2121 times
-
- DSC00780.jpg (99.19 KiB) Viewed 2110 times
-
- DSC00782.jpg (103.79 KiB) Viewed 2101 times
-
- DSC00784.jpg (101.44 KiB) Viewed 2099 times

Those are beautiful! I really do love that Green & Silver color scheme.
I also really like your lights and the light mounts you put on the belt cover.
I also really like your lights and the light mounts you put on the belt cover.
Heath
Central Louisiana
-10ER - SN 13927, Born 1949, Acquired October 2008, Restored November, 2008
-10ER - SN 35630, Born 1950, Acquired April 2009, Restored May 2009, A34 Jigsaw
-Mark V - SN 212052, Born 1986, Acquired Sept 2009, Restored March 2010, Bandsaw
-10ER - SN 39722, Born 1950, Acquired March 2011, awaiting restoration
Central Louisiana
-10ER - SN 13927, Born 1949, Acquired October 2008, Restored November, 2008
-10ER - SN 35630, Born 1950, Acquired April 2009, Restored May 2009, A34 Jigsaw
-Mark V - SN 212052, Born 1986, Acquired Sept 2009, Restored March 2010, Bandsaw
-10ER - SN 39722, Born 1950, Acquired March 2011, awaiting restoration
-
robinson46176

- Platinum Member
- Posts: 4182
- Joined: Mon Mar 09, 2009 9:00 pm
- Location: Central Indiana (Shelbyville)
Looks like a setup to be proud of... 
And I'll bet you had a lot of fun getting there.
What is next in the plan?
.
And I'll bet you had a lot of fun getting there.
What is next in the plan?
.
--
farmer
Francis Robinson
I did not equip with Shopsmiths in spite of the setups but because of them.
1 1988 - Mark V 510 (bought new), 4 Poly vee 1 1/8th HP Mark V's, Mark VII, 1 Mark V Mini, 1 Frankensmith, 1 10-ER, 1 Mark V Push-me-Pull-me Drillpress, SS bandsaw, belt sander, jointer, jigsaw, shaper attach, mortising attach, TS-3650 Rigid tablesaw, RAS, 6" long bed jointer, Foley/Belsaw Planer/molder/ripsaw, 1" sander, oscillating spindle/belt sander, Scroll saw, Woodmizer sawmill
farmer
Francis Robinson
I did not equip with Shopsmiths in spite of the setups but because of them.
1 1988 - Mark V 510 (bought new), 4 Poly vee 1 1/8th HP Mark V's, Mark VII, 1 Mark V Mini, 1 Frankensmith, 1 10-ER, 1 Mark V Push-me-Pull-me Drillpress, SS bandsaw, belt sander, jointer, jigsaw, shaper attach, mortising attach, TS-3650 Rigid tablesaw, RAS, 6" long bed jointer, Foley/Belsaw Planer/molder/ripsaw, 1" sander, oscillating spindle/belt sander, Scroll saw, Woodmizer sawmill


-
shipwright

- Platinum Member
- Posts: 1165
- Joined: Tue Dec 15, 2009 7:28 pm
- Location: Vancouver Island, Canada
- Contact:
Those mag lights are from HF as well, no? I use them with cover plates just like you did. They are a great addition and can move easily to another cover plate at a moment's notice.
Nice shop and a nice brace of SS's.
Paul M
Nice shop and a nice brace of SS's.
Paul M
Paul M ........ The early bird gets the worm but the second mouse gets the cheese
Planning to tile the floor with tiles like this from an ebay supplier. But thinking gray/beige combo. The paint on the floor has gotten pretty chewed up and I'm thinking the tiles would be nice.robinson46176 wrote:Looks like a setup to be proud of...
And I'll bet you had a lot of fun getting there.
What is next in the plan?
.
http://www.ebay.com/itm/Basement-Floor- ... 484b390bc8
Next wood project I'm planning is this Marble Machine. But since I have limited space, plan to make it at half scale.
http://www.youtube.com/watch?v=unDVtGto ... F3AC89DB1E
-
dusty

- Platinum Member
- Posts: 21530
- Joined: Wed Nov 22, 2006 6:52 am
- Location: Tucson (Wildcat Country), Arizona
I don't know how I missed this thread when it was first posted.
Just want to say that you have done a fantastic job with your machines. I like the paint jobs very much. I appreciate that skill because I lack it. '
Thanks for the ideas. Especially the cover plates for a magnetic base.
Just want to say that you have done a fantastic job with your machines. I like the paint jobs very much. I appreciate that skill because I lack it. '
Thanks for the ideas. Especially the cover plates for a magnetic base.
"Making Sawdust Safely"
Dusty
Sent from my Dell XPS using Firefox.
Dusty
Sent from my Dell XPS using Firefox.