Hi all,
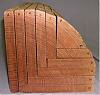
Attached are photos of the new workbench I finished building. The design is loosely based upon plans from an issue of Wood magazine.
The frame is Douglas fir, construction grade 2"x6" lumber. I resized this lumber to make up 2 1/2" x3 3/4" legs.
The size of the top is 32" x 72". The top is made up of 2 layers are 3/4" plywood with a replaceable hardboard surface. This top is wrapped with Red Alder. The feet are also of Red alder.
The reason I chose this lumber is to highlight two of the tree species of the Pacific Northwest.
The finish is an old "Workbench Recipe" that contains 1/3 beeswax, 1/3 turpentine and 1/3 Linseed oil. I applied two coats of this "Workbench Recipe" over a period of 3 days. I have never used this finish before, but I am quite happy with the results.
The casters are 4" double, locking casters from Woodcraft. I would have used the new workbench wheels from Rockler, but I had already purchased these double locking casters. My garage floor has some uneven spots. I have found that moving the workbench a few inches either way solves any "wobble" problems.
Thanks to all for taking a look at this project. Hopefully, I won't get the snarky comments I recieved when I sent in my "Maintnenance Table" attachment last month.
New Workbench
Moderators: HopefulSSer, admin
New Workbench
- Attachments
-
- Workbench 1.jpg (201.11 KiB) Viewed 3272 times
-
- Workbench 2.jpg (208.66 KiB) Viewed 3160 times
-
- Workbench 3.jpg (199.64 KiB) Viewed 3153 times
-
- Workbench 4.jpg (194.79 KiB) Viewed 3152 times

-
pieceseeker
- Gold Member
- Posts: 370
- Joined: Mon Jan 07, 2013 12:13 pm
- Location: Lawrenceville, Georgia
Great bench! Why didn't you use the SS as a backdrop in the photos? Never can see too many SS's. 
" I cut it twice and it's still too short"
2006 Mark 520, 1983 Mark V model 500(soon to be a shorty)/Power Stand mounted Planer/Jointer/Belt Sander/Band Saw/Jigsaw on pwr stand/Scroll saw/Strip Sander/Power Station/Speed Reducer/Increaser/2 Nova chucks.... 12" DeWalt sliding compound mitre saw, 10" Delta tabletop saw, Bosch router and jig saw, Makita circular saw, Graco V-COMP HVLP, Festool CT-26 E Hepa
2006 Mark 520, 1983 Mark V model 500(soon to be a shorty)/Power Stand mounted Planer/Jointer/Belt Sander/Band Saw/Jigsaw on pwr stand/Scroll saw/Strip Sander/Power Station/Speed Reducer/Increaser/2 Nova chucks.... 12" DeWalt sliding compound mitre saw, 10" Delta tabletop saw, Bosch router and jig saw, Makita circular saw, Graco V-COMP HVLP, Festool CT-26 E Hepa
Great looking workbench!Lodgepole wrote:Hi all,
Thanks to all for taking a look at this project. Hopefully, I won't get the snarky comments I recieved when I sent in my "Maintnenance Table" attachment last month.
I liked your maintenance table attachment too, but I may of been guilty of a "snarky comment":( Anyway, I did comment and hope it was not taken as negative feedback, just something that I would have needed to add for me.
Congrats again on a great project.
Sam in Northfield, MN
A day without beer......could have been better

Mark V 500 - S/N 100990, Mark V 510 - S/N missing, SS Band Saw, SS 6" Belt Sander, SS 4" Jointer, SS Scroll Saw, SS DC3300
A day without beer......could have been better
Mark V 500 - S/N 100990, Mark V 510 - S/N missing, SS Band Saw, SS 6" Belt Sander, SS 4" Jointer, SS Scroll Saw, SS DC3300
-
BuckeyeDennis

- Platinum Member
- Posts: 3700
- Joined: Tue Jul 24, 2012 10:03 pm
- Location: Central Ohio
Dude: Like almost everyone else on this forum, you are well ahead of me on the cool workshop stuff front. That is a GREAT looking workbench.
I personally have plans to recycle a surplus workbench from OSU. It has a nice old antique cast iron frame, but needs new work surfaces. It has been in my possession for at least 15 years, and is still in need of restoration. (Yes, just in case anyone is tuned in from That State Up North, OSU is indeed short for the Ohio State University.)
I'm thinking hard maple for the new top, and ShopSmith gray for the frame. I probably need to work in a scarlet highlight here or there, come to think of it. I am hoping to restore it next winter, AFTER I finish my 13 year old daughter's secret room. Some things just won't wait another 15 years.
-
BuckeyeDennis
- Platinum Member
- Posts: 3700
- Joined: Tue Jul 24, 2012 10:03 pm
- Location: Central Ohio

Great looking bench - well done! I appreciate the red alder touch - it's the most common hardwood around these parts and not often used for much but chips heading to a pulp mill...it's a beautiful wood that recently has started seeing local use for flooring as well.
What issue of Wood did you get your inspiration from?
What issue of Wood did you get your inspiration from?
'78 Mark V 500 #27995 (my Dad bought new)
'82 Mark V 500 #96309
Two '47 10E's (serial#4314+6149) - one a dedicated drill press and the other a lathe
Two 10E/ER in parts slowly being restored…#26822 and #????? (SS plate missing)
SPT's: Bandsaw, Belt Sander, Strip Sander, Jointer, Jigsaw, Biscuit Joiner
'82 Mark V 500 #96309
Two '47 10E's (serial#4314+6149) - one a dedicated drill press and the other a lathe
Two 10E/ER in parts slowly being restored…#26822 and #????? (SS plate missing)
SPT's: Bandsaw, Belt Sander, Strip Sander, Jointer, Jigsaw, Biscuit Joiner
Hopefully, the following is a complete response to the questions that have been asked regarding this workbench:
The roll of paper is to protect the workbench top when I am gluing up or finishing a project. I have also used the paper to draw out new ideas for possible projects.
The plans can be found in the June/July 2005 issue of Wood. In addition to the workbench plans in this issue, there is another article entitled, "6 Ways to Beef Up a Workbenche". The ideas are:
1. 50 lbs of added weight stability
2. Three tool totes
3. Three wide drawers for tools and plans
4. Paper roll holder for protecting the top from finish spills
5. Surge protector power strip
6. Glue-up clamp holder
As you have notice, I already have installed the paper roll holder and the surge protector power strip. After I use the workbench for a while, I will probably add the tool totes, drawers and glue-up clamp holder.
Thanks for all of the positive feedback that everyone has given!