45-degree angle has me stumped
Moderator: admin

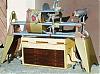
Sliding table and Triangles Works for me.
I built a set of 1/4" thick Triangles from hard board for my sliding Table. The triangles have 45. 30, 60, angles for one of the points. I use a couple of fence clamps to hold the triangles on the sliding table with the point of the triangle close to the saw blade. Then place the molding against the edge of the triangle and cut the miter.
Sliding Table has lots of room to set up to make the cut. I been forgoing a stop block for cutting to length and using a mark on the edge of the triangle ( same with cutting to length - a mark on the fence works fine, for me).
There are lots of improvements: sandpaper on the edge of the triangle to stop the molding from slipping, offcut support, silicone caulk beads to raise the triangle off the sliding table to move saw dust out of the way, bigger triangles at least 18" to an edge .... The advantage is the sliding table and triangles are quick and accurate setup.
Sliding Table has lots of room to set up to make the cut. I been forgoing a stop block for cutting to length and using a mark on the edge of the triangle ( same with cutting to length - a mark on the fence works fine, for me).
There are lots of improvements: sandpaper on the edge of the triangle to stop the molding from slipping, offcut support, silicone caulk beads to raise the triangle off the sliding table to move saw dust out of the way, bigger triangles at least 18" to an edge .... The advantage is the sliding table and triangles are quick and accurate setup.
MK V 520; MK V 510 w/PP DIY Upgrade; MK 5 500; Jointer; Bandsaw; Sliding Table; Conical Sanding Disk; Sharpening Guide, Lathe Duplicator, Jigsaw, Scrollsaw, Beltsander, Ring Master, Biscuit Joiner.
-
Ed in Tampa

- Platinum Member
- Posts: 5834
- Joined: Fri Jul 21, 2006 12:45 am
- Location: North Tampa Bay area Florida
Pictures please!!!allsas wrote:I built a set of 1/4" thick Triangles from hard board for my sliding Table. The triangles have 45. 30, 60, angles for one of the points. I use a couple of fence clamps to hold the triangles on the sliding table with the point of the triangle close to the saw blade. Then place the molding against the edge of the triangle and cut the miter.
Sliding Table has lots of room to set up to make the cut. I been forgoing a stop block for cutting to length and using a mark on the edge of the triangle ( same with cutting to length - a mark on the fence works fine, for me).
There are lots of improvements: sandpaper on the edge of the triangle to stop the molding from slipping, offcut support, silicone caulk beads to raise the triangle off the sliding table to move saw dust out of the way, bigger triangles at least 18" to an edge .... The advantage is the sliding table and triangles are quick and accurate setup.
Ed in Tampa
Stay out of trouble!
Stay out of trouble!
 :rolleyes:
-
JPG

- Platinum Member
- Posts: 35600
- Joined: Wed Dec 10, 2008 7:42 pm
- Location: Lexington, Ky (TAMECAT territory)
I just skimmed over this thread.
It was implied, but not explicitly stated that tilting the table is NOT the way to cut miters.
The miter gauge is a more reasonable approach.
And yes stops need to be adjusted accurately.
It was implied, but not explicitly stated that tilting the table is NOT the way to cut miters.
The miter gauge is a more reasonable approach.
And yes stops need to be adjusted accurately.
╔═══╗
╟JPG ╢
╚═══╝
Goldie(Bought New SN 377425)/4" jointer/6" beltsander/12" planer/stripsander/bandsaw/powerstation /Scroll saw/Jig saw /Craftsman 10" ras/Craftsman 6" thicknessplaner/ Dayton10"tablesaw(restoredfromneighborstrashpile)/ Mark VII restoration in 'progress'/ 10E[/size](SN E3779) restoration in progress, a 510 on the back burner and a growing pile of items to be eventually returned to useful life. - aka Red Grange
╟JPG ╢
╚═══╝
Goldie(Bought New SN 377425)/4" jointer/6" beltsander/12" planer/stripsander/bandsaw/powerstation /Scroll saw/Jig saw /Craftsman 10" ras/Craftsman 6" thicknessplaner/ Dayton10"tablesaw(restoredfromneighborstrashpile)/ Mark VII restoration in 'progress'/ 10E[/size](SN E3779) restoration in progress, a 510 on the back burner and a growing pile of items to be eventually returned to useful life. - aka Red Grange