Today in the shop (flag kite build)
Moderator: admin
Today in the shop (flag kite build)
I have way toooooooooo much scrap lumber laying around so it time to make something out of it. One project that came to mind is one I have posted here before, it is a wind spinner in the shape of a kite and painted in a flag like manor.
Not a flattering photo but you will get the idea.
I have several bundles of scape wood I got from a cabinet shop quite a few years ago (they have since gone out of business so that source dried up but I still have these pieces and lets say this is 1/4 of what is left).
The actual dimensions are in the 3/8" thick by 1" wide by 20+ long. I think they maybe fine but a bit wider then I normally use. I don't see a problem trying one kite this way and see if it functions OK rather then sizing the strips to 3/4" wide.
I had planned to have 3 of these done by tomorrow but life happens. I haven't even started and painting will take several days alone much less the wood working.
This is the hardware for the kite.
Rather then measuring and or doing the math to find out how many strips it will take I simply lay them out and then add a couple of spares in case I find some defects I can work around. The process looks like this:
I then do a visual inspection looking for those defects early on. Some of the parts have defects but if I think they will be a show stopper I get rid of them now. I still keep the spare count as somethings don't show up at this stage.
So next post we will get started by setting up to cut the stock to length.
Ed
Not a flattering photo but you will get the idea.
I have several bundles of scape wood I got from a cabinet shop quite a few years ago (they have since gone out of business so that source dried up but I still have these pieces and lets say this is 1/4 of what is left).
The actual dimensions are in the 3/8" thick by 1" wide by 20+ long. I think they maybe fine but a bit wider then I normally use. I don't see a problem trying one kite this way and see if it functions OK rather then sizing the strips to 3/4" wide.
I had planned to have 3 of these done by tomorrow but life happens. I haven't even started and painting will take several days alone much less the wood working.
This is the hardware for the kite.
Rather then measuring and or doing the math to find out how many strips it will take I simply lay them out and then add a couple of spares in case I find some defects I can work around. The process looks like this:
I then do a visual inspection looking for those defects early on. Some of the parts have defects but if I think they will be a show stopper I get rid of them now. I still keep the spare count as somethings don't show up at this stage.
So next post we will get started by setting up to cut the stock to length.
Ed
{Knight of the Shopsmith} [Hero's don't wear capes, they wear dog tags]
Re: Today in the shop (flag kite build)
Today I'm using stock that has already been ripped to 3/8" thick but other times I have started with scrap in wider widths and then ripped it to this size. I'm not covering that aspect of the process because I'm not doing it but that might not be the case for you. Ripping thin strips can be a challenge to do safely wise so know what you are doing before you get started and if you don't ask and understand before you get hurt.
I have decided to bring out my sled to do the cutting. I will do a "gang" of parts at the same time and this is a safe way of doing that.
I start by using a tape measure, hooking the end in the zci slot of the sled and measuring over to set up a stop on the sled.
Note that since the blade cut the slot in the sled the edge of the cut will be pretty darn close but in this case it doesn't really matter as we are just making a pretty simple craft item where being off even a 1/4" on this cut would not matter.
Next I pick out a "gang" of strips, a comfortable hands worth and register one end to the sled.
Next, using the stop for location I clamp the strips together to the sled. For added safety you might want to clamp to both sides of the cut.
That is about all for now. Have to see if the weather will allow me to continue after lunch...... and I have to wait for the camera battery to charge up....... and I might want to take a nap.......
Ed
I have decided to bring out my sled to do the cutting. I will do a "gang" of parts at the same time and this is a safe way of doing that.
I start by using a tape measure, hooking the end in the zci slot of the sled and measuring over to set up a stop on the sled.
Note that since the blade cut the slot in the sled the edge of the cut will be pretty darn close but in this case it doesn't really matter as we are just making a pretty simple craft item where being off even a 1/4" on this cut would not matter.
Next I pick out a "gang" of strips, a comfortable hands worth and register one end to the sled.
Next, using the stop for location I clamp the strips together to the sled. For added safety you might want to clamp to both sides of the cut.
That is about all for now. Have to see if the weather will allow me to continue after lunch...... and I have to wait for the camera battery to charge up....... and I might want to take a nap.......
Ed
{Knight of the Shopsmith} [Hero's don't wear capes, they wear dog tags]
Re: Today in the shop (flag kite build)
No nap, the weather held out just long enough for me to do this set of cuts resulting in 142 pieces and a small pile of left overs.
First the left overs:
I say left overs cause they some of them are still going to be useable if I get into a bind and need them.
The cut pieces, did I mention 142 of them are now ready for the next process.
The next process will be drilling the center hole. Since I have so many parts to drill I think it likely that I will take the time to make a simple jig to make that process easier.
Work on this will resume either later today if the rain goes away or another fair weather day soon.
Ed
First the left overs:
I say left overs cause they some of them are still going to be useable if I get into a bind and need them.
The cut pieces, did I mention 142 of them are now ready for the next process.
The next process will be drilling the center hole. Since I have so many parts to drill I think it likely that I will take the time to make a simple jig to make that process easier.
Work on this will resume either later today if the rain goes away or another fair weather day soon.
Ed
{Knight of the Shopsmith} [Hero's don't wear capes, they wear dog tags]
Re: Today in the shop (flag kite build)
Well, I was writing to say you've napped enough but, you are already up.
Re: Today in the shop (flag kite build)
Looks like ya got a good start Ed. How many pieces for ONE wind flag and can ya share some length measurements?
SS 500(09/1980), DC3300, jointer, bandsaw, belt sander, Strip Sander, drum sanders,molder, dado, biscuit joiner, universal lathe tool rest, Oneway talon chuck, router bits & chucks and a De Walt 735 planer,a #5,#6, block planes. ALL in a 100 square foot shop.
.
.
Bob
.
.
Bob
Re: Today in the shop (flag kite build)
The parts shown will do 3 spinners and there should be a few spares that might or might not get used.beeg wrote:Looks like ya got a good start Ed. How many pieces for ONE wind flag and can ya share some length measurements?
The thickness of the actual wood will determine just how many strips are needed. Since I did not rip these pieces the actual thickness might be a hit and miss 3/8" thick so I'm using a number of about 45 for the whole kite. At assembly time and before the angle cuts are made I will have an actual count based on an assembly test.
The length of the strips is about 10-5/8" for all of the parts. They will later be cut to the proper shape and end up somewhere in the 10-3/8" range at the maximum and much smaller at the ends. You can cut them into a stack like design but it is harder to do and wastes time so I opted to make a rectangle and then cut the angles from that at the expense of the using more wood.
I'll add more dimensions as they come up if you wish. Some of this can be varied by how you want it to look so I'm only going to cover what I'm doing without options or alterations.
Ed
{Knight of the Shopsmith} [Hero's don't wear capes, they wear dog tags]
Re: Today in the shop (flag kite build)
Time to make the donuts... ah wrong ad, time to make the holes. Weather is not going to be stable for a while yet so I decided to just work inside and get this part of the job done.
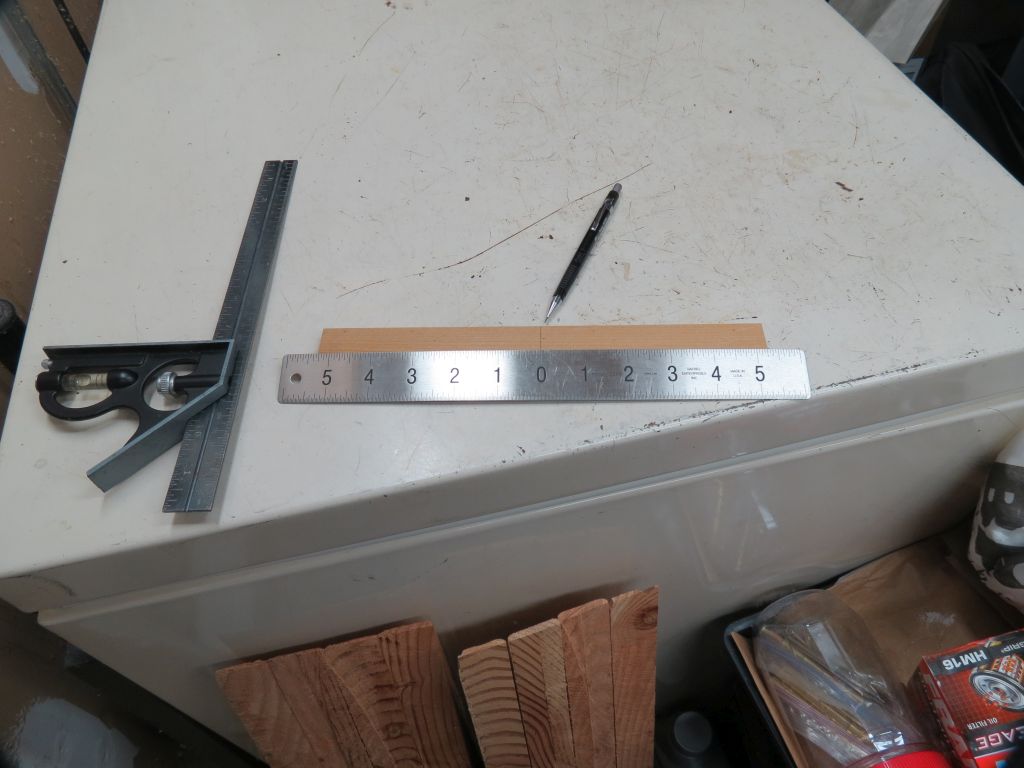
First thing was to find the center of the workpieces, and a handy way to do that is with a centering rule.
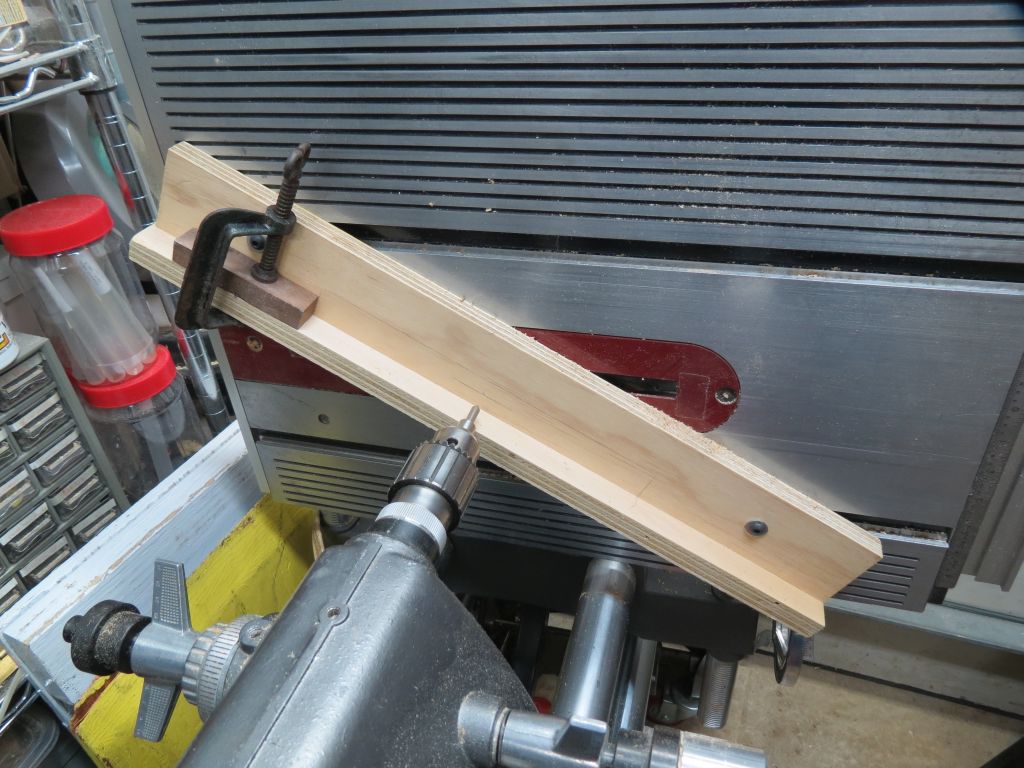
With this part I then set up the shopsmith to do the drilling. A few notes here as this might interest some of you users. I made a jig out of a scraps of plywood. One part I simply drilled a hole that would allow me to mount the plywood to the table using a couple of t-nuts.
It was done at an angle for a couple of reasons. First it didn't require any measurements, I simply set the wood on the table at an approximate angle that looked good to me and then marked where the miter slots were. Drilled the holes and that part was done.
Next I wanted a part that would index and hold the parts during drilling. Another scrap of plywood and some screws to attach it to the first piece. So far we are talking minutes here.
Now with the jig mounted it was time to locate it vertically by way of the table height. Yes we are taking a horizontal drill press mode here. using the marked workpiece and a centering bit I got the table adjusted. Next was to locate a stop block along the jig for that location. A clamp worked fine to hold a pen blank reject in place.
I then rechecked the location to make sure it was where I wanted it. Removed the centering bit and when to decide which bit I would be using.
We will get to the other reason for this setup a little later.
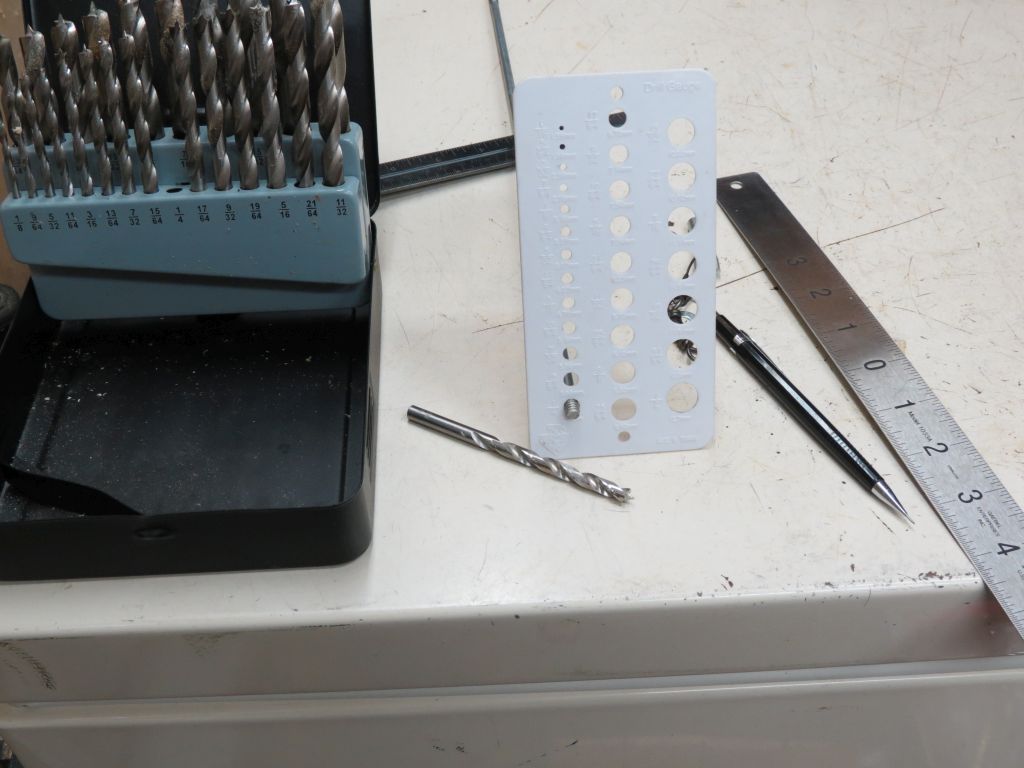
I wanted to use a brad point so I got a clean cut. By using a drill gauge it looked like a 1/4" hole would be just right.
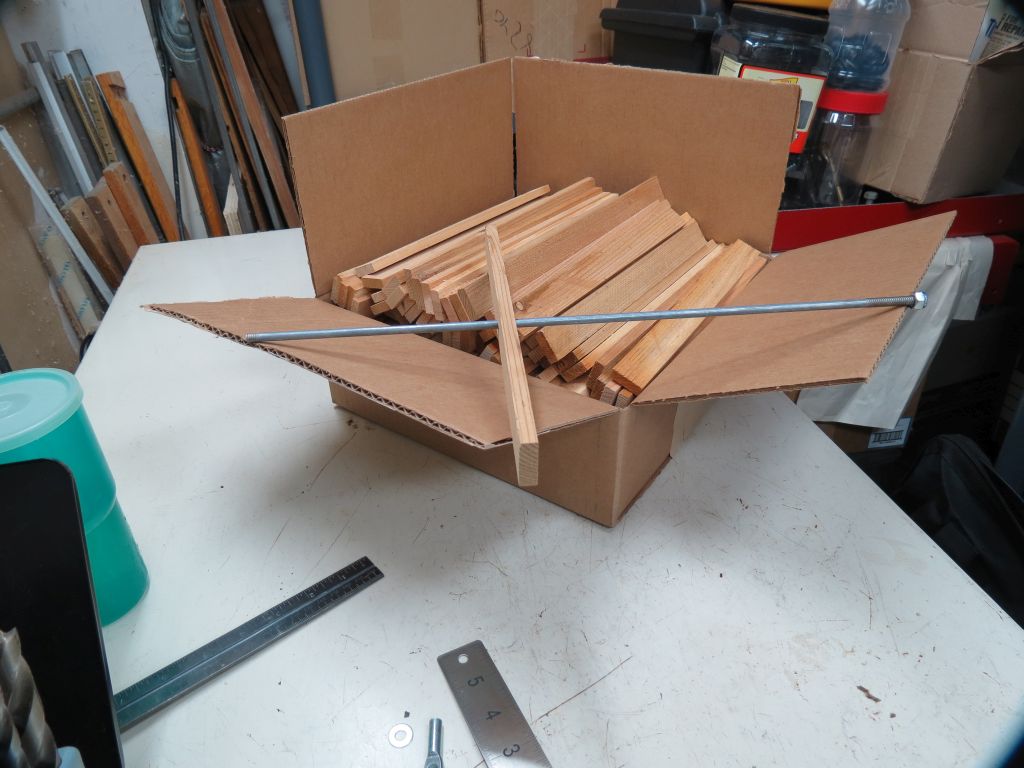
Now it was time to drill a sample and see how it fit. One of 142 pieces mind you. It fit fine so it was now time to do the drilling but you will see that in my next post.
Ed
First thing was to find the center of the workpieces, and a handy way to do that is with a centering rule.
With this part I then set up the shopsmith to do the drilling. A few notes here as this might interest some of you users. I made a jig out of a scraps of plywood. One part I simply drilled a hole that would allow me to mount the plywood to the table using a couple of t-nuts.
It was done at an angle for a couple of reasons. First it didn't require any measurements, I simply set the wood on the table at an approximate angle that looked good to me and then marked where the miter slots were. Drilled the holes and that part was done.
Next I wanted a part that would index and hold the parts during drilling. Another scrap of plywood and some screws to attach it to the first piece. So far we are talking minutes here.
Now with the jig mounted it was time to locate it vertically by way of the table height. Yes we are taking a horizontal drill press mode here. using the marked workpiece and a centering bit I got the table adjusted. Next was to locate a stop block along the jig for that location. A clamp worked fine to hold a pen blank reject in place.
I then rechecked the location to make sure it was where I wanted it. Removed the centering bit and when to decide which bit I would be using.
We will get to the other reason for this setup a little later.
I wanted to use a brad point so I got a clean cut. By using a drill gauge it looked like a 1/4" hole would be just right.
Now it was time to drill a sample and see how it fit. One of 142 pieces mind you. It fit fine so it was now time to do the drilling but you will see that in my next post.
Ed
{Knight of the Shopsmith} [Hero's don't wear capes, they wear dog tags]
Re: Today in the shop (flag kite build)
I didn't time the drilling operation but it felt like it went pretty fast. I later looked at the time stamp of the last photo before I did the drilling and then the photo I took when I finished re-boxing them. The time was 19 minutes, and a few of those were not drilling related so my guess is it took about 15 minutes. That is not bad for all of those pieces and I wasn't rushing it.
One of the reasons was how I had the set up done. My set up allowed me to drill them 3 at a time. The angle and location of the fence let the sawdust fall away so I didn't have to keep cleaning up the work area. That was intentional and is the other reason for the set up being the way it was.
Now with the holes drilled I was able to do a test assembly. It looks like 45 is a good number.
This is also a good place to stop for the evening. More work to be done but that is why there is tomorrow.
Ed
One of the reasons was how I had the set up done. My set up allowed me to drill them 3 at a time. The angle and location of the fence let the sawdust fall away so I didn't have to keep cleaning up the work area. That was intentional and is the other reason for the set up being the way it was.
Now with the holes drilled I was able to do a test assembly. It looks like 45 is a good number.
This is also a good place to stop for the evening. More work to be done but that is why there is tomorrow.
Ed
{Knight of the Shopsmith} [Hero's don't wear capes, they wear dog tags]
Re: Today in the shop (flag kite build)
May plan was to put the other two kites together then cut them all this morning. So are the plans of man. I did get them assembled and they are ready to cut. I was setting up for the cuts when the rains came so that was what you call a washout.
This is what the three of them look like when they are ready to be cut.
I'm planning to make the cuts using this jig:
http://www.shopsmith.com/ss_forum/gener ... 11262.html
I'll take a few pictures of the setup to do the cutting and give a few more details on my design.
So for now I'm off on another project but still have hopes of making the cuts today.
After that it is finishing part of the project which I'm not planning on posting about. Perhaps I'll post a picture when they are finished assuming that happens sometime soon.
Ed
This is what the three of them look like when they are ready to be cut.
I'm planning to make the cuts using this jig:
http://www.shopsmith.com/ss_forum/gener ... 11262.html
I'll take a few pictures of the setup to do the cutting and give a few more details on my design.
So for now I'm off on another project but still have hopes of making the cuts today.
After that it is finishing part of the project which I'm not planning on posting about. Perhaps I'll post a picture when they are finished assuming that happens sometime soon.
Ed
{Knight of the Shopsmith} [Hero's don't wear capes, they wear dog tags]
Re: Today in the shop (flag kite build)
So the long awaited time arrived between the rain for me to get these cut to shape. I had to hurry things along so I don't have any pictures of the actual cutting or various set ups but I did get a couple of the initial arrangement and here they are:
A couple of quick comments. First remember that the edge of the jig was cut with the saw so you can use that to visual alignment of where the cut will be. I elected to have the rod in place and tightened so the strips acted like a single board for the purpose of these cuts. Makes sure the metal rod does not cross the edge of the jig cause you don't want to hit that.
Next make sure you have a similarly thick (to the jig)surface to the left of the blade to prevent the little bits from dropping into the blade and getting kicked all over the place.
I used a visual sighting to locate the cuts but you could add guide lines that would help you align the cut. If this were a more precise item then I would have done that.
Here it what the kites look like at this stage:
From the center line the widest parts are 10-3/8". The taper starts where the lower portion of the 16th down strip sits. The line runs to a 2" wide mark at both the top and bottom.
Hope that makes sense....
Ed
A couple of quick comments. First remember that the edge of the jig was cut with the saw so you can use that to visual alignment of where the cut will be. I elected to have the rod in place and tightened so the strips acted like a single board for the purpose of these cuts. Makes sure the metal rod does not cross the edge of the jig cause you don't want to hit that.
Next make sure you have a similarly thick (to the jig)surface to the left of the blade to prevent the little bits from dropping into the blade and getting kicked all over the place.
I used a visual sighting to locate the cuts but you could add guide lines that would help you align the cut. If this were a more precise item then I would have done that.
Here it what the kites look like at this stage:
From the center line the widest parts are 10-3/8". The taper starts where the lower portion of the 16th down strip sits. The line runs to a 2" wide mark at both the top and bottom.
Hope that makes sense....
Ed
{Knight of the Shopsmith} [Hero's don't wear capes, they wear dog tags]
