Today in the shop (mounting a Dust Right®)

This is a forum for intermediate to advanced woodworkers. Show off your projects or share your ideas.

Moderator: admin

Post Reply
User avatar
reible
Platinum Member
Posts: 11283
Joined: Thu Jul 20, 2006 12:08 pm
Location: Aurora, IL

Today in the shop (mounting a Dust Right®)

Post by reible »

Dust Right® Lathe Dust Collection System is sold by Rockler, see this post for details:

http://shopsmith.com/ss_forum/community ... 19213.html

It was designed for mini lathes that a lot of people apparently use for pen turning. Since we are shopsmith folks that turn pens it sure would be nice to use it on our shopsmith. Designed for it no, easy to do anyway, sure!

I'll post more detail later but just to wet your appetite here are a couple of pictures.
1fff.jpg
1fff.jpg (239.55 KiB) Viewed 8155 times
1ffff.jpg
1ffff.jpg (243.73 KiB) Viewed 8155 times
Yes the plastic is all scratched up........ comes from being in the box with all the other parts and having a protective cover on only one side. The protected cover side was in good shape, the other side is the major issue. They are going to send me another one.

So as you can see it mounts fine. I have not used it yet so we can look forward to that at sometime in the future. I'm all set to turn that blank but other things to do/finish first.

In the second photo you can see how I mounted it, that will be shown in more detail later this evening. Pretty happy with how that turned out.

Pretty busy day so this is all I have time for now.

Ed
{Knight of the Shopsmith} [Hero's don't wear capes, they wear dog tags]
User avatar
Skizzity
Gold Member
Posts: 482
Joined: Thu Feb 25, 2016 12:22 pm
Location: Colorado Springs

Re: Today in the shop (mounting a Dust Right®)

Post by Skizzity »

Pretty cool. I need to get something like that. Every time I turn, I jimmy up a holder with blocks and clamps for my hose. Looks like room to spare with it mounted to the left of the carriage. Off topic - Is that a 1/4" router chuck holding your mandrel? I tried mine(looks different) and had a little slop. I didn't tighten it down though.
PowerPro Mark 7, 11" Bandsaw, 4" Jointer, 12" Professional Planer, DC3300 Dust Collector, DW745, DW718 w/ DW723 and a DW788 w/ DW7880.
Success is not final, failure is not fatal: it is the courage to continue that counts. -Winston Churchill
User avatar
reible
Platinum Member
Posts: 11283
Joined: Thu Jul 20, 2006 12:08 pm
Location: Aurora, IL

Re: Today in the shop (mounting a Dust Right®)

Post by reible »

Skizzity wrote:Pretty cool. I need to get something like that. Every time I turn, I jimmy up a holder with blocks and clamps for my hose. Looks like room to spare with it mounted to the left of the carriage. Off topic - Is that a 1/4" router chuck holding your mandrel? I tried mine(looks different) and had a little slop. I didn't tighten it down though.
No actual use yet so how well it works is still up in the air. It does mount which was my first issue. Not sure when I'll get to turning but I hope to in the next week or so.

Yes that is the 1/4" router chuck. Perhaps from an older time or another supplier. It fits pretty well and I get the shaft from woodcraft:

http://www.woodcraft.com/product/06R0A/ ... h-nut.aspx

For $6 it was a cheap way to get to where I wanted to go. I have several router chucks so I just keep one with the mandrel shaft mounted.

Ed
{Knight of the Shopsmith} [Hero's don't wear capes, they wear dog tags]
User avatar
reible
Platinum Member
Posts: 11283
Joined: Thu Jul 20, 2006 12:08 pm
Location: Aurora, IL

Re: Today in the shop (mounting a Dust Right®)

Post by reible »

I'll not go in to details of what unistut is or how it is used but I really hope you take the time to google it and check it out. If you don't weld or have a welder this stuff allows you to make all manor of things out of nice sturdy metal.

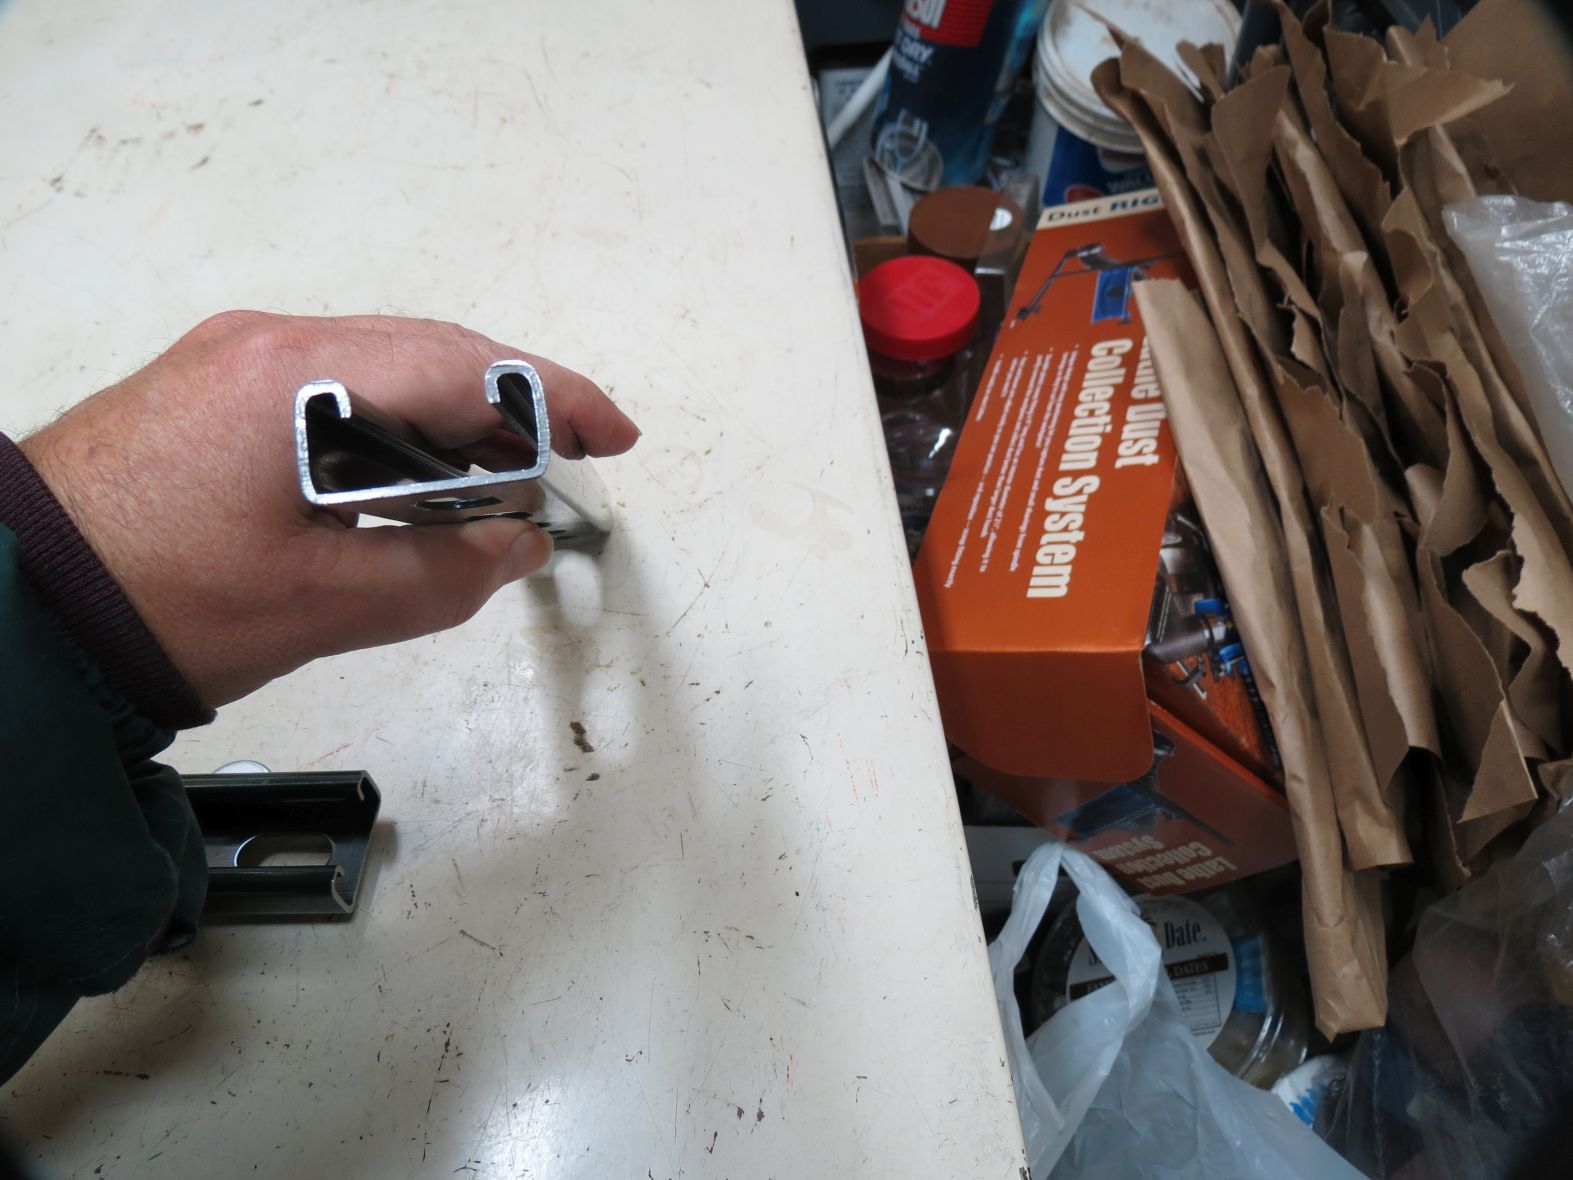
It of course comes in different sizes. What is picture here is the one that is 1-5/8" wide. As you can see this one is green but other colors can be had. Places like Menard's, Lowe's carry it. It is in 10 foot long sections for somewhere around $17. Other sizes and finishes will be different.

This is what the cross section looks like:
IMG_3144sc.jpg
IMG_3144sc.jpg (191.46 KiB) Viewed 8111 times
It is sort of like a t-track but different. The shape makes it quite strong, of course much stronger then we need it for this project. As you will see in other pictures it has a pattern of cut outs that allow it to be mounted in any number of ways. The nuts (channel nut with spring) they sell have a shape that lets you insert them and when you twist it the right way it engages the track. Here is one of the nuts:
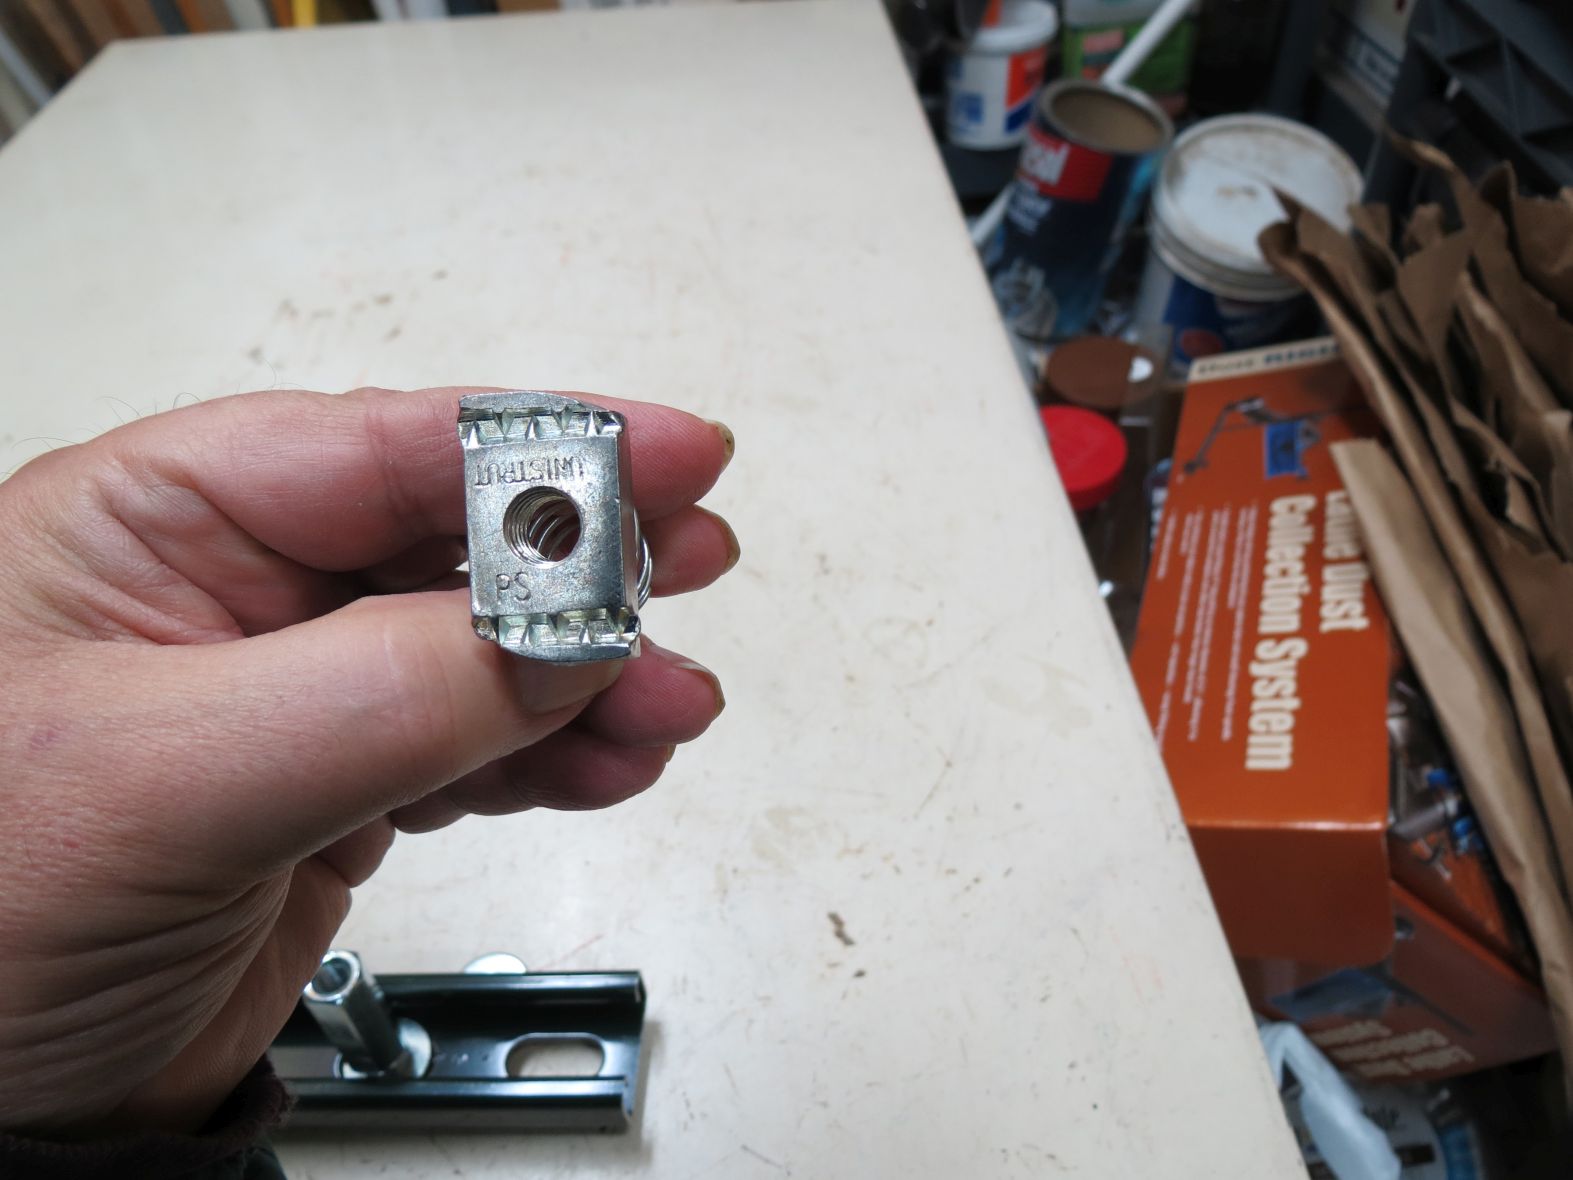
IMG_3145sc.jpg
IMG_3145sc.jpg (158.8 KiB) Viewed 8111 times
The normal use allows the spring that is attached to the back to hold it in position and in place. The way I'm using it worked better with the spring removed.

There are several other normal attachments but I'm only using the rod coupler nuts. Again this stuff comes in various sizes, here I'm using the 3/8" version. They are thread all the way through. You will see them in a moment but first lets start with what I've called the bottom. This being the part towards the floor:
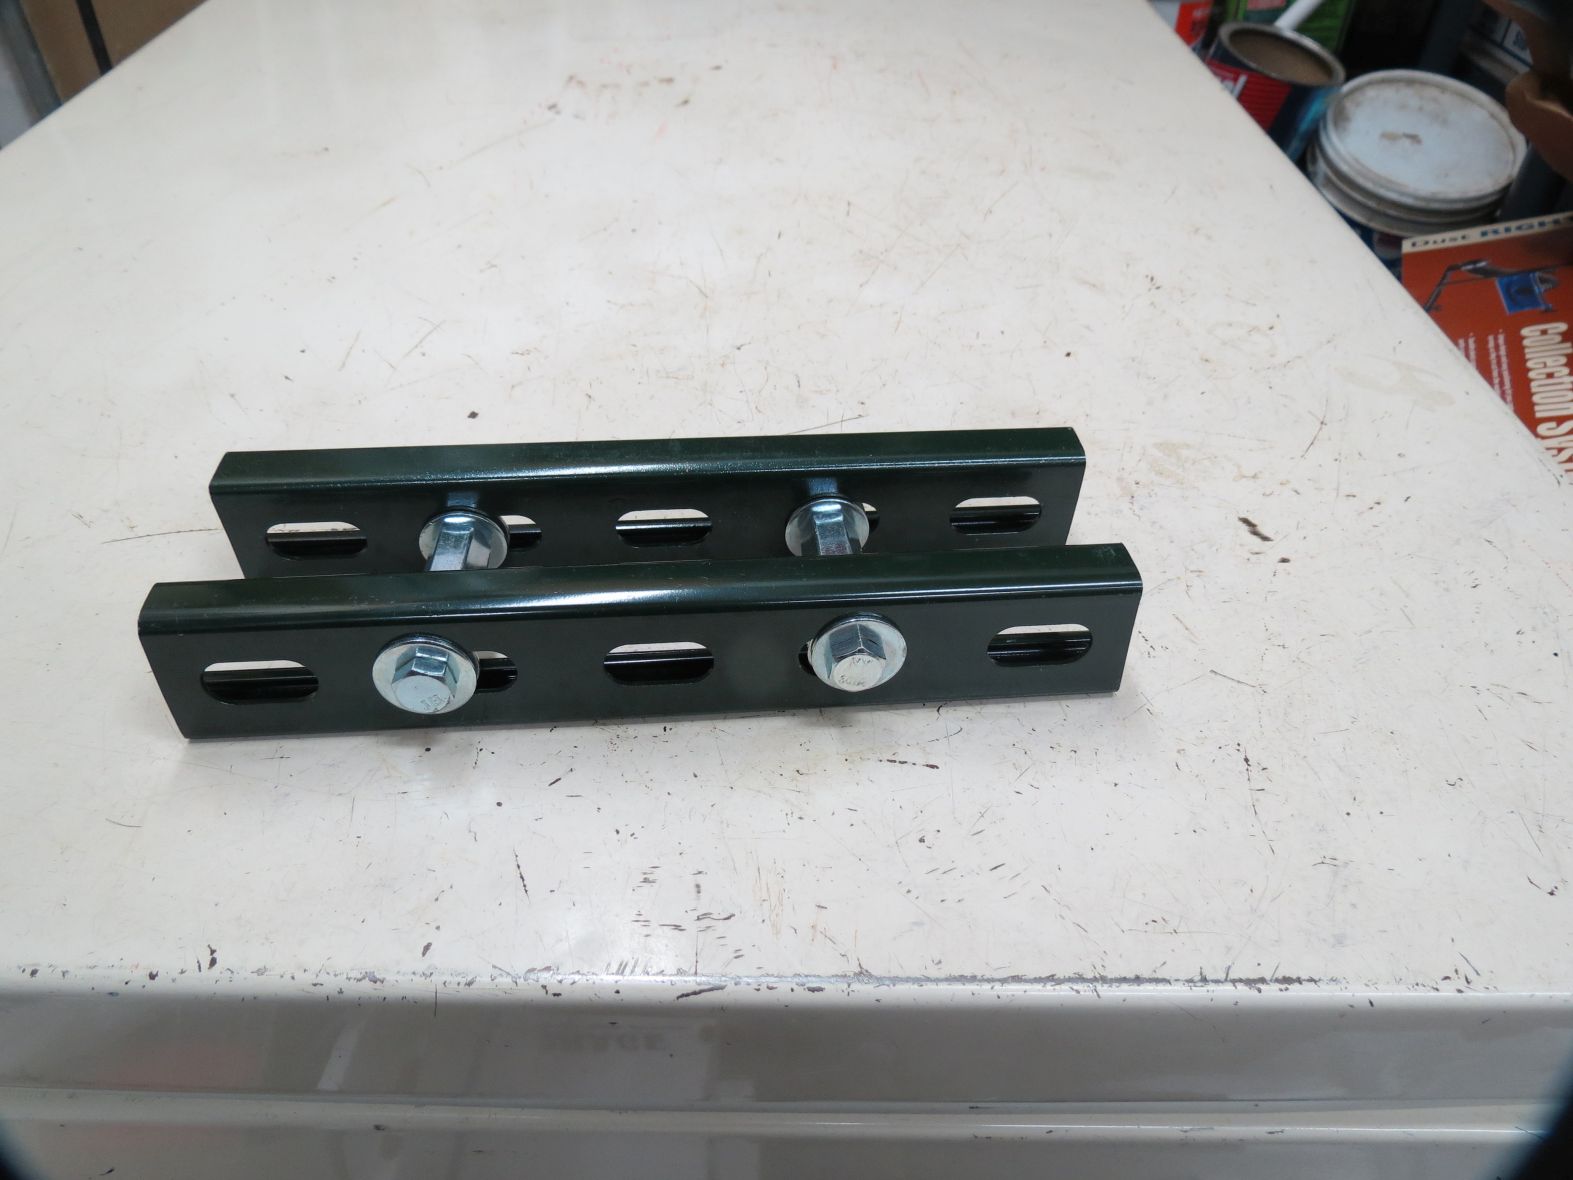
IMG_3146sc.jpg
IMG_3146sc.jpg (159.38 KiB) Viewed 8111 times
That is a 3/8" hex bolt with washer. Since I wanted the parts held in position the inside has another washer and then a hex nut. The coupler is then added and this whole string of parts are tightened starting with the nut and then the coupler. I set the seperation to allow them to just fit with in the way tubes on the shopsmith. This is the stack up to this point:
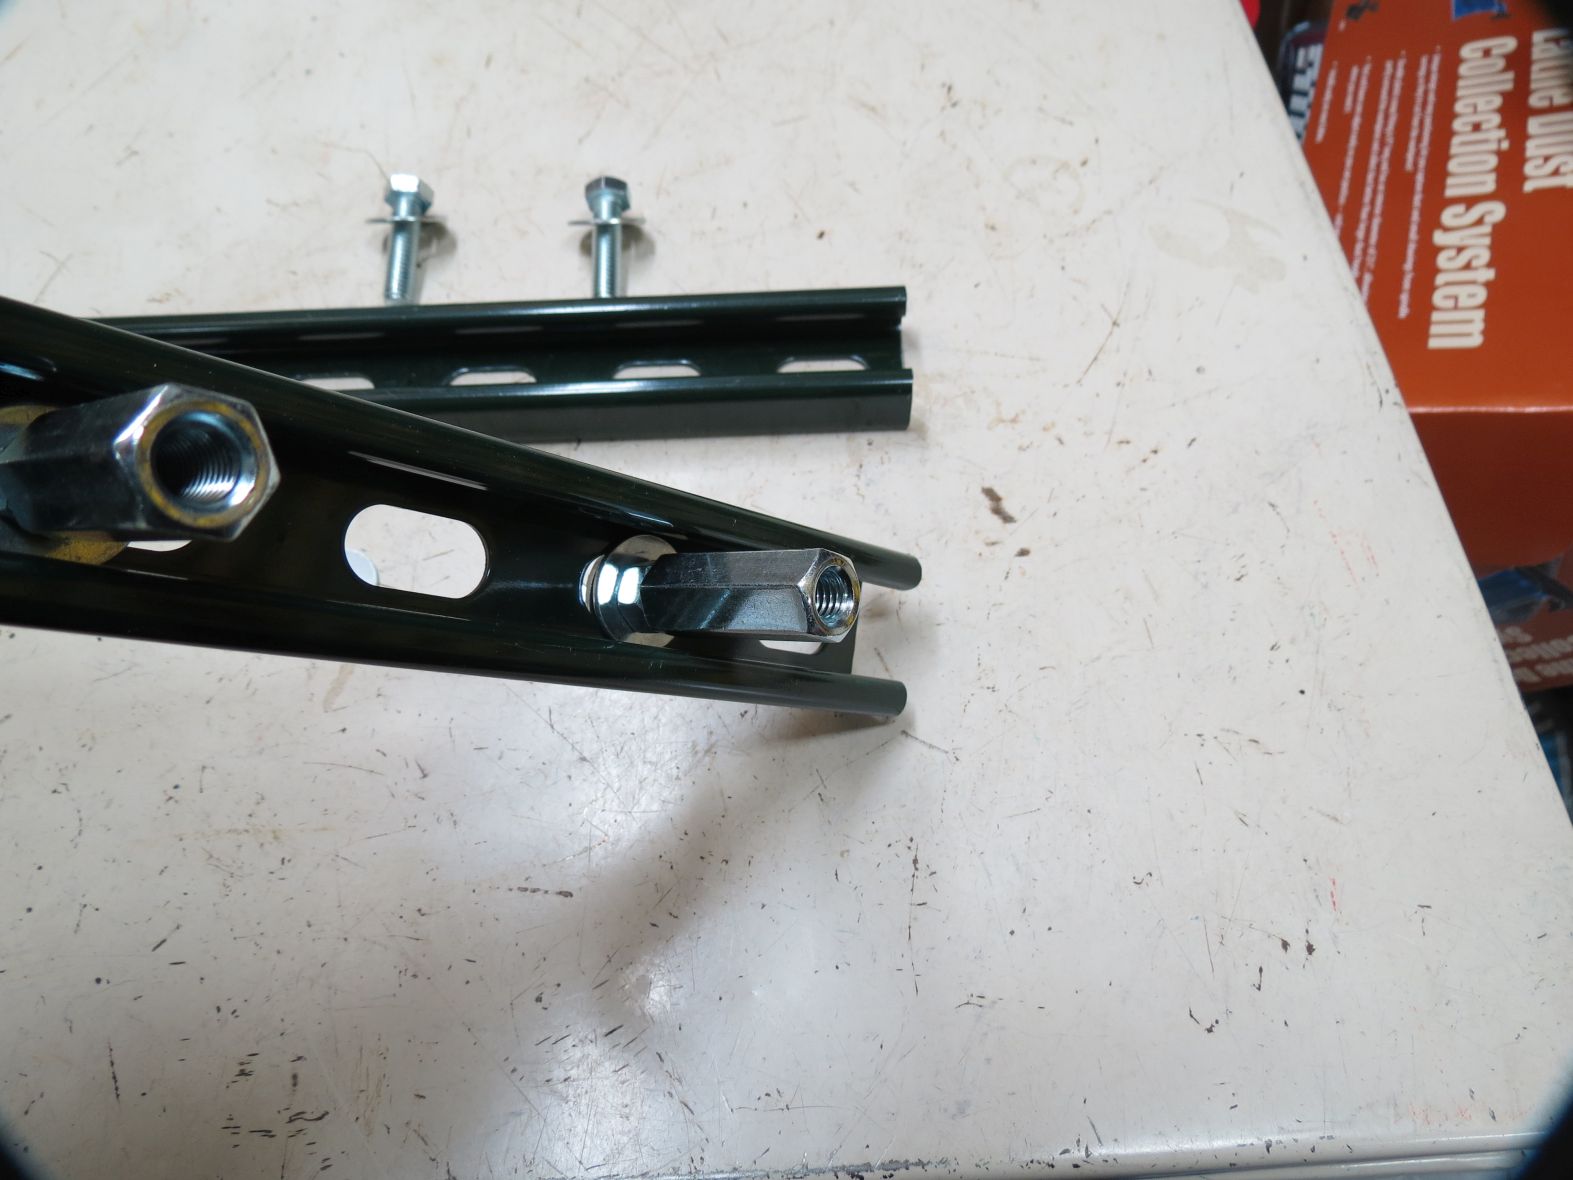
IMG_3143sc.jpg
IMG_3143sc.jpg (168.45 KiB) Viewed 8111 times
The strut for this is about 10" long, both the top and bottom pieces. To attach to top strut I added a washer then the strut another washer and then the top hex bolt. This is a shot of the top parts before being assembled:
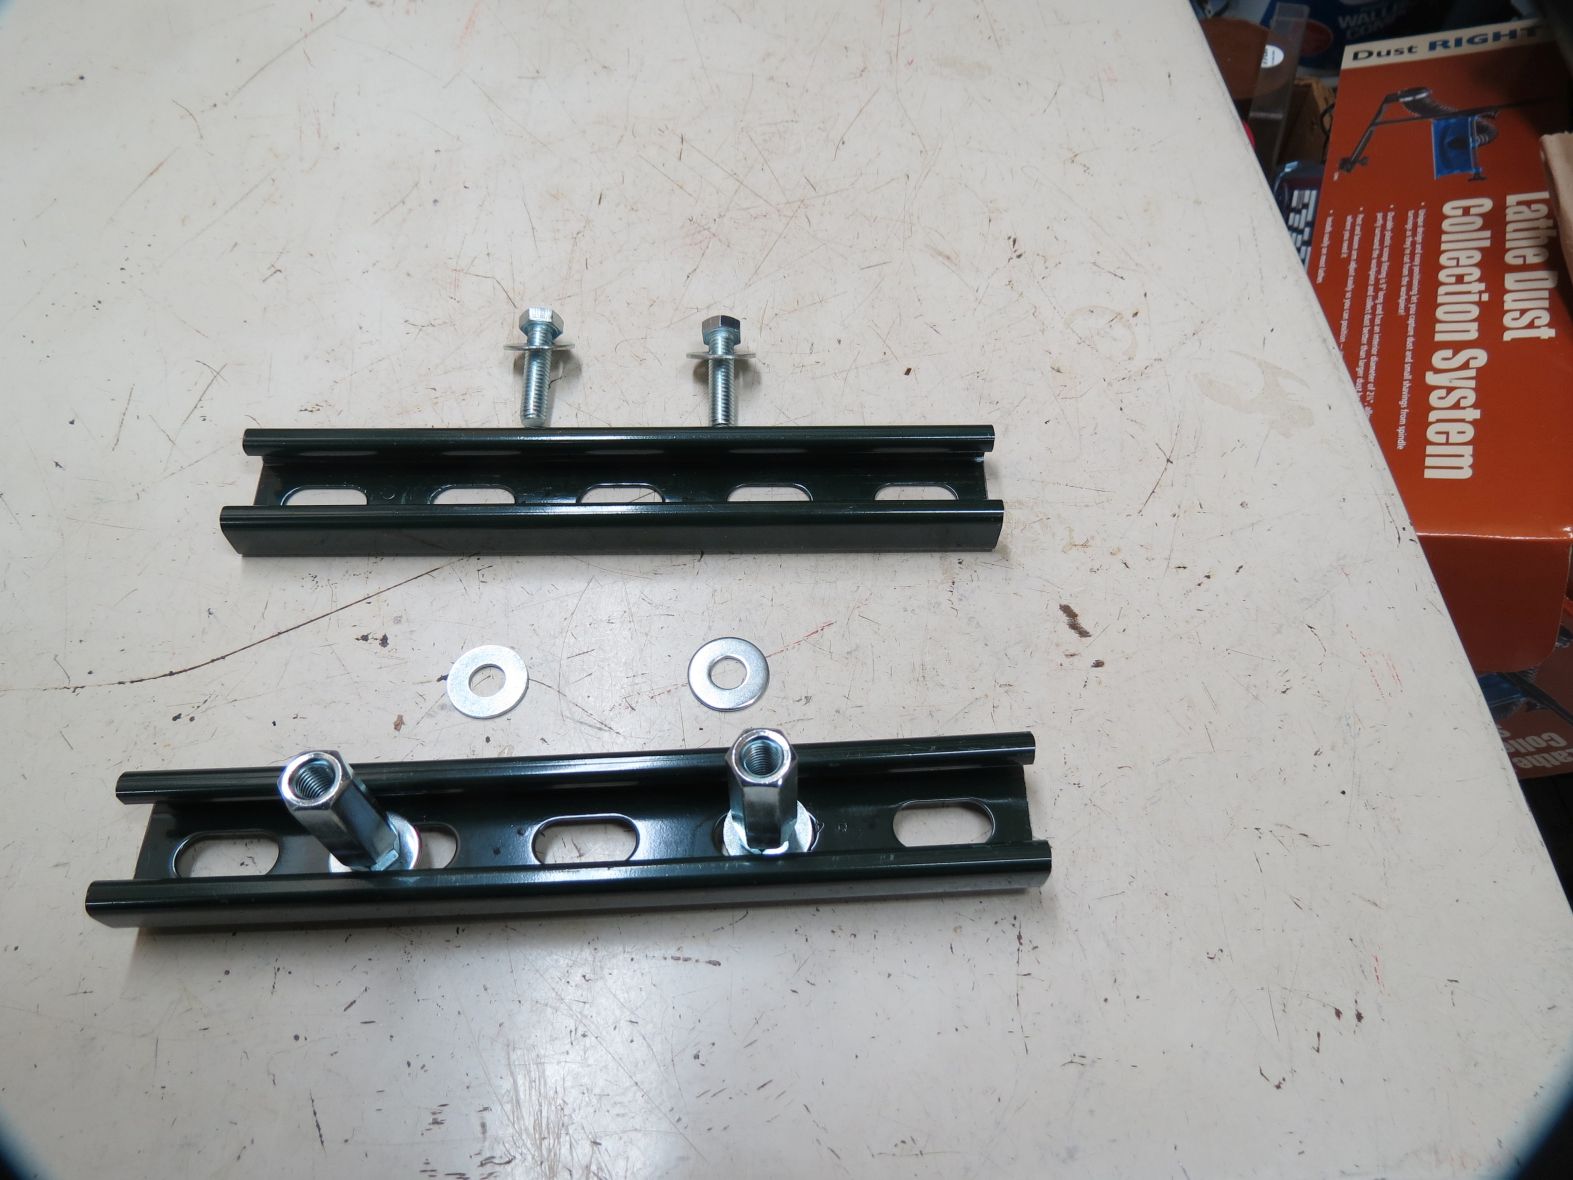
IMG_3142sc.jpg
IMG_3142sc.jpg (202.97 KiB) Viewed 8111 times
I'm going to take a break and will return with how this is mounted to the shopsmith.

Ed
{Knight of the Shopsmith} [Hero's don't wear capes, they wear dog tags]
User avatar
reible
Platinum Member
Posts: 11283
Joined: Thu Jul 20, 2006 12:08 pm
Location: Aurora, IL

Re: Today in the shop (mounting a Dust Right®)

Post by reible »

Now lets put it all together and take it to the shopsmith.
IMG_3141sc.jpg
IMG_3141sc.jpg (223.61 KiB) Viewed 8102 times
This is something I don't love about the mount but for now I don't see a better way to attach it. When possible it nice to not have a wrench involved but you need a way to tighten it down. If I had a some other fasteners on hand, perhaps the use of an allen wrench would be better but that will have to be another day. As it is I used a deep well socket to do the deed.

So anyway you have it assemble so now you need to mount it. With the headstock slide back out of the way you twist the assembly and put it between the way tubes. Then twist back to put it perpendicular. Since space is an issue I'm putting it over the rubber stop ring and this seem better done as shown.
IMG_3140sc.jpg
IMG_3140sc.jpg (235.94 KiB) Viewed 8102 times
I put it tight to the carriage and lightly tighten, no reason to get to heavy handed.
IMG_3139sc.jpg
IMG_3139sc.jpg (208.79 KiB) Viewed 8102 times
And there you have it.
IMG_3138sc.jpg
IMG_3138sc.jpg (228.67 KiB) Viewed 8102 times
Now we are back to the funny nut. The base of the dust collector will attach to the shopsmith now. You drop the nut in the strut and tighten.
IMG_3137sc.jpg
IMG_3137sc.jpg (218.17 KiB) Viewed 8102 times
IMG_3136sc.jpg
IMG_3136sc.jpg (233.96 KiB) Viewed 8102 times
IMG_3135sc.jpg
IMG_3135sc.jpg (236.51 KiB) Viewed 8102 times
That is about it. If you have questions on this up to this point ask away.

After I use it I may find issues but I think the idea is sound.

Ed
{Knight of the Shopsmith} [Hero's don't wear capes, they wear dog tags]
User avatar
dusty
Platinum Member
Posts: 21530
Joined: Wed Nov 22, 2006 6:52 am
Location: Tucson (Wildcat Country), Arizona

Re: Today in the shop (mounting a Dust Right®)

Post by dusty »

I had questions after my first glance at this thread. This morning I took time and read the thread carefully and not have no questions. Your explanation of what you did and why are, as always, a great contribution to the forum.

An unintended consequence: I think you have just shown me how I want to mount a work light on my Mark V. I'll probably use lighter weight uni-strutebut I am sure this will lead to a better solution that what I have now.

Thank you, Ed. I hope you never run out of money in your equipment budget. Every purchase you make seems to result in a very informative thread.
"Making Sawdust Safely"
Dusty
Sent from my Dell XPS using Firefox.
br549
Platinum Member
Posts: 657
Joined: Sun Nov 30, 2014 8:51 am
Location: Midway between Houston/Galveston, TX

Re: Today in the shop (mounting a Dust Right®)

Post by br549 »

dusty wrote: ... Your explanation of what you did and why are, as always, a great contribution to the forum.
...
Thank you, Ed. I hope you never run out of money in your equipment budget. Every purchase you make seems to result in a very informative thread.
I agree wholeheartedly! I find myself reading Ed's posts and threads, even for operations I seldom perform, just to learn something new.
User avatar
dusty
Platinum Member
Posts: 21530
Joined: Wed Nov 22, 2006 6:52 am
Location: Tucson (Wildcat Country), Arizona

Re: Today in the shop (mounting a Dust Right®)

Post by dusty »

br549 wrote:
dusty wrote: ... Your explanation of what you did and why are, as always, a great contribution to the forum.
...
Thank you, Ed. I hope you never run out of money in your equipment budget. Every purchase you make seems to result in a very informative thread.
I agree wholeheartedly! I find myself reading Ed's posts and threads, even for operations I seldom perform, just to learn something new.
What always intrigues me is when Ed details a project that involves drilling holes. His holes always look to be right exactly where they are suppose to be. Mine are always close (with or without my glasses) but NEVER spot on.
"Making Sawdust Safely"
Dusty
Sent from my Dell XPS using Firefox.
ERLover
Platinum Member
Posts: 3914
Joined: Mon Aug 31, 2015 10:19 pm
Location: Greenie and Goldie Country not to metion the WI Badgers!

Re: Today in the shop (mounting a Dust Right®)

Post by ERLover »

dusty wrote:
br549 wrote:
dusty wrote: ... Your explanation of what you did and why are, as always, a great contribution to the forum.
...
Thank you, Ed. I hope you never run out of money in your equipment budget. Every purchase you make seems to result in a very informative thread.
I agree wholeheartedly! I find myself reading Ed's posts and threads, even for operations I seldom perform, just to learn something new.
What always intrigues me is when Ed details a project that involves drilling holes. His holes always look to be right exactly where they are suppose to be. Mine are always close (with or without my glasses) but NEVER spot on.
Thats because, I believe it is Ed, has that super duper Lazar on his DP.
KNOWLEDGE AND EXPERIENCE EQUALS WISDOM. Albert Einstein
The Greatness officially starts :D :D :D :D :D :D
Greenie, Grayling, SS stand alone BS and BS SPT, jointer and belt sander, 3 Ers with Speed Changers. I think those 3 cover my ER needs, and space for them. :)
User avatar
JPG
Platinum Member
Posts: 35600
Joined: Wed Dec 10, 2008 7:42 pm
Location: Lexington, Ky (TAMECAT territory)

Re: Today in the shop (mounting a Dust Right®)

Post by JPG »

I would attribute it to proper layout and drilling technique. :cool:
╔═══╗
╟JPG ╢
╚═══╝

Goldie(Bought New SN 377425)/4" jointer/6" beltsander/12" planer/stripsander/bandsaw/powerstation /Scroll saw/Jig saw /Craftsman 10" ras/Craftsman 6" thicknessplaner/ Dayton10"tablesaw(restoredfromneighborstrashpile)/ Mark VII restoration in 'progress'/ 10
E[/size](SN E3779) restoration in progress, a 510 on the back burner and a growing pile of items to be eventually returned to useful life. - aka Red Grange
Post Reply