Tool quest hardware storage

Moderator: admin

User avatar
JPG
Platinum Member
Posts: 35598
Joined: Wed Dec 10, 2008 7:42 pm
Location: Lexington, Ky (TAMECAT territory)

Tool quest hardware storage

Post by JPG »

Beginning this thread although still in process.

Tool quest stuff comes in cute little plastic bags. Great for shipping etc. but where to store them?
STUFF IN BAGS.jpg
STUFF IN BAGS.jpg (167.55 KiB) Viewed 1307 times
The bags with light blue tags are from Tool Quest.
The orange bags are Home depot stuff.
The studs are all thread cut to same lengths as Tool quest studs(not as pretty but will suffice).
The screw box is really good though small. It will be retained as is for the moment.

The clamping kit (KT0119-1.250) contains two different 1/2" od washers, one 5/8" od washer,one 1 1/8" od washer, one screw, one pin in addition to the anchor nut.
KIT.jpg
KIT.jpg (101.19 KiB) Viewed 1307 times
In addition to all that two wrenches need to be stored.
SCREWS & WRENCHES.jpg
SCREWS & WRENCHES.jpg (176.46 KiB) Viewed 1307 times
The screw box contains 9 differnt length screws.

The special router bit will be stored with all my other router bits.

That first picture has over 125 'pieces'.
╔═══╗
╟JPG ╢
╚═══╝

Goldie(Bought New SN 377425)/4" jointer/6" beltsander/12" planer/stripsander/bandsaw/powerstation /Scroll saw/Jig saw /Craftsman 10" ras/Craftsman 6" thicknessplaner/ Dayton10"tablesaw(restoredfromneighborstrashpile)/ Mark VII restoration in 'progress'/ 10
E[/size](SN E3779) restoration in progress, a 510 on the back burner and a growing pile of items to be eventually returned to useful life. - aka Red Grange
User avatar
JPG
Platinum Member
Posts: 35598
Joined: Wed Dec 10, 2008 7:42 pm
Location: Lexington, Ky (TAMECAT territory)

Re: Tool quest hardware storage

Post by JPG »

So here goes. first some top/end/back pix. The hunk of poplar is made from a~1"x~6"-2' sawed in half and glued with crowned faces opposing so as to flatten it out(yes under stress).
TOP.jpg
TOP.jpg (424.7 KiB) Viewed 1255 times
LEFT END.jpg
LEFT END.jpg (53.91 KiB) Viewed 1255 times
BACK.jpg
BACK.jpg (43.85 KiB) Viewed 1255 times
A close up of the anchor nut slot.
ANCHOR NUT SLOT END.jpg
ANCHOR NUT SLOT END.jpg (16.65 KiB) Viewed 1255 times
The anchor slots were created by first routing a 1/2" groove(because of the anchor nut router bit not capable of that deep of a slot) using my goldie at 5k+ rpm - slow feed gets it done.

And the top view of the back anchor not slot
ANCHOR NUT SLOT TOP.jpg
ANCHOR NUT SLOT TOP.jpg (103.97 KiB) Viewed 1255 times
The slot is over 11" long and will store up to nine anchor nuts. The left(open) end has a 1 1/8" bore that allows both storing up to 4 of the heavy washers that come with the anchor kit (KT0199-1.250) and serves to retain the entire contents by inserting a screw through the stack of washers and threading it into the anchor nut at that end of the slot. The other anchor nuts are free to slide along the slot.


The back has a 1/4" slot that provides storage for a SS tool kit. The short arm goes into a hole and a small magnet serves to keep the wrench in the groove, Finger holes are there to allow removing the wrench from the slot. (see earlier pix of back)


9 loaded.jpg
9 loaded.jpg (90.64 KiB) Viewed 1255 times
Now we need to store the 7/16" combination wrench. So by removing one of the anchor nuts, a gap is created which allows the open end of the wrench to position below the top and the box end of the wrench is retained by the short arm of the SS tool kit.
COMBINATION WRENCH CAPTURED.jpg
COMBINATION WRENCH CAPTURED.jpg (117.47 KiB) Viewed 1255 times
8 loaded with wrench.jpg
8 loaded with wrench.jpg (76.14 KiB) Viewed 1255 times
The second slot can hold 9 anchor nuts and 4 heavy washers.

Between the two slot are 10 holes.

HOLES.jpg
HOLES.jpg (99.07 KiB) Viewed 1255 times
The larger hole at the left provides storage for the large (5/8") anchor kit washer. the four holes at the left provide storage for the anchor kit 1/2" thin and thick washers. The washer holes are counterbored at the bottom to allow the SS tool kit to snag under the washer at the bottom of the hole. The other 5 holes provide storage of the 1/4-20 jam nuts. All the holes are 3/4" deep plus the 1/8" deeper/1/8" smaller counter bore at the bottom. Originally 5 deeper holes were planned at a different location. When I decided to relocate them the shallower depth required more holes. I got carried away!(more holes than needed!)
washer & nut.jpg
washer & nut.jpg (107.36 KiB) Viewed 1255 times

The washers and a nut are positioned near their respective holes.
╔═══╗
╟JPG ╢
╚═══╝

Goldie(Bought New SN 377425)/4" jointer/6" beltsander/12" planer/stripsander/bandsaw/powerstation /Scroll saw/Jig saw /Craftsman 10" ras/Craftsman 6" thicknessplaner/ Dayton10"tablesaw(restoredfromneighborstrashpile)/ Mark VII restoration in 'progress'/ 10
E[/size](SN E3779) restoration in progress, a 510 on the back burner and a growing pile of items to be eventually returned to useful life. - aka Red Grange
User avatar
JPG
Platinum Member
Posts: 35598
Joined: Wed Dec 10, 2008 7:42 pm
Location: Lexington, Ky (TAMECAT territory)

Re: Tool quest hardware storage

Post by JPG »

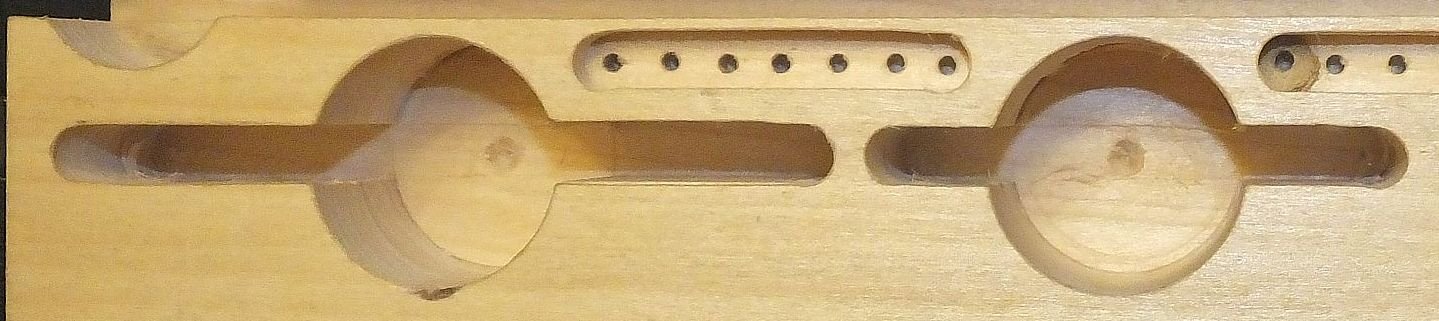
Moving towards the front left are two slots.
STUD SLOTS.jpg
STUD SLOTS.jpg (98.44 KiB) Viewed 1255 times
These slots can contain 5 each of the 4" and 2.5" threaded studs. The large holes at the center allow fingers to grasp the studs.

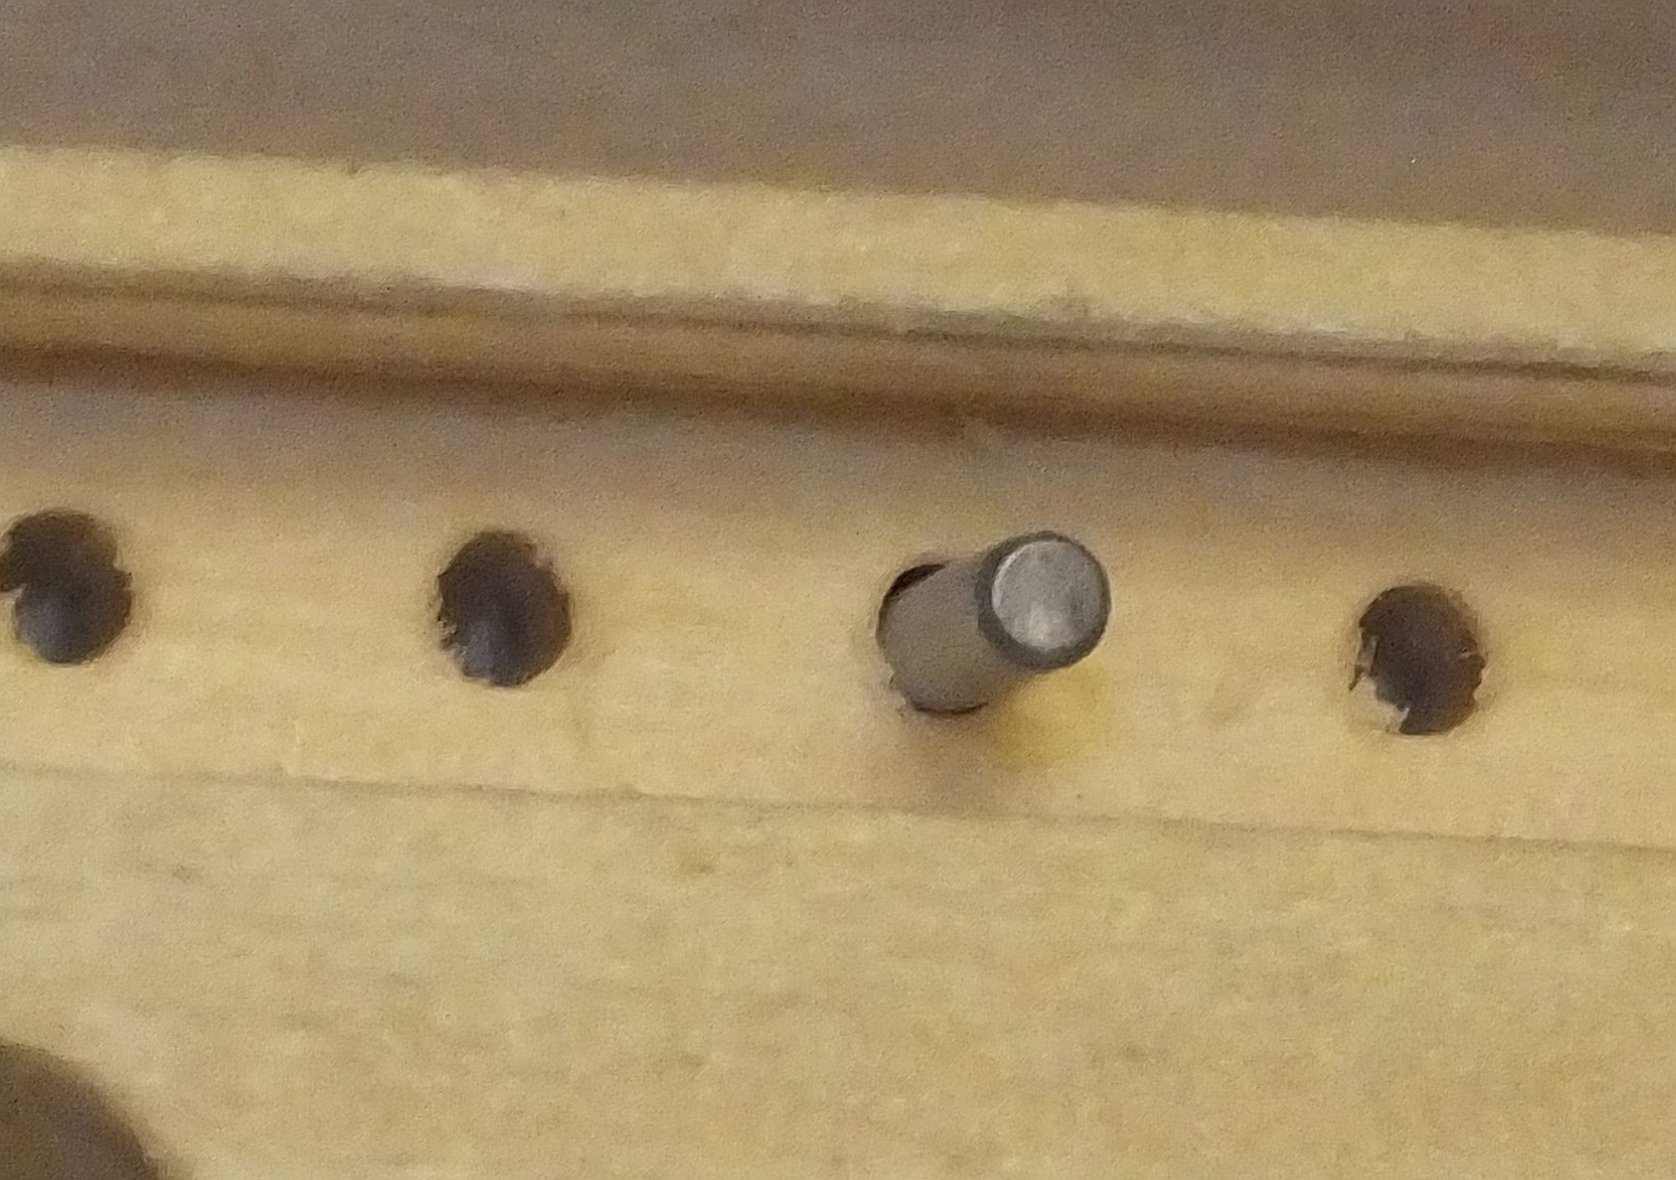
Above and to the left are two rows of small holes in a 1/4" deep groove. These allow storing the small alignment pins that orient the anchor nuts.

PIN HOLES.jpg
PIN HOLES.jpg (44.94 KiB) Viewed 1255 times
Originally I thought a magnetized SS tool kit could pull them from the holes. NOT SO! They be Stainless Steel. I will likely remove the lip above them to allow finger clearance to grasp them.
pin in hole.jpg
pin in hole.jpg (286.82 KiB) Viewed 1255 times
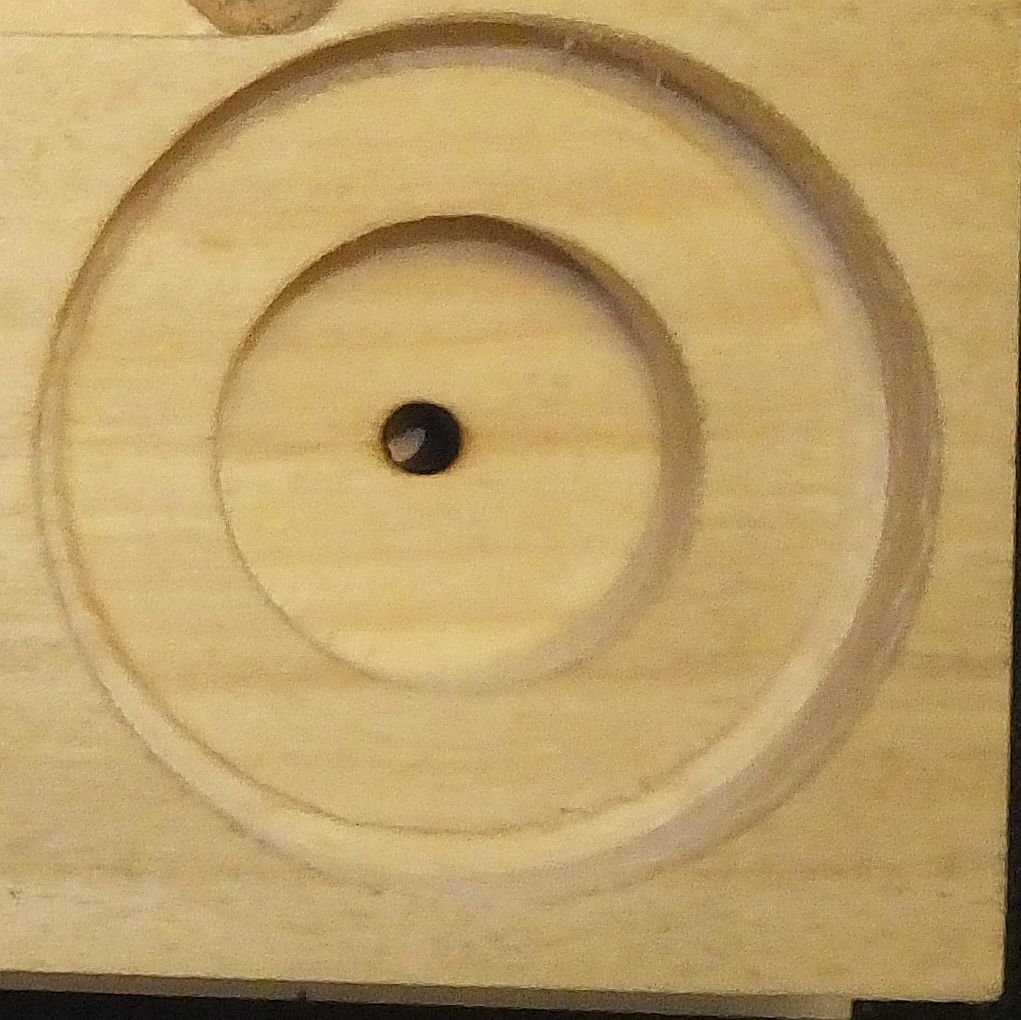
At the far right is a large counter bored hole.
BIG WASHER HOLE.jpg
BIG WASHER HOLE.jpg (162.58 KiB) Viewed 1255 times
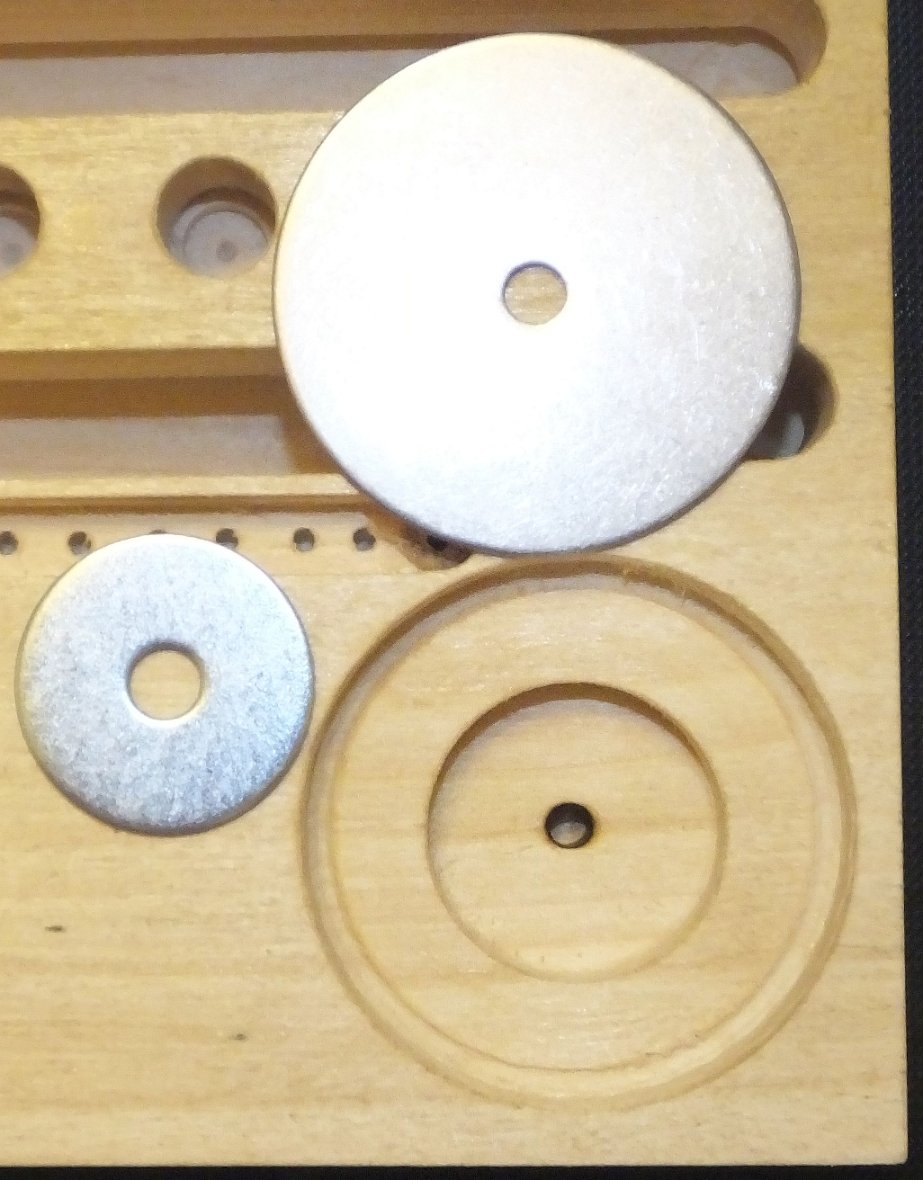
This stores up to 6 of the Home Depot fender washers and 4 of the 2 3/16" clamp base washers. I need to add a counter bore at the bottom so the SS tool kit can snag the last washer at the bottom of the hole.
big washers.jpg
big washers.jpg (141.35 KiB) Viewed 1255 times
Now everything in it's place.
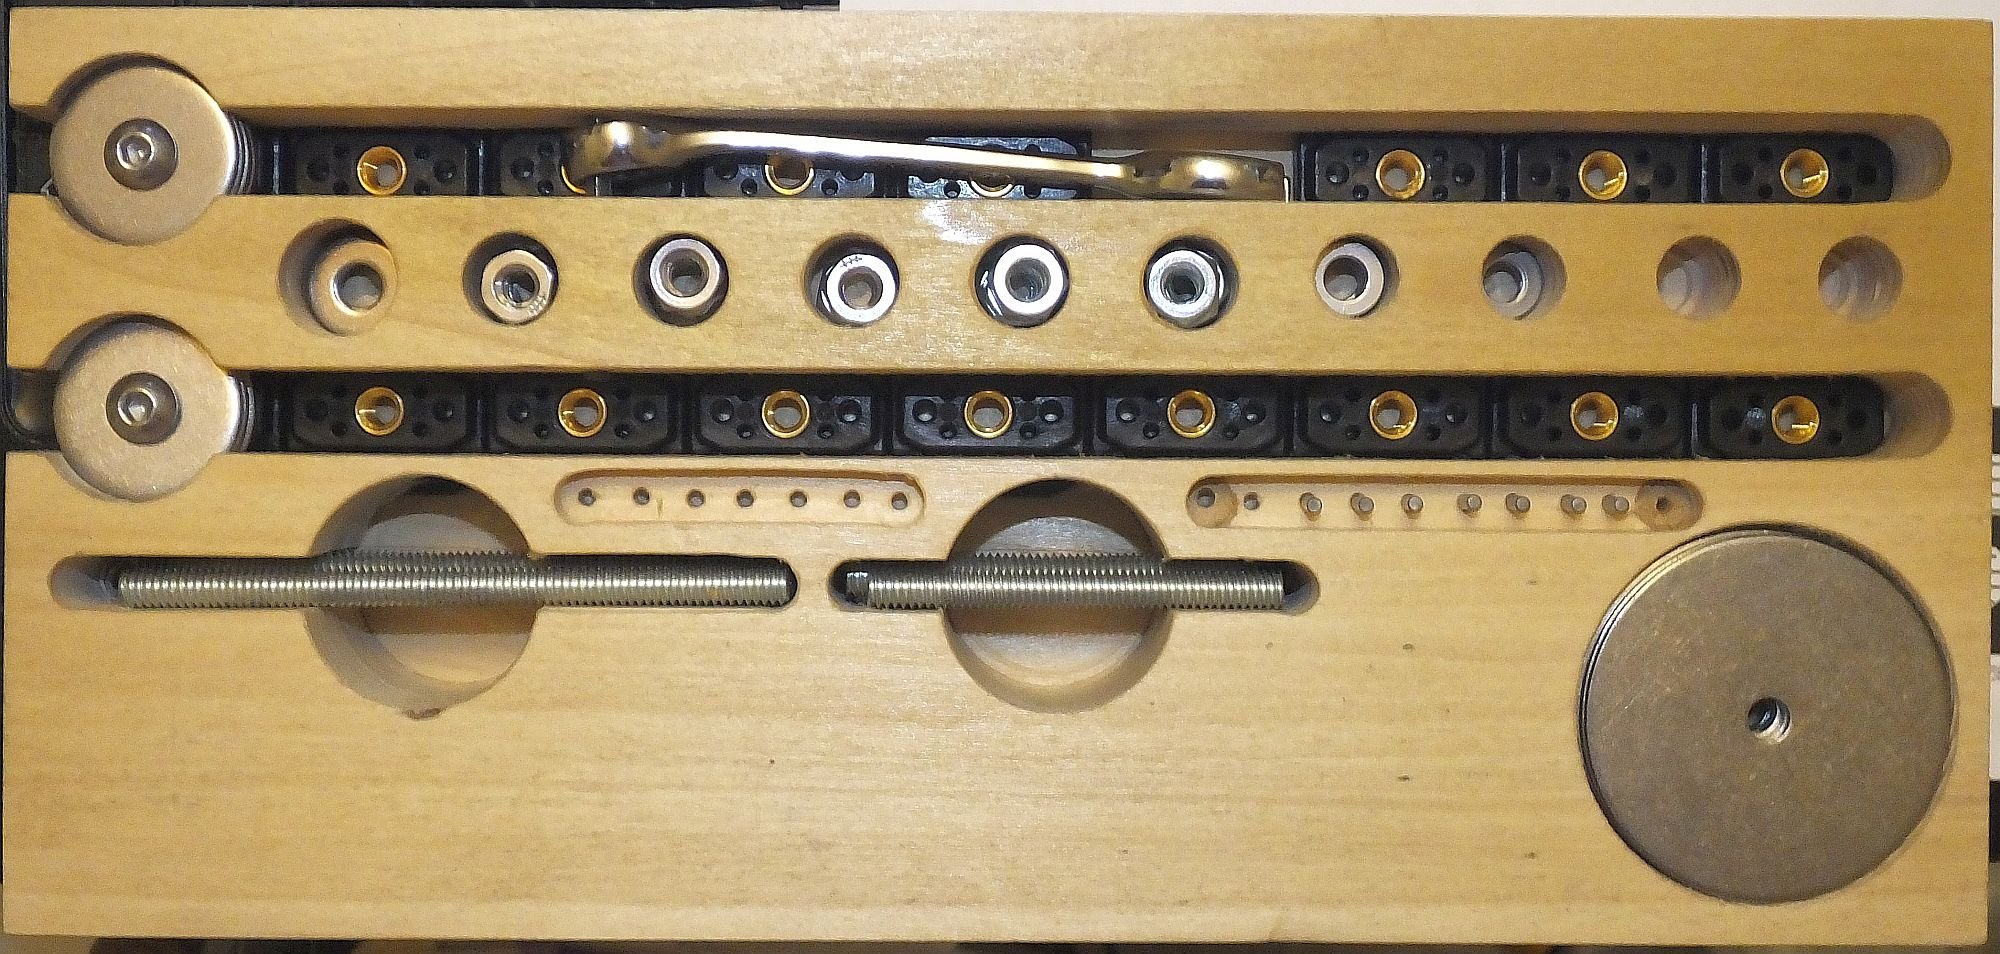
loaded.jpg
loaded.jpg (443.89 KiB) Viewed 1255 times
How can all this stay 'in the holes'?
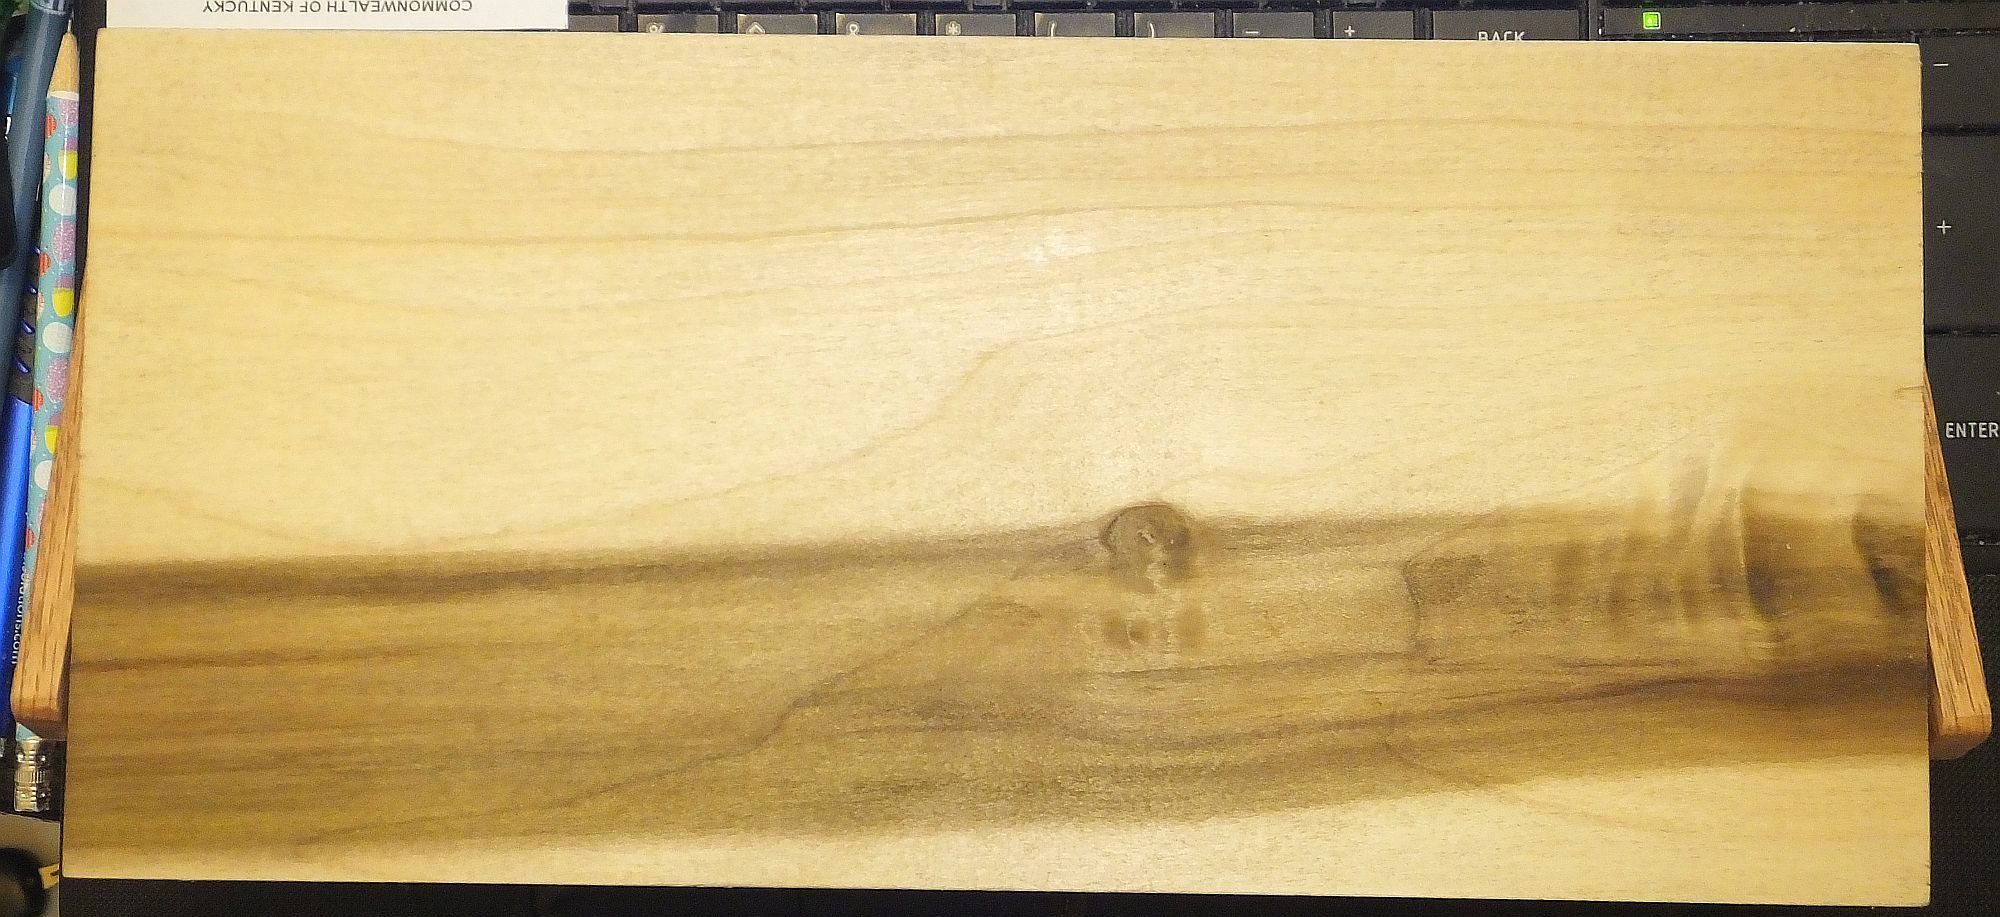
covered.jpg
covered.jpg (332.54 KiB) Viewed 1255 times
Covering it will help, but how to attach the cover.
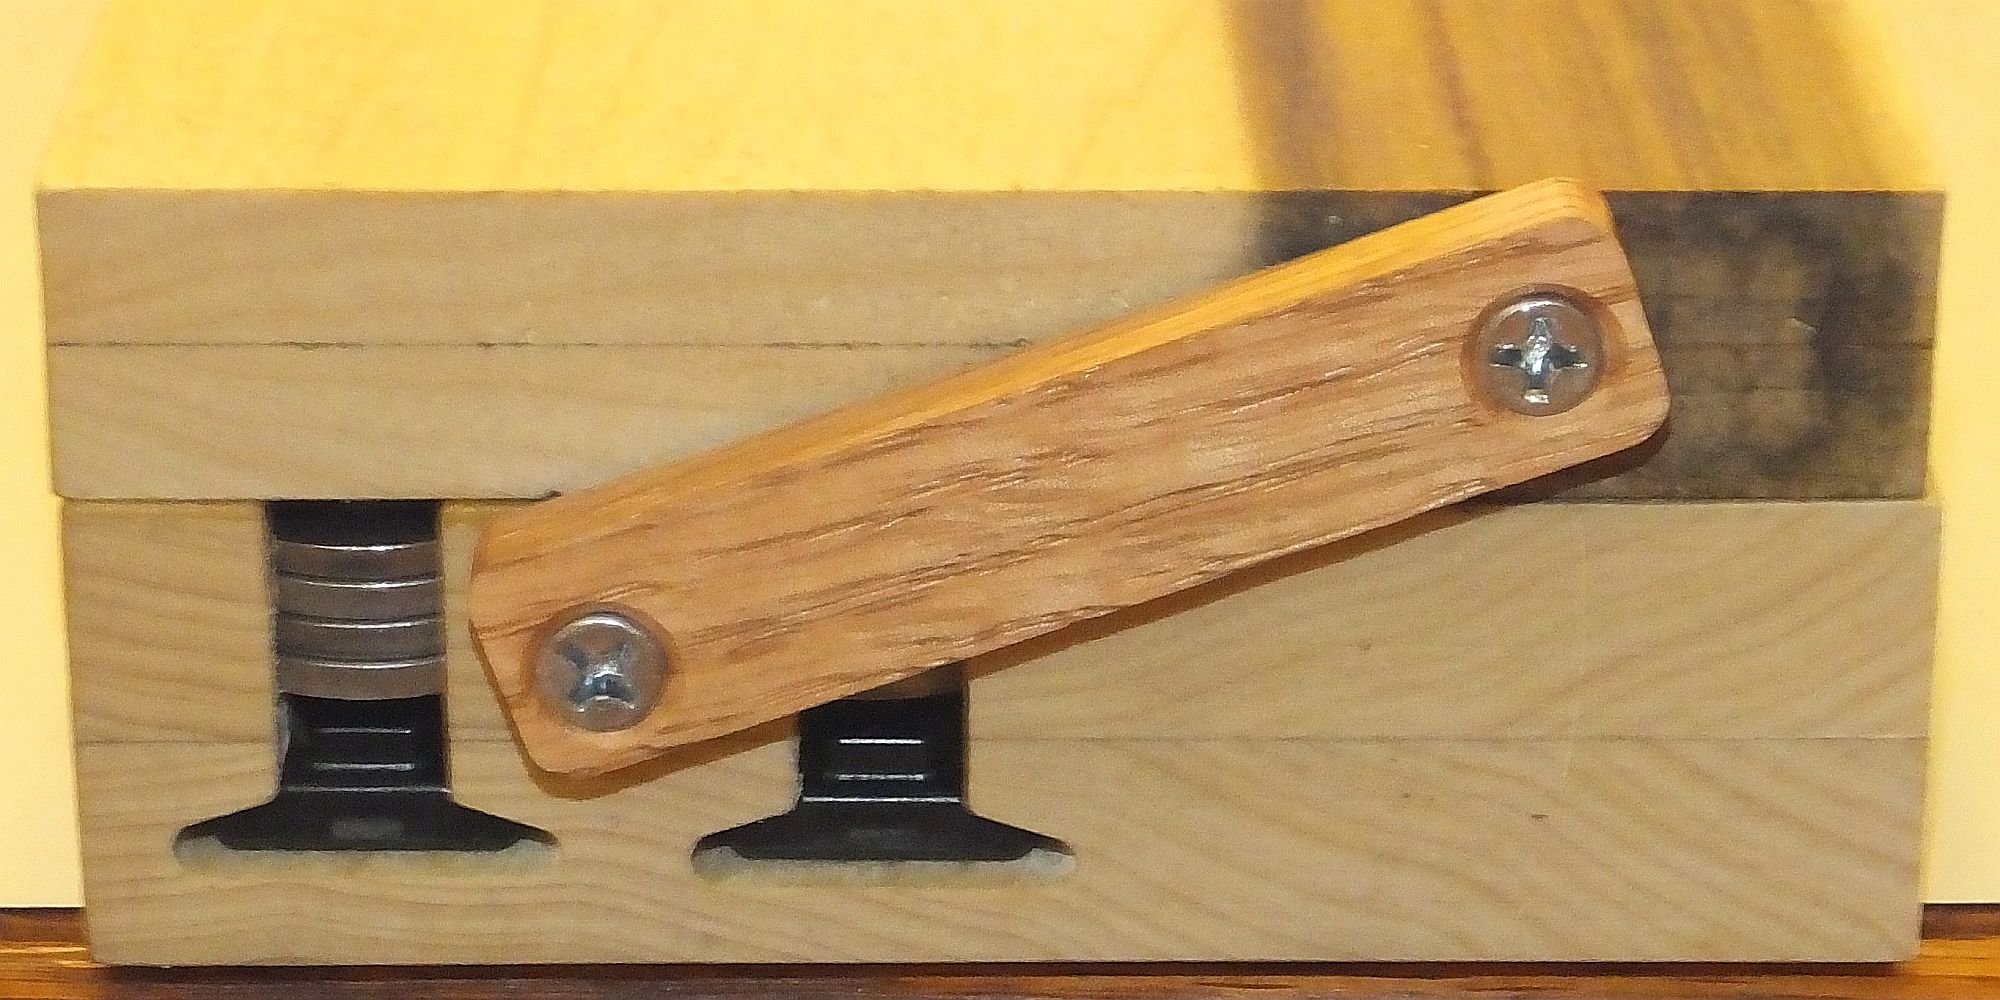
cover hinge end.jpg
cover hinge end.jpg (356.73 KiB) Viewed 1255 times
Attach it with a hinge at both ends. The hinges are two narrow strips with a counter sink hole at each end.
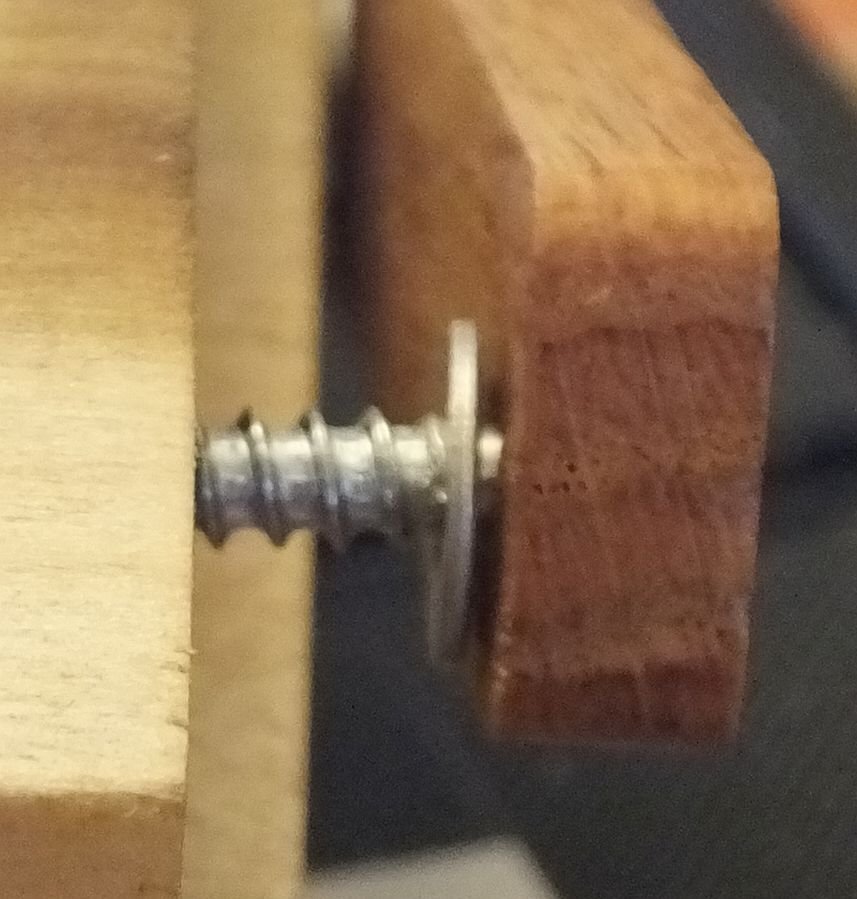
hinge screw washer.jpg
hinge screw washer.jpg (105.74 KiB) Viewed 1255 times
In each hole a flat head screw and a flat washer attach to both the cover and the 'base'. In order to function effectively the hinge holes are not simply a counter sunk hole. The hole under the counter sink is sized to tightly clear the od of the unthreaded shank of the flat head screw. Today's flat head screws have a larger od of the threads than the plain shank under the head of the screws. This means the screws must be screwed through the hinge hole until the unthreaded shank can act as a pivot. Both the countersnk And the washer side of the hinge are coated with JPW as well as the unthreaded shank.

So with the cover opened.
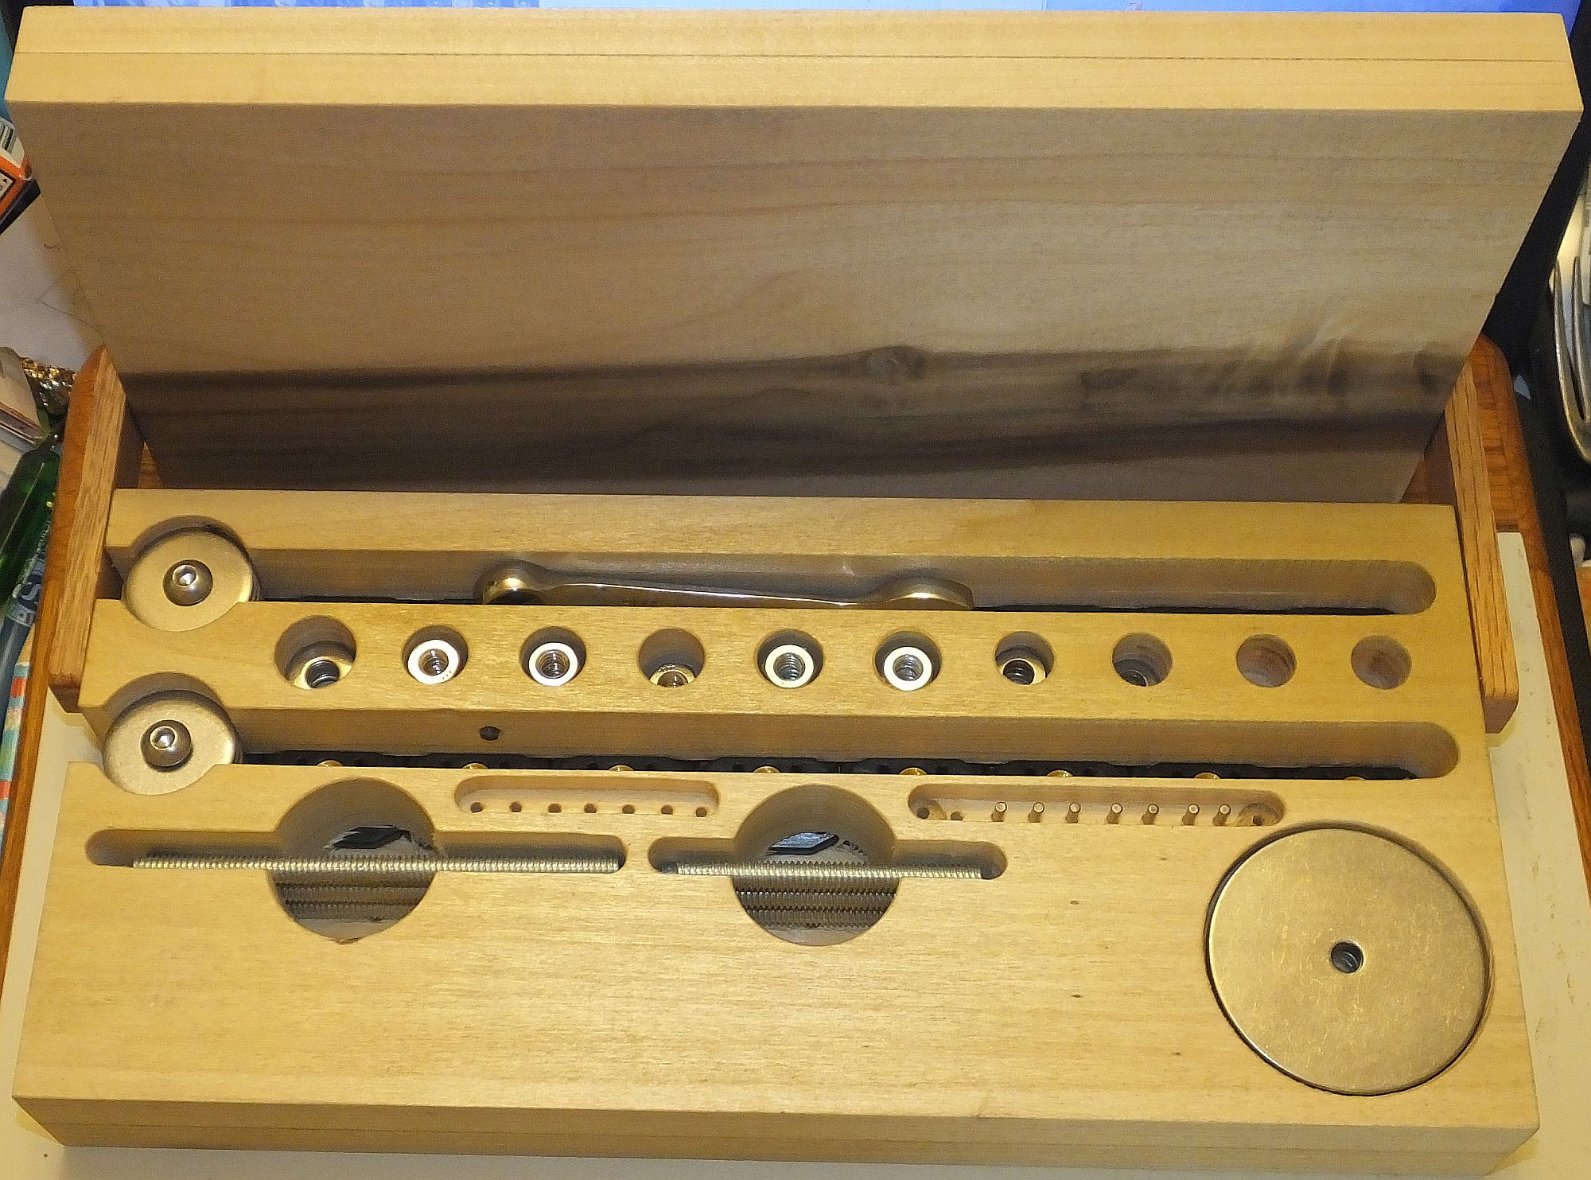
cover open.jpg
cover open.jpg (373.6 KiB) Viewed 1255 times
And fully open and laying flat.

cover flat.jpg
cover flat.jpg (142.12 KiB) Viewed 1255 times

And closed.
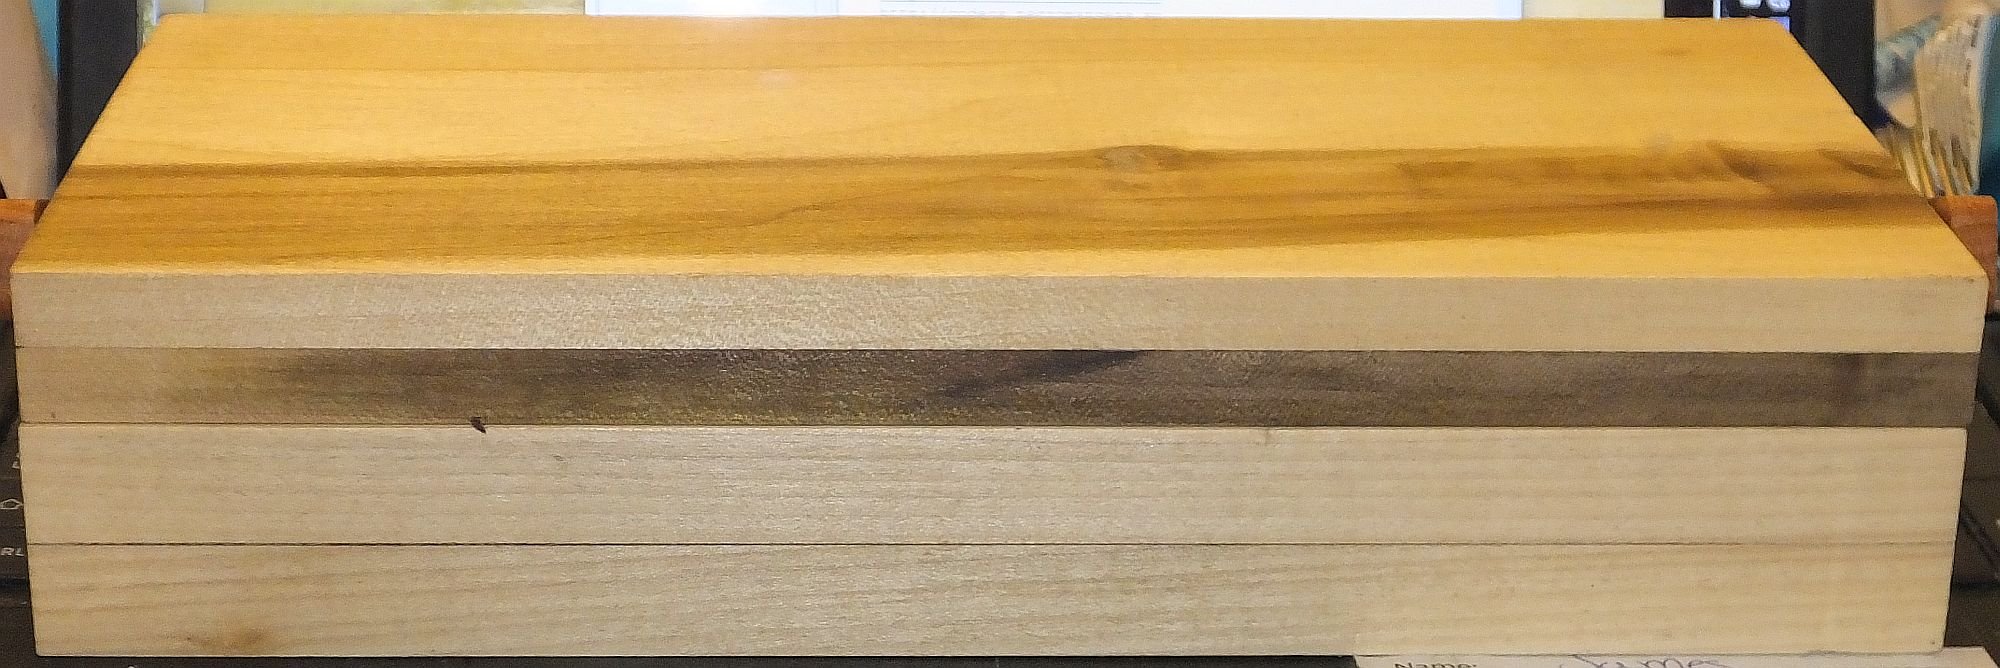
closed.jpg
closed.jpg (255.77 KiB) Viewed 1255 times

We are not yet finished. The cover needs to be secured to the base with some sort of latch. They are supposedly 'in the mail'.

More to come.

Latches arrived.
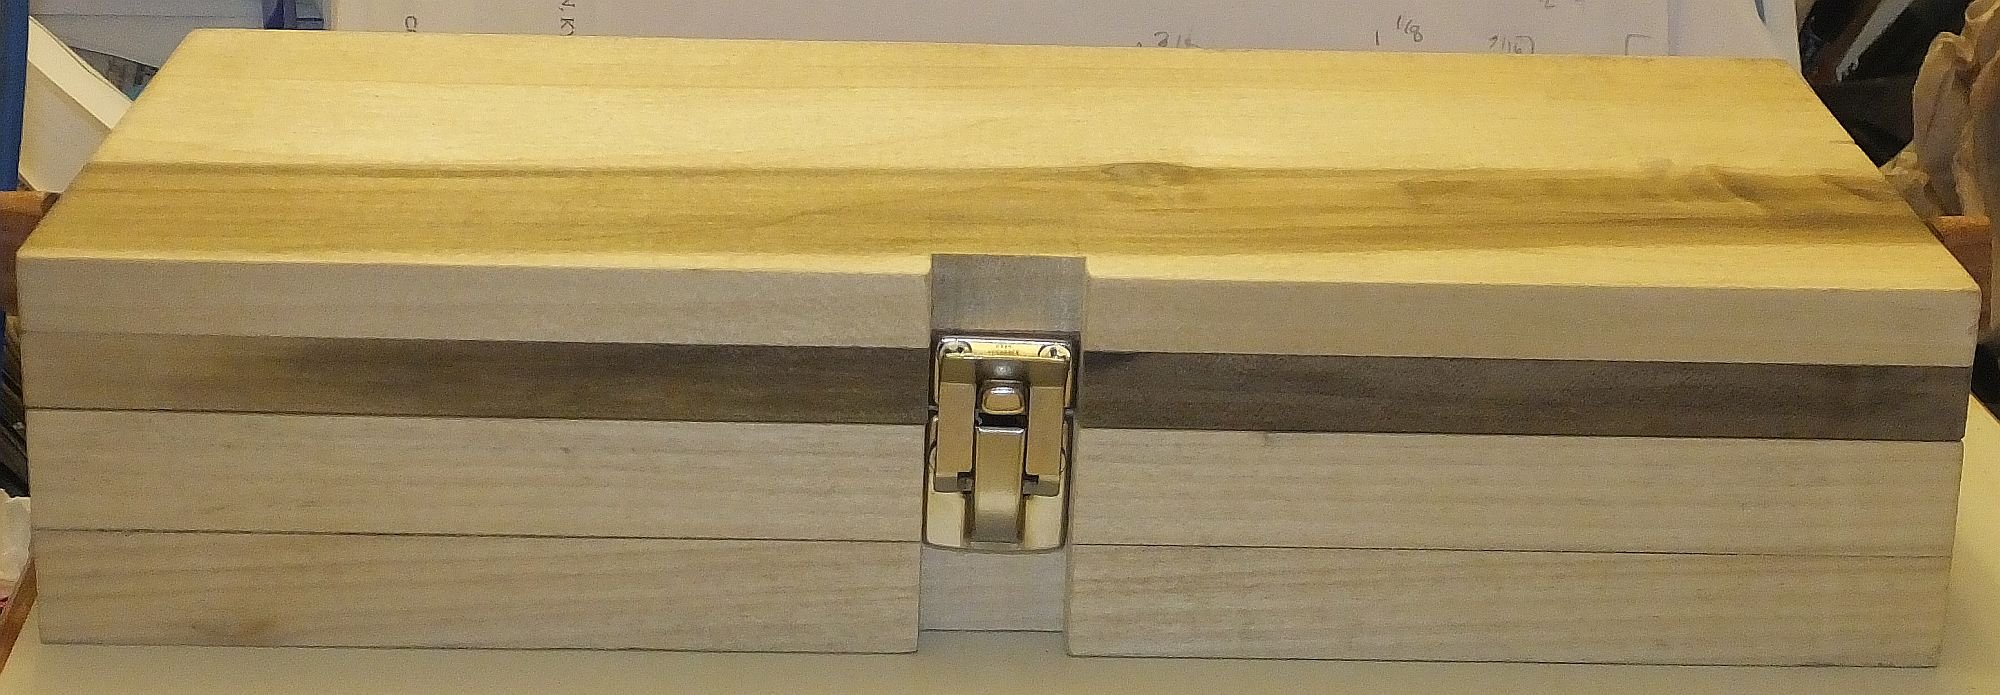
front latched.jpg
front latched.jpg (272.42 KiB) Viewed 1138 times
I originally planned to attach a latch at the front sides of both ends. BUT the hinges require that real estate to function.(it is the simple, obvious stuff that in the end bites thee!) So mount in the front. BUT then they prevent a full opened cover. So bury them in a groove.

But then the cover will not lay flat in the full open position.

latched open side.jpg
latched open side.jpg (145.49 KiB) Viewed 1138 times
The protrusion of the upper latch is in the way.

So What! The least of the evils.

BUT what if the latch parts are reversed?

latch reversed open.jpg
latch reversed open.jpg (117 KiB) Viewed 1138 times
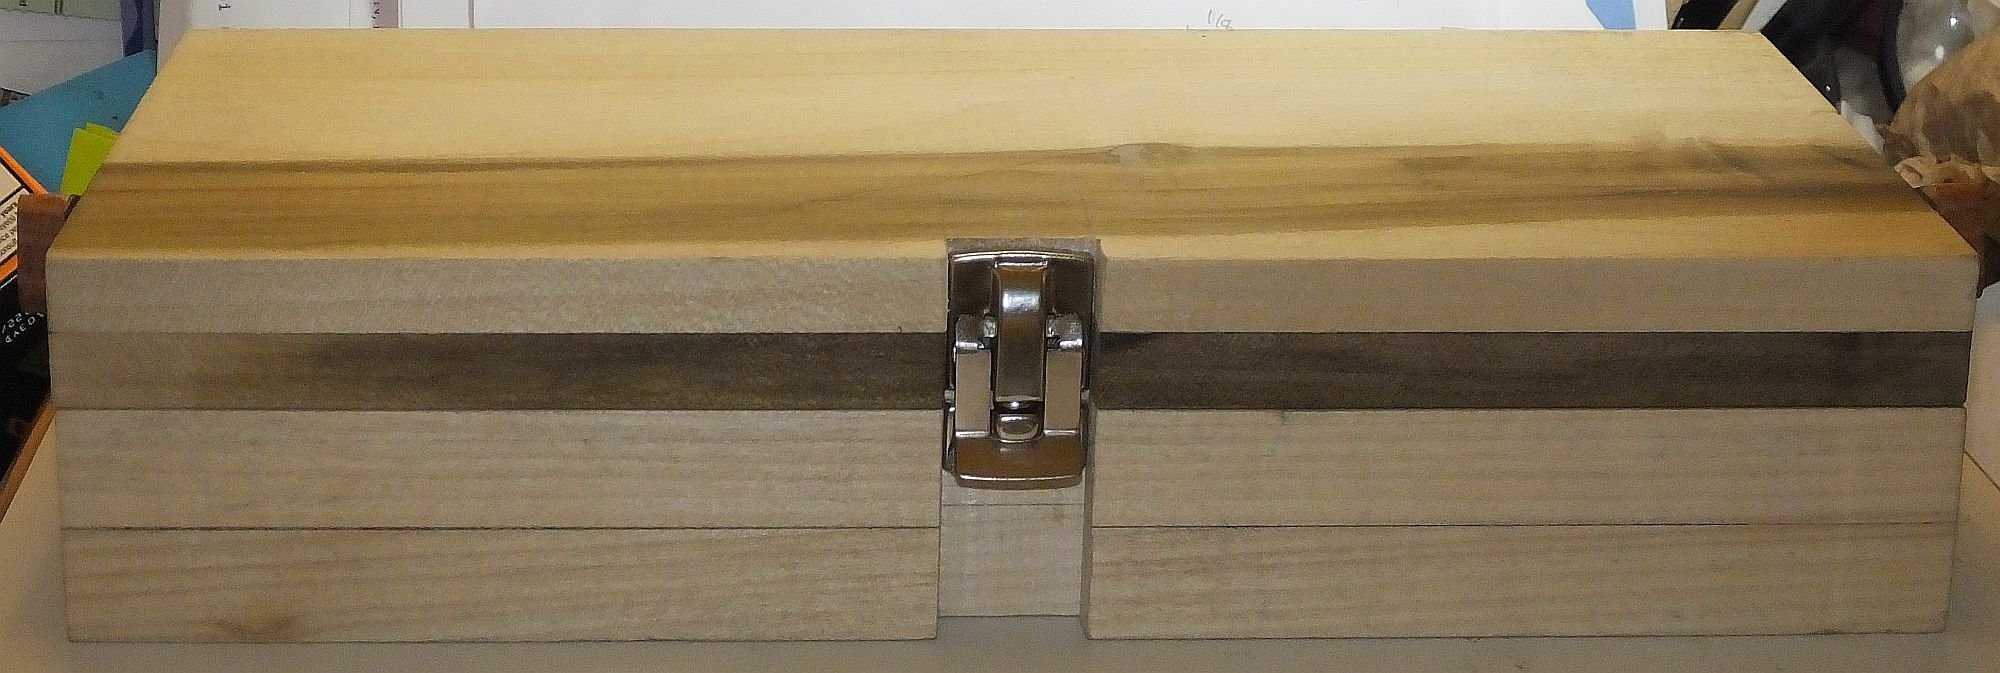
latch reversed front.jpg
latch reversed front.jpg (252.06 KiB) Viewed 1138 times
Thank God for toothpick hole fillers.

I asked Dennis a while back as I was contemplating making this about any new 'stuff' coming out. His reply was "make it modular".

So:
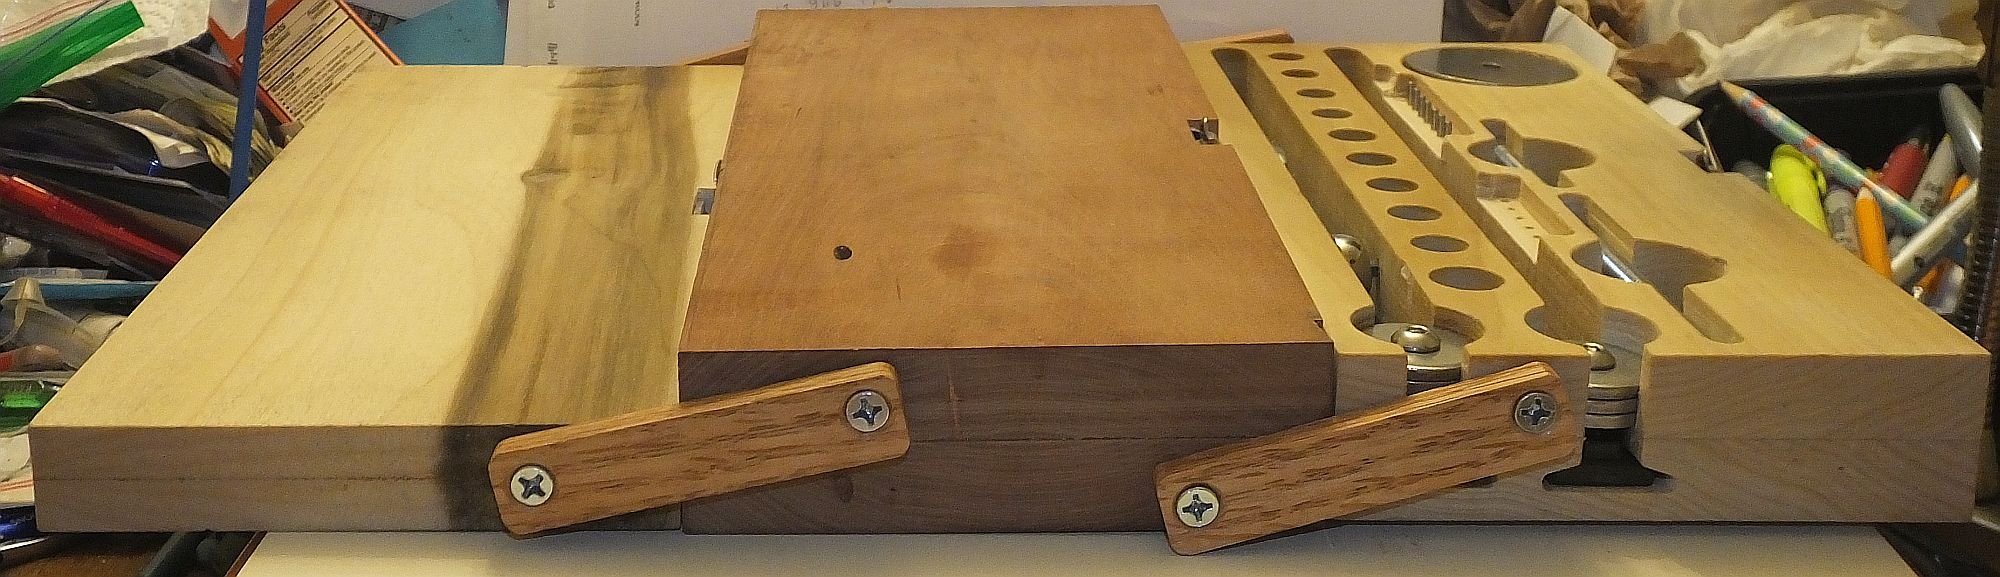
modularized.jpg
modularized.jpg (259.22 KiB) Viewed 1134 times
That is it until something new appears.

Now about my favorite "knob".
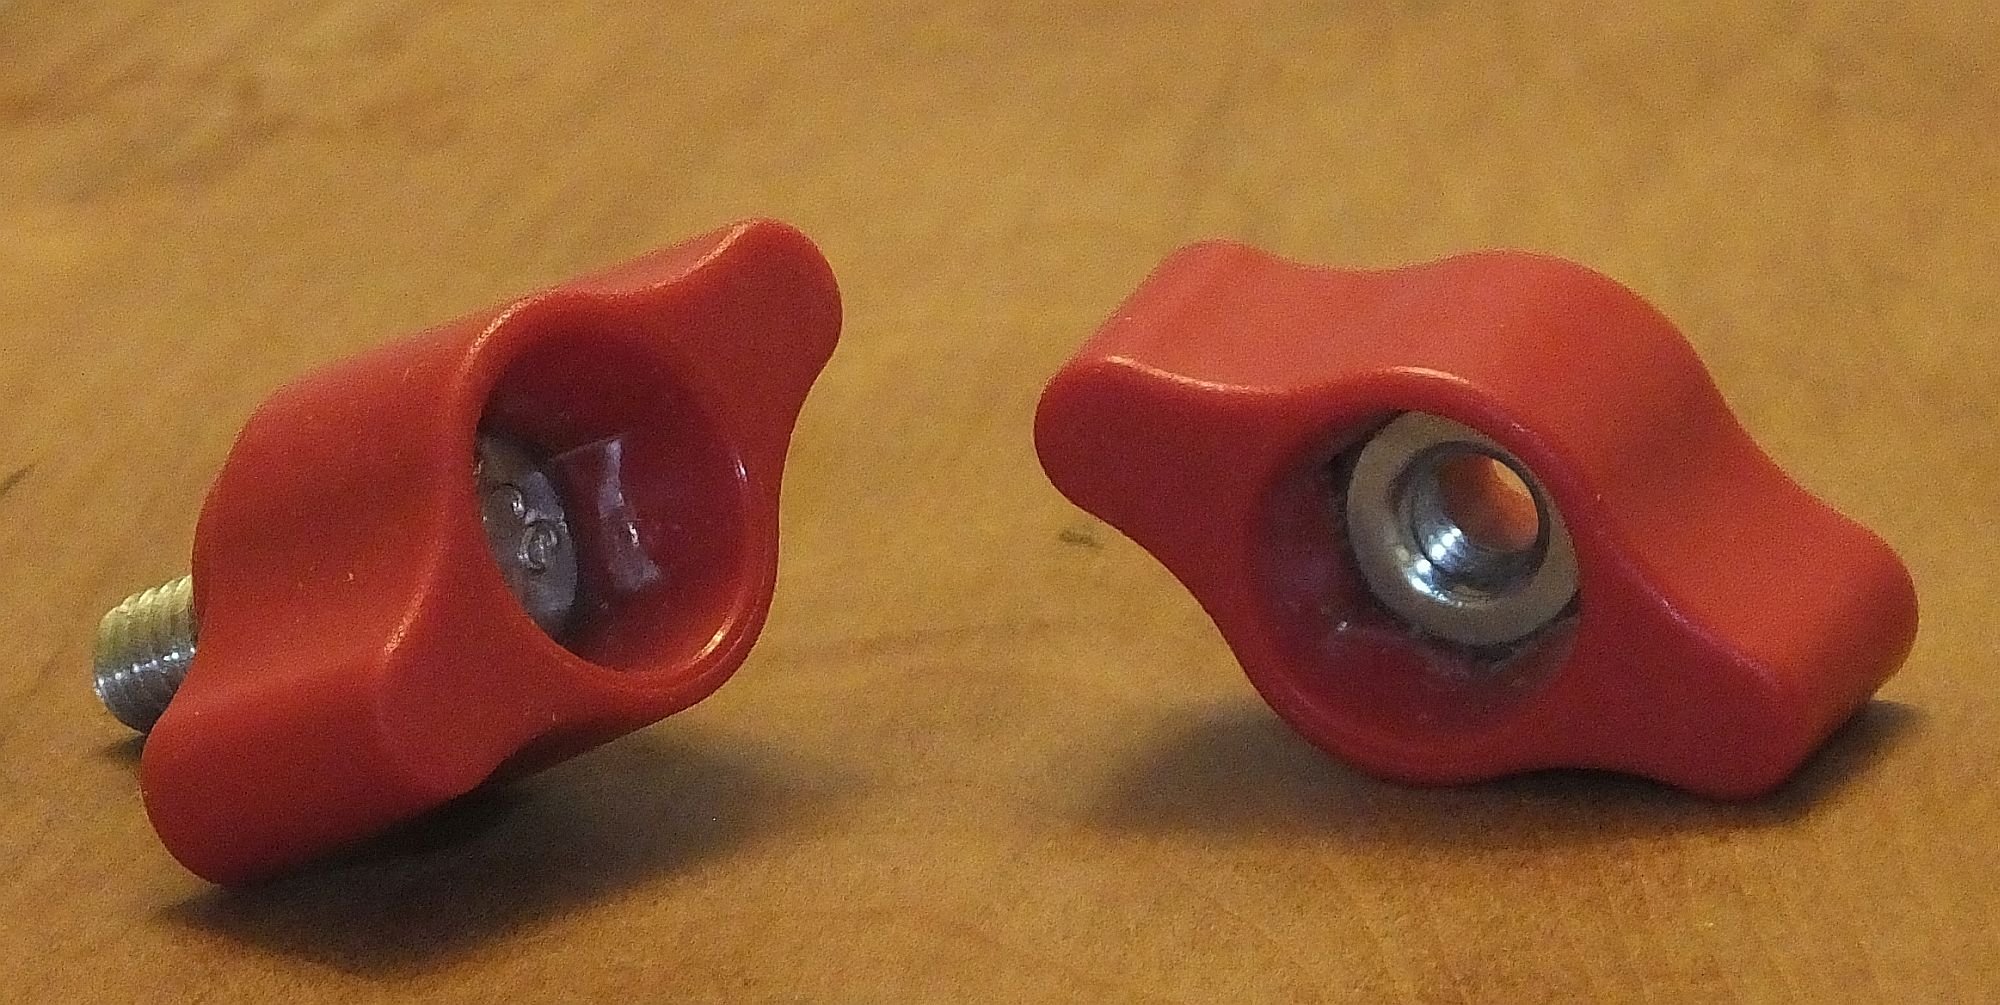
fav knob.jpg
fav knob.jpg (391.79 KiB) Viewed 1134 times
From Woodpeckers. Accepts either a 1/4 nut or a 1/4 hex head bolt. Removable and reusable.
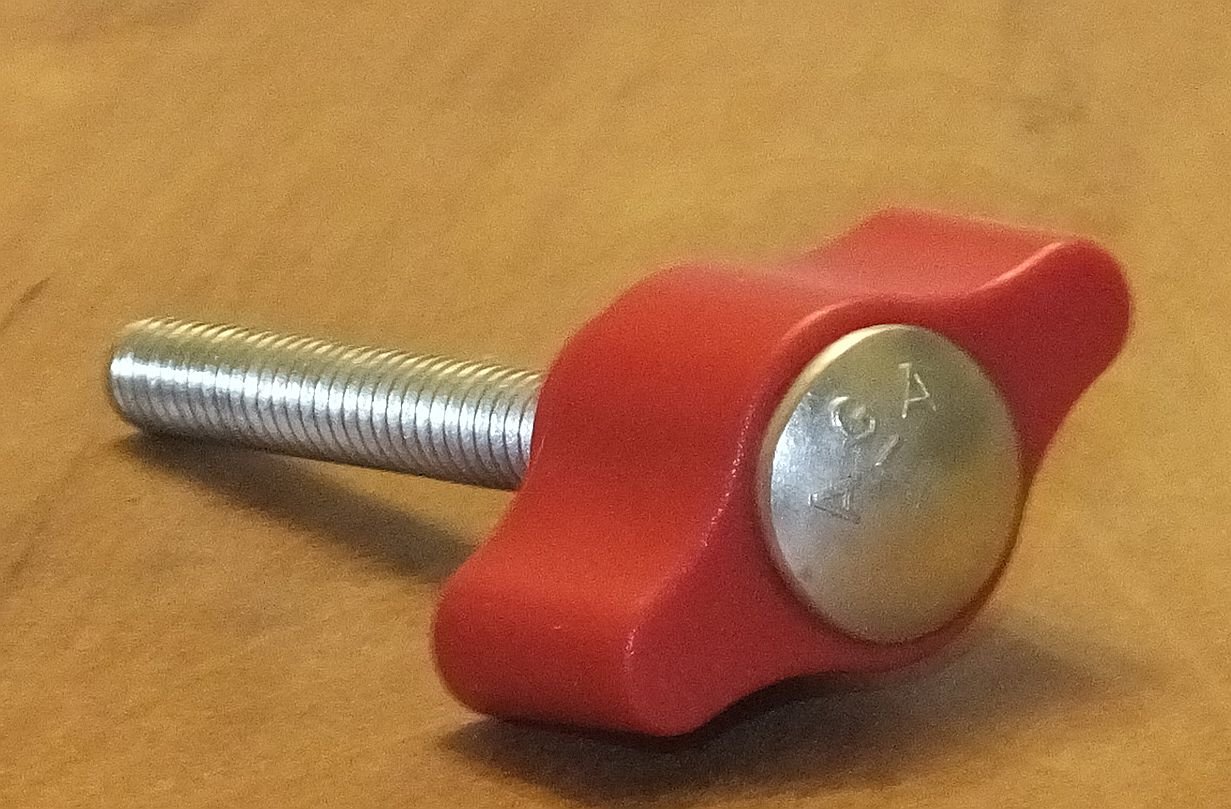
knob bolt variation.jpg
knob bolt variation.jpg (189.07 KiB) Viewed 1134 times
An unusual variation. There IS a nut inside also.


(I'se testing the former 10 pix/post limit - not sure there is one any more)
╔═══╗
╟JPG ╢
╚═══╝

Goldie(Bought New SN 377425)/4" jointer/6" beltsander/12" planer/stripsander/bandsaw/powerstation /Scroll saw/Jig saw /Craftsman 10" ras/Craftsman 6" thicknessplaner/ Dayton10"tablesaw(restoredfromneighborstrashpile)/ Mark VII restoration in 'progress'/ 10
E[/size](SN E3779) restoration in progress, a 510 on the back burner and a growing pile of items to be eventually returned to useful life. - aka Red Grange
User avatar
JPG
Platinum Member
Posts: 35598
Joined: Wed Dec 10, 2008 7:42 pm
Location: Lexington, Ky (TAMECAT territory)

Re: Tool quest hardware storage

Post by JPG »

reserved
╔═══╗
╟JPG ╢
╚═══╝

Goldie(Bought New SN 377425)/4" jointer/6" beltsander/12" planer/stripsander/bandsaw/powerstation /Scroll saw/Jig saw /Craftsman 10" ras/Craftsman 6" thicknessplaner/ Dayton10"tablesaw(restoredfromneighborstrashpile)/ Mark VII restoration in 'progress'/ 10
E[/size](SN E3779) restoration in progress, a 510 on the back burner and a growing pile of items to be eventually returned to useful life. - aka Red Grange
User avatar
JPG
Platinum Member
Posts: 35598
Joined: Wed Dec 10, 2008 7:42 pm
Location: Lexington, Ky (TAMECAT territory)

Re: Tool quest hardware storage

Post by JPG »

Another reservation

Comments welcome!
╔═══╗
╟JPG ╢
╚═══╝

Goldie(Bought New SN 377425)/4" jointer/6" beltsander/12" planer/stripsander/bandsaw/powerstation /Scroll saw/Jig saw /Craftsman 10" ras/Craftsman 6" thicknessplaner/ Dayton10"tablesaw(restoredfromneighborstrashpile)/ Mark VII restoration in 'progress'/ 10
E[/size](SN E3779) restoration in progress, a 510 on the back burner and a growing pile of items to be eventually returned to useful life. - aka Red Grange
User avatar
BuckeyeDennis
Platinum Member
Posts: 3812
Joined: Tue Jul 24, 2012 10:03 pm
Location: Central Ohio

Re: Tool quest hardware storage

Post by BuckeyeDennis »

Very slick, Red!

You have me thinking that ToolQuest may need to up its packaging game. Those optional wall-mountable “cases” that Woodpeckers sells for their squares come to mind. Those make nice display cases, but they never struck me as a practical storage solution, as they consume an enormous amount of wall space relative to the amount of stuff that they hold.

But your hardware-organizer box is both good-looking and imminently practical. It will make fixturing setups significantly faster, by eliminating the need to grub about in bags or boxes for the particular bit of hardware you need at the moment. The design might have to be tweaked a bit, but it looks to me as if a production variant of it could be milled efficiently on a CNC router.

How difficult is it to fish the small washers out of their holes? You mentioned using the SS toolkit for that. I’m wondering if it might be easier with one of the longer screws, as the threads would provide a bit of lateral bite.
User avatar
JPG
Platinum Member
Posts: 35598
Joined: Wed Dec 10, 2008 7:42 pm
Location: Lexington, Ky (TAMECAT territory)

Re: Tool quest hardware storage

Post by JPG »

The long studs work but somewhat unreliably(probably has to do with the thread orientation). A very small screwdriver works well. The SS tool kit is also somewhat futzy.

The SS tool kit is there because of the socket screws.

This is neither the first thought nor a final one. It is quite heavy when loaded. Also material available influenced it greatly.

BTW I did not include knob storage as I have my favorite stored elsewhere.
╔═══╗
╟JPG ╢
╚═══╝

Goldie(Bought New SN 377425)/4" jointer/6" beltsander/12" planer/stripsander/bandsaw/powerstation /Scroll saw/Jig saw /Craftsman 10" ras/Craftsman 6" thicknessplaner/ Dayton10"tablesaw(restoredfromneighborstrashpile)/ Mark VII restoration in 'progress'/ 10
E[/size](SN E3779) restoration in progress, a 510 on the back burner and a growing pile of items to be eventually returned to useful life. - aka Red Grange
User avatar
algale
Platinum Member
Posts: 4841
Joined: Thu Nov 04, 2010 8:13 am

Re: Tool quest hardware storage

Post by algale »

l like it a lot. I aspire to be as organized as this but it seems I never get around to it.

As for grabbing nuts, washers, etc., what if you turned a little wood dowel, bottom diameter sized to sit snugly in the counterbore in the bottom and a longer handle just the diameter of the holes in the washers/nuts and long enough to grab? You could pull out the whole stack of washers/nuts with one fell swoop, pull off what you need and put the rest back in place in another fell swoop.
Gale's Law: The bigger the woodworking project, the less the mistakes show in any photo taken far enough away to show the entire project!

User avatar
JPG
Platinum Member
Posts: 35598
Joined: Wed Dec 10, 2008 7:42 pm
Location: Lexington, Ky (TAMECAT territory)

Re: Tool quest hardware storage

Post by JPG »

Actually the SS Tool Kit does that already. However that one fell swoop business has a tendency to have them all fall off in one fell swoop! :eek:
╔═══╗
╟JPG ╢
╚═══╝

Goldie(Bought New SN 377425)/4" jointer/6" beltsander/12" planer/stripsander/bandsaw/powerstation /Scroll saw/Jig saw /Craftsman 10" ras/Craftsman 6" thicknessplaner/ Dayton10"tablesaw(restoredfromneighborstrashpile)/ Mark VII restoration in 'progress'/ 10
E[/size](SN E3779) restoration in progress, a 510 on the back burner and a growing pile of items to be eventually returned to useful life. - aka Red Grange
User avatar
algale
Platinum Member
Posts: 4841
Joined: Thu Nov 04, 2010 8:13 am

Re: Tool quest hardware storage

Post by algale »

JPG wrote: Tue Sep 07, 2021 11:09 am Actually the SS Tool Kit does that already. However that one fell swoop business has a tendency to have them all fall off in one fell swoop! :eek:
But if the bottom if sized to fit snugly in the counterbore, which is larger than the diameter of the hole in the nut/washer, then this wouldn't be an issue. At least they couldn't slip off the bottom end, which is what I assume happens when you try to use the SS Tool Kit
Gale's Law: The bigger the woodworking project, the less the mistakes show in any photo taken far enough away to show the entire project!

Post Reply
