Just what I thought. Might be wrong.
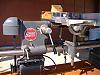
My second 10ER - Restored!
Moderator: admin
- wlhayesmfs
- Platinum Member
- Posts: 667
- Joined: Fri Jul 21, 2006 10:50 am
- Location: Broken Arrow OK
My guess one inside the tie bar was, as you know there was not extra extention on the pulley side and with that extention having the longer slot if he put it on the outside the slot would come too far down to fit right. So the get the extra extention table to work and look right it had to go on the inside.
Just what I thought. Might be wrong.

Bill
Broken Arrow OK
MKV, 510, MKVll, 50th Anniversary 520 with Jointech saw train, Bandsaw, scroll saw, joiner, 6" Sander,Stand Alone Pin Router and Router Table, Strip Sander, Jigsaw & (4) ER's plus Jigsaw for ER. DC SS RAS
Broken Arrow OK
MKV, 510, MKVll, 50th Anniversary 520 with Jointech saw train, Bandsaw, scroll saw, joiner, 6" Sander,Stand Alone Pin Router and Router Table, Strip Sander, Jigsaw & (4) ER's plus Jigsaw for ER. DC SS RAS
You may be right, who knows. On my 10ER, I have the longer brackets on my extension tables and the tailstock pieces are held in place with a smaller knurled head screw that accepts an allen wrench. The extension table bracket can then slide down past the head of that screw. I would not be able to drop mine past the knobs that Heath has holding his tailstocks to the ends of the machine.wlhayesmfs wrote:My guess one inside the tie bar was, as you know there was not extra extention on the pulley side and with that extention having the longer slot if he put it on the outside the slot would come too far down to fit right. So the get the extra extention table to work and look right it had to go on the inside.
Just what I thought. Might be wrong.
Rob in San Diego
Email: SDSSmith51 AT gmail.com
- mickyd
- Platinum Member
- Posts: 2999
- Joined: Mon Feb 09, 2009 1:18 pm
- Location: San Diego, CA
- Contact:
Heath,
ABSOLUTELY gorgeous!! I really like the color. What paint did you use and what application method?
I'm glad you posted the link to your first restoration. That was an incredible restoration also. This is the first I've seen it. I had see the title of that post when I first came into this forum but it wasn't enough to lure me in to read it. That'll teach me to go purely on the post title!! You went off topic on your own post!!
Anyway, ironic that we finished and posted both our resto's in the same day, just few hours apart.
Again Heath, real nice job. You obviously put many hours of TLC into it.
ABSOLUTELY gorgeous!! I really like the color. What paint did you use and what application method?
I'm glad you posted the link to your first restoration. That was an incredible restoration also. This is the first I've seen it. I had see the title of that post when I first came into this forum but it wasn't enough to lure me in to read it. That'll teach me to go purely on the post title!! You went off topic on your own post!!
Anyway, ironic that we finished and posted both our resto's in the same day, just few hours apart.
Again Heath, real nice job. You obviously put many hours of TLC into it.
Mike
Sunny San Diego
Sunny San Diego
Thanks for the nice comments everyone! I still look at MickyD's pictures of his restored "Greenie" and there's just no comparison between his craftsmanship and mine!
I had originally decided on black after using gray on my first ER because the gray shows dirt and grease smudges very easily. My first ER now just looks dirty to me because of touching it with dirty hands. I know saw dust will show up clearly on the black, but that can just be brushed off. But maybe I'll regret that decision later!
The paint I used is just Rustoleum Hammered Gloss Black spray paint. I covered that with two coats of clear gloss. I only used 1 coat of the black, but let it dry a minimum of the recommended 48 hours before handling it or applying the clear coat. I applied several layers of gray on my first ER, but didn't follow the painting instructions and ended up with smudges and chipping to the paint. Follow the directions!
I also build a rack for hanging the parts on while I painted them. I just used a couple of 2x8 boards about 3.5' long with support braces so they would stand on end. Then I cut a V-notch cut in the top end which held a long 1-1/2" dowel (that I stole from an unused closet - don't tell my wife) on which I hung the parts using wire or, as in the case of the headstock, putting the down through the holes for the way tubes. This made getting even coverage a lot easier. Then I left them alone for 48 hours or more. On the first ER, I just laid the parts out on a board, sprayed paint, came back a couple hours later and flipped them over and sprayed again. Not the best idea.
These old cast iron parts have a texture to them anyway so blemishes and imperfections in the paint conceal easily. I don't have great painting skills and don't have an airbrush, so I have to stick to spray paint! I used some Krylon gloss red on the quill lever handle.

The guy I bought it from was about my age (early/mid 30s). He got the machine from his uncle. The guy implied that he built the bench. I mentioned it being made from angle iron and he said, "Yeah, I get a lot of that stuff from work." But as the whole thing showed years of not being touched, I have my suspicion that his uncle built the bench. But I couldn't be wrong.robinson46176 wrote:Very nice... Something you can be proud to show anybody that comes into your shop.
I am also intrigued by the bench. With the formed curves at the top of the legs it has a factory built look about it. Any idea of its origin?
I agree, and I'm not sure if I'm going to leave it that way or not. I haven't done anything to the bench yet and because of where the headrest was mounted, there wasn't room to mount the extra tailstock outside of the tie bar. Removing that tailstock does require propping up the tubes, and removing the tie bar first. I haven't quite decided how to handle this yet. I can either use it the way it is (which seems to work just fine) or remount the headrest. Either way limits the leftward placement of the headstock, but both methods have their ways to deal with it. Regardless, if I need those extra few inches for a project on the lathe, I'm going to have to prop up the tubes and rearrange something on that end (tie bar & tailstock or headrest). So I think I'm going to leave it as is for a while until I determine what's going to work best for me.SDSSmith wrote:Heath,
Nice job, the tailstock on the left mounted inside of the tie bar instead of outboard of it is a little unusual. I guess you would have to move the headrest support to the right to allow mounting the tailstock/extension table normally (outboard of the tie bar). Looks great!
I agree that it looks better the way it is. But I'll just wait and see which way is more functional for how I use it.wlhayesmfs wrote:My guess one inside the tie bar was, as you know there was not extra extention on the pulley side and with that extention having the longer slot if he put it on the outside the slot would come too far down to fit right. So the get the extra extention table to work and look right it had to go on the inside.
Just what I thought. Might be wrong.
Unfortunately, I'm missing that knurled head screw on both of my ERs. I've been trying to find one, but haven't had any luck. So, I had to make do with what I have. Since I have the shorter extension table brackets, they can be lowered all the way without hitting the big knobbed bolt I'm using, so that's not a big problem for me. One benefit of the original smaller knurled head screw over what I'm using, is the original will allow you to stand the machine in vertical position without needing to remove the tailstock. With what I'm using, I would have to remove the tailstock to lift the machine. Since I have another ER as a dedicated drill press, I shouldn't be lifting this one very often.SDSSmith wrote:You may be right, who knows. On my 10ER, I have the longer brackets on my extension tables and the tailstock pieces are held in place with a smaller knurled head screw that accepts an allen wrench. The extension table bracket can then slide down past the head of that screw. I would not be able to drop mine past the knobs that Heath has holding his tailstocks to the ends of the machine.
Thanks, Ed! I hope your brother enjoys restoring his as much as I have enjoyed restoring mine! As for the color, I'll answer you and MickyD together.reible wrote:Hi,
NICE!
I'm going to forward the before and after pictures to my brother for inspiration on the one he has.
Is the color the Home Depot version?
Ed
Thanks! For those of you reading, MickyD knows from private messages that I was planning on adding flames to the headstock (reminiscent of old hot rod cars), but I haven't updated him since. I bought the paint, covered the headstock in masking tape and started drawing the flames. But I was never happy with anything I drew, so I abandoned the idea. For now. I may revisit that idea later. Maybe.mickyd wrote:Heath,
ABSOLUTELY gorgeous!! I really like the color. What paint did you use and what application method?
I had originally decided on black after using gray on my first ER because the gray shows dirt and grease smudges very easily. My first ER now just looks dirty to me because of touching it with dirty hands. I know saw dust will show up clearly on the black, but that can just be brushed off. But maybe I'll regret that decision later!
The paint I used is just Rustoleum Hammered Gloss Black spray paint. I covered that with two coats of clear gloss. I only used 1 coat of the black, but let it dry a minimum of the recommended 48 hours before handling it or applying the clear coat. I applied several layers of gray on my first ER, but didn't follow the painting instructions and ended up with smudges and chipping to the paint. Follow the directions!
I also build a rack for hanging the parts on while I painted them. I just used a couple of 2x8 boards about 3.5' long with support braces so they would stand on end. Then I cut a V-notch cut in the top end which held a long 1-1/2" dowel (that I stole from an unused closet - don't tell my wife) on which I hung the parts using wire or, as in the case of the headstock, putting the down through the holes for the way tubes. This made getting even coverage a lot easier. Then I left them alone for 48 hours or more. On the first ER, I just laid the parts out on a board, sprayed paint, came back a couple hours later and flipped them over and sprayed again. Not the best idea.
These old cast iron parts have a texture to them anyway so blemishes and imperfections in the paint conceal easily. I don't have great painting skills and don't have an airbrush, so I have to stick to spray paint! I used some Krylon gloss red on the quill lever handle.
I noticed that too! Irony, alignment of the planets, or pure chance... whatever it was, I thought it was kind of neat! You totally showed me up, though! I look at those pictures of yours (especially the polished aluminum) and think, "Man, I really suck at this!" You've raised the bar quite high with your work!mickyd wrote:Anyway, ironic that we finished and posted both our resto's in the same day, just few hours apart.
- JPG
- Platinum Member
- Posts: 35600
- Joined: Wed Dec 10, 2008 7:42 pm
- Location: Lexington, Ky (TAMECAT territory)
heathicus wrote:Thanks for the nice comments everyone! I still look at MickyD's pictures of his restored "Greenie" and there's just no comparison between his craftsmanship and mine!
. . .
I noticed that too! Irony, alignment of the planets, or pure chance... whatever it was, I thought it was kind of neat! You totally showed me up, though! I look at those pictures of yours (especially the polished aluminum) and think, "Man, I really suck at this!" You've raised the bar quite high with your work!
QUITE HIGH INDEED!:)
╔═══╗
╟JPG ╢
╚═══╝
Goldie(Bought New SN 377425)/4" jointer/6" beltsander/12" planer/stripsander/bandsaw/powerstation /Scroll saw/Jig saw /Craftsman 10" ras/Craftsman 6" thicknessplaner/ Dayton10"tablesaw(restoredfromneighborstrashpile)/ Mark VII restoration in 'progress'/ 10E[/size](SN E3779) restoration in progress, a 510 on the back burner and a growing pile of items to be eventually returned to useful life. - aka Red Grange
╟JPG ╢
╚═══╝
Goldie(Bought New SN 377425)/4" jointer/6" beltsander/12" planer/stripsander/bandsaw/powerstation /Scroll saw/Jig saw /Craftsman 10" ras/Craftsman 6" thicknessplaner/ Dayton10"tablesaw(restoredfromneighborstrashpile)/ Mark VII restoration in 'progress'/ 10E[/size](SN E3779) restoration in progress, a 510 on the back burner and a growing pile of items to be eventually returned to useful life. - aka Red Grange
- mickyd
- Platinum Member
- Posts: 2999
- Joined: Mon Feb 09, 2009 1:18 pm
- Location: San Diego, CA
- Contact:
heathicus wrote:Thanks for the nice comments everyone! I still look at MickyD's pictures of his restored "Greenie" and there's just no comparison between his craftsmanship and mine!
Heath,
You are being WAY TOO TOUGH on yourself. Craftsmanship has absolutely nothing to do with it. Time does. Looking at both your first and second restorations, you absolutely have the skills to do the exact same thing. You are willing to try various restoration techniques and THAT is what makes a difference. There is NO QUESTION in my mind. I think your work is excellent. My work borders on obsessive (which is a personality trait I have, and that can be both blessing and curse). The only thing that was different between our units was polishing. I spent many hours on that and that is only difference your eyes are picking up. (and it's never too late to do that)
Soooooo, that's my opinion. You can be proud of your output for sure.
Mike
Sunny San Diego
Sunny San Diego
- JPG
- Platinum Member
- Posts: 35600
- Joined: Wed Dec 10, 2008 7:42 pm
- Location: Lexington, Ky (TAMECAT territory)
Mike: You neglected to mention the far greater degree ofmickyd wrote:Heath,
You are being WAY TOO TOUGH on yourself. Craftsmanship has absolutely nothing to do with it. Time does. Looking at both your first and second restorations, you absolutely have the skills to do the exact same thing. You are willing to try various restoration techniques and THAT is what makes a difference. There is NO QUESTION in my mind. I think your work is excellent. My work borders on obsessive (which is a personality trait I have, and that can be both blessing and curse). The only thing that was different between our units was polishing. I spent many hours on that and that is only difference your eyes are picking up. (and it's never too late to do that)
Soooooo, that's my opinion. You can be proud of your output for sure.
You can BOTH STAND TALL!!!
╔═══╗
╟JPG ╢
╚═══╝
Goldie(Bought New SN 377425)/4" jointer/6" beltsander/12" planer/stripsander/bandsaw/powerstation /Scroll saw/Jig saw /Craftsman 10" ras/Craftsman 6" thicknessplaner/ Dayton10"tablesaw(restoredfromneighborstrashpile)/ Mark VII restoration in 'progress'/ 10E[/size](SN E3779) restoration in progress, a 510 on the back burner and a growing pile of items to be eventually returned to useful life. - aka Red Grange
╟JPG ╢
╚═══╝
Goldie(Bought New SN 377425)/4" jointer/6" beltsander/12" planer/stripsander/bandsaw/powerstation /Scroll saw/Jig saw /Craftsman 10" ras/Craftsman 6" thicknessplaner/ Dayton10"tablesaw(restoredfromneighborstrashpile)/ Mark VII restoration in 'progress'/ 10E[/size](SN E3779) restoration in progress, a 510 on the back burner and a growing pile of items to be eventually returned to useful life. - aka Red Grange