
Hi,
Still at removing pictures from my Flickr site and these will be gone in minutes but I know at least a few people were helped by them....
[ATTACH]2642[/ATTACH]
[ATTACH]2643[/ATTACH]
[ATTACH]2644[/ATTACH]
[ATTACH]2645[/ATTACH]
Ed
quill lock reference info
Moderator: admin
quill lock reference info
- Attachments
-
- qlr 1.jpg (125.45 KiB) Viewed 7582 times
-
- qlr 2.jpg (98.91 KiB) Viewed 7586 times
-
- qlr 3.jpg (99.8 KiB) Viewed 7579 times
-
- qlr 4.jpg (129.75 KiB) Viewed 7584 times
{Knight of the Shopsmith} [Hero's don't wear capes, they wear dog tags]
-
JPG

- Platinum Member
- Posts: 35600
- Joined: Wed Dec 10, 2008 7:42 pm
- Location: Lexington, Ky (TAMECAT territory)
quill pix
Very Good! 1 Picture is worth 1 thousand words(or 100 line drawings). Several are that much better. Hope they stay till I can "copy" . THANKS!!!!!:)
╔═══╗
╟JPG ╢
╚═══╝
Goldie(Bought New SN 377425)/4" jointer/6" beltsander/12" planer/stripsander/bandsaw/powerstation /Scroll saw/Jig saw /Craftsman 10" ras/Craftsman 6" thicknessplaner/ Dayton10"tablesaw(restoredfromneighborstrashpile)/ Mark VII restoration in 'progress'/ 10E[/size](SN E3779) restoration in progress, a 510 on the back burner and a growing pile of items to be eventually returned to useful life. - aka Red Grange
╟JPG ╢
╚═══╝
Goldie(Bought New SN 377425)/4" jointer/6" beltsander/12" planer/stripsander/bandsaw/powerstation /Scroll saw/Jig saw /Craftsman 10" ras/Craftsman 6" thicknessplaner/ Dayton10"tablesaw(restoredfromneighborstrashpile)/ Mark VII restoration in 'progress'/ 10E[/size](SN E3779) restoration in progress, a 510 on the back burner and a growing pile of items to be eventually returned to useful life. - aka Red Grange

Feed stop removal
I found a video that explains everything . . . all is well!
While working on my shop smith and trying to get the quill spring to work,
I broke the tab off the feed stop. How do I replace it with a new one?
I do not see any threads, so I'm guessing it is a press fit.
Any assistance is greatly appreciated (especially from the wife).
E Ben
Oklahoma
While working on my shop smith and trying to get the quill spring to work,
I broke the tab off the feed stop. How do I replace it with a new one?
I do not see any threads, so I'm guessing it is a press fit.
Any assistance is greatly appreciated (especially from the wife).
E Ben
Oklahoma
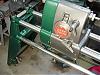
The feed stop is part of the quill spring housing. You can buy a used quill feed assembly off eBay or order a new Quill spring with housing from Shopsmith. The quill spring housing slides off the shaft after the spring is disconnected from the screw. The gear does not need to be replaced.
Dave - Idaho
Greenie S#261612 - Mar 1954 / Greenie S#305336 - Oct 1955 / Gray S#SS1360 - ?
"Why do we drive on parkways and park on driveways?"
Greenie S#261612 - Mar 1954 / Greenie S#305336 - Oct 1955 / Gray S#SS1360 - ?
"Why do we drive on parkways and park on driveways?"
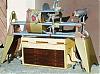
Feed Stop Re - placed.
I have a Feed Stop (34) where the tab was broken off. Some of the tab was there but too much was broken off to provide a positive stop in all situations.
I drilled a small hole in the edge where the tab had been broken off, turned a small brass screw into the hole and made a dam around the tab with clear packing tape. The dam was filled with JB Weld and after setting, shaped on a grinding wheel. Some of the brass screw was ground off as the combination Screw/JB Weld was reduced to the right size. The tab was shaped until the indicator fit close to the SS and the index mark lined up with the 0 mark on the indicator.
I had another Quill advance assembly, but fixed this one because the rest of the advance assembly was OK. eBay has Quill Advance assemblies, reasonable unless I'm trying to buy one.
The same procedure may work for the Tab on the Spring housing (39) which may be harder to shape because of the extra weight of the shaft.
I drilled a small hole in the edge where the tab had been broken off, turned a small brass screw into the hole and made a dam around the tab with clear packing tape. The dam was filled with JB Weld and after setting, shaped on a grinding wheel. Some of the brass screw was ground off as the combination Screw/JB Weld was reduced to the right size. The tab was shaped until the indicator fit close to the SS and the index mark lined up with the 0 mark on the indicator.
I had another Quill advance assembly, but fixed this one because
the rest of the advance assembly was OK. eBay has Quill Advance assemblies, reasonable unless I'm trying to buy one.The same procedure may work for the Tab on the Spring housing (39) which may be harder to shape because of the extra weight of the shaft.
MK V 520; MK V 510 w/PP DIY Upgrade; MK 5 500; Jointer; Bandsaw; Sliding Table; Conical Sanding Disk; Sharpening Guide, Lathe Duplicator, Jigsaw, Scrollsaw, Beltsander, Ring Master, Biscuit Joiner.